
In this article:

Welcome to the beginner’s guide to crochet – a fun world of yarn and hooks! In this article, we’re on our way to help you get started and feel confident in the art of crocheting. Whether you’re brand new to crochet or want to hone your skills, this guide is all about making this craft easy and enjoyable.
Let’s jump in together and explore the basics, stitches, and patterns that will help you create cool things with yarn.
Get ready to have some fun while making your own handmade treasures!
How to Crochet for Beginners
Crocheting is a versatile craft that allows beginners to create beautiful textiles with just a hook and yarn.
Begin by learning basic stitches, like the chain stitch and single crochet. Practice these stitches to build muscle memory and gain confidence. As you progress, experiment with different yarn textures and colors to add a personal touch to your creations.
What is Crochet?
Crochet is a handicraft that involves creating fabric by interlocking loops of yarn using a crochet hook. Unlike knitting, which uses two needles, crochet requires only one hook. This versatile craft offers endless possibilities for creating various items, including clothing, accessories, and home decor.
What do you need to start crocheting?
To start, gather essential materials such as a crochet hook, yarn in your preferred color, and a beginner-friendly pattern.
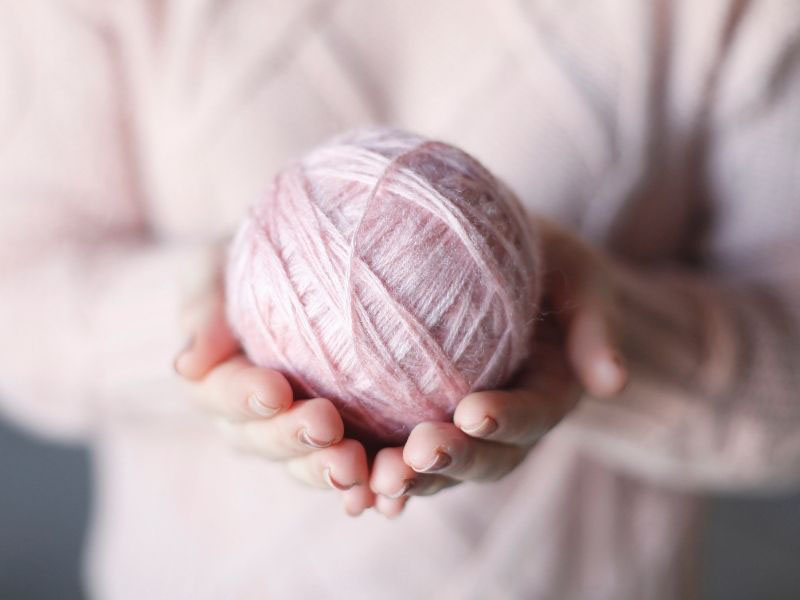
How to choose the best yarn?
Understanding the different types of yarn and their unique qualities is the foundation upon which you’ll build your crochet expertise.
Types of Yarn Fibers
Yarn comes in a variety of fibers, each with its own characteristics and properties. Explore the most common types in this article:
Yarn Weight and Thickness
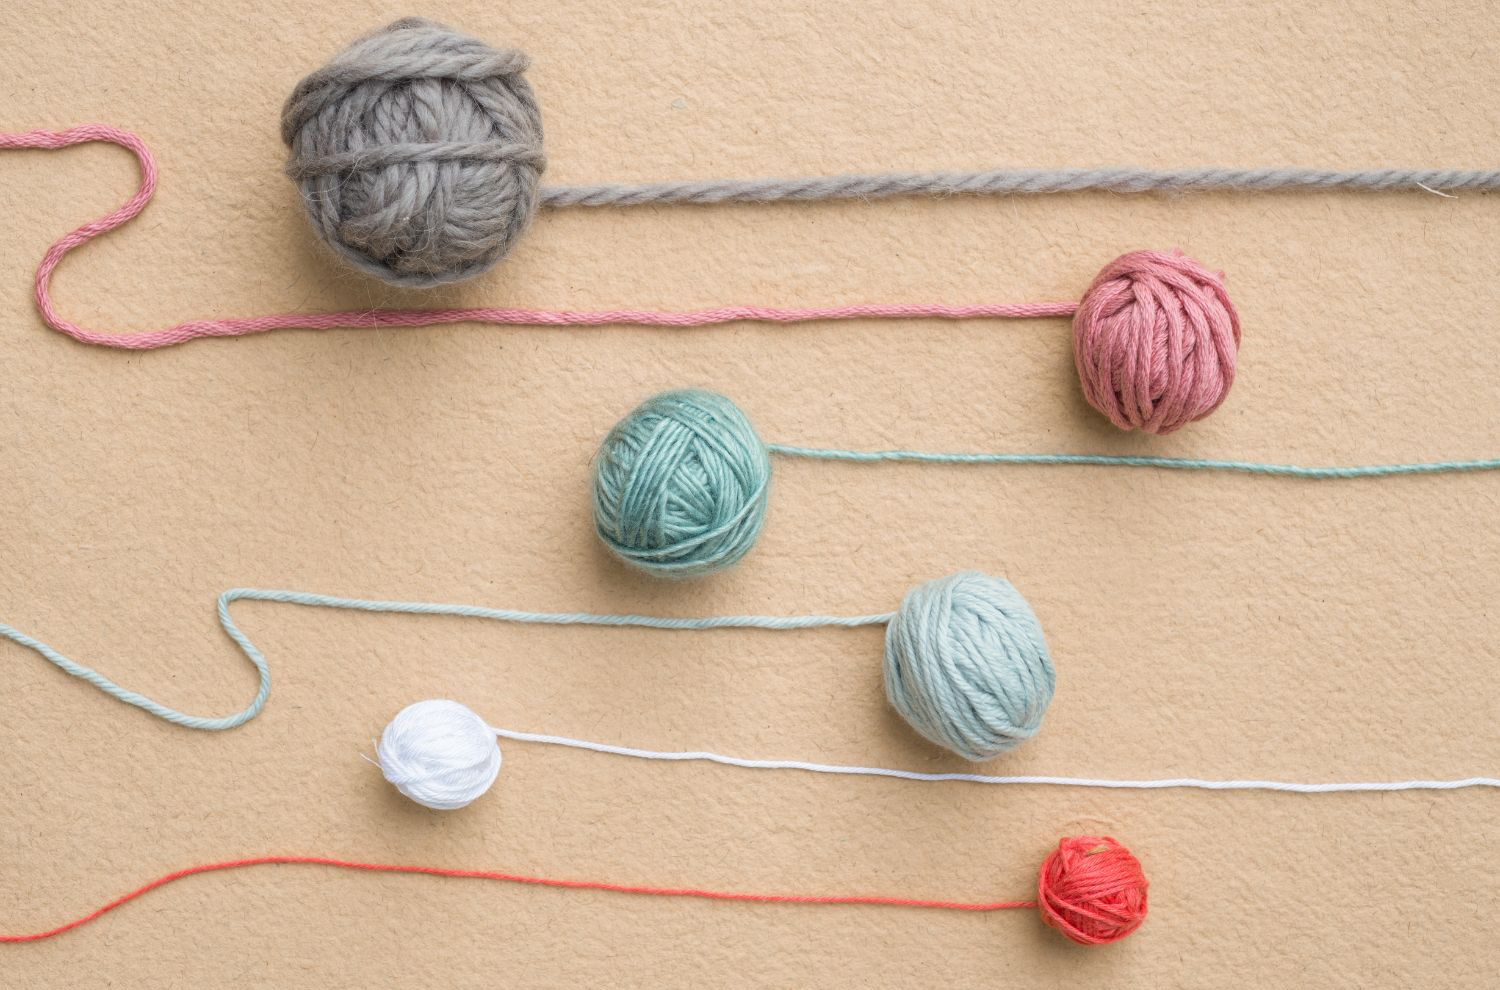
Yarn comes in various weights or thicknesses, which are indicated on the yarn label.
See the most common yarn weights in this article and learn how to match yarn to your projects:
Choosing the right yarn weight is crucial for achieving the desired look and feel of your project, so always refer to your pattern’s recommendations.
Understanding Yarn Labels
Learn how to read yarn labels with this guide:
How to choose a crochet hook
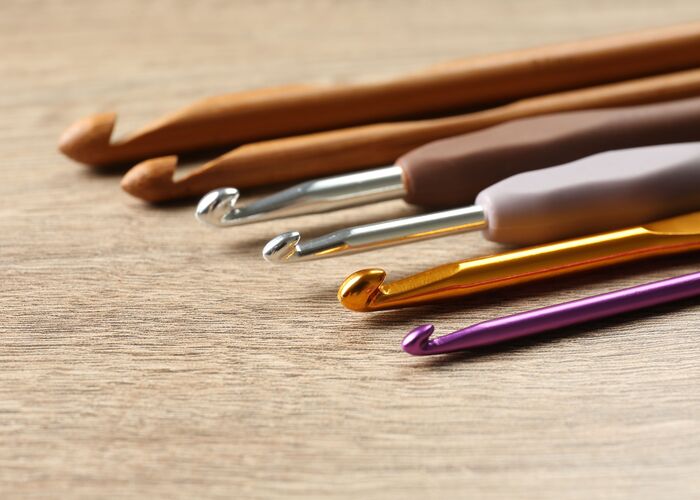
Crochet hooks are the heart of your crochet toolkit. These simple, slender instruments come in various sizes, materials, and designs. Each hook serves a unique purpose, allowing you to create different textures and tension in your projects. Choosing the right hook size depends on your yarn and project.
Here’s a brief overview of crochet hook types:
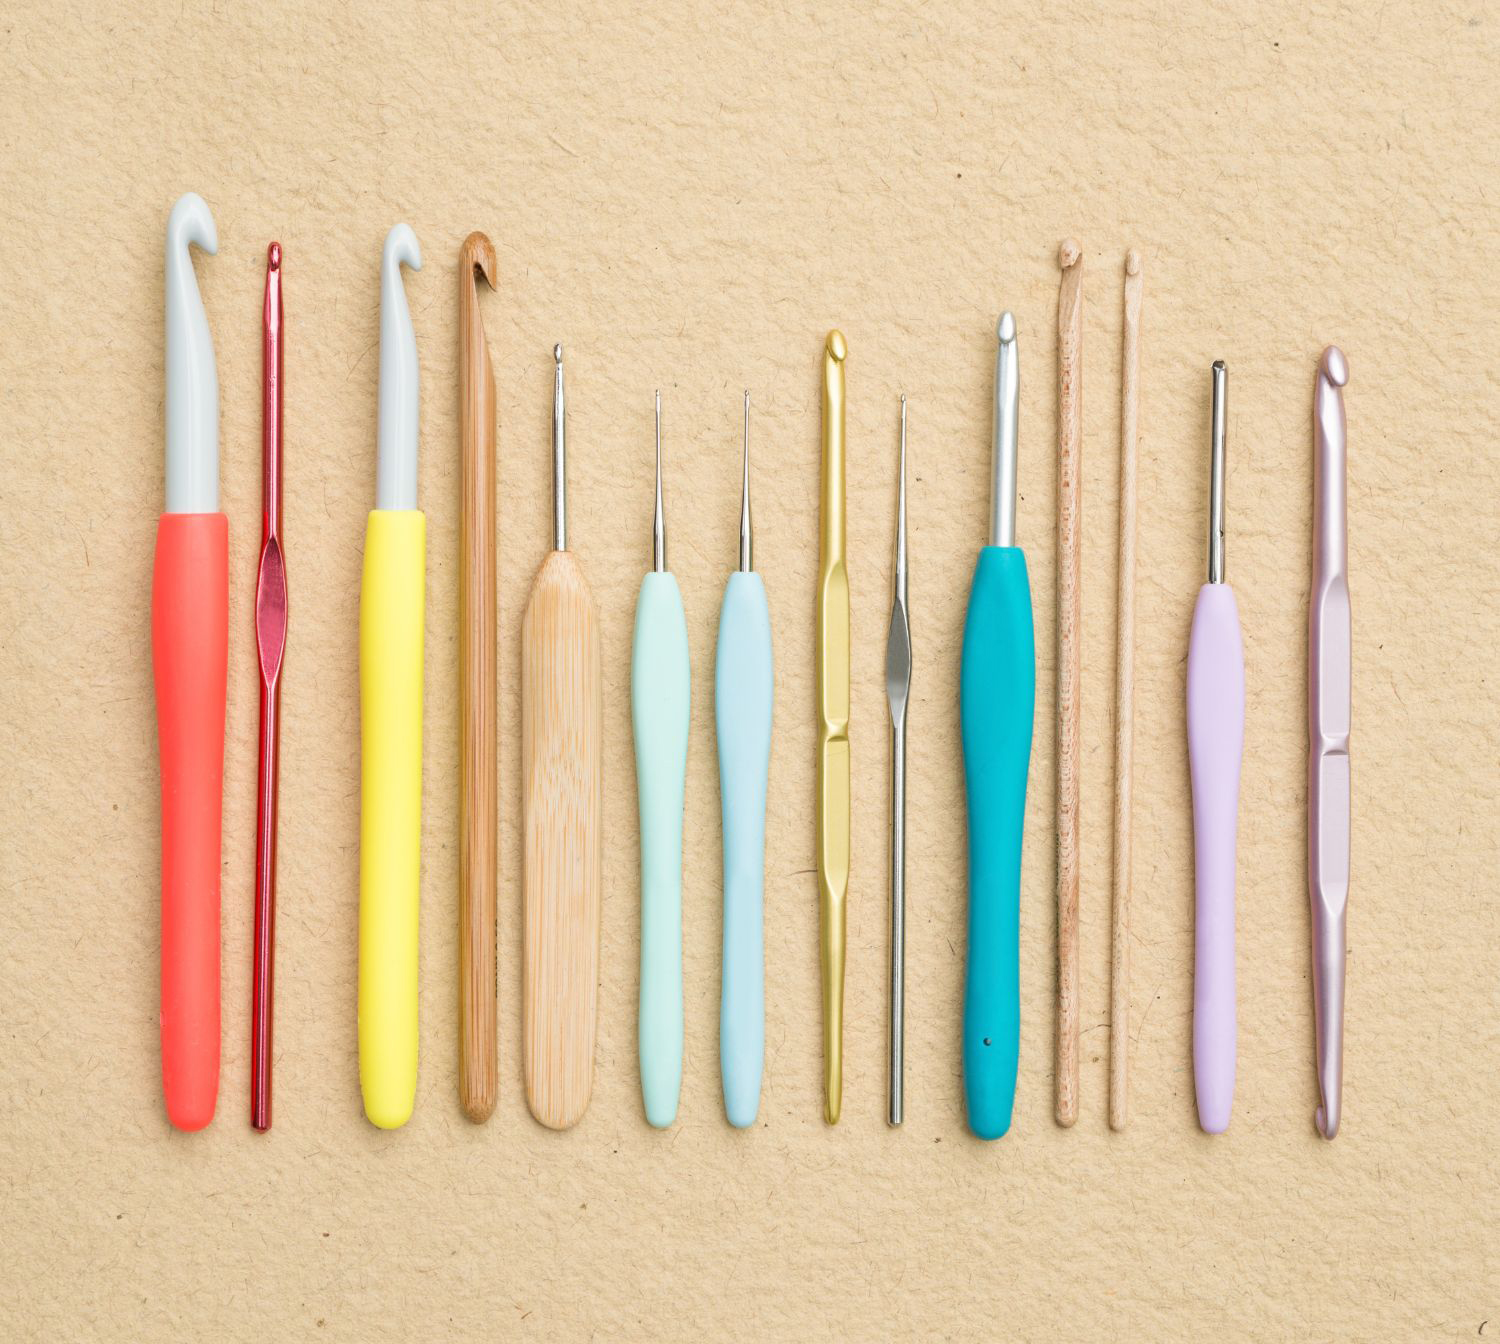
Crochet Hook Sizes
Understanding crochet hook sizes is crucial for a successful crochet journey. The size of your hook significantly impacts the final size and drape of your project.
Crochet hooks are labeled with a letter or number, and each corresponds to a specific diameter. Smaller numbers or letters indicate smaller hooks, while larger numbers or letters represent larger hooks.
Learn all there is to know about crochet hook sizes in this article:
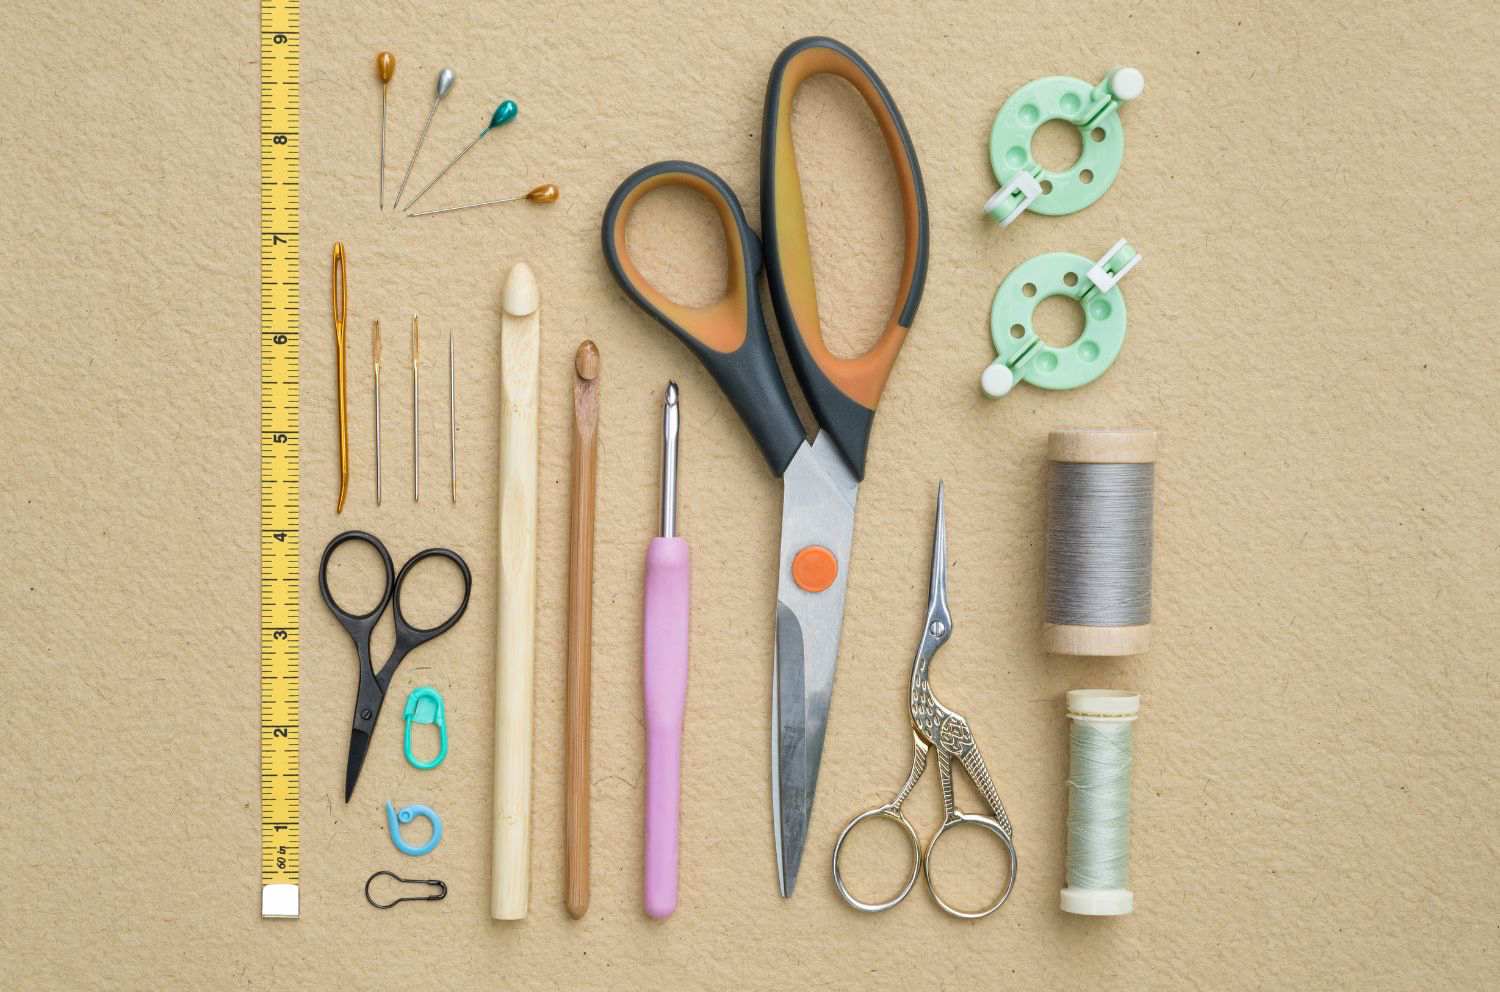
Other tools for crocheting
Alongside crochet hooks, there are several accessories that will make your crochet journey more enjoyable and efficient.
Explore some must-haves in this article:
How to Crochet Step-by-Step?
In this section, you will learn the practical basics of crochet. They are a must-have if you want to progress in the art of crocheting.
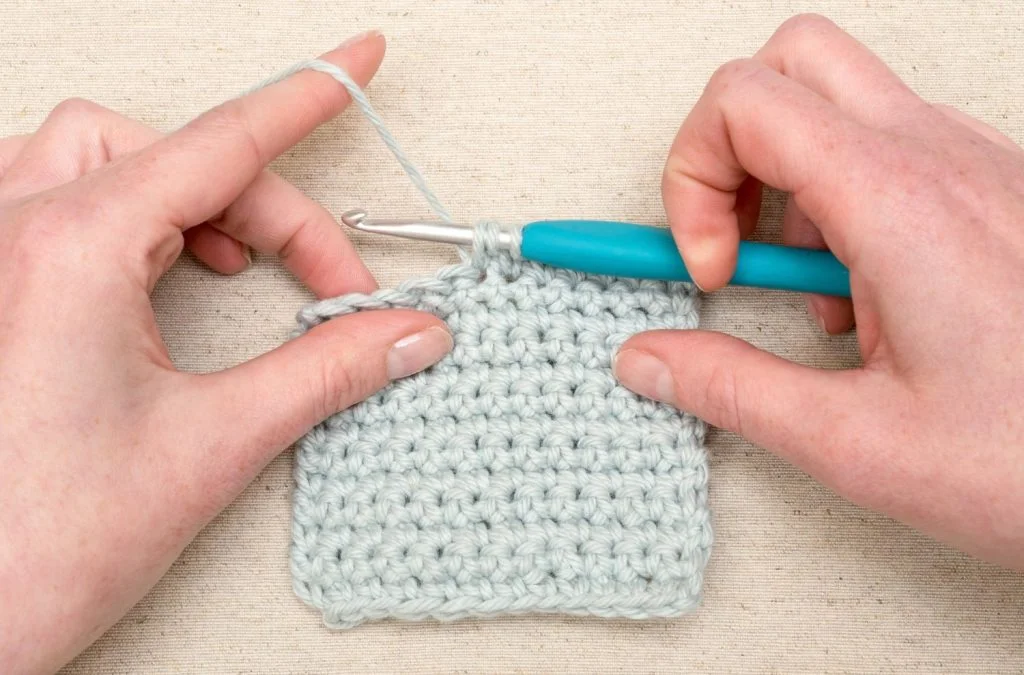
How to Hold the Crochet Hook
Properly holding your crochet hook is the first step in mastering the art.
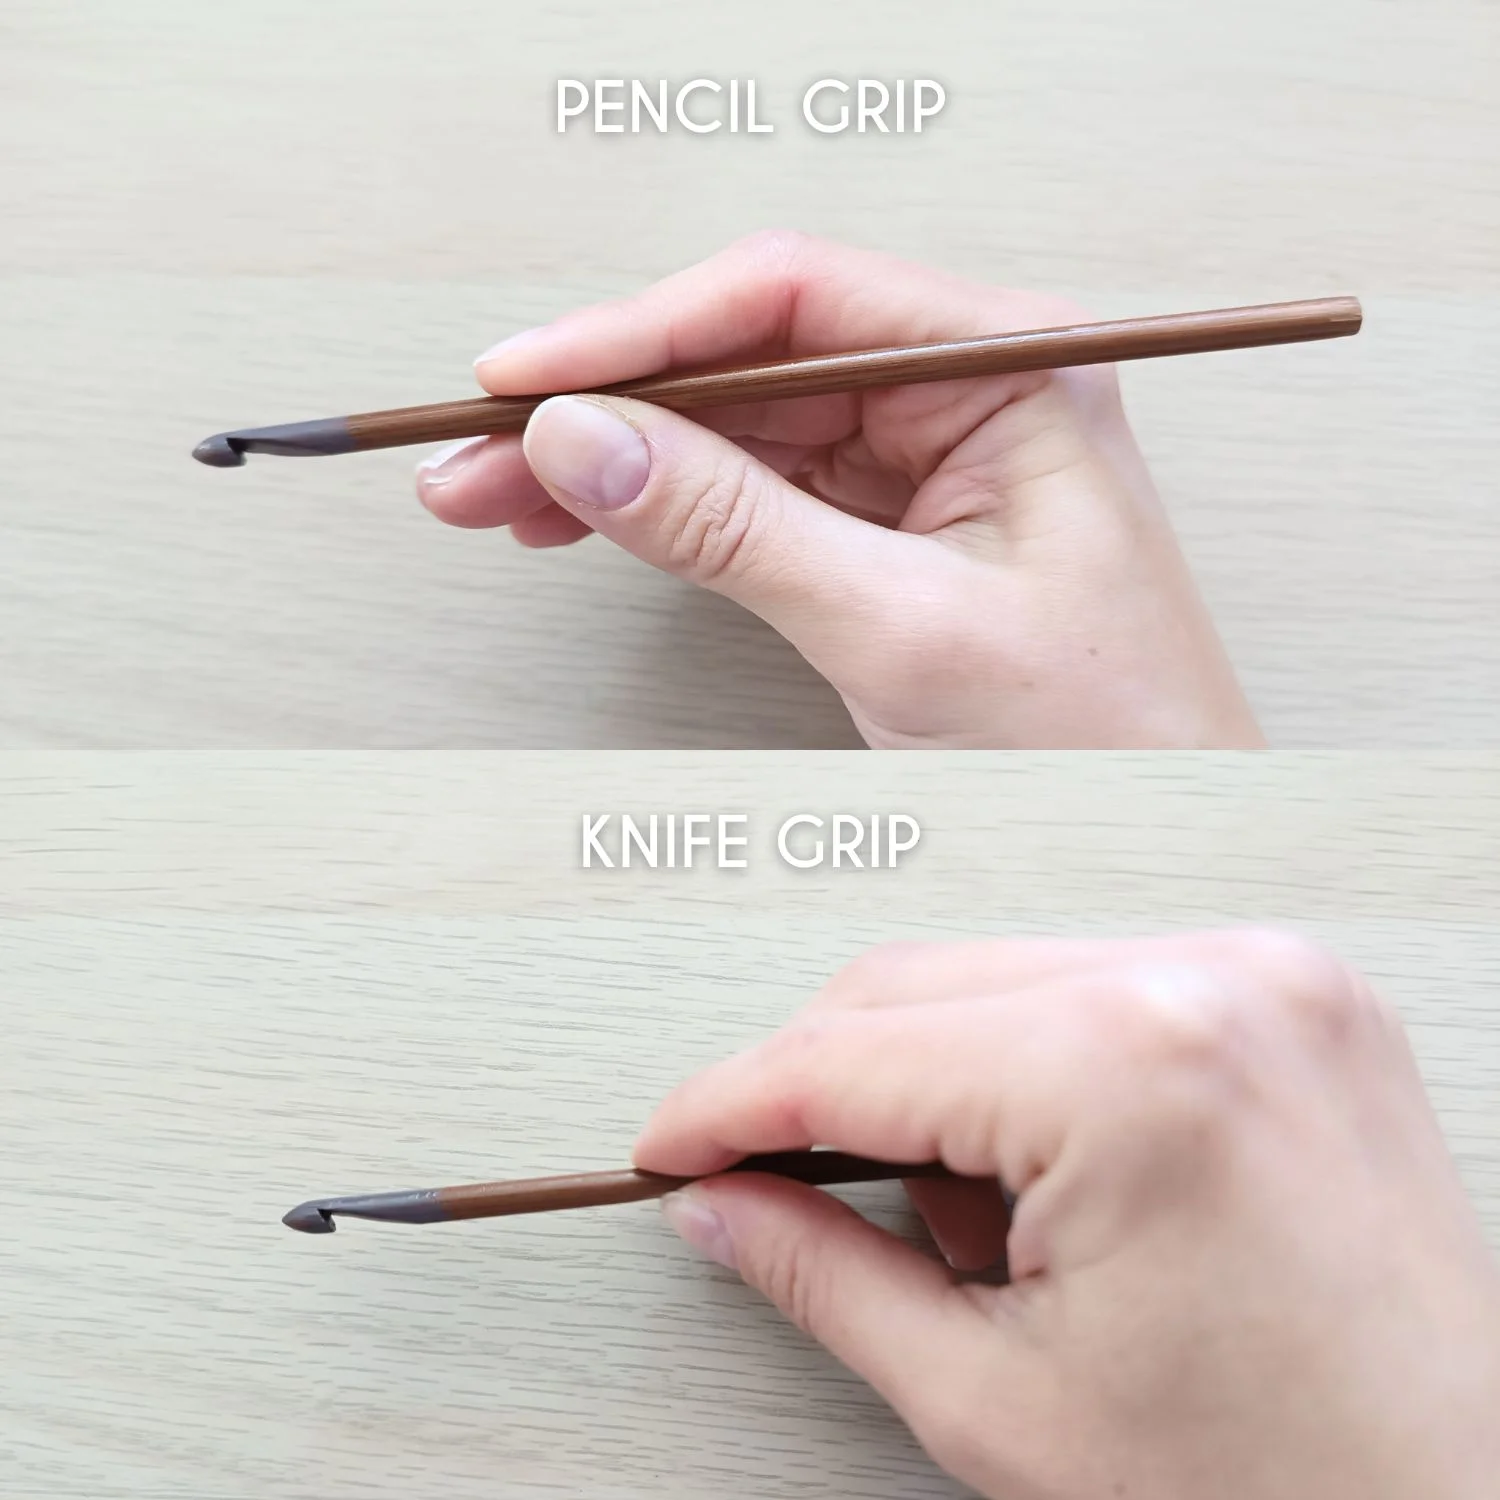
- Pencil Grip: Hold the crochet hook like you would a pencil. Grip it firmly but not too tightly, with the thumb and index finger near the hook’s head and the other fingers supporting the shaft.
- Knife Grip: Alternatively, you can use a knife grip, with the handle resting against the palm and the hook extending out between the thumb and index finger.
Whichever grip feels more natural to you is the right one. As you practice, you’ll develop your unique style.
How to Hold the Yarn for Crochet
When it comes to holding the yarn for crochet, find a grip that feels comfortable for you. Many beginners start by holding the yarn between their fingers to maintain tension while allowing the hook to glide smoothly through the loops. Experiment with different techniques until you discover the hold that suits your style, making your crochet journey a seamless and enjoyable experience.
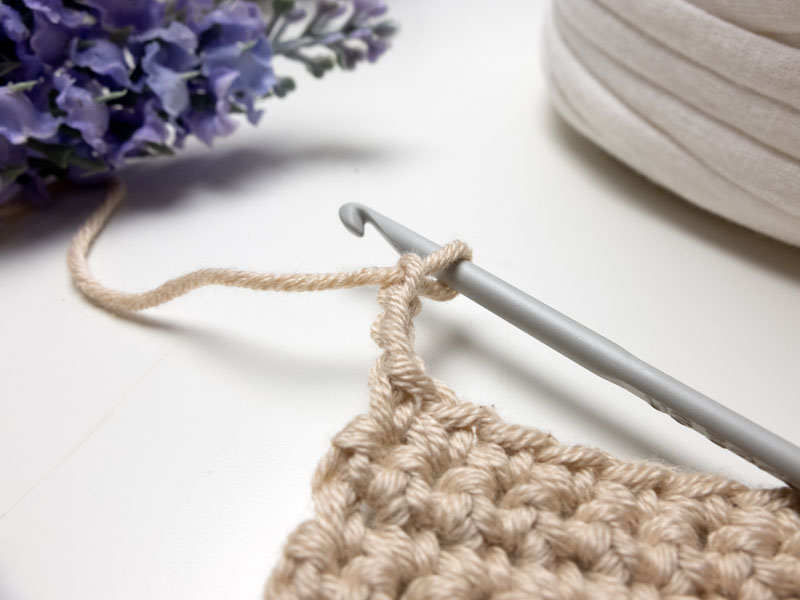
How to Make a Starting Chain?
The chain is a series of interconnected loops that form the base for your crochet work. The foundation chain’s length determines the width of your project, so it’s crucial to get it just right.
How to Tie a Slip Knot?
Learn how to make a slip knot to start crocheting. In this article you will find step-by-step instructions and a video tutorial:
How to Yarn Over?
Yarnovers are a crucial part of making chain stitches.
In the article linked below, you will find step-by-step instructions and a video tutorial on crocheting a chain. You will also learn the anatomy of the foundation chain and how to count crochet stitches.
How to Make a Turning Chain
Turning chains play a significant role in shaping your crochet work and maintaining consistency in your stitches. In this section, we will explore how to count turning chains and what you should keep in mind when working with them.
What are Turning Chains?
Turning chains are the chains you create at the beginning of a new row or round in your crochet project.
They serve several essential functions:
- Height: Turning chains add height to your work. The number of turning chains you create depends on the stitch you plan to work in the new row or round.
- Turning: They allow you to turn your work to start a new row or round without causing your project to become distorted.
- Stability: Turning chains create a stable edge, ensuring your crochet piece maintains its shape.
How to Count Chains?
Counting turning chains is essential to maintain the proper height for your stitches and achieve a clean, uniform appearance in your work. Here’s how to count turning chains for some common crochet stitches:
| stitch type | how many chains | does it count as a stitch? |
| Single Crochet (sc) | 1 | no |
| Half Double Crochet (hdc) | 2 | yes |
| Double Crochet (dc) | 3 | yes |
| Treble Crochet (tr) | 4 | yes |
| Double Treble (dtr) | 5 | yes |
| Triple Treble (ttr) | 6 | yes |
Turning Chains in the Foundation Chain
Every time you start a project with the foundation chain, you have to make additional chain stitches before you begin. These chain stitches serve the same purpose as turning chains.
However, it can be hard to locate them if you are new to crochet. Let’s see how to count stitches in the foundation chain.
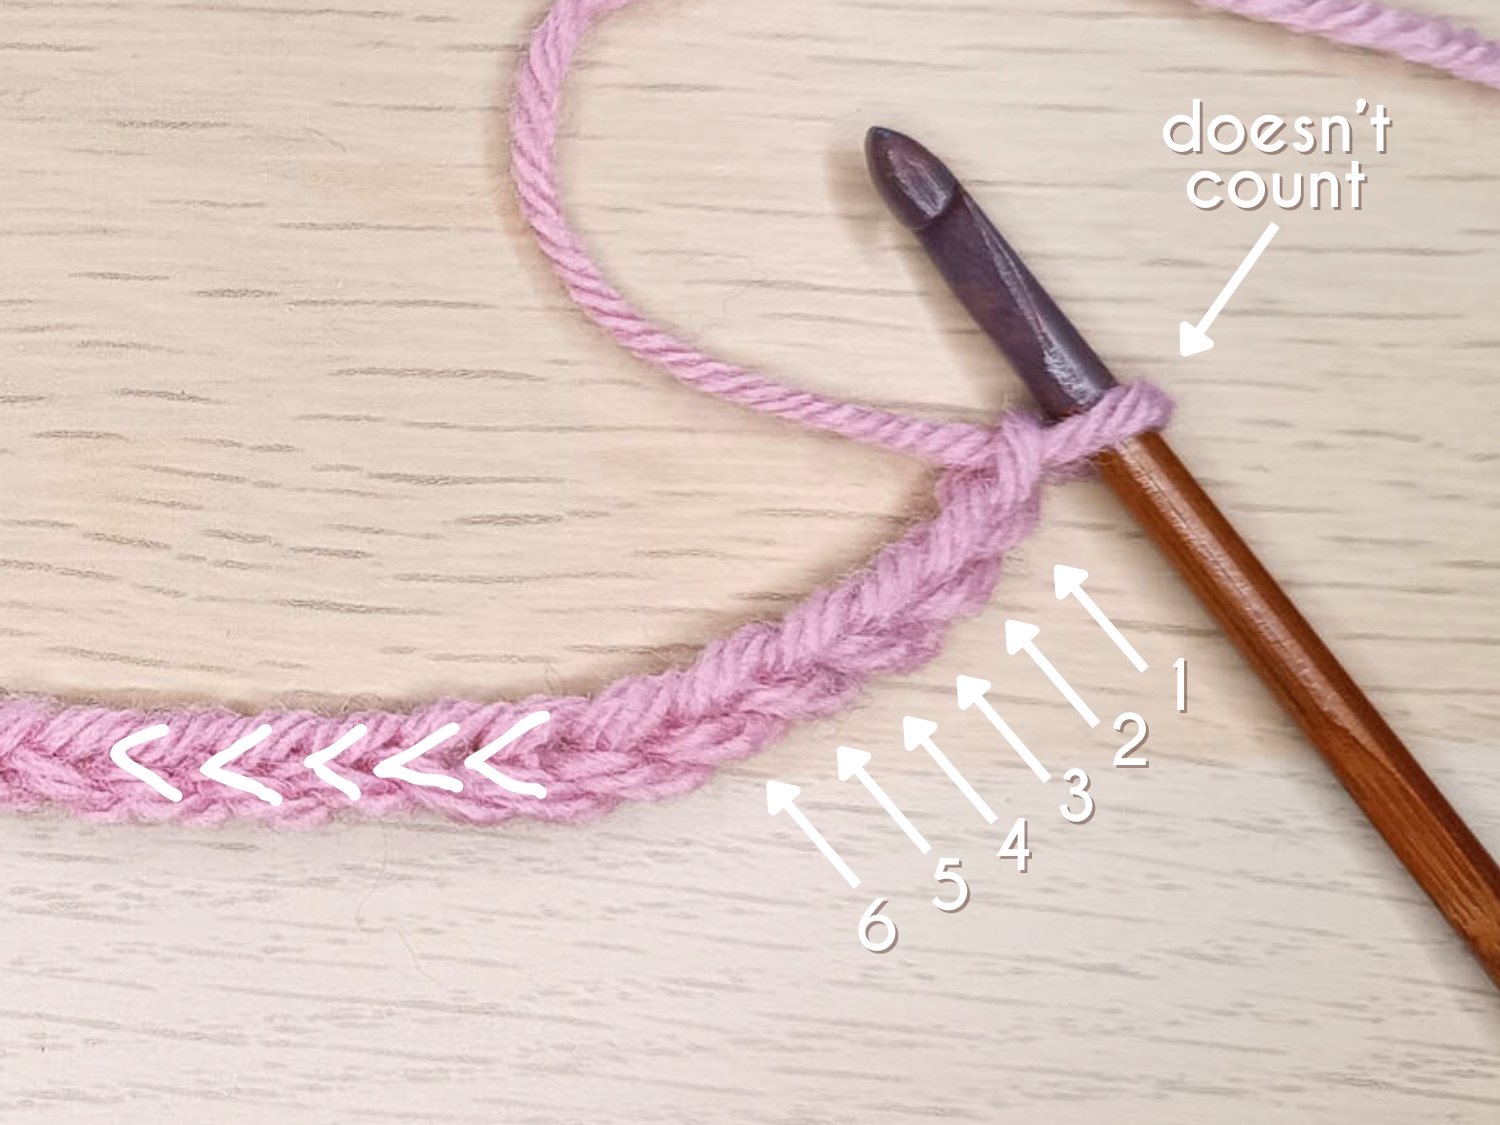
Always start counting stitches from the hook, going in the direction of the slip knot. Your working loop doesn’t count, so the first “V” you see will be the first stitch.
If you want to make a row of single crochet stitches, you have to omit one stitch and insert your hook in the second one. This one omitted stitch is your turning chain for a single crochet.
Similarly, if you want to start with a double crochet or treble, omit as many stitches as you need for a turning chain. If you omit two stitches, you insert the hook in the third one; if you omit four, you insert the hook in the fifth. When in doubt, consult the table above.
What to Remember About Turning Chains
Here are some essential tips to keep in mind when working with turning chains:
- Consistency: Always follow the pattern instructions regarding the number of turning chains required for a particular stitch. Using the correct number ensures uniformity in your work.
- Turning Direction: When turning your work, flip it towards you. This means if you were working from right to left, your work should now be oriented from left to right.
- Skip or Count?: Remember that most turning chains count as the first stitch unless the pattern specifies otherwise. Be mindful not to work additional stitches into the same space as your turning chain unless instructed.
- Height Matters: Turning chains vary in height based on the stitch you’re using. Ensure your turning chains match the height of the stitches you’re about to work into them.
- Practice: As with any crochet skill, practice is key to perfecting your turning chains. The more you work with them, the more comfortable and precise you’ll become.
Different Crochet Stitches
Most crochet techniques are built with a few basic crochet stitches. Having them under your belt sets you up for success in learning more complex patterns. You already know how to make a chain, a slip stitch, and a single crochet, so let’s explore taller stitches.
How to Slip Stitch (sl st)
You will encounter the slip stitch at all stages of your crochet journey. Learn all about the versatility of the slip stitch in this article:
How to Single Crochet (sc)
Single crochet is one of the most straightforward stitches, making it ideal for beginners. It creates a tight, dense fabric and is often used for amigurumi, dishcloths, and more. Every time you crochet the first row of stitches, you’re practicing working into the chain.
How to Half-Double Crochet (hdc)
The half double crochet stitch is slightly taller than the single crochet. It’s versatile and great for scarves, blankets, and hats. See our step-by-step tutorial and video tutorial to learn faster:
How to Double Crochet (dc)
Double crochet is a taller stitch that gives your work an airy, open texture. It’s commonly used for scarves, blankets, and shawls.
How to Treble Crochet (tr)
The treble crochet stitch is even taller than the double crochet, resulting in an open and lacy fabric. It’s often used in decorative pieces like shawls and doilies.
How to Double Treble (dtr)
Multiple crochet stitches, such as the double treble (dtr), triple treble (trtr), and taller variations, are used to create open and airy patterns, add height to your projects, and achieve intricate designs.
How to Triple Treble (trtr / ttr)
The process for the triple treble is similar to the double treble, but with four yarn overs instead of three.
How to Crochet Granny Square
Learn the most classic crochet motif with our video tutorial:
How to Read a Crochet Pattern
Reading crochet patterns might seem daunting at first, but with a bit of practice and an understanding of the basics, you’ll unlock a world of creative possibilities.
Make reading and writing crochet patterns easier with our comprehensive guide:
How to Read Crochet Diagrams
Crochet diagrams are visual representations of crochet patterns that use symbols and images to convey instructions. Learning to read crochet diagrams can be a valuable skill, as they offer a clear and universal way to understand and follow crochet patterns.
How to Fasten Off
Learn how to fasten off with this guide:
Correcting Mistakes in Crochet
Mistakes are a natural part of the crochet learning process, and every crocheter, from beginners to experts, makes them. The key is knowing how to identify and correct those mistakes without unraveling all your hard work.
How to Fix Common Mistakes
| MISTAKE | FIX |
|---|---|
| Miscounted Stitches Losing or adding stitches unintentionally is a common mistake. This can result in uneven edges and distorted patterns. | Carefully count your stitches in the row and compare them to the pattern’s instructions. If you have too many, you can skip a stitch to catch up; if you have too few, add an extra stitch where needed. |
| Uneven Tension Inconsistent tension leads to stitches that are too tight or too loose, affecting the overall look of your project. | Pay attention to your yarn tension and practice maintaining a consistent level of tightness throughout your work. Change the size of the crochet hook if needed. This skill improves with practice. |
| Wrong Stitch or Technique Using the wrong stitch or technique can alter the appearance of your project. | Review the pattern and ensure you’re using the correct stitch and following the instructions accurately. If you’ve made a mistake, carefully unravel a few stitches to the point where the error occurred and redo the section correctly. |
| Tangled Yarn or Knots Yarn can become tangled or knotted, causing interruptions in your crocheting. | Carefully untangle any knots or snarls in your yarn. If the yarn is severely damaged, you may need to cut it and reattach a new strand. |
| Twisted Stitches It usually happens when working with long chains. | Untwist the stitches by carefully turning them in the right direction with your fingers or a crochet hook. |
| Uneven Rows Some rows are shorter or longer than others. | Count your stitches to identify where the mistake occurred, and adjust accordingly. Remember to count stitches in each row, and revise identifying stitches if needed. |
| Missed Stitch Markers If you forget to place stitch markers at key points in your pattern, it can lead to incorrect stitch placement and shaping. | Go back and insert the missing stitch markers where indicated in the pattern. Carefully work the stitches as directed around the markers. |
Crocheting is a skill that improves with practice, and each mistake is an opportunity to learn and become a better crocheter. Stay patient, stay positive, and enjoy the journey of creating beautiful crochet projects.
The Importance of Crochet Swatches
Crochet swatches may seem like small, inconsequential pieces of work, but they play a crucial role in ensuring the success of your crochet projects.
Calculating Yarn Yardage for Your Crochet Project
Knowing how much yarn you need for a project is a must for every crocheter. Learn what to pay attention to and how to calculate the yardage needed for your crochet pattern.
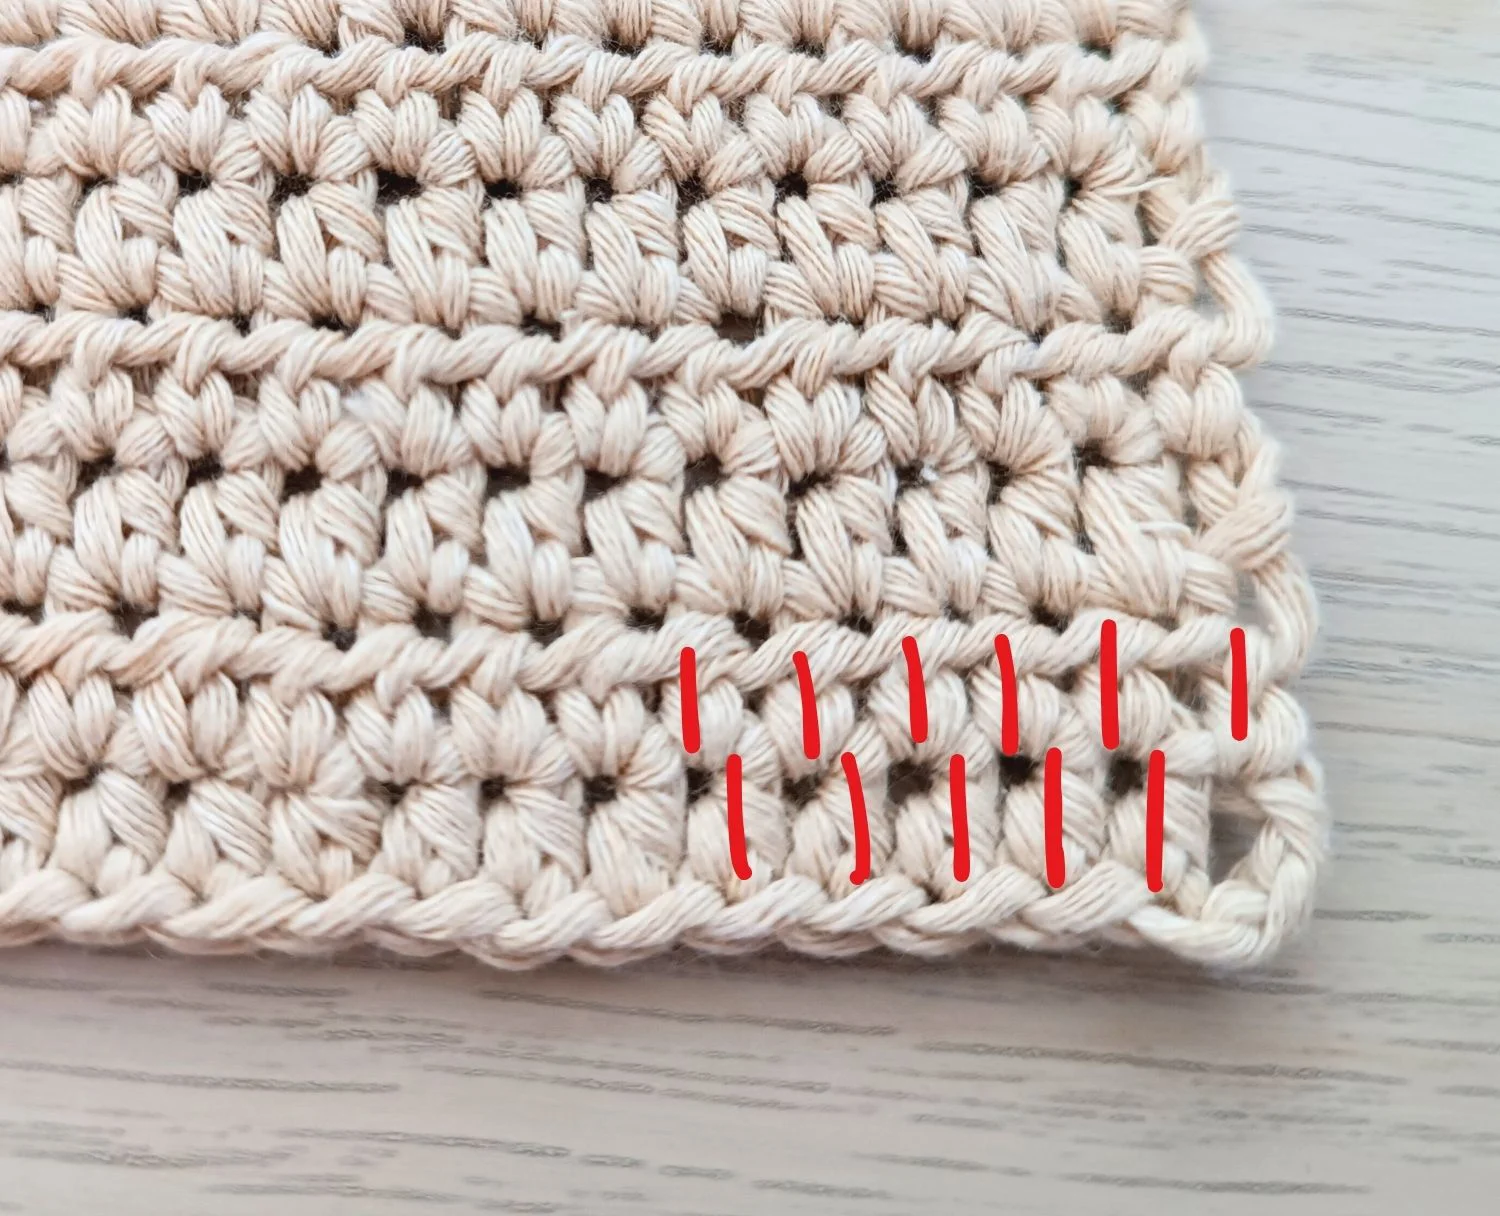
How to Count Stitches
Counting stitches is relatively straightforward, but it’s important to be consistent and systematic in your approach:
- Use Your Fingers: As you crochet, use your non-dominant hand (the hand that doesn’t hold the crochet hook) to hold onto your work near the last stitch you made. This helps you keep track of your stitches.
- Start at the Right Place: Begin counting stitches from where you finished the previous row or round. For example, if your last stitch was a single crochet, count the loops on top of it as you work your next row or round.
- Count the Vs: In most basic crochet stitches, such as single crochet or double crochet, each “V” shape represents one stitch. Count each V as you come to it.
- Keep a Steady Pace: Try to maintain a consistent rhythm as you count. You can count silently or say the numbers aloud to help you stay on track.
Crocheting in the Round
How to Make a Magic Ring
The magic ring is one of the best methods to start circular crochet projects because it creates a tight center. Learn how to create a magic ring with our step-by-step instructional video and photo tutorial:
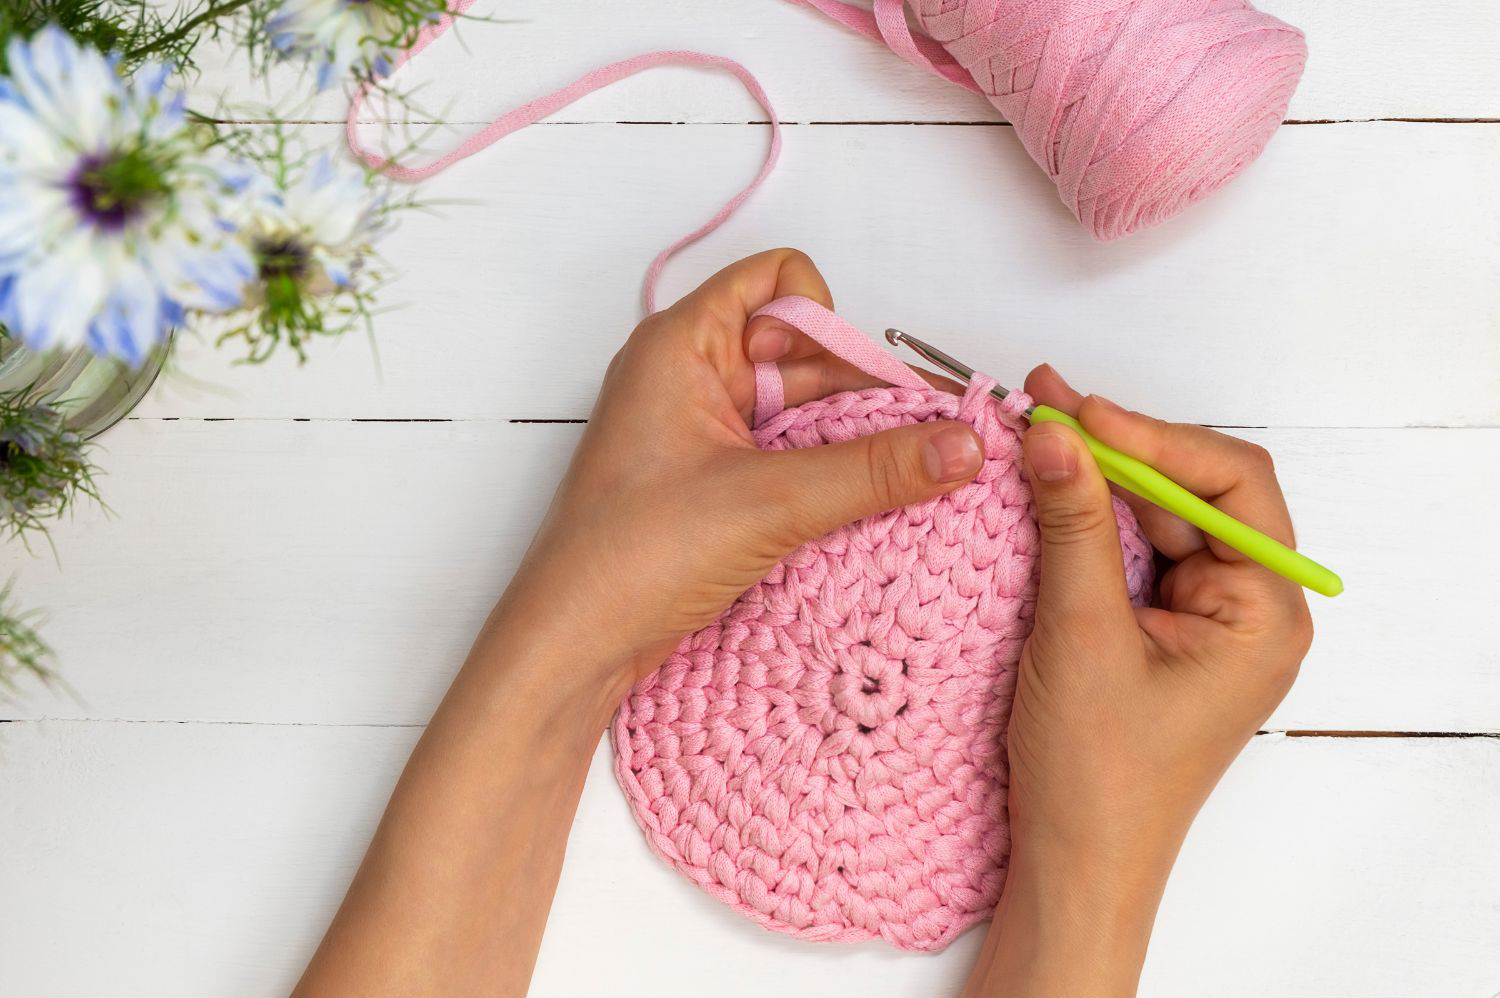
How to Crochet a Flat Circle
Creating a flat crochet circle is a fundamental skill used in many crochet projects, including coasters, doilies, and the bases of hats or bags.
How to Keep the Right Tension
- Relax Your Grip – Hold your crochet hook and yarn with a relaxed grip. A tight hold can result in tight stitches, while a loose grip can create loose stitches. Find a balance that feels comfortable for you.
- Practice, Practice, Practice – Tension control improves with practice. Start with simple projects to hone your tension skills before tackling more complex patterns. As you become more comfortable, you’ll find it easier to maintain even tension.
- Use the Right Hook – Choose a crochet hook that feels comfortable in your hand and matches the recommended size for your yarn. A hook that’s too small can create tight tension, while a larger hook can result in loose tension.
- Yarn Choice – Different yarns have different textures and characteristics that can affect your tension. Experiment with various yarn types to find ones that feel comfortable for your crocheting style.
- Check Your Gauge – Always make a gauge swatch before starting a project. It helps you determine if your tension matches the pattern’s requirements. Adjust your hook size as needed to achieve the correct gauge.
- Take Breaks – Crocheting for extended periods can lead to fatigue and uneven tension. Take short breaks to relax your hands and maintain consistent tension throughout your project.
Tips for Maintaining Evenness
Consistent tension and even stitches are essential for achieving a professional finish in your crochet work. Here are some tips to help you maintain evenness:
- Practice Regularly – Like any skill, crochet improves with practice. Spend time working on swatches and small projects to refine your tension.
- Choose the Right Hook – Use the hook recommended in your pattern or experiment with different hook sizes to achieve the desired tension. A larger hook creates looser stitches, while a smaller hook results in tighter stitches.
- Focus on Tension – Pay attention to how tightly you hold the yarn and maintain consistent tension throughout your project. If your tension is uneven, your stitches will be as well.
- Block Your Work – Blocking is a technique where you wet your finished project, shape it, and allow it to dry. This can help even out stitches and make your work look more polished.
- Use Stitch Markers – In more complex patterns or when working in the round, consider using stitch markers to mark the beginning of each round. This can help you keep track and ensure your stitch count remains consistent.
- Count Regularly – Don’t wait until the end of a row or round to count your stitches. Periodically check your stitch count to catch any mistakes early.
By practicing these techniques and staying attentive to your stitch count and tension, you’ll be well on your way to creating beautiful, evenly crocheted projects you can be proud of.
Increases and Decreases in Crochet
In the world of crochet, increases and decreases are fundamental techniques that shape your projects, adding curves, angles, and depth to your work. Understanding how to make these adjustments is essential for creating intricate and well-balanced crochet pieces.

Increases: Adding Stitches
Increases involve adding stitches to your work, usually in a specific pattern or sequence. This technique widens your project and can create curves, ruffles, or a variety of shapes.
Learn how to increase in crochet with our comprehensive guide:
Decreases: Reducing Stitches
Decreases involve removing stitches from your work, typically in a controlled pattern or sequence. Decreasing is used to shape your crochet piece, making it narrower or more pointed. See how it’s done here:
Tips for Successful Increases and Decreases
- Follow Your Pattern: Pay close attention to your crochet pattern instructions, as they will specify when and how to make increases and decreases.
- Count Stitches: Keep track of your stitch count to ensure that you have the correct number of stitches before and after making increases or decreases.
- Practice: Practice these techniques on small swatches before applying them to larger projects to get a feel for how they work.
- Tension Matters: Maintain even tension when making increases and decreases to keep your work looking neat and consistent.
- Experiment: Don’t be afraid to experiment with different increase and decrease methods to achieve unique shapes and textures in your crochet projects.
By mastering the art of increases and decreases, you’ll have the flexibility to create a wide range of crochet items, from intricate lace shawls to amigurumi characters with precise shapes.
Exploring Color Changes in Crochet
Changing colors in crochet opens up a world of creative possibilities, allowing you to add depth, contrast, and unique designs to your projects.
Explore the techniques for changing colors and offer tips for achieving clean, professional-looking color transitions in this article:
How to Keep Straight Edges
Achieving straight edges and maintaining consistent tension in your crochet work are fundamental skills that can greatly enhance the quality of your projects. In this chapter, we’ll explore tips and techniques to help you keep your edges straight and ensure your tension remains even throughout your crochet journey.
- Count Your Stitches – Counting your stitches at the end of each row or round is crucial for maintaining straight edges. Ensure that you have the correct number of stitches specified in your pattern. If you’re missing or adding stitches, it can cause your work to slant or ripple.
- Use Stitch Markers – Place stitch markers at the beginning and end of each row or round to clearly mark the edge stitches. This helps you identify where to start and finish your rows, preventing accidental increases or decreases along the edges.
- Turn Chains – When turning at the end of a row, make sure your turning chains are the correct height for the stitch you’re working. For example, for double crochet stitches, a turning chain of three is usually used. This helps maintain the height and alignment of your stitches.
- Consistent Tension – Maintaining consistent tension in your yarn is key to straight edges. Avoid pulling your yarn too tightly or leaving it too loose when making stitches. Practice keeping a steady tension as you work.
Basic Joining Techniques
Learn the best ways to join crochet squares with our comprehensive guide.
Blocking and Stiffening Crochet Pieces
Blocking and stiffening are essential techniques in the world of crochet. These processes help refine the appearance of your crochet pieces, ensuring they look polished and professional.
Choosing the Right Substitute Yarn
Choosing the perfect yarn for your project plays a significant role in bringing your vision to life. However, what if you can’t find the exact yarn recommended in your pattern or prefer to use something else?
Let’s explore the art of selecting substitute yarns, ensuring that your crochet projects turn out beautifully, even when the recommended yarn isn’t readily available.
When You Can’t Find the Recommended Yarn
It’s not uncommon to encounter situations where the yarn specified in a pattern is unavailable, discontinued, or simply not to your liking. Fortunately, there are steps you can take to find a suitable substitute.
Consider the Following Factors:
- Yarn Weight: Check the pattern for the recommended yarn weight (e.g., worsted, sport, or bulky). Select a substitute yarn with the same weight to maintain the project’s size and drape.
- Fiber Content: Pay attention to the fiber content of the recommended yarn (e.g., cotton, acrylic, wool). Choose a substitute yarn with a similar fiber composition to achieve a comparable feel and appearance.
- Texture and Finish: Consider the texture and finish of the recommended yarn. For example, if the original yarn has a soft, matte finish, look for a substitute with similar characteristics.
- Color: Match the color requirements of your pattern, or use the opportunity to experiment with different shades and color combinations that suit your personal style.
- Yardage: Ensure that the substitute yarn has a similar yardage per skein to avoid running out before completing your project.
- Gauge: Make a gauge swatch using your chosen substitute yarn and the recommended crochet hook to ensure your tension matches the pattern’s requirements.
Tips for Successful Yarn Substitution
- Keep Swatching: Always create a gauge swatch before diving into your project. This allows you to assess the drape, texture, and overall appearance of your chosen substitute yarn.
- Consider Texture: Think about how the texture of your substitute yarn will affect the stitch pattern. Some stitch patterns may look different with a textured or fuzzy yarn compared to a smooth one.
- Check Dye Lots: If you’re buying multiple skeins of substitute yarn, be sure to check the dye lots to ensure consistent color throughout your project.
- Ask for Advice: Seek guidance from experienced crocheters or yarn shop experts when choosing substitute yarns, especially if you’re unsure about the characteristics of a particular yarn.
- Embrace Creativity: Remember that choosing a substitute yarn can be an opportunity to put your own creative spin on a pattern. Don’t be afraid to experiment and make the project uniquely yours.
FAQ
How to crochet a blanket
Crocheting a blanket is a rewarding project that allows you to wrap yourself in warmth and creativity. Begin by selecting a soft and cozy yarn in your favorite colors. Learn essential stitches like the chain and double crochet, and follow a simple pattern to build the blanket’s foundation. As you progress, experiment with different stitch combinations and textures for a personalized touch.
Find out more about in our article How to crochet a blanket.
How to crochet a granny square
Mastering the art of crocheting a granny square opens the door to a myriad of creative possibilities. These versatile squares can be combined to make blankets, pillows, or even garments. Start by learning the basic granny square pattern, then experiment with color changes and variations to add flair.
Find out more about in our article How to crochet a granny square.
How to crochet a hat
Crocheting a hat is a fantastic way to blend style and functionality. Choose a soft yarn suitable for keeping you warm, and familiarize yourself with the magic circle and basic stitches like single and double crochet. With the right techniques, you’ll soon be creating custom hats for yourself and your loved ones.
How to crochet a scarf
Crocheting a scarf is an ideal project for both beginners and experienced crafters. Select a yarn that feels cozy against the skin and experiment with different stitch patterns to create a unique design. Soon enough, you’ll be crafting stylish scarves to complement any outfit.
Find out more about in our article How to crochet a scarf.
How to crochet a flower
Adding a crocheted flower to your repertoire brings a touch of charm to various projects. Whether embellishing accessories, home decor, or gifts, crocheted flowers are versatile and fun to make. Learn the art of creating petals and assembling blooms by following a simple flower pattern.
Find out more about in our article How to crochet a flower.