
In this article:

Bracelets are one of the best beginner crochet projects. You only need to know basic crochet stitches to create a unique piece of jewelry for yourself or for a friend. Also, because these friendship bracelets are narrow, they don’t require a long time to make.
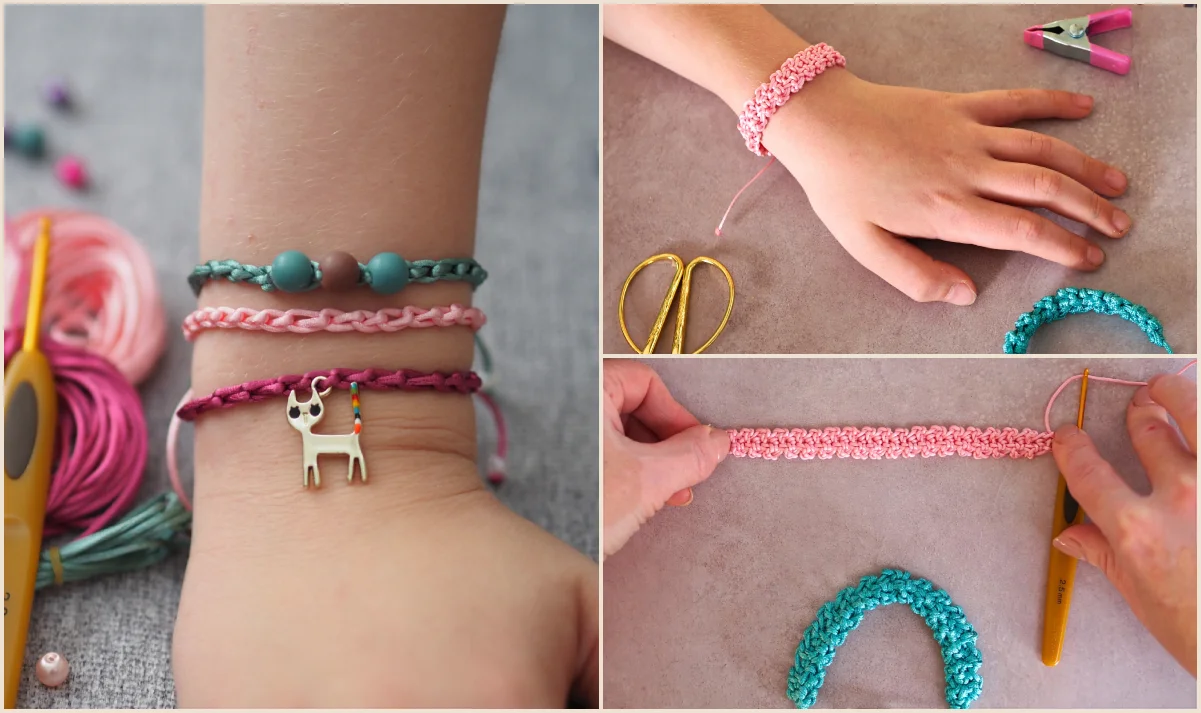
A crocheted bracelet from a chain stitch or single crochet stitch will be a perfect, fun project for kids to encourage them to learn crocheting. It’s simple and quick to craft, so you will have a gift for a friend or jewelry matching your favorite outfits in no time.
In my post “Basic Crochet Stitches”, I guided you through (surprise!) basic crochet stitches. As I promised, there is no time for dully repeating stitches, like practicing scales in music.
If you have just learned the chain stitch, practice it in your first crochet project: an easy friendship bracelet.
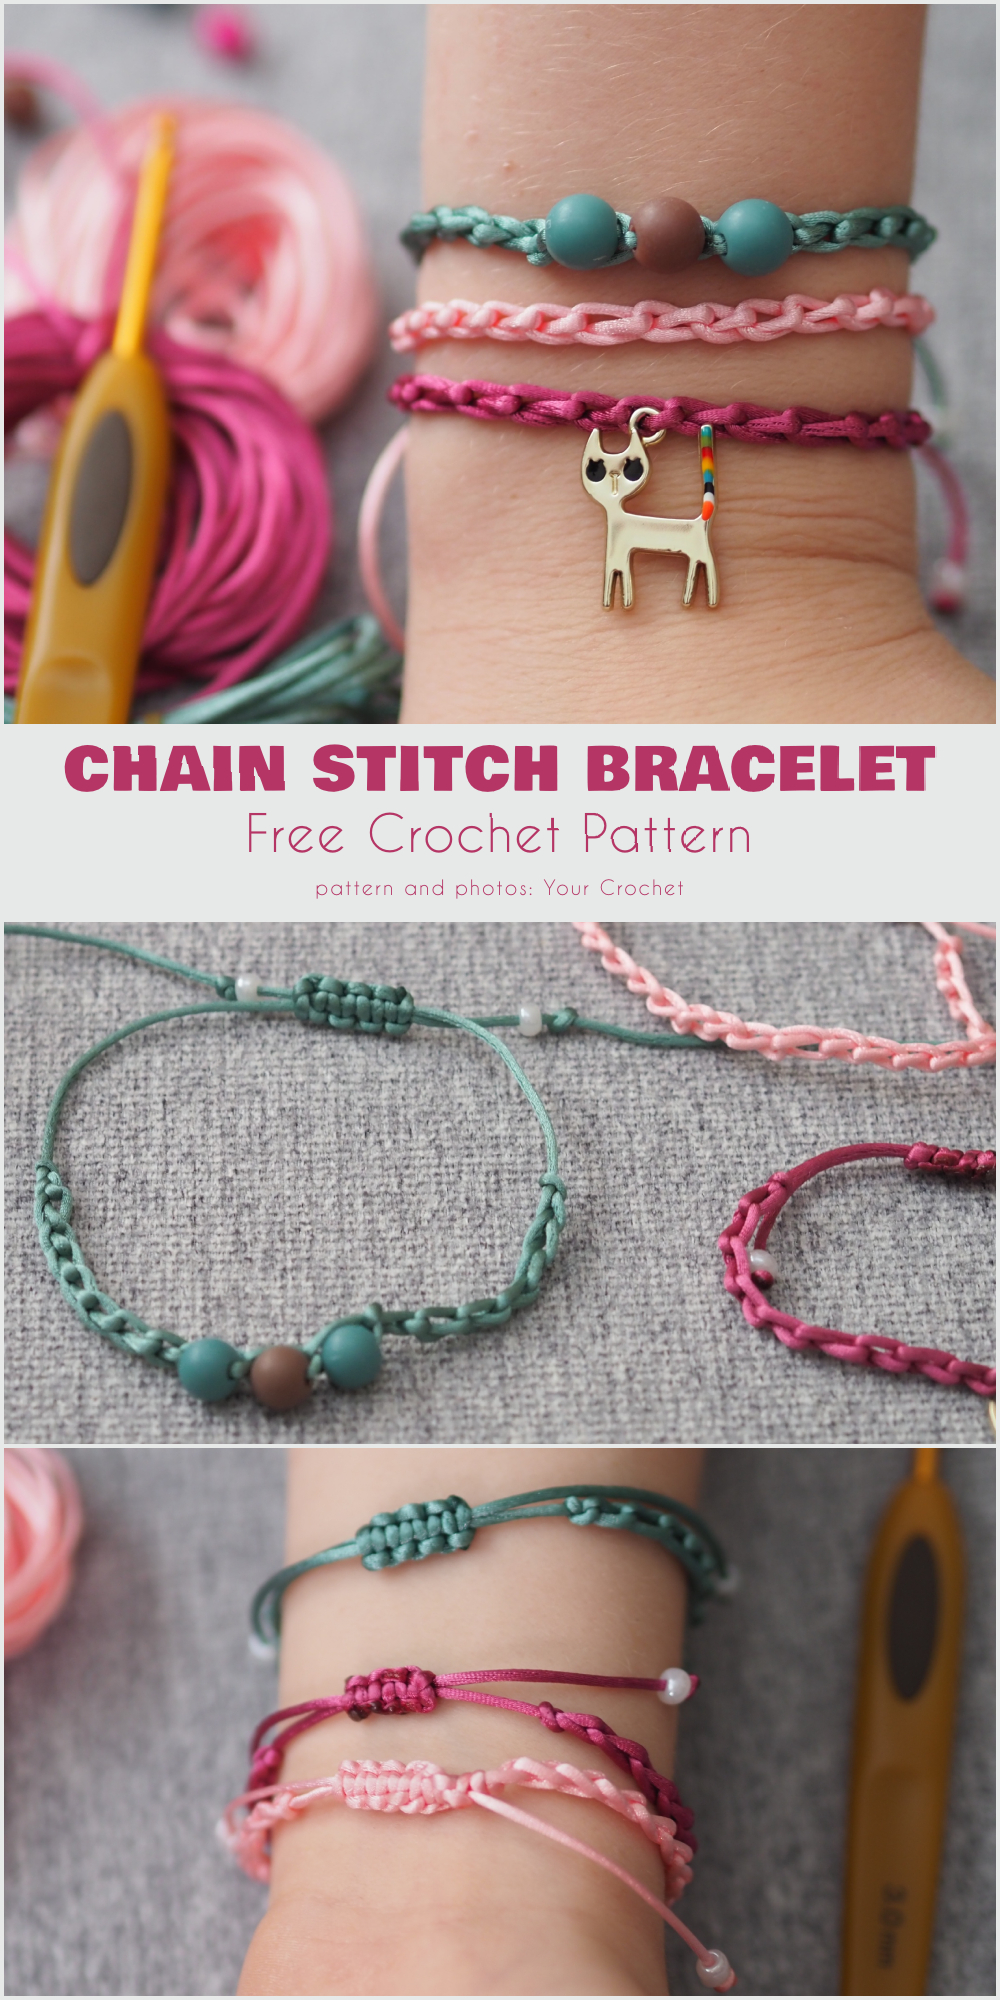
Easy Chain Stitch Friendship Bracelet Free Crochet Pattern
A crocheted bracelet from a chain stitch only will also be a perfect project for kids to encourage them to learn crocheting. It’s a simple, quick project and you will have a gift for a friend or bracelets matching your favourite outfits.
A crocheted friendship bracelet made using the chain stitch will be just the thing to get them to crochet. It’s uncomplicated and fast, but produces amazing accessories for adding pizzazz to any outfit.
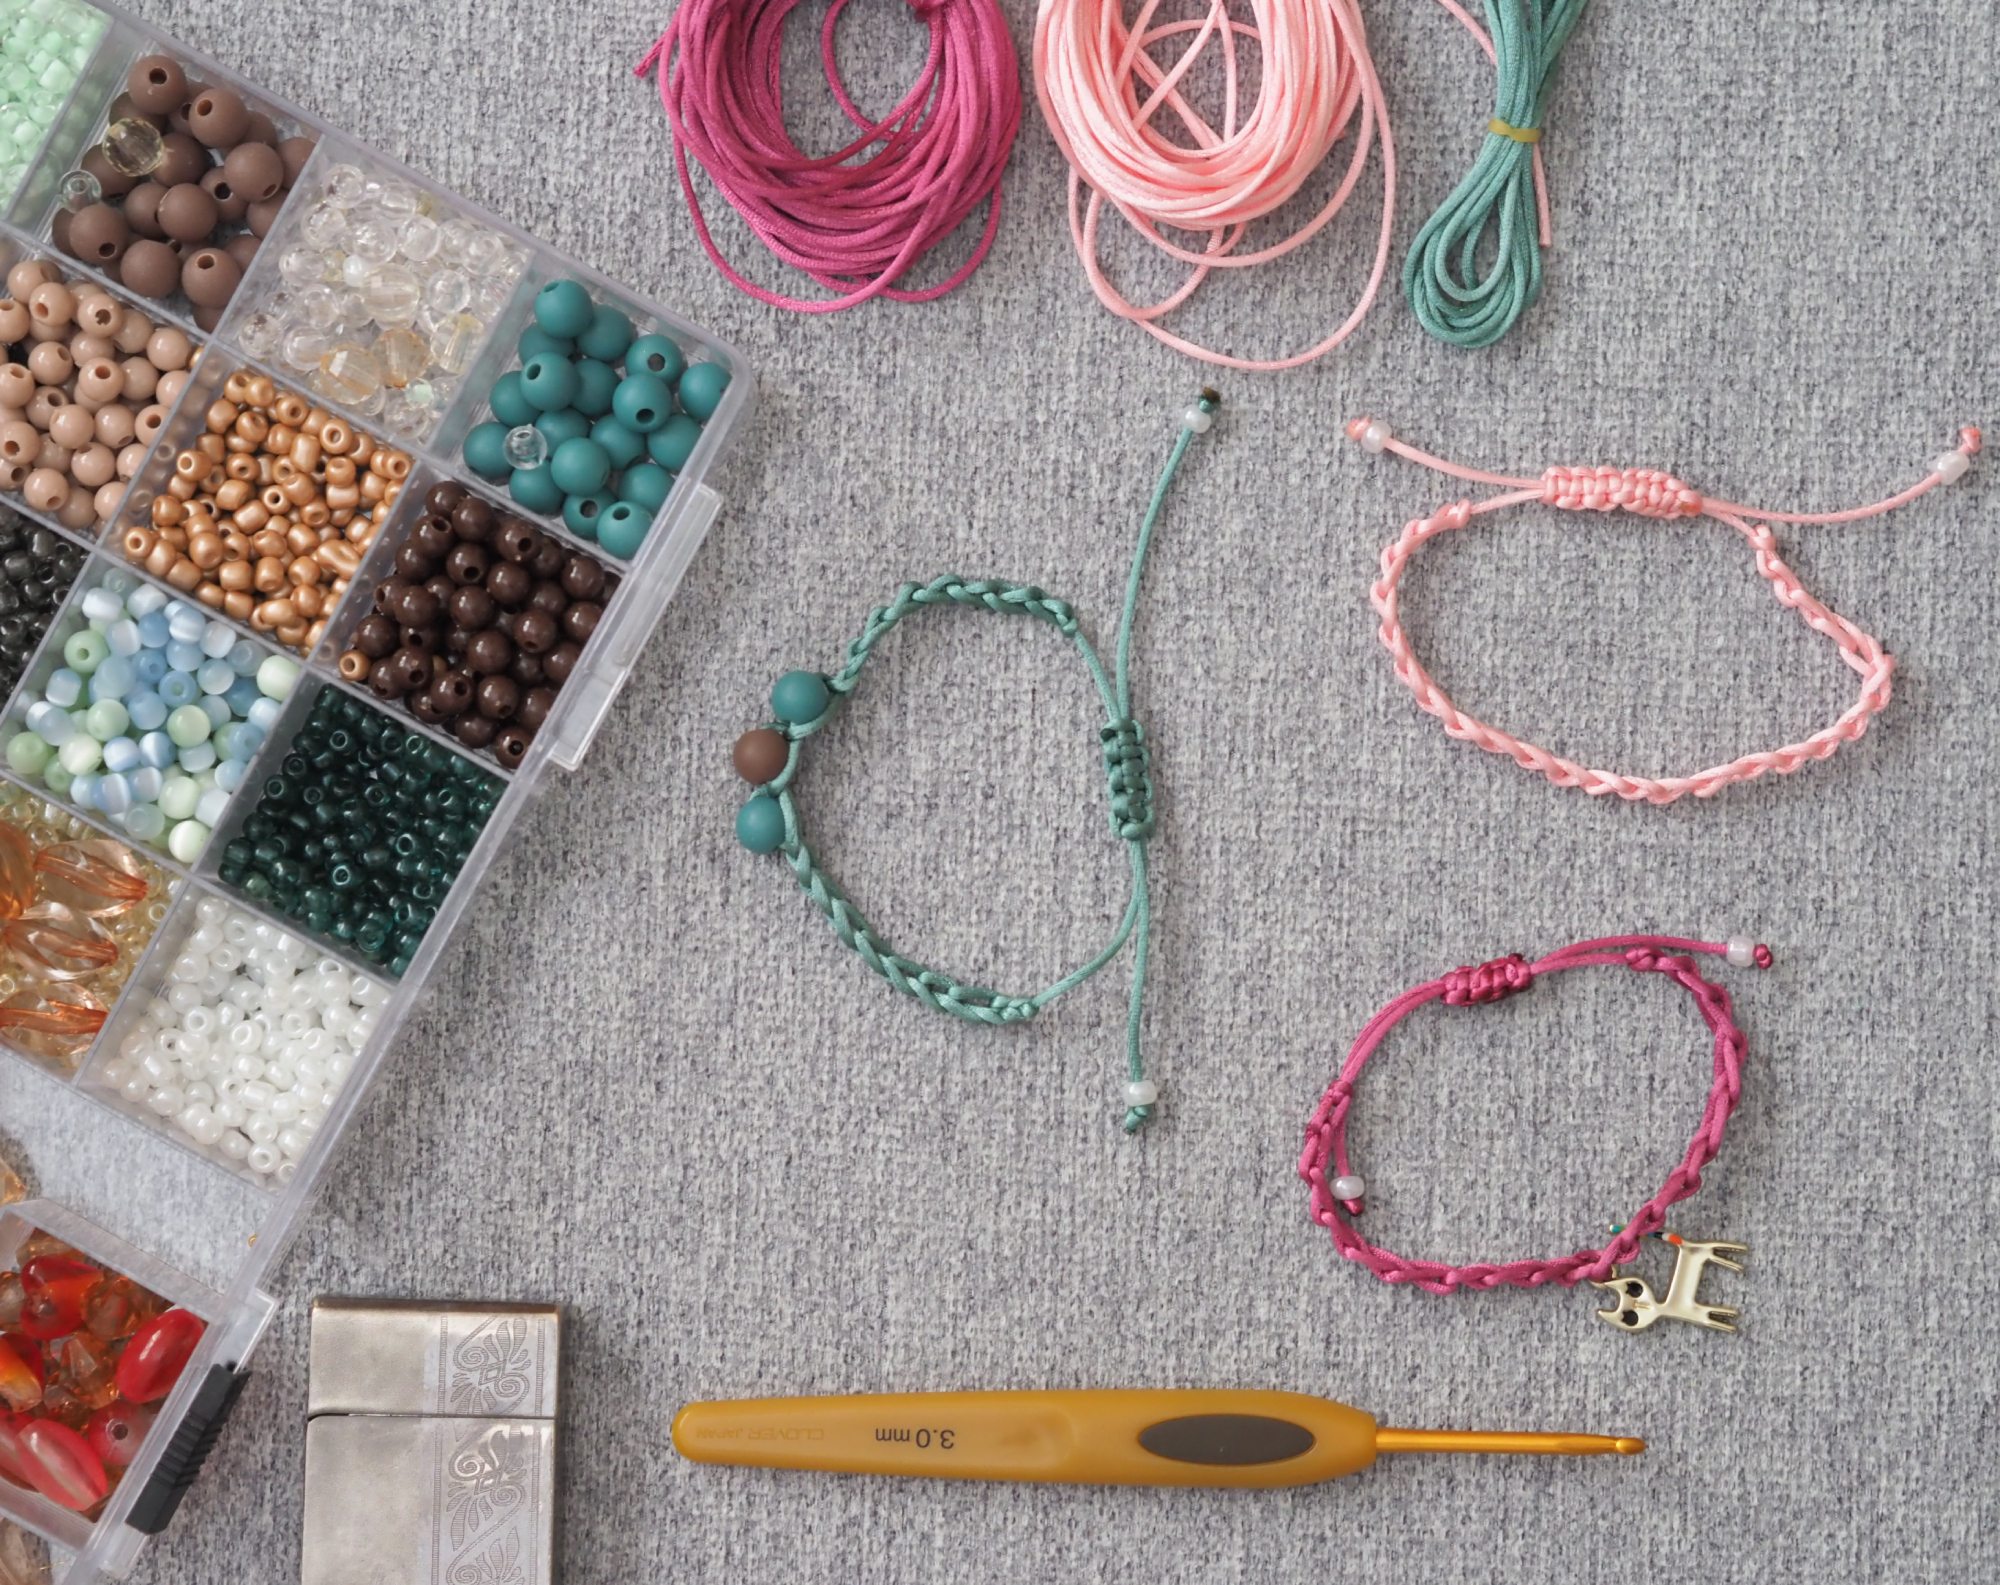
Materials you will need:
- Satin Nylon Cord for the Bracelet; if you don’t have any, use embroidery thread instead
- Crochet hook – I’ve chosen a 3 mm hook size for my cord
- Scissors
- beads (optional)
- lighter
Step 1: Beginning
Leave approximately 8″ (20 cm) at the beginning. Long tails will help us to block the bracelet at the end while making an adjustable closure. Make a slip knot.
Step 2: Continue with a Chain
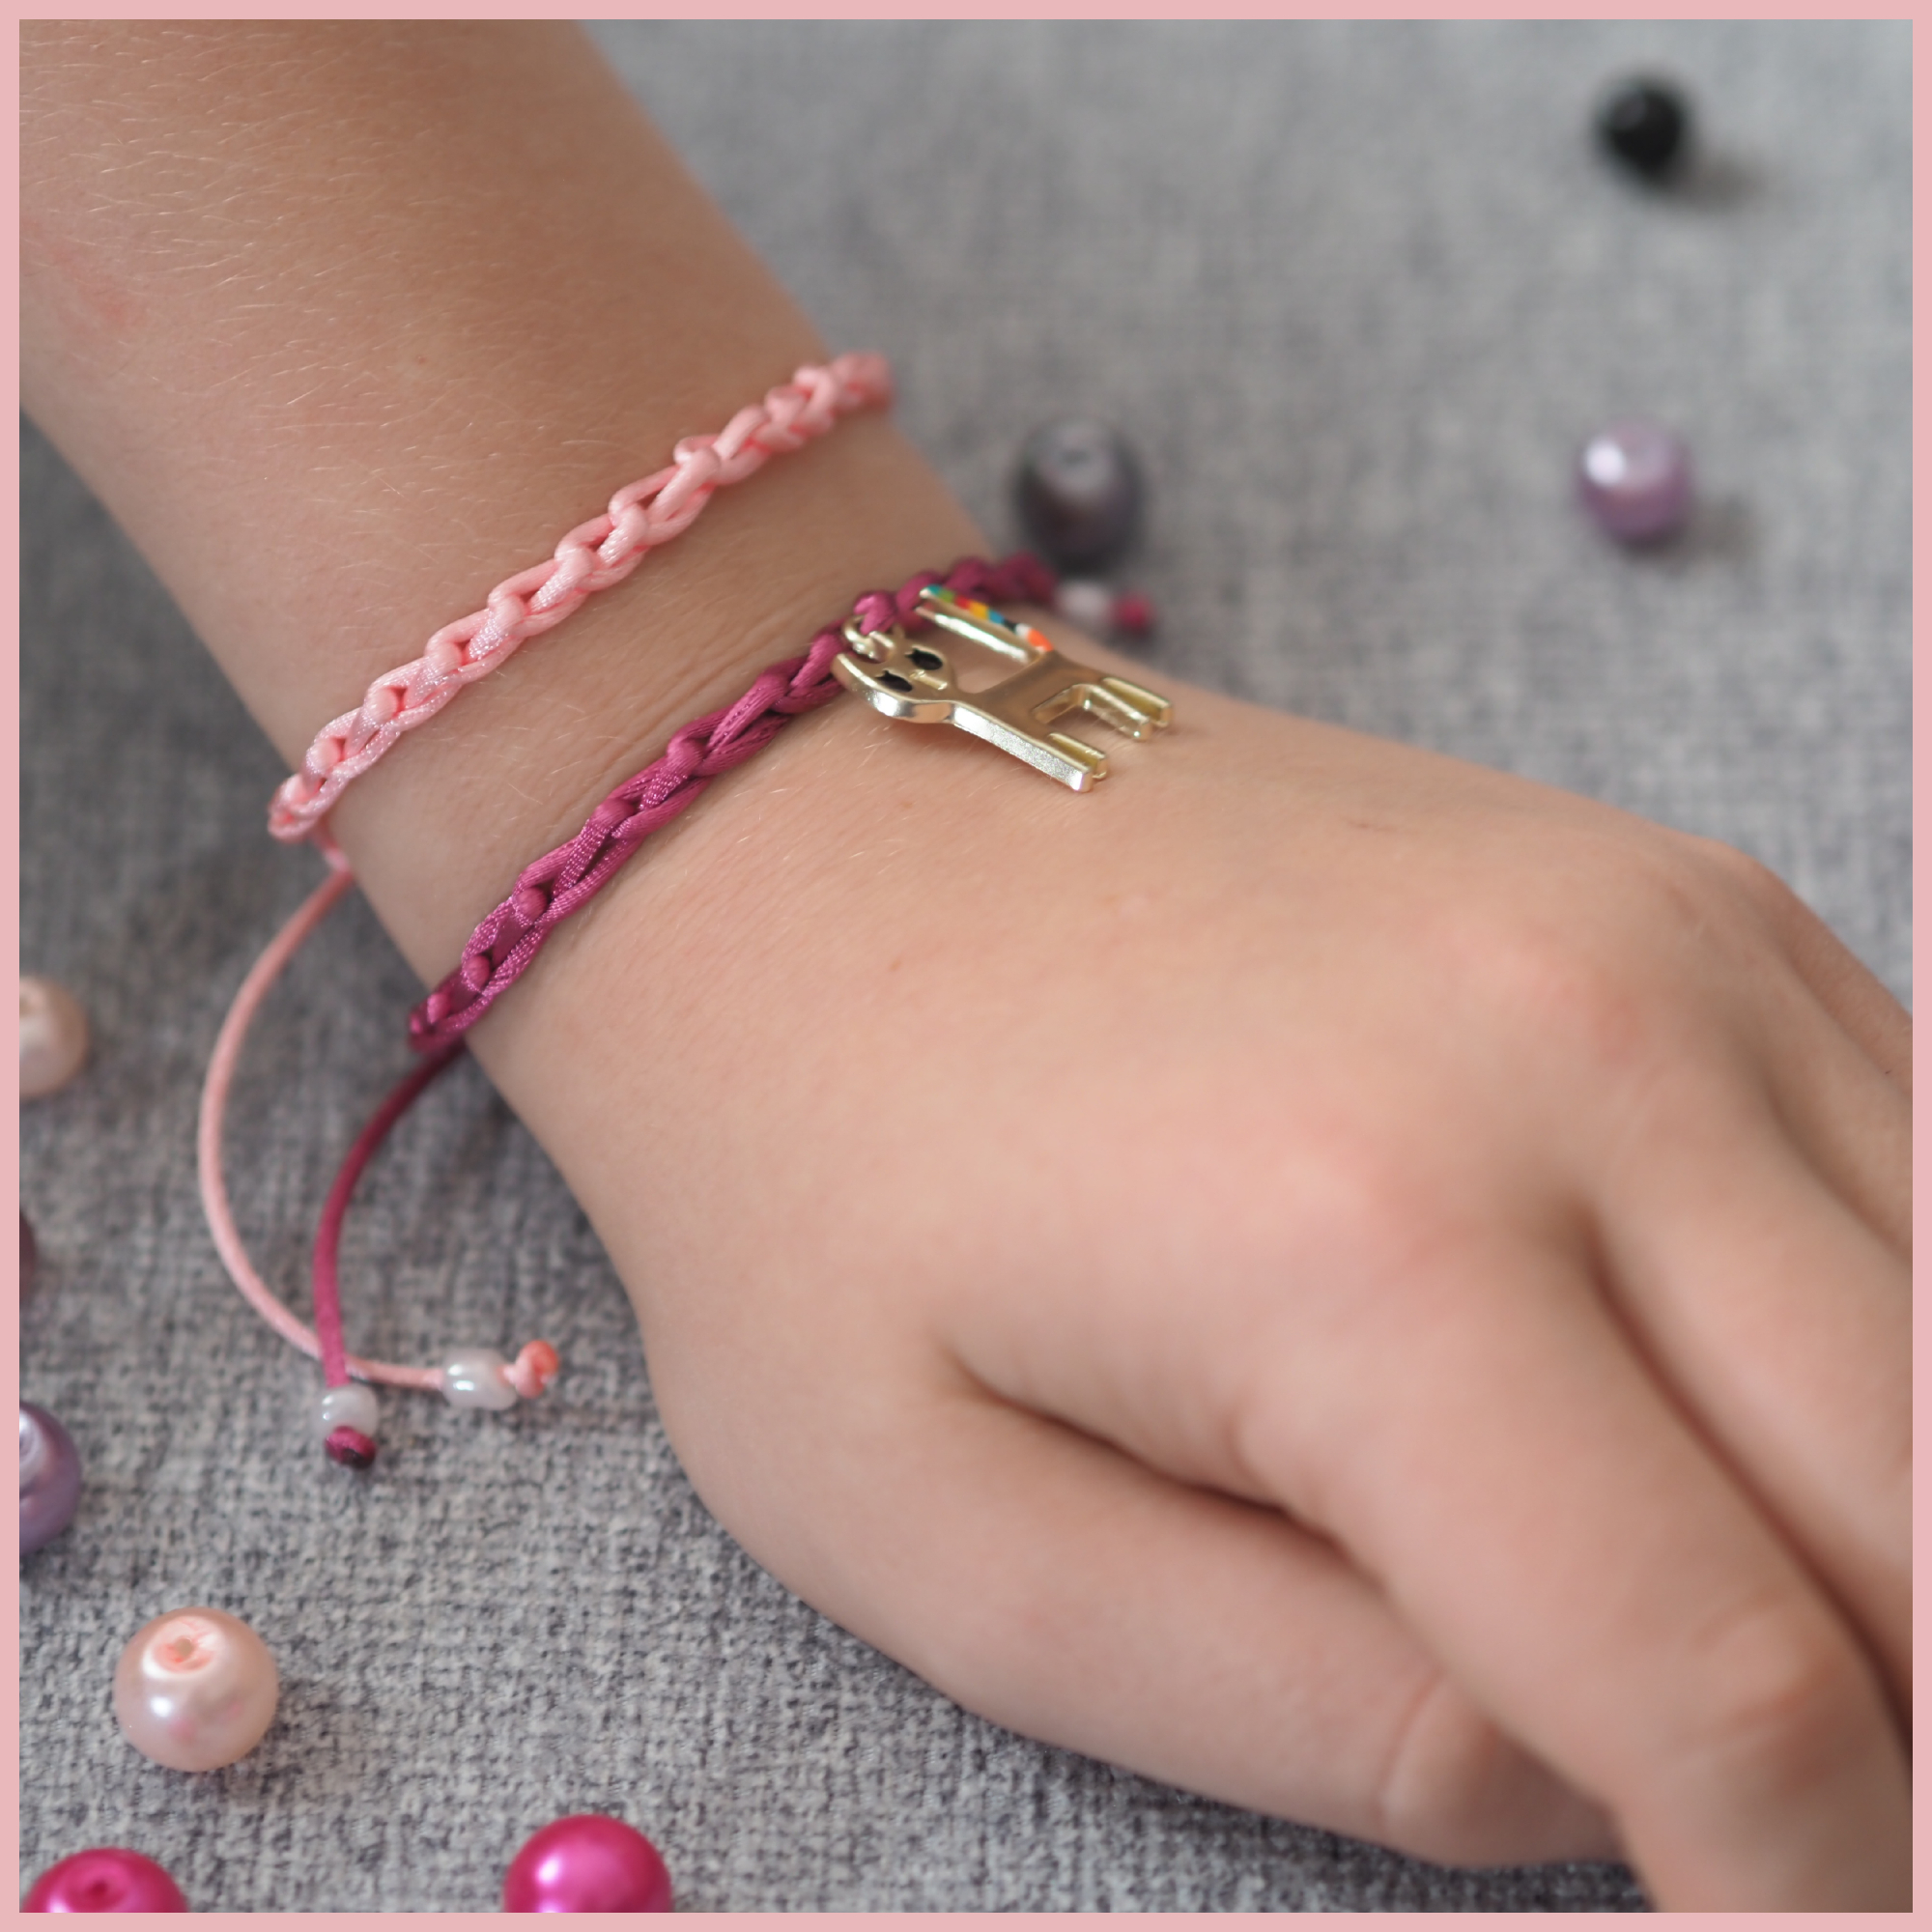
Insert the hook and tighten the knot a bit. Make a chain by grabbing the cord over the hook and pulling it through the loop. Continue to crochet chains until your chain measures approximately 5″ (12-13 cm). The chains wrapped around your wrist should cover 3/4 of your wrist to leave a space for an adjustable closure. The number of chains will depend on the yarn or cord you have: I crocheted 20 chains for my bracelet.
Cut the cord leaving approximately 8″ (20 cm) cm, pull the tail end of the cord through the last chain and pull to tie a knot.
Step 3 Finishing off
You can simply tie the bracelet around the wrist when you want an easy version for younger kids. However, I recommend you move one step further and learn how to create an adjustable closure for bracelets. Let’s go!
Grab a PIN:
How to Make an Adjustable Knot for a Bracelet
The adjustable knot we will use is also called a square knot and it’s frequently used in macrame and in bracelets. It allows you to adjust your bracelet to the width of your wrist and easily loosen it when you need to take it off. It’s not complicated when practiced a few times. Using the square knot will need longer tails on your wrist, which are not as pretty as the rest of the bracelet. But, they can easily be made to look great when decorated with small beads.

Before you start, I recommend that you block your bracelet end strands using any box cover and clips. It will give them a bit of tension and will be easier for you to tie knots.

Start with a Knot
To start with a knot, grab a separate 8″ (20 cm) length of cord. I prefer to use the same color as the main color of the bracelet but feel free to use any color you want. Try different combinations.
Now, tie it around the bracelet tails just to secure the cord.
See these four photos:
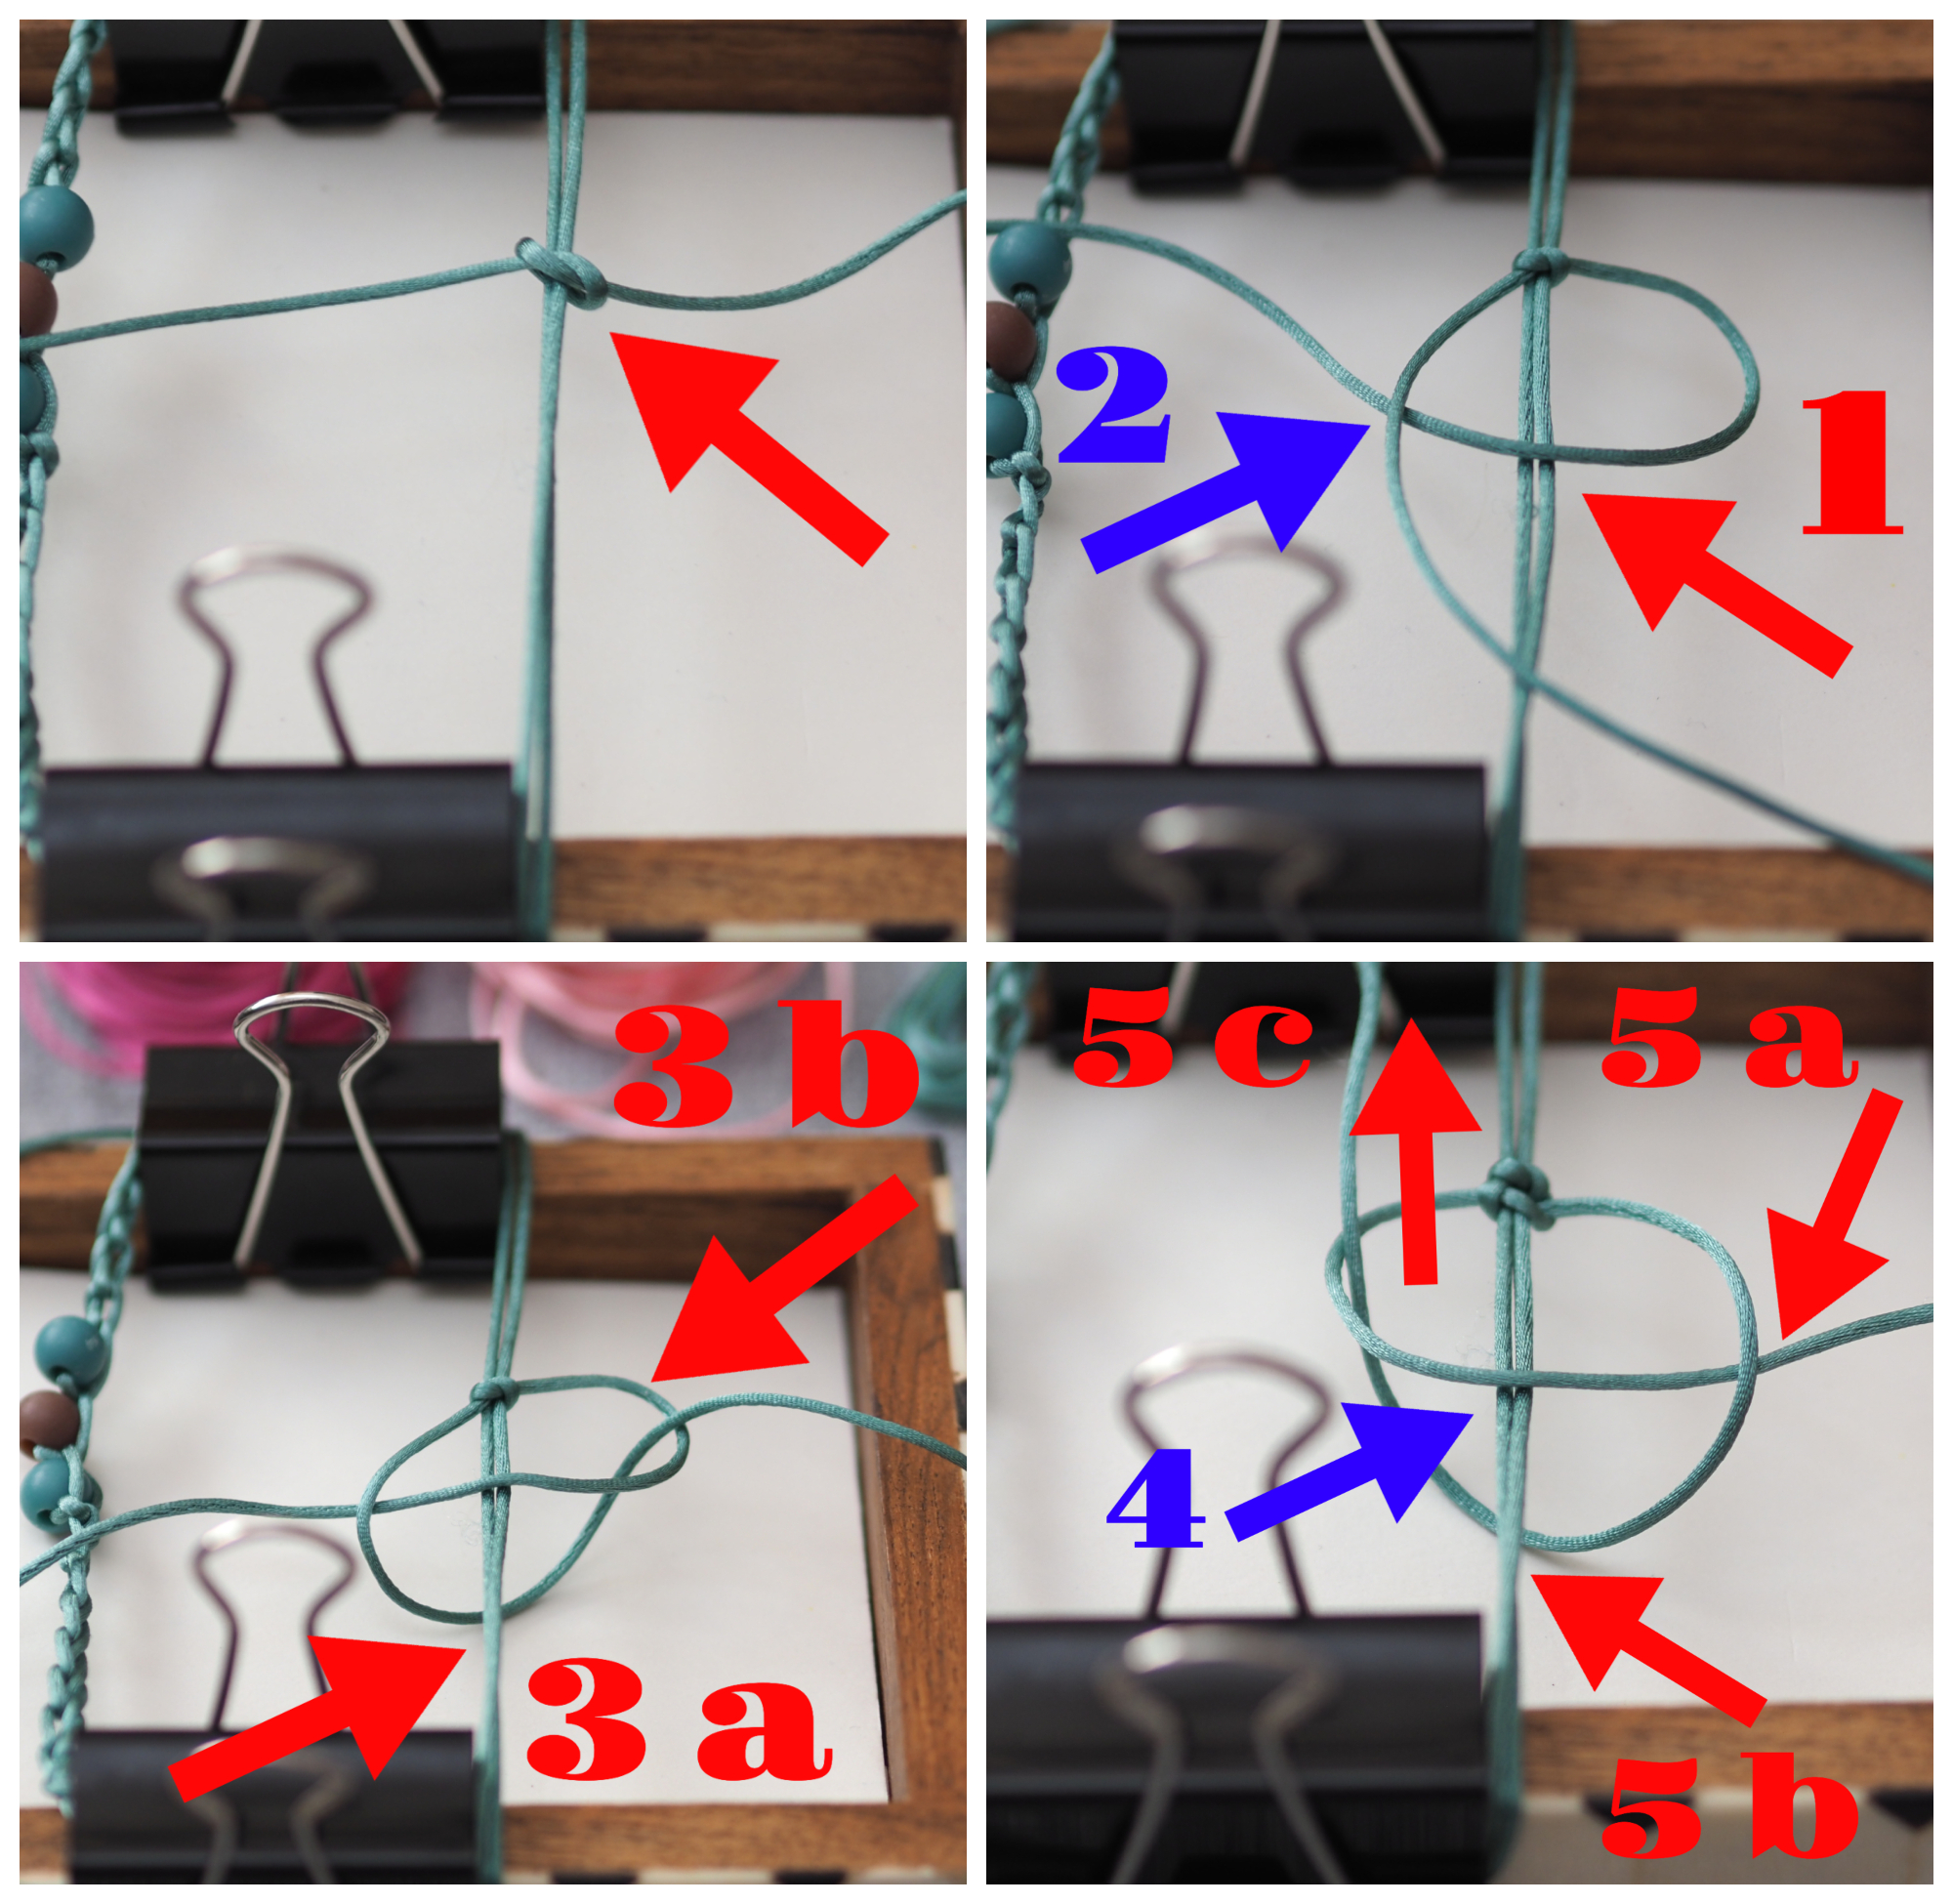
Repeat Square Knots
You will have four cords – 2 in the middle (the bracelet cords) and right and left cords for the adjustable knot we’re going to make. Now, carefully follow the following steps:
- Take the right cord and place it over the bracelet cords crossing it as you can see in the photo above (an arrow no 1).
- Place the left cord over the right cord (please see the blue arrow no 2 for reference).
- Continue with the left cord and place it under the bracelet cords (3a) and up through the center of the loop formed by the right cord (3b). Pull the knot tightly.
- Now take the left cord and place it over the bracelet cords (4).
- Place the right cord over the left cord (5a), beneath the bracelet cords (5b), and through the loop formed by the left cord (5b).
- Pull the knot tightly.
- Repeat a few times, each time follow the steps above in the opposite direction. Doing it alternately by changing directions is a key feature of this design.
Finishing off
Now you can cut the square knot ends leaving 3 mm length. Using a lighter, light the ends for a very short period just to make the ends sticky.
Check whether a square knot is centralized on the back of the bracelet. Widen your bracelet and put it on your or your friend’s wrist to check the optimal length. You can add small beads on the ends to complete the design, but it’s optional. Make a small knot in the end, and cut the string.
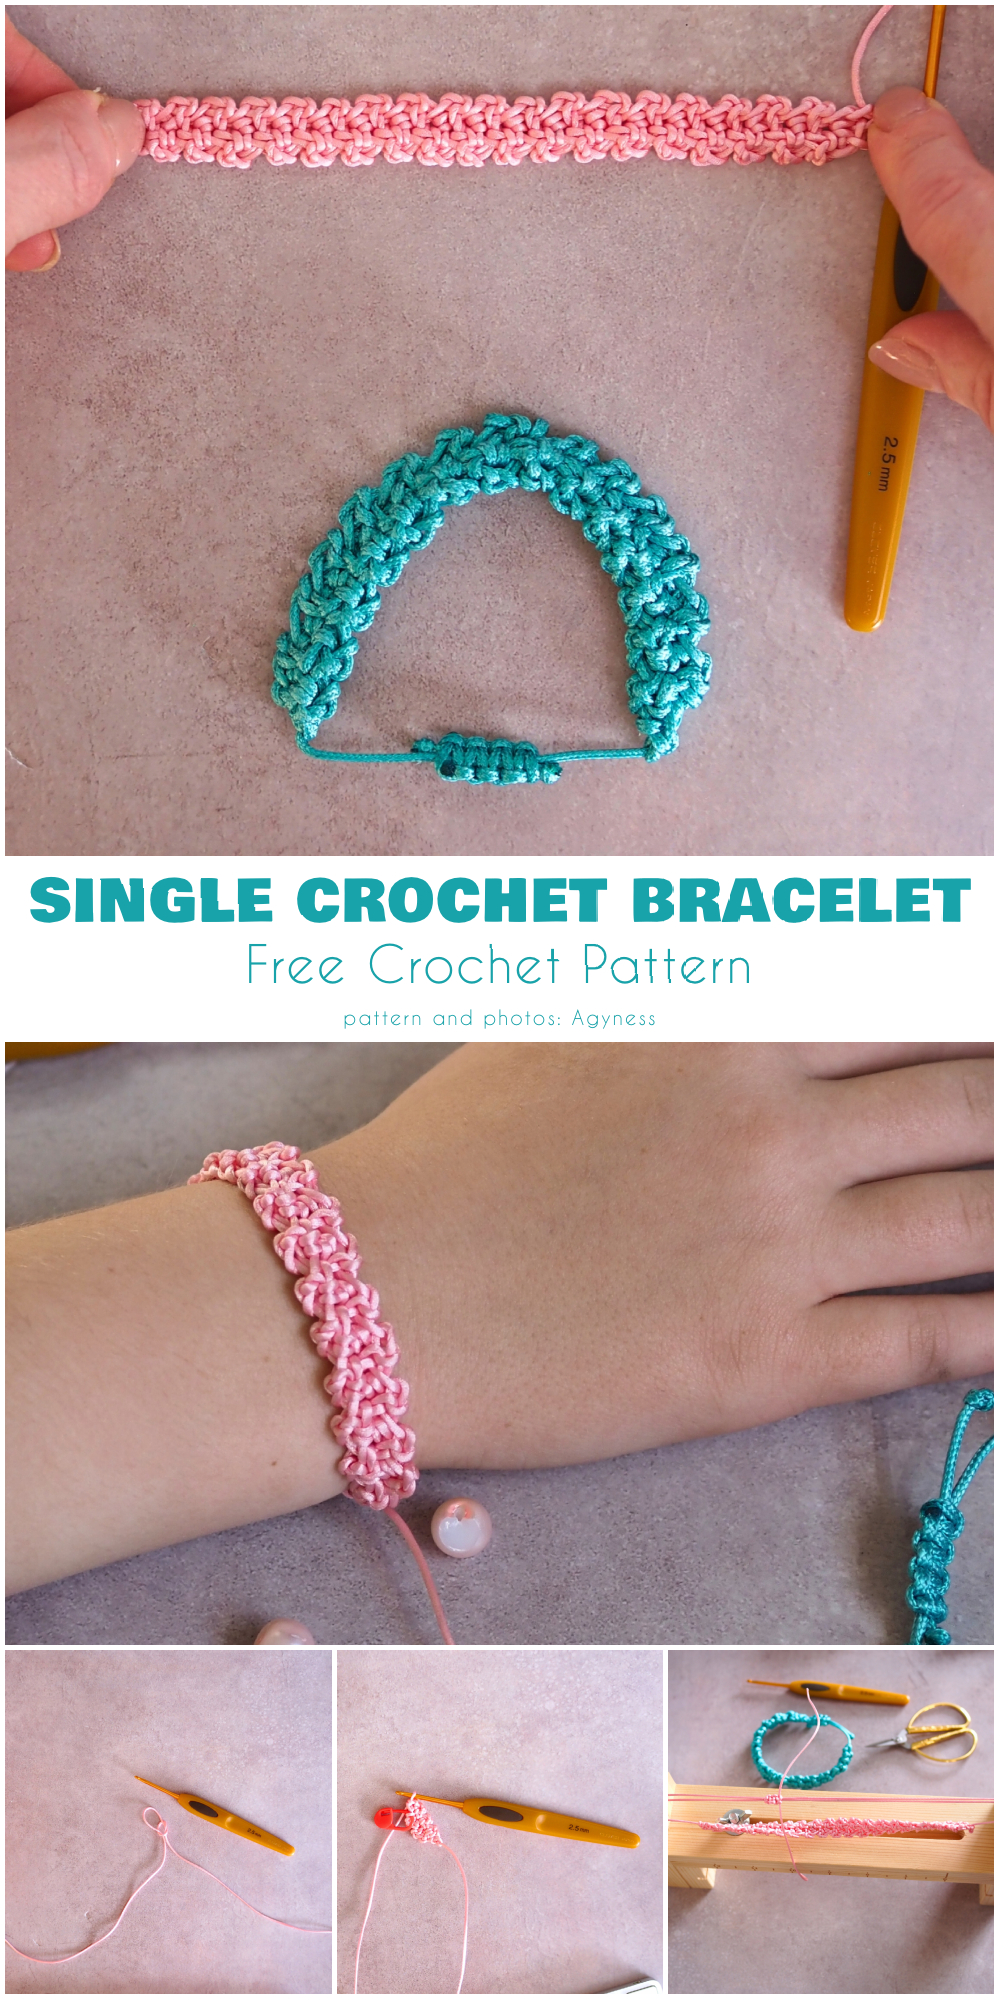
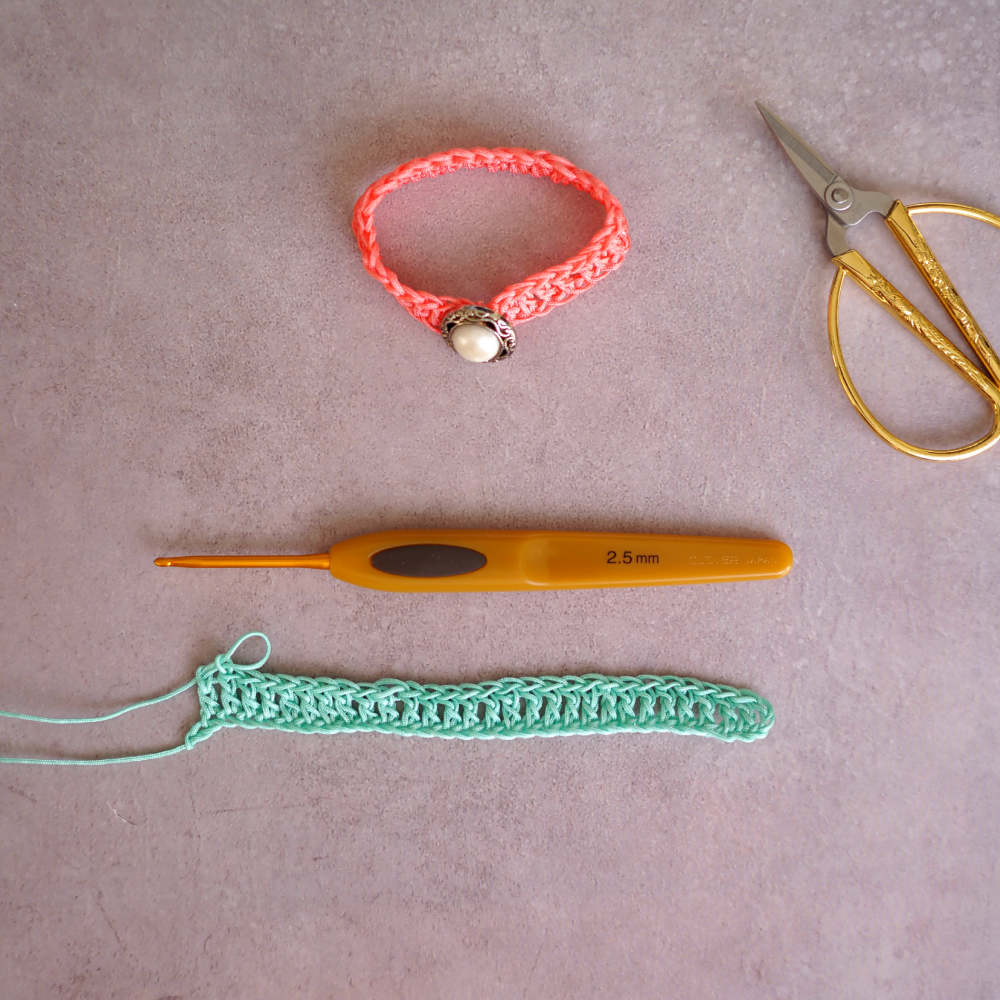
Single Crochet Friendship Bracelet Free Pattern
A single crochet stitch bracelet will be a perfect project for newbies to introduce them into crocheting.
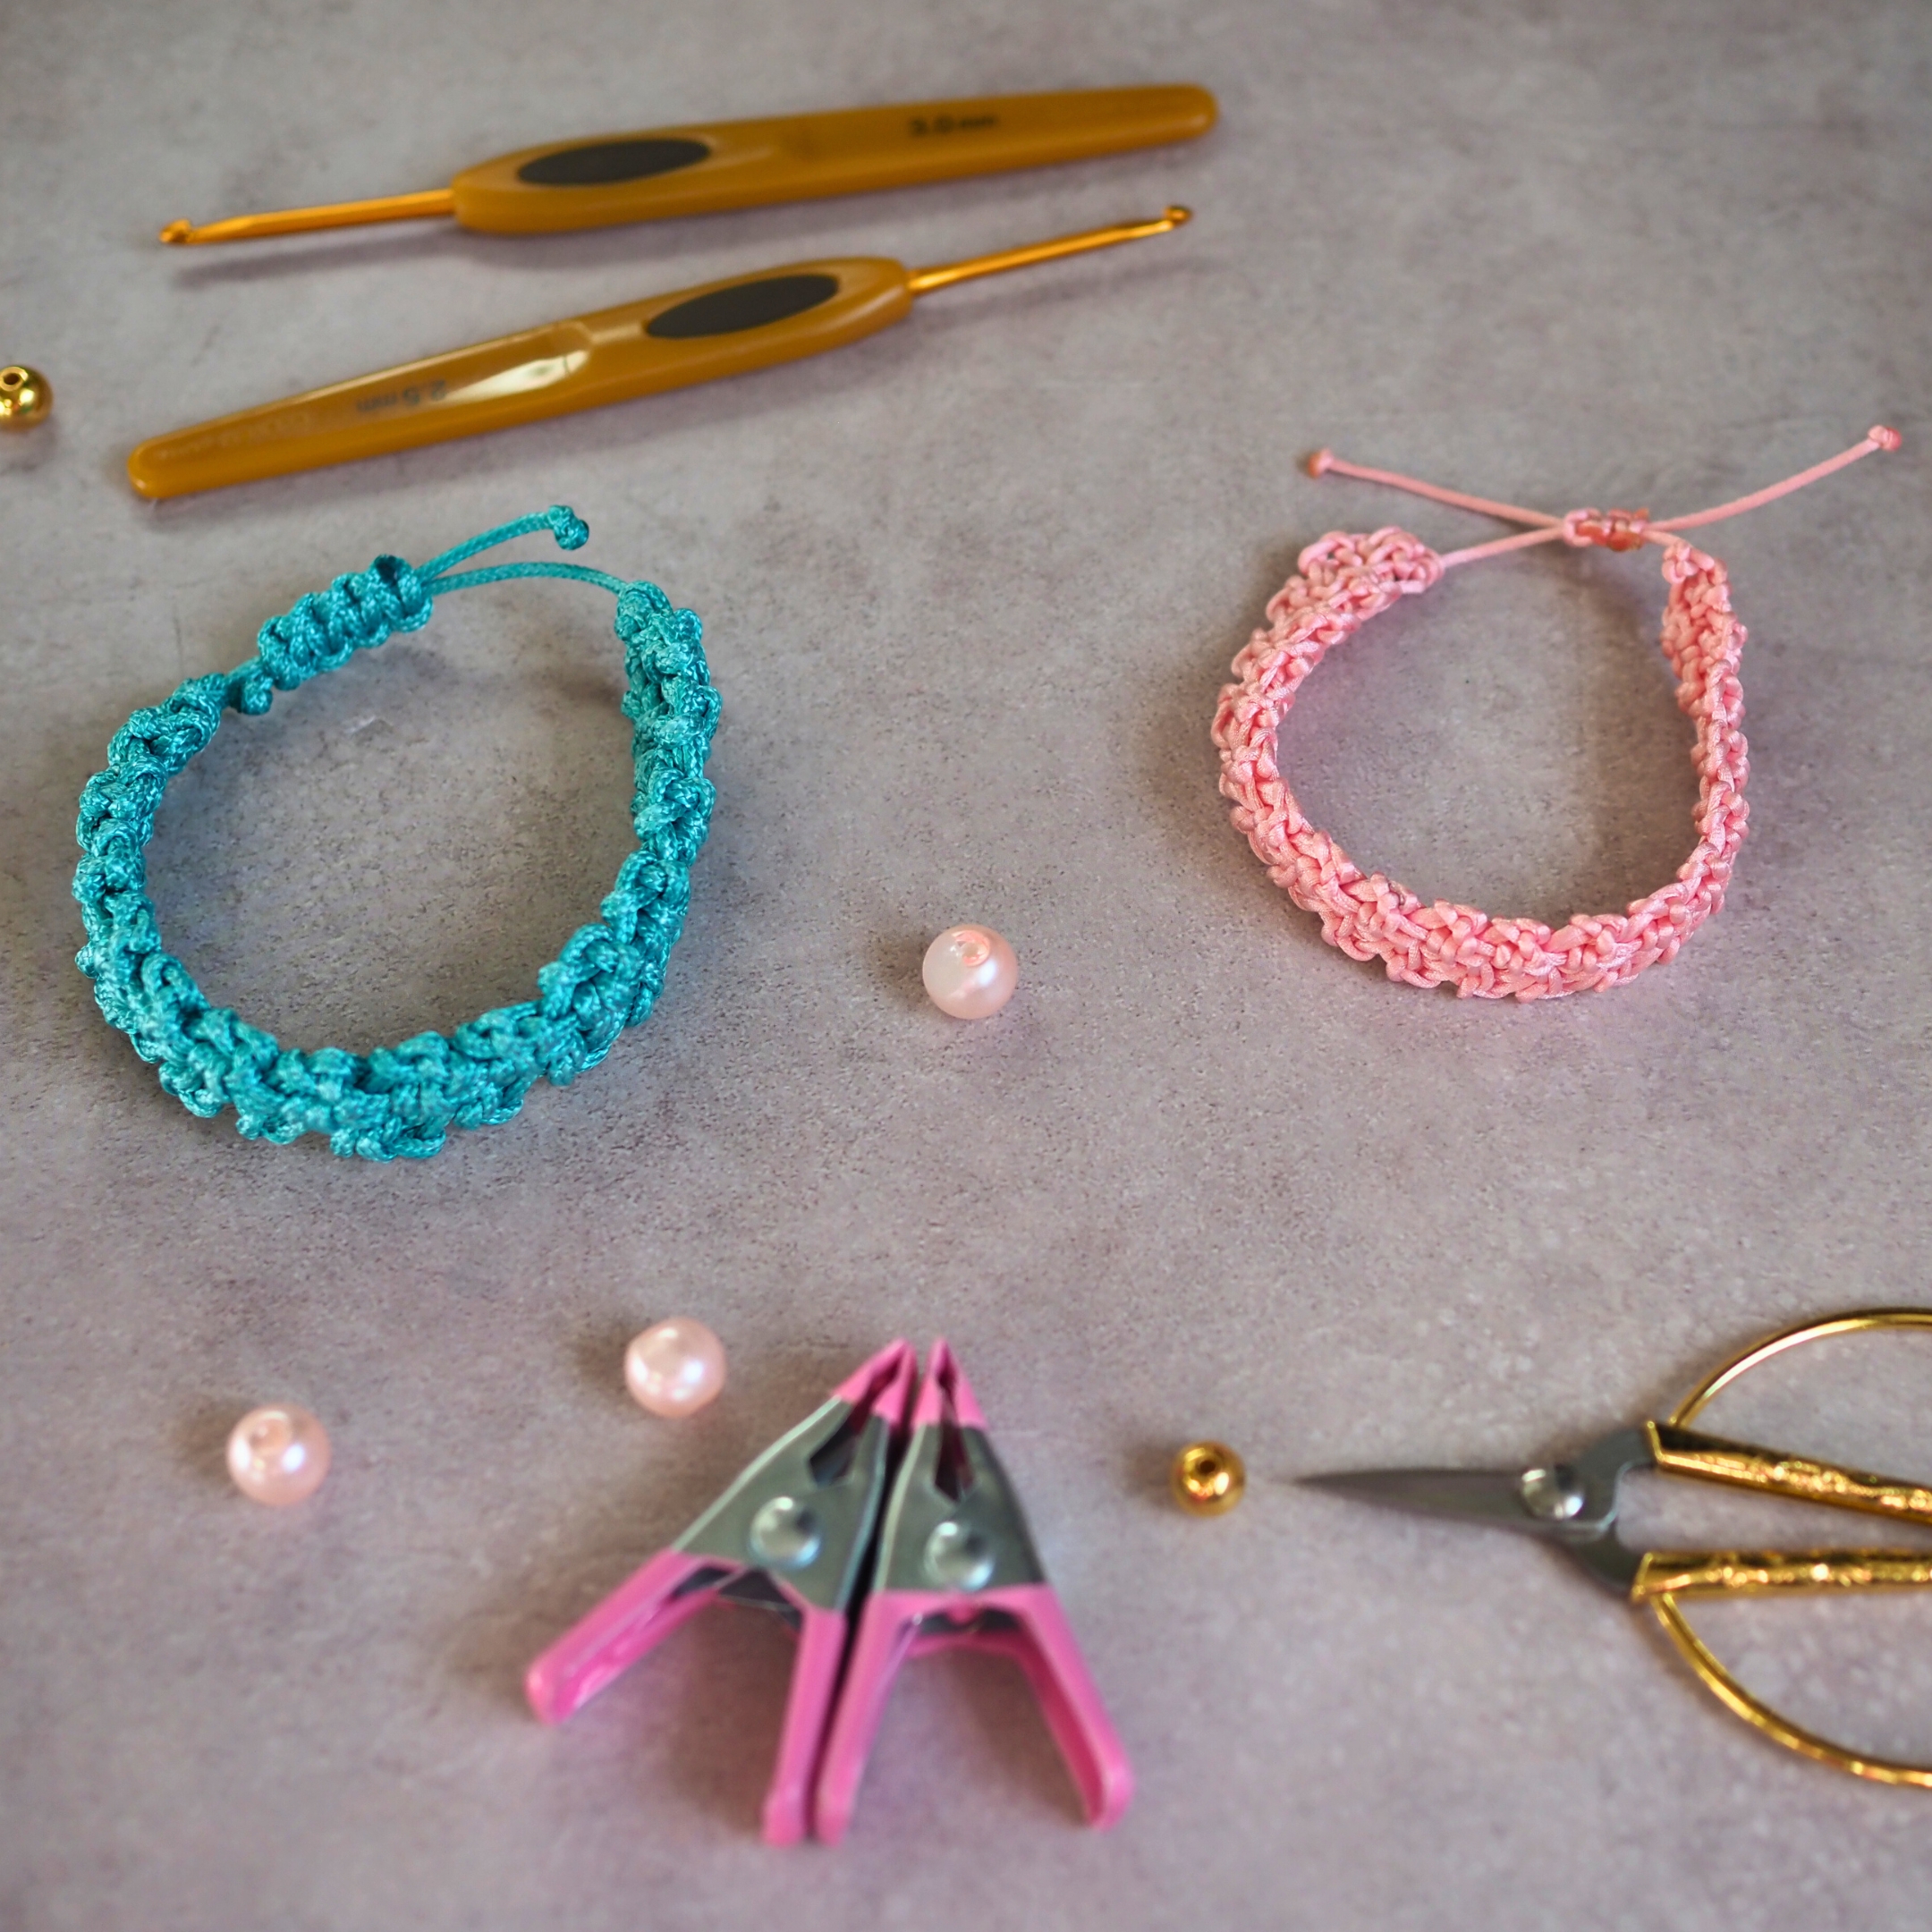
Materials you will need:
- 1 mm Nylon or Cotton Cord for the Bracelet
- 2.5 mm Crochet Hook
or
- 1.5 mm Nylon Cord
- 3 mm – 4 mm Crochet Hook
- Scissors
- a box lid
- 2 clips
- beads (optional)
- lighter
Beginning
Leave approximately 8″ (20 cm) at the beginning. Long tails will help us to block the bracelet at the end while making an adjustable closure. Make a slip knot. Insert a crochet hook and pull a cord to tighten the knot.
Make a chain by grabbing the cord over the hook and pulling it through the loop. Repeat to have 3 chains in total.
Row 1
Insert the hook under the 2nd chain from the hook, yarn over and pull the hook through. Yarn over and pull through the loops on the hook making the first single crochet. Insert the hook under the next string of yarn – it’s not a chain, it’s a bump at the end of the row.
(See photo below – the point at which to make the 2nd chain is designated with a red stitch marker).
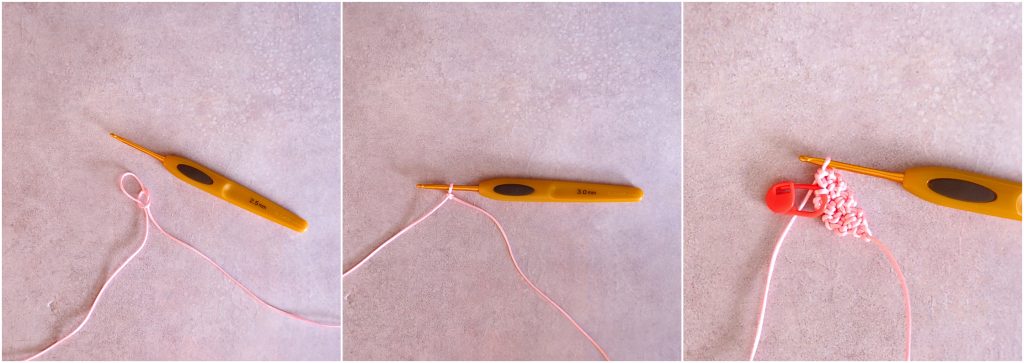
Make a 2nd single crochet and turn over.
Next Rows
Continue to make the next rows of 2 single crochets until the bracelet reaches the desired length. Measure the length of the crocheted part of the bracelet around your wrist. It should cover about ¾ of the circumference.
When you reach the desired length, make only 1 chain in the next row instead of two to center the cord in the middle of the bracelet. Yarn over and pull through to make a knot. Tighten the knot and cut the end leaving approximately 20 cm of the cord.
Come back to the first end. To make the end tighten more, insert the hook into the middle of the first row, yarn over and pull through.
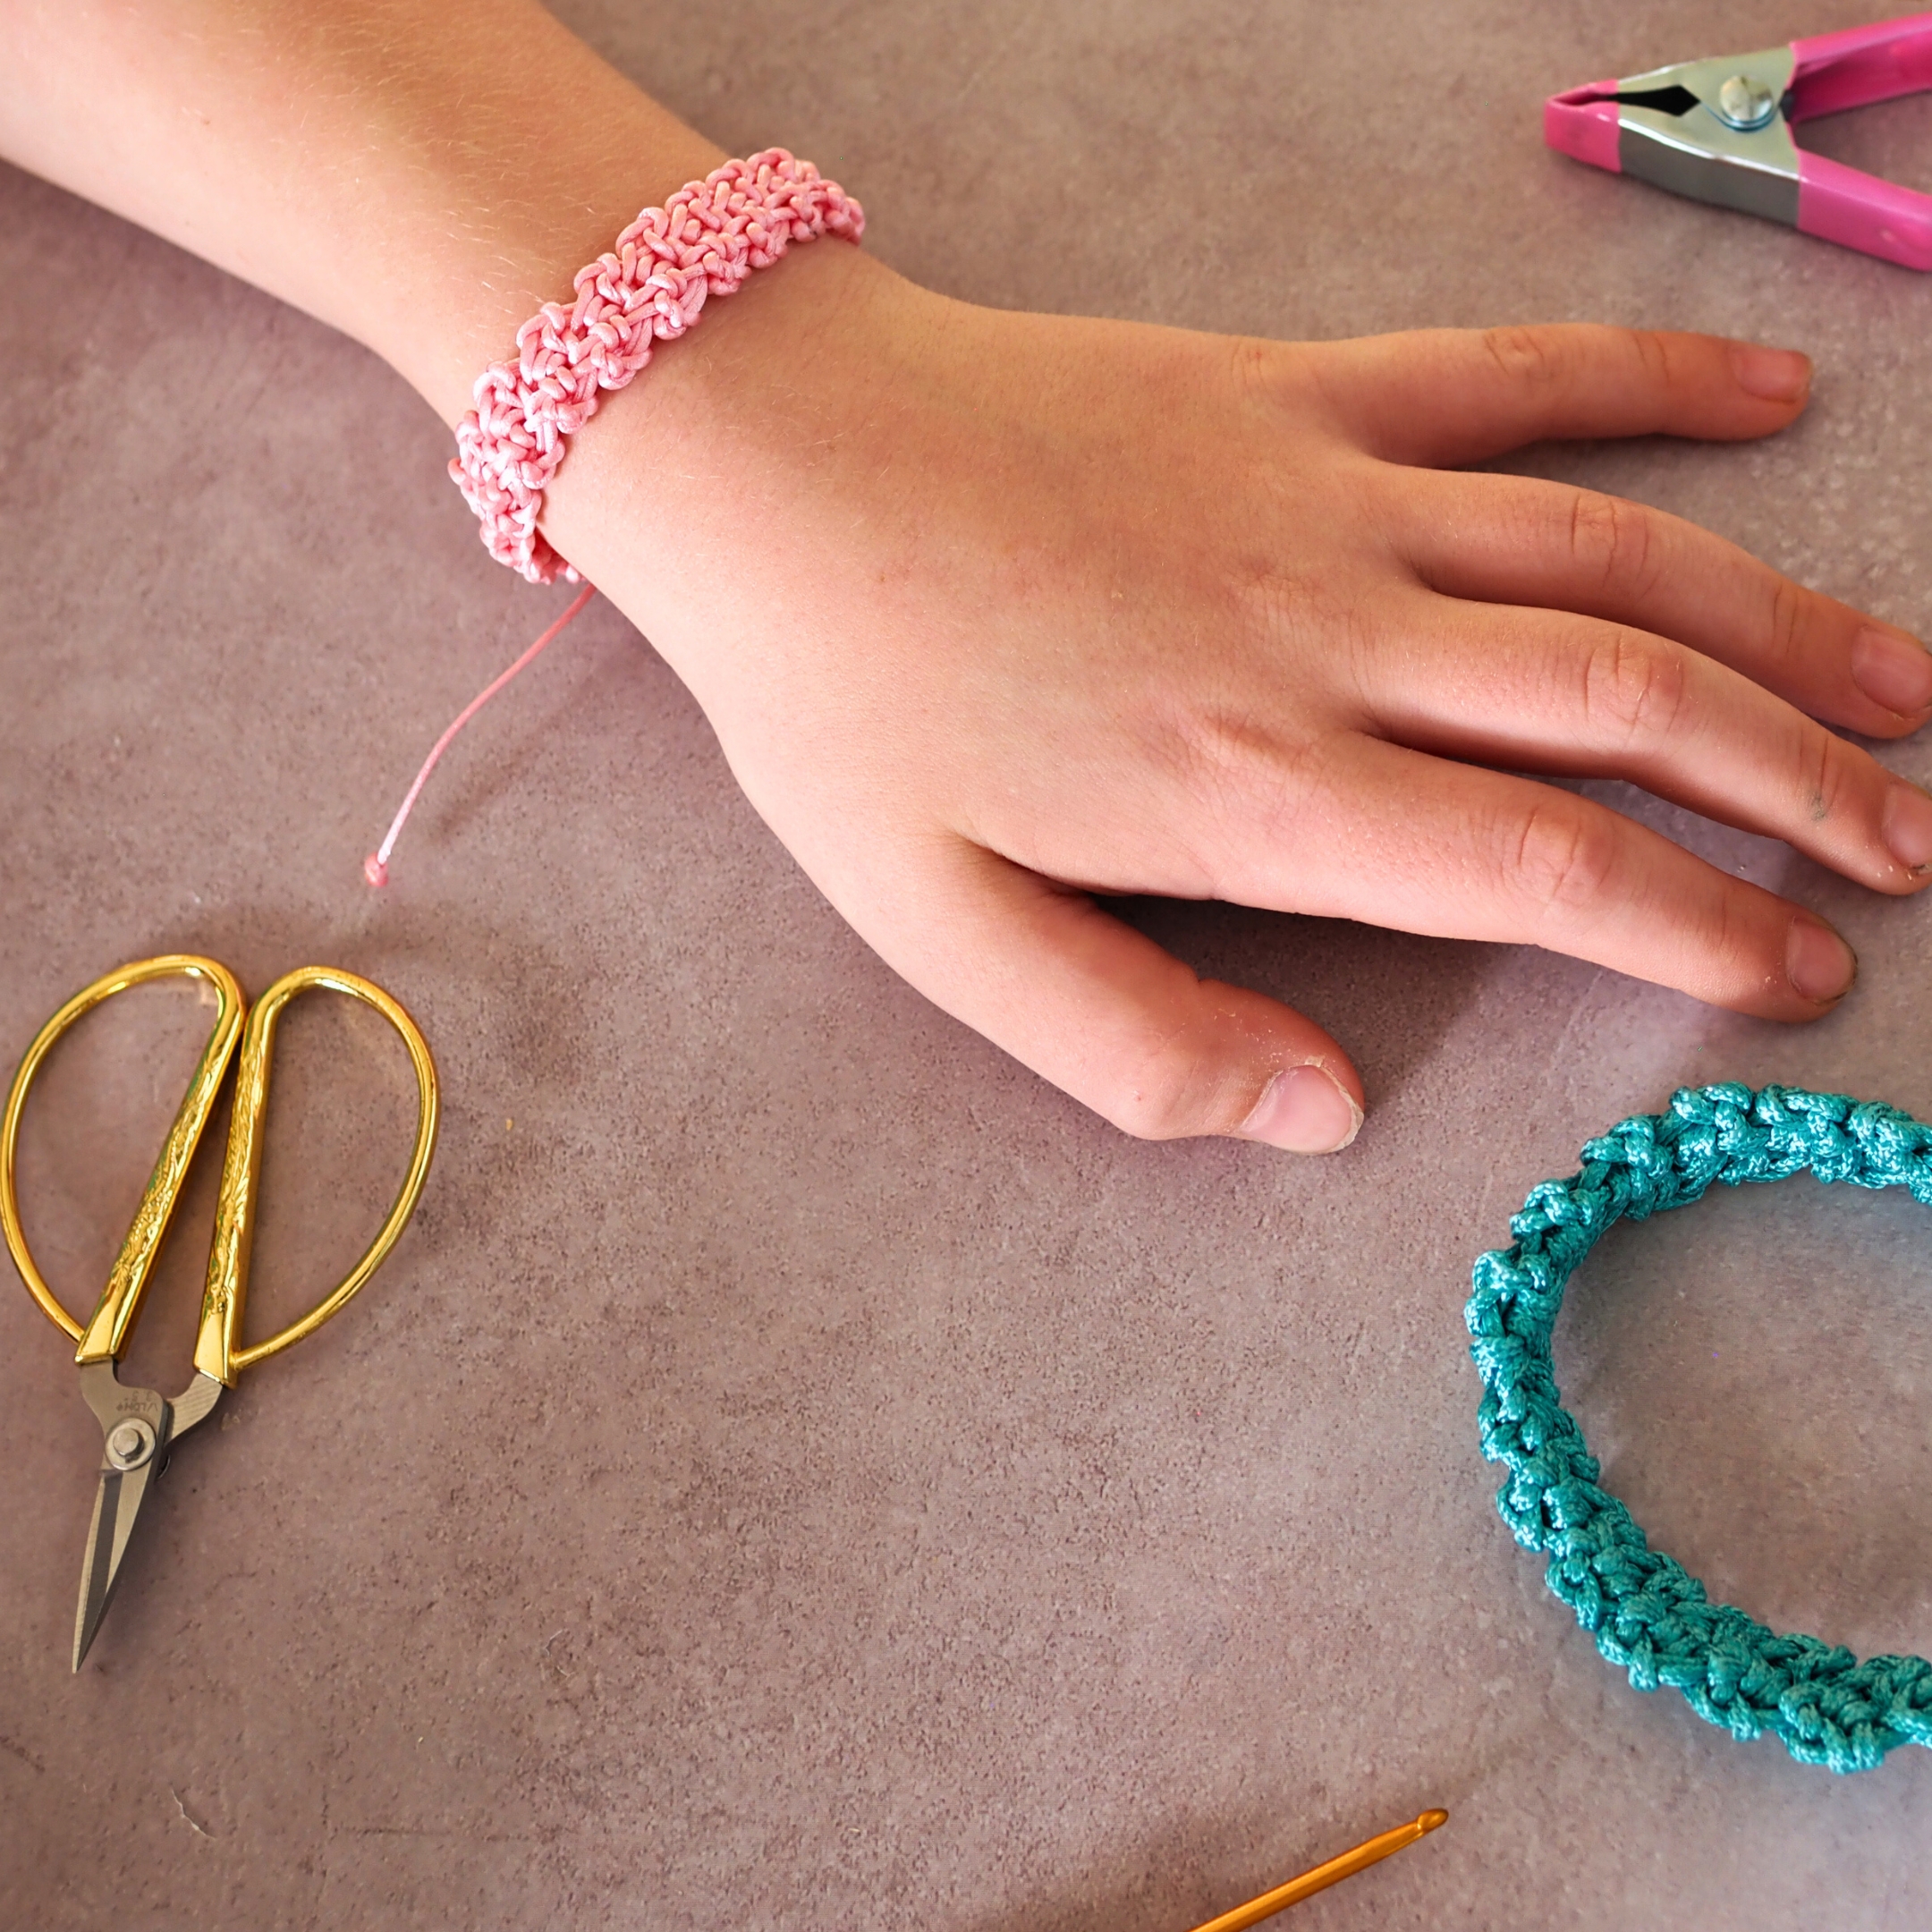
Making a Clousure
Continue by tieing the bracelet around the wrist or by making the adjustable square knot for bracelets. See the previous accapit for the instructions how to make the Adjustable Knot.
Finishing off
After making the adjustable knot for the closure, put the bracelet on your wrist. Now take it off to see how long the cords should be to allow you to take the bracelet off comfortably. Keeping this in mind, make knots at the end of the cords. Cut the rest of the cord leaving 2 mm. Melt the ends using the lighter to prevent the ends from unravelling.
Save this pattern for later:
Double Crochet Bracelet Free Pattern
Materials you will need:
- 0.80 or 1 mm Nylon or Cotton Cord for the Bracelet
- 2.0 mm Crochet Hook
- Scissors
- a box lid (optional)
- 2 clips (optional)
- a button (optional)
- lighter (optional)
Beginning:
Leave approximately 8″ (20 cm) at the beginning. Long tails will help us block the bracelet at the end while making an adjustable closure. Make a slip knot. CH 33. (As this bracelet is adjustable, it should fit both adults’ and kids’ wrists).
DC into 4th chain from the hook.
Continue to make dc to the end of the row, but stop before the last chain.
Chain 1. Slip stitch into the first chain of the round and pull through the 2 cord endings—the cord end from the beginning and the working end of a cord. Cut the cord, leaving approximately 20 cm of tail.
Making the Closure:
Cut 16″ (40 cm) of the cord, fold it in half, insert it into the opposite end of the bracelet, and put the ends into the middle of the hole.
Continue by tying the bracelet around the wrist or by making an adjustable square knot for the bracelet. See the previous paragraph for the instructions on how to make the Adjustable Knot. The only difference is that your bracelet will have 4 cords, not 2, but the method is the same.
Finishing Off:
After making the adjustable knot for the closure, put the bracelet on your wrist. Now take it off to see how long the cords should be to allow you to take the bracelet off comfortably. Keeping this in mind, make knots at the ends of the cords. Cut the rest of the cord leaving 2 mm (~3/16″). Melt the ends using the lighter to prevent the ends from unraveling.
You May Also Like:
Elegant and Quick Bracelet
If you are looking for a great project for a gift for your mother, friend, or just for yourself, you couldn’t choose any better. Easy and quick (it takes an hour) to make and can be done in a colour to match any outfit. This beautiful jewelry can be made from yarn scraps because you will only need a small amount of yarn.
Designer : Wilma Westenberg

Visit the pattern site.
Interlinked Hearts Bracelet
![Interlinked Hearts Bracelet [Free Pattern]](https://yourcrochet.com/wp-content/uploads/2018/01/3-Interlinked-linked-hearts-bracelet-free-crochet-pattern.jpg)
Visit the pattern site.
Unicorn Slap Bracelet Free Crochet Pattern

Animal Bracelets Free Crochet Pattern
