
In this article:

In this post, you will learn how to crochet a solid granny square. A granny square is one of the most popular techniques and is easy to learn. It’s based on basic crochet stitches; you don’t have to know anything more. The most common classic granny square looks like a mosaic tile, you can learn how to make one in my previous post.
Here, let’s focus on the next most popular granny square – a solid granny. The solid granny square is also based on double crochets, but this square is more dense. It is great for many crochet projects like blankets, bags and event tops. There are plenty of free patterns to choose from. It is not more complicated than normal ‘base’ granny, but needs a little bit of focus during stitches counting.
There are a few methods of making this square. I assume that you are a beginner, so I chose the easiest one – we will start each round from the corner of the square. It is the easiest method for a newbie to follow and count the stitches correctly.
So grab your crochet hook and let’s get started.
Materials you will need:
- Yarn of your choice. A bonus is that you don’t need a whole skein of yarn to get going. A small ball of yarn will do. You can use yarn scraps and introduce a new color in each round. In the tutorial, used a worsted weight yarn.
- Crochet hook (to choose the right hook size read the yarn label for info on which size of crochet hook to choose)
- Scissors
- Yarn needle (for weaving in ends)
A step-by-step guide on How to Crochet a Solid Granny Square:
Abbreviations:
Ch = Chain stitches
Sl St = Slip Stitch
Dc (s) = Double Crochet (s)
St = Stitch
Sts = Stitches
Foundation:
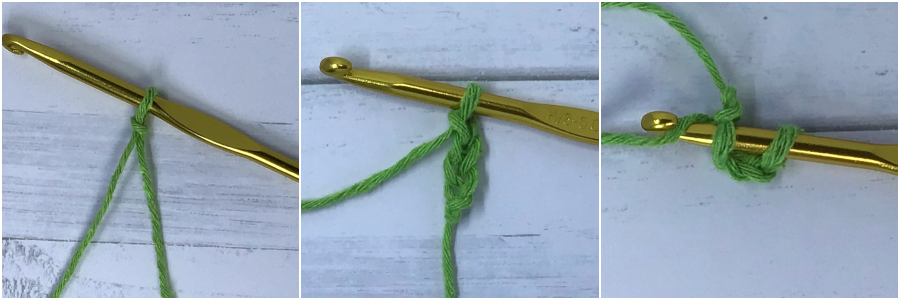
- Start with a slip knot on your crochet hook. If you don’t know how to make one, you can find a tutorialon our YouTube.
- Make ch 4.
- Insert the hook into the 4th chain from the hook (it will be the first chain we make). Sl st. (To make a slip stitch (sl st) insert the hook, yarn over and pull loops on the hook through. )
If you already know how to make a magic ring, you can start with a magic ring as well. But there is no need for that, as the center of the square will be small enough when we start with 4 chains only.
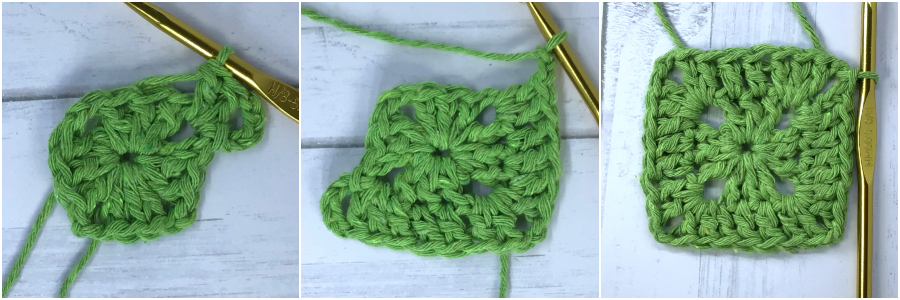
Round one:
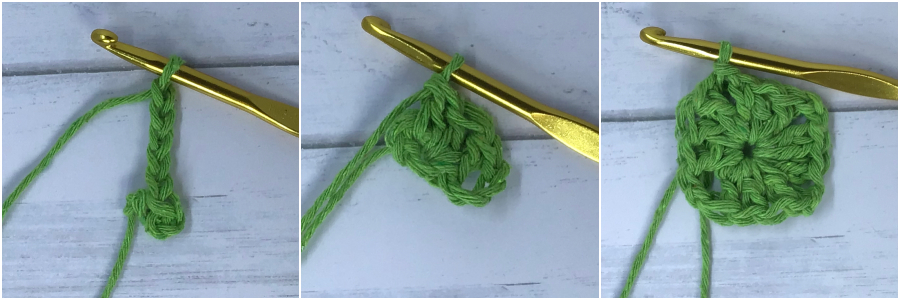
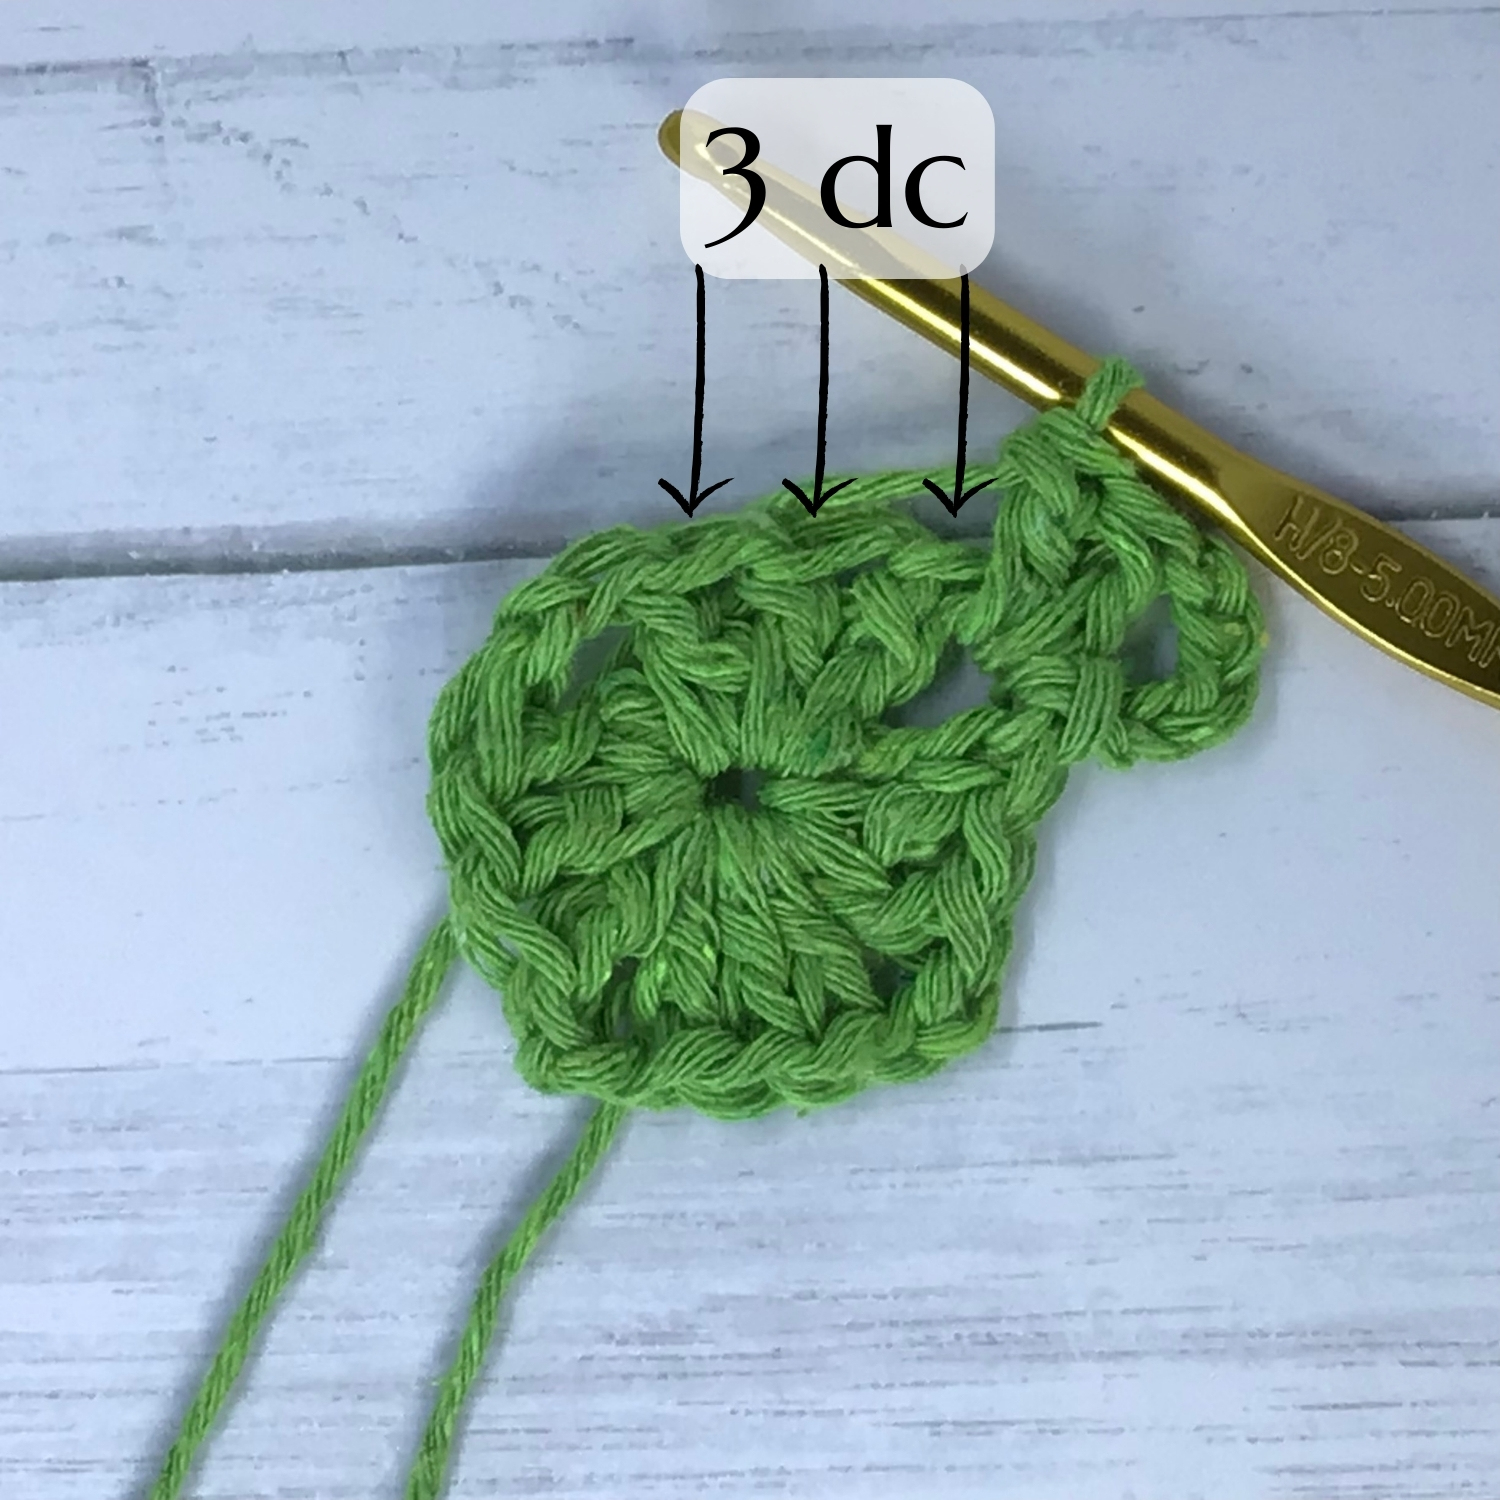
- Ch 5.
- *(Make 3 dc into the ring of ch4. Ch 2) * repeat 2 times making all dc into the center of the ring.
- 2 Dc into the ring. Insert the hook into the 3rd chain of ch5 from the beginning of the round. Sl st.
- Make Sl st into 2ch space.
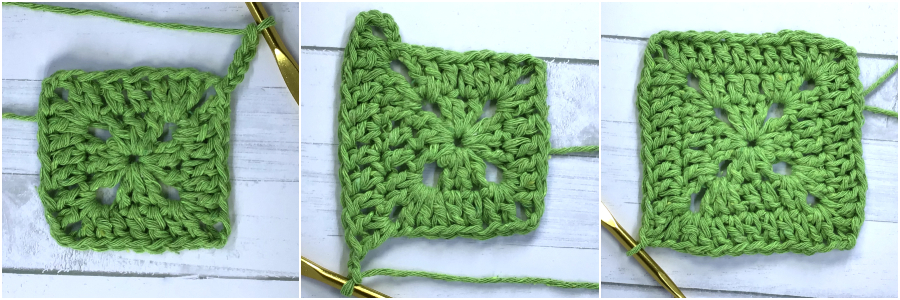
Round two:
- Ch 5.
- *(2 dc into ch-2 space of round 1 and 3 dc into each of dc of round 1. Next 2 dc into 2-ch space of round 1. Ch 2) * repeat twice.
- 3. 2 dc into ch 2 space, 3 dc into following dc(s) of round 1. Dc into 2-ch space. Sl st into the 3rd chain of the starting ch 5.
- 4. Sl st into the next ch-2 space.
You may be confused about where to start 3 dc stitches after making the dc into a corner. See the photo below. The point where you make the first dc can be covered by the last dc made. Move the corner stitches slightly to find the right chain.
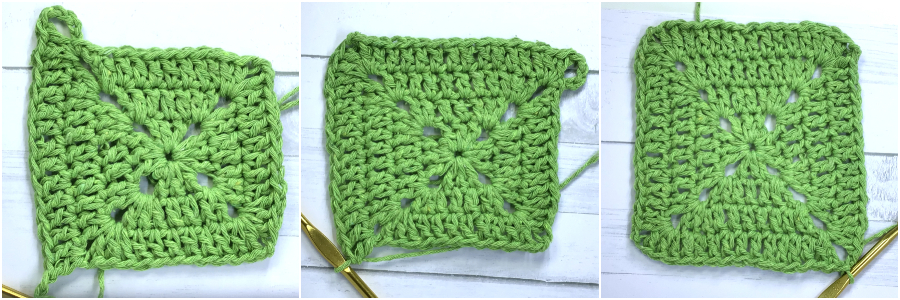
Round three:
- Ch 5
- *(2 dc into ch-2 space of round 1 and 7 dc into each of the following dc. 2 dc into ch-2 space, ch 2) * repeat twice.
- 2 dc into ch-2 space, 7 dc into dcs of round 1. Dc into 2-ch space. Sl st into the 3rd chain of the starting ch 5.
- Sl st into the next ch-2 space.
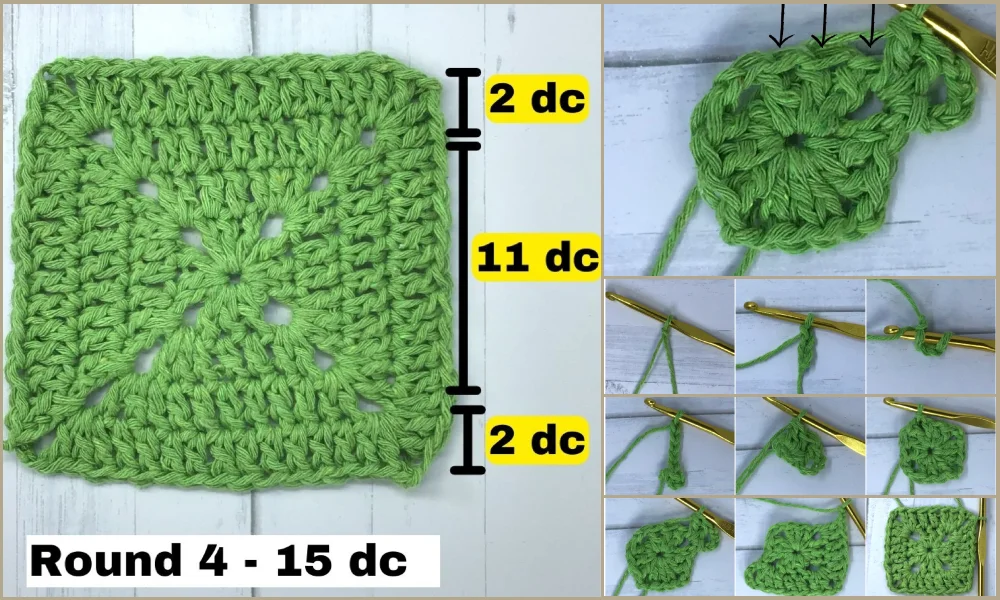
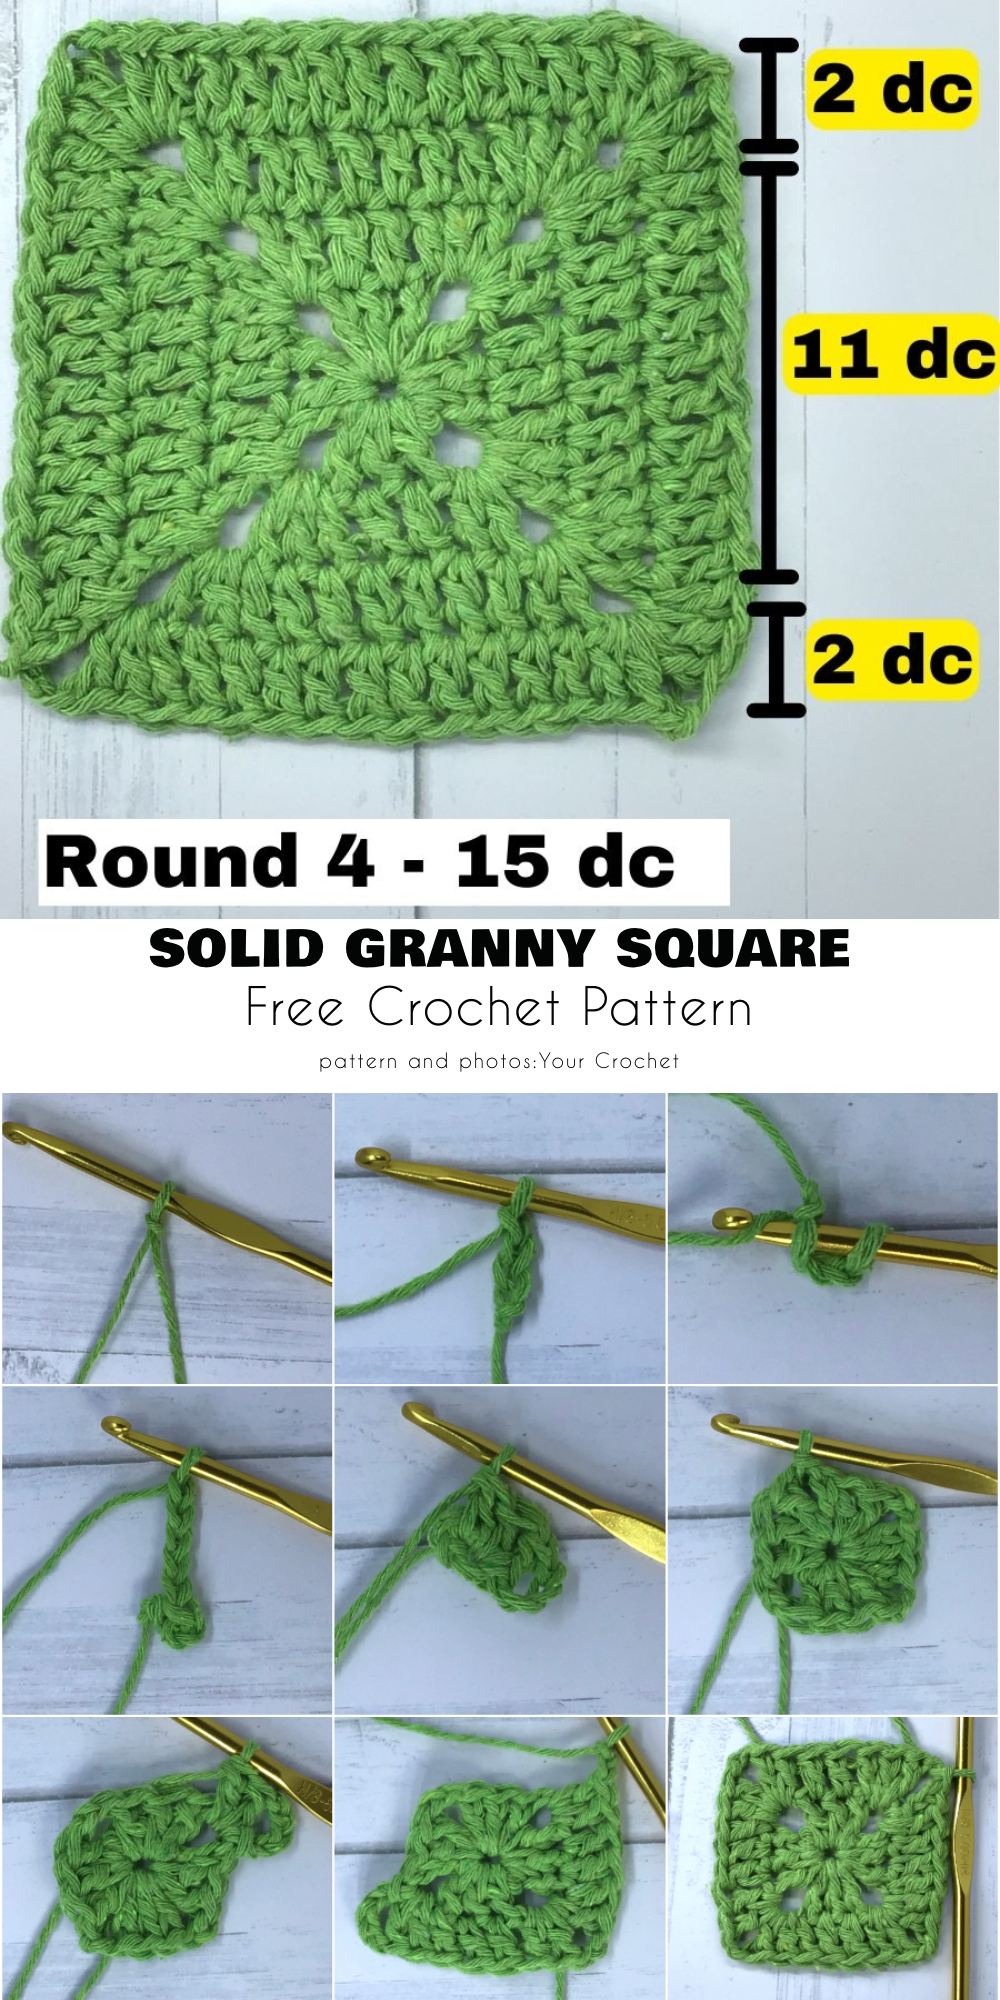
Round four:
- Ch 5
- *(2 dc into ch-2 space of round 1 and 11 dc into each of the following dc. 2 dc into ch-2 space, ch 2) * repeat twice.
- 2 dc into ch-2 space, 11 dc into dcs of round 1. Dc into 2-ch space. Sl st into the 3rd chain of the starting ch 5.
- Sl st into the next ch-2 space.
Finish off:
Yarn over and pull through. Cut the yarn end and pull the hook out. Pull the yarn to tighten the knot. Weave in the ends.
Summary:
Congratulations, you have just made your first granny square!
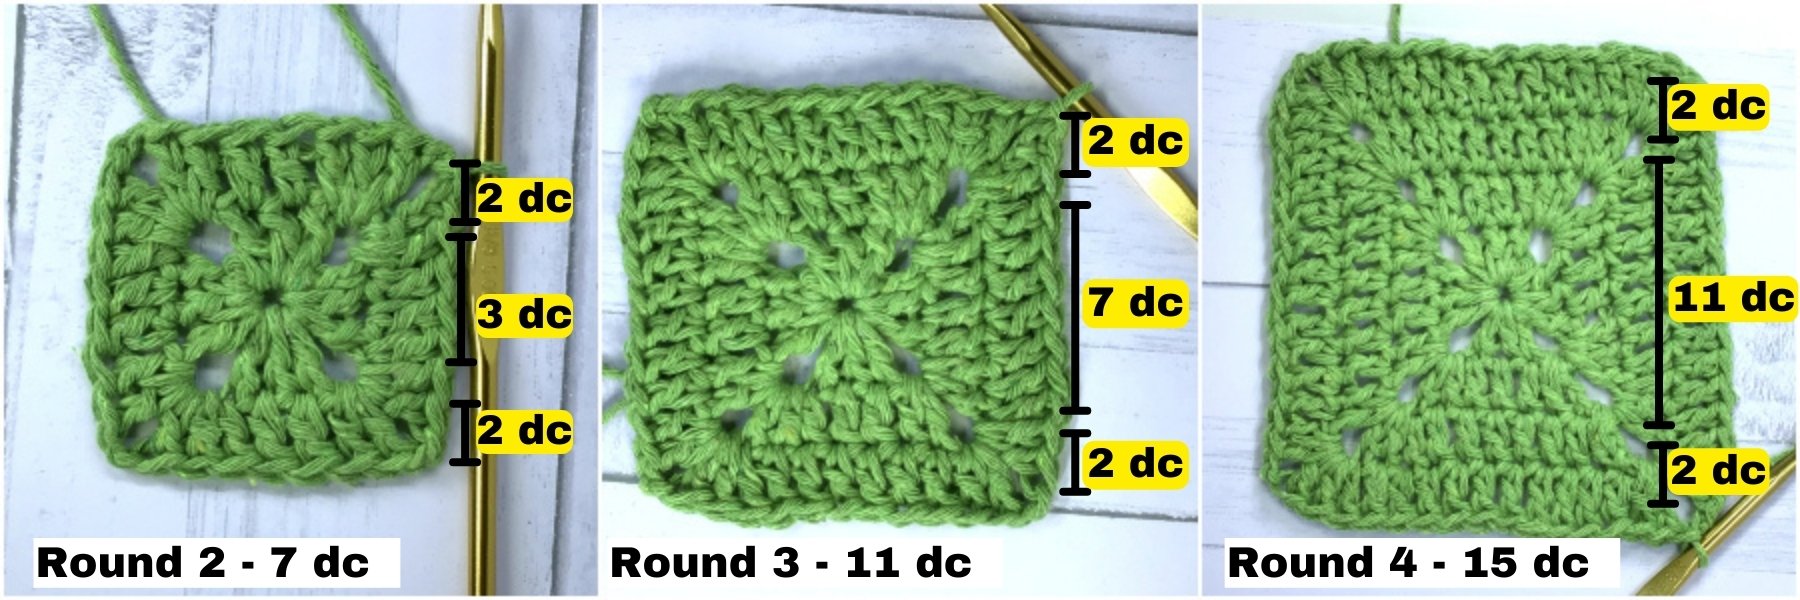
The pattern is easy to understand and to follow. If you want to make it again, please remember the number of stitches. Each round increases by 4 double crochet stitches. Round 1 has 3 dc, Round 2 – 7 dc, Round 3 – 11 dc, Round 4 – 15 dc.
If you want to make your solid square longer, simply increase the rounds further by 4 dc.
Pin this pattern for later:
If you like this post, you may also like:
How to Crochet a Classic Granny Square
For more free designs follow us on Facebook and share your ideas and your work on our Facebook group!