

In this article:

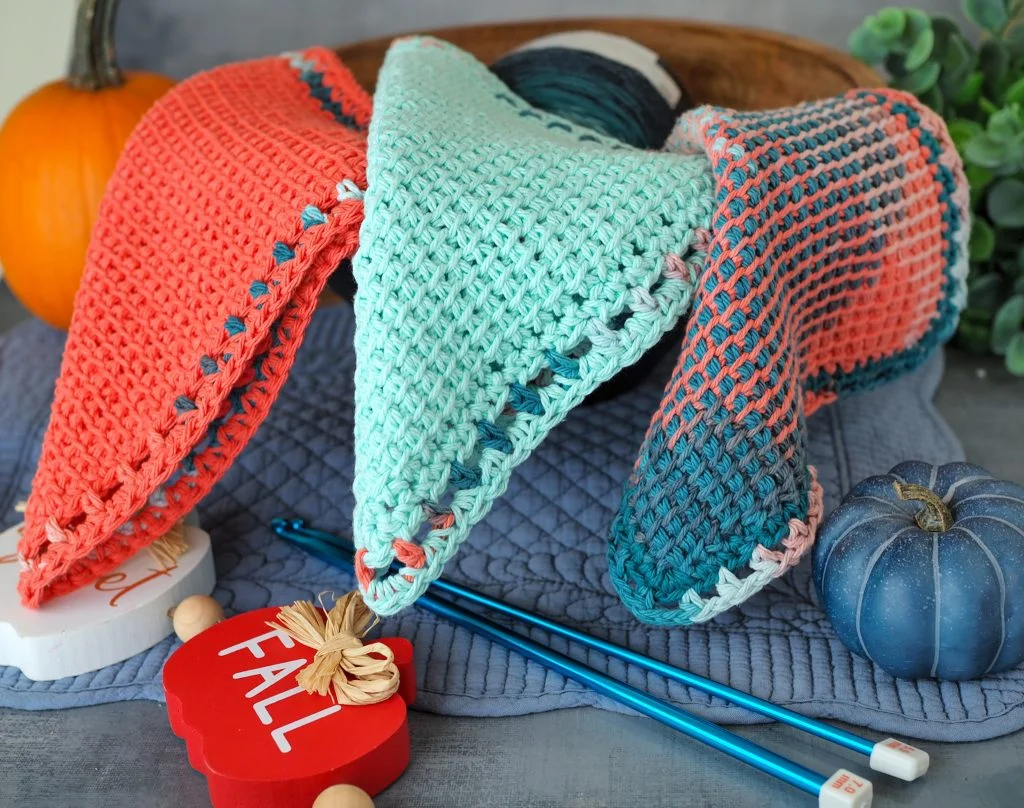
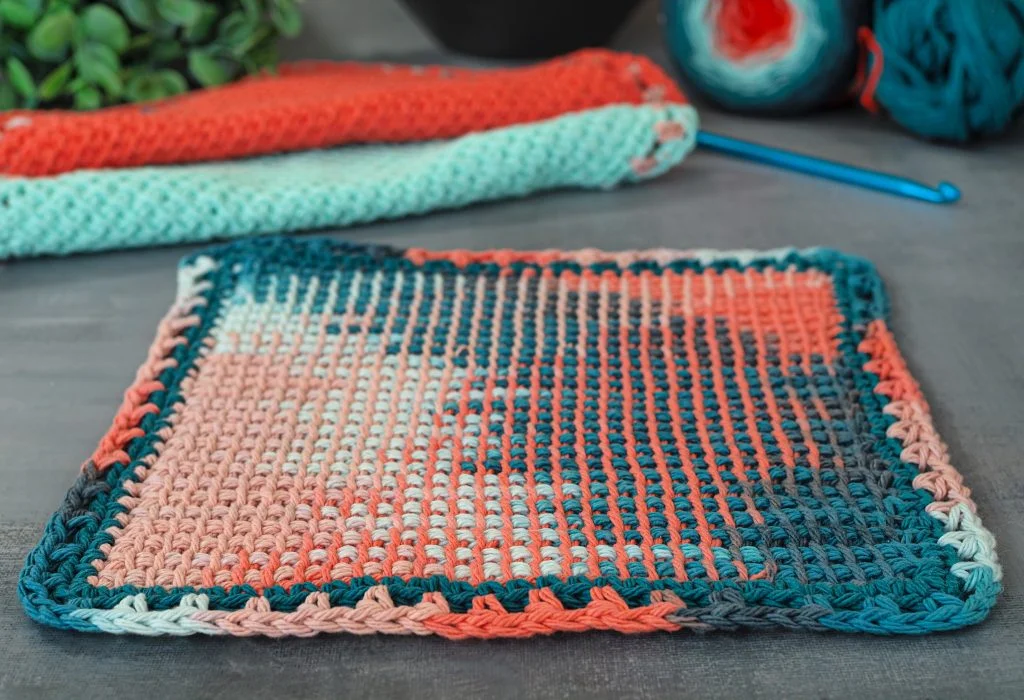
If you want to learn Tunisian crochet, don’t go diving off the deep end. Start with a simple item like a potholder! The Tunisian Simple Stitch I’m using in this pattern is very easy to learn, and because it’s so repetitive, you’ll quickly get into the flow and find your hands working almost automatically. Tunisian crochet combines elements of knitting and traditional crochet, giving your work a unique and modern look. That’s why it’s the right time to try something new.
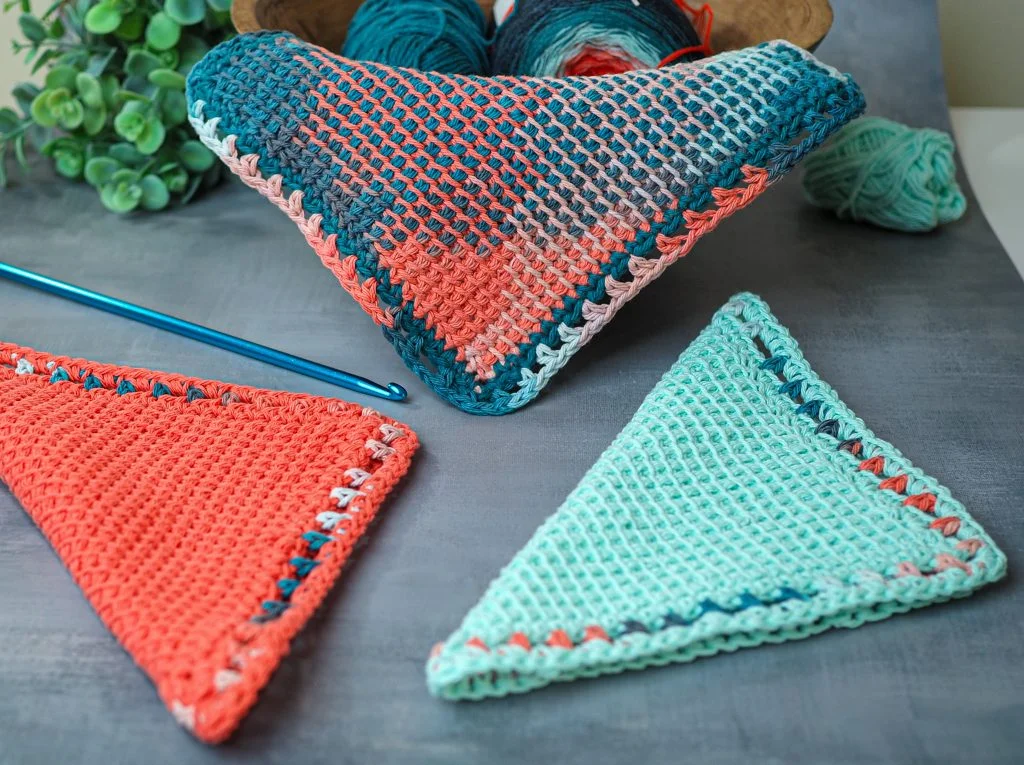
This potholder pattern can be easily adjusted in size to make a washcloth, table runner, set of placemats, or even a pillow. Its modern, grid-like texture also makes it a wonderful and unique gift!
You’ll Need
- Yarn – a medium-weight yarn; I used the Classic 100% Cotton Loops and Threads yarn.
- Tunisian Crochet Hook – use a bigger size of a hook that is suggested for your yarn. Size it 1 or 2 sizes up. For my yarn the recommended regular crochet hook size is H-8 (5 mm), and I’m using a 7 mm Tunisian hook
- regular crochet hook for the border
- Scissors: For cutting off the yarn at the end
- Tapestry (Yarn) Needle: For weaving in the ends
Abbreviations
- Ch Chain
- TSS Tunisian Simple Stitch
- St(s) Stitch(es)
- YO Yarn Over
- Sl St – Slip Stitch
- SC – single crochet (US terms)
The pattern uses US terms.
Measure: 25cm (9 ¾”)
The Tunisian Potholder Free Crochet Pattern
To make a potholder, make a Tunisian Simple Stitch Square which measures 21 cm (8 1/4″). To make it, start with ch 27. It is the part 1 of my tutorial, so if you familiar with the technique, go directly to part 2.
Part 1: Start with a Tunisian Stitch Square
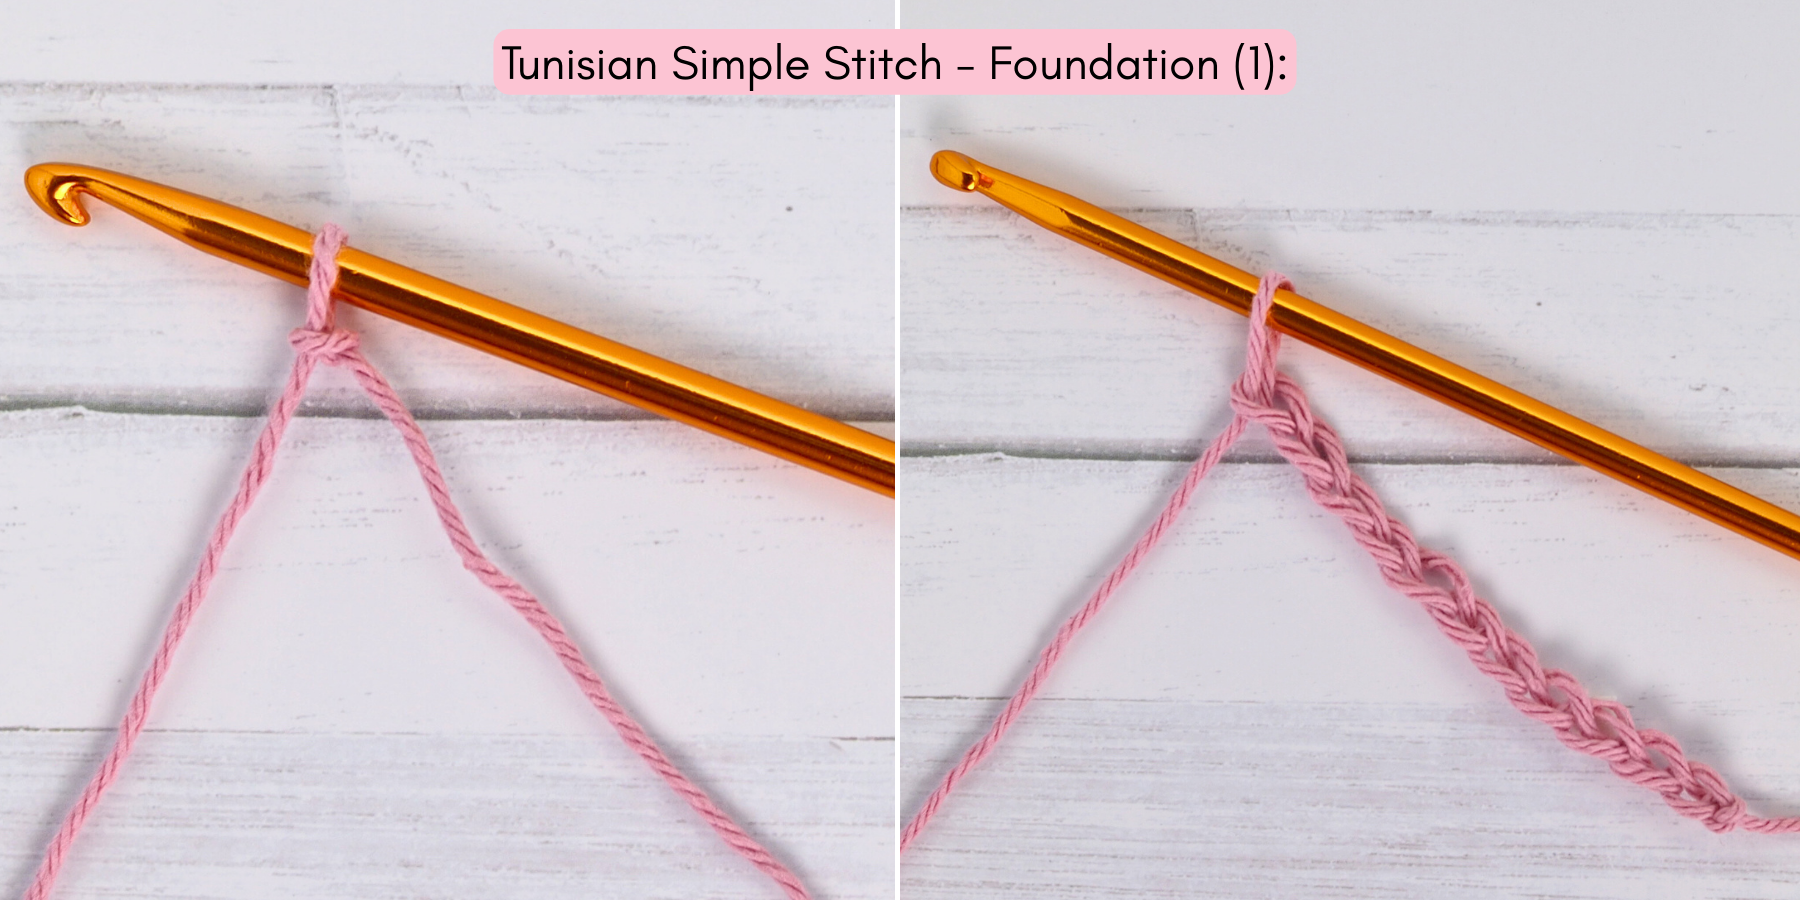
Step 1: Make a Foundation
With yarn A, make a slip knot and Ch 27. Try to keep your chains loose.
Here is a detailed tutorial how to make a Tunisian Stitch step by step. Please notice, that the photos show only a few chains to make it simpler, although we will be repeating each step for our 27 chains.
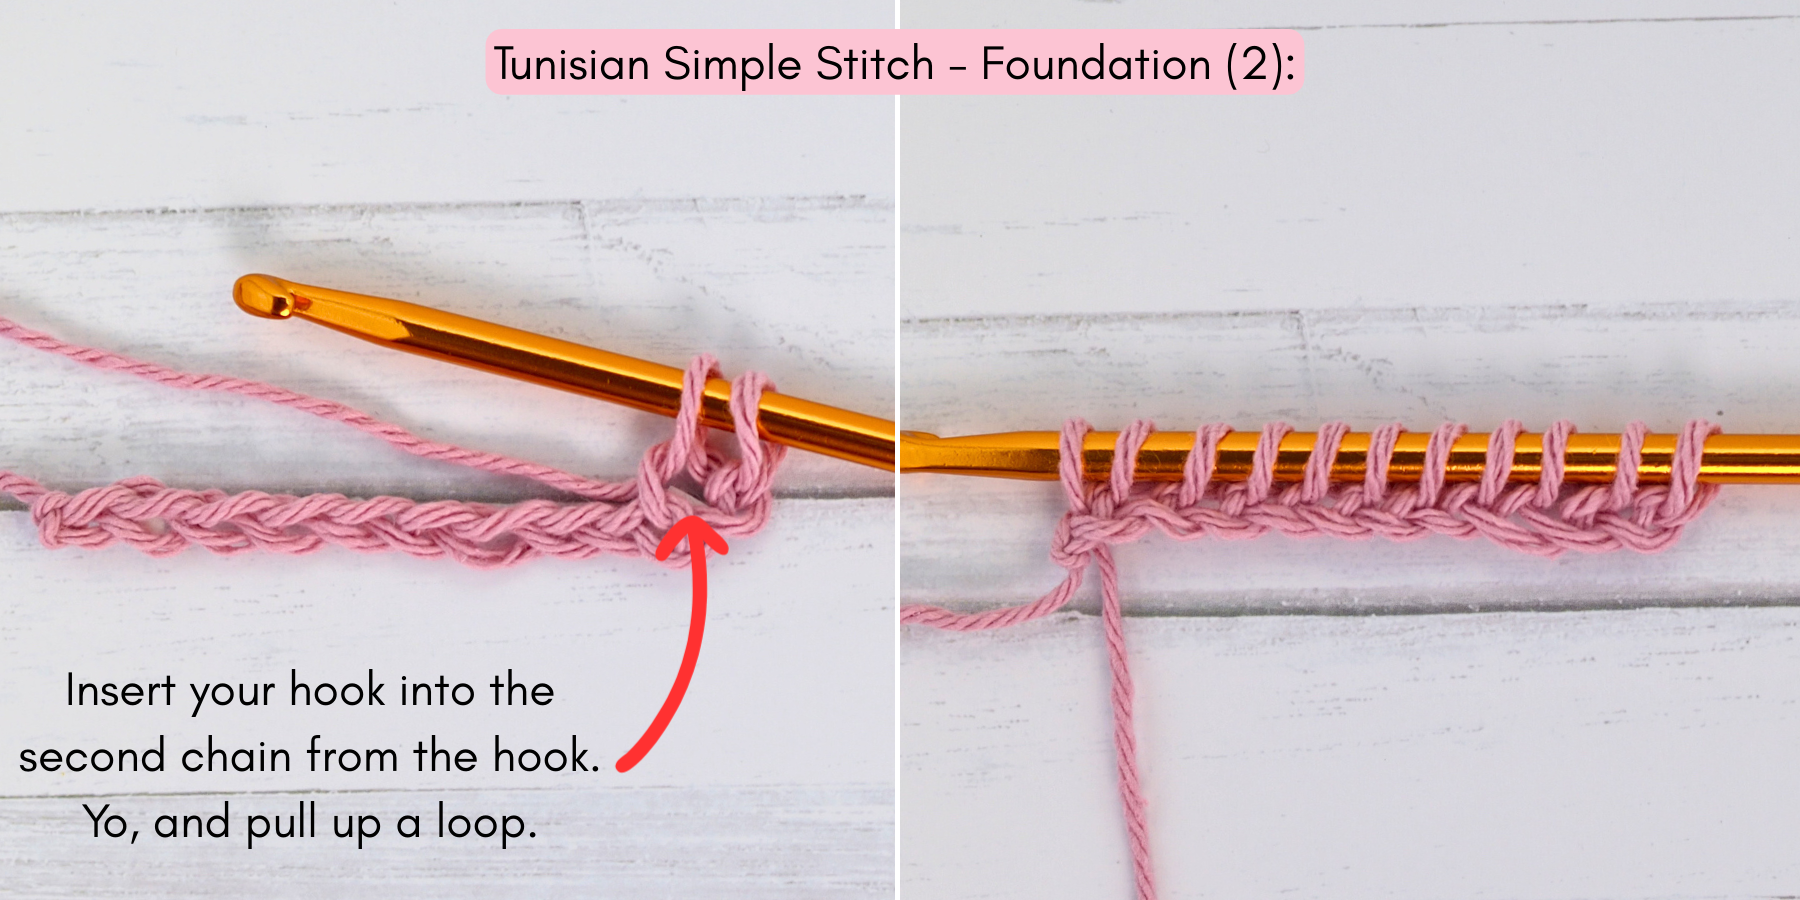
Foundation Row: Moving forward
In the Tunisian Crochet Stitches we often make a foundation row by working on the backside of chains. If you’re curious how to start on the backside of chains, see the foundation row explanation in the Tunisian Full Stitch (TFS) Tutorial.
Insert your hook into the second chain from the hook. Yarn over, and pull up a loop. * Insert your hook into the next chain, yo and pull up a loop. Repeat from * to the end of the row. Count your loops. You should have exactly 27 loops on your hook.
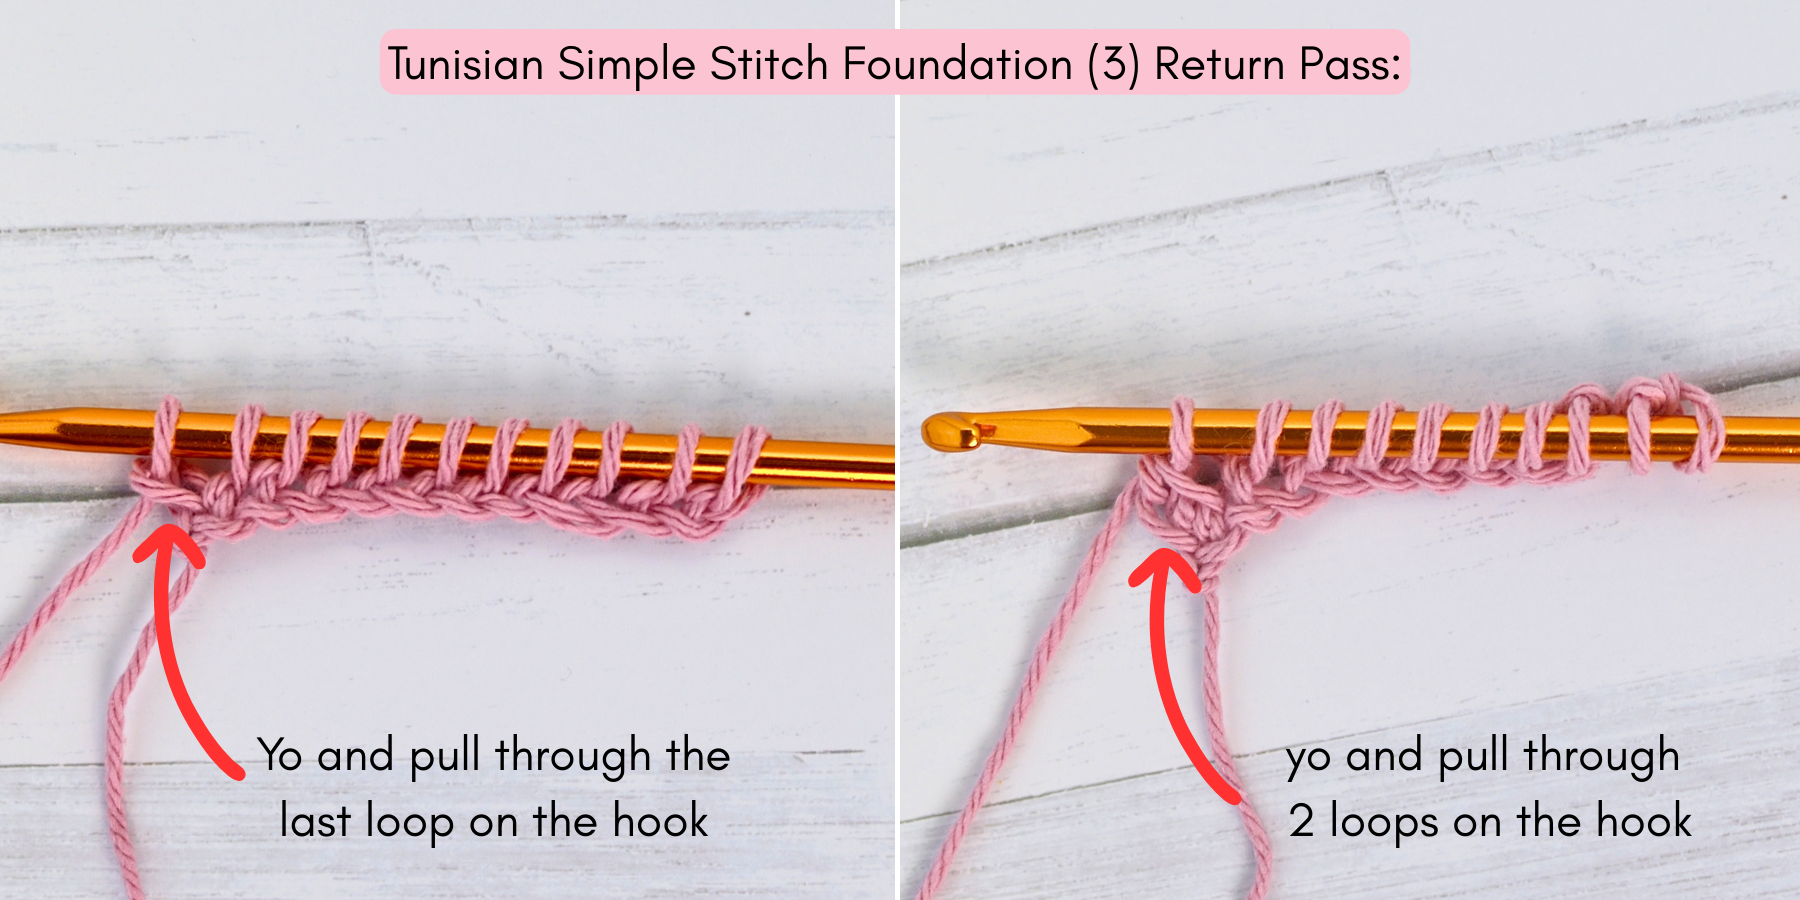
Foundation Row: Moving backwards
Yo and pull through the last loop on the hook (one loop on the hook only) . Next, * yo and pull through two loops on the hook. Repeat from * to the end of a row losing all loops from the hook except the last one.
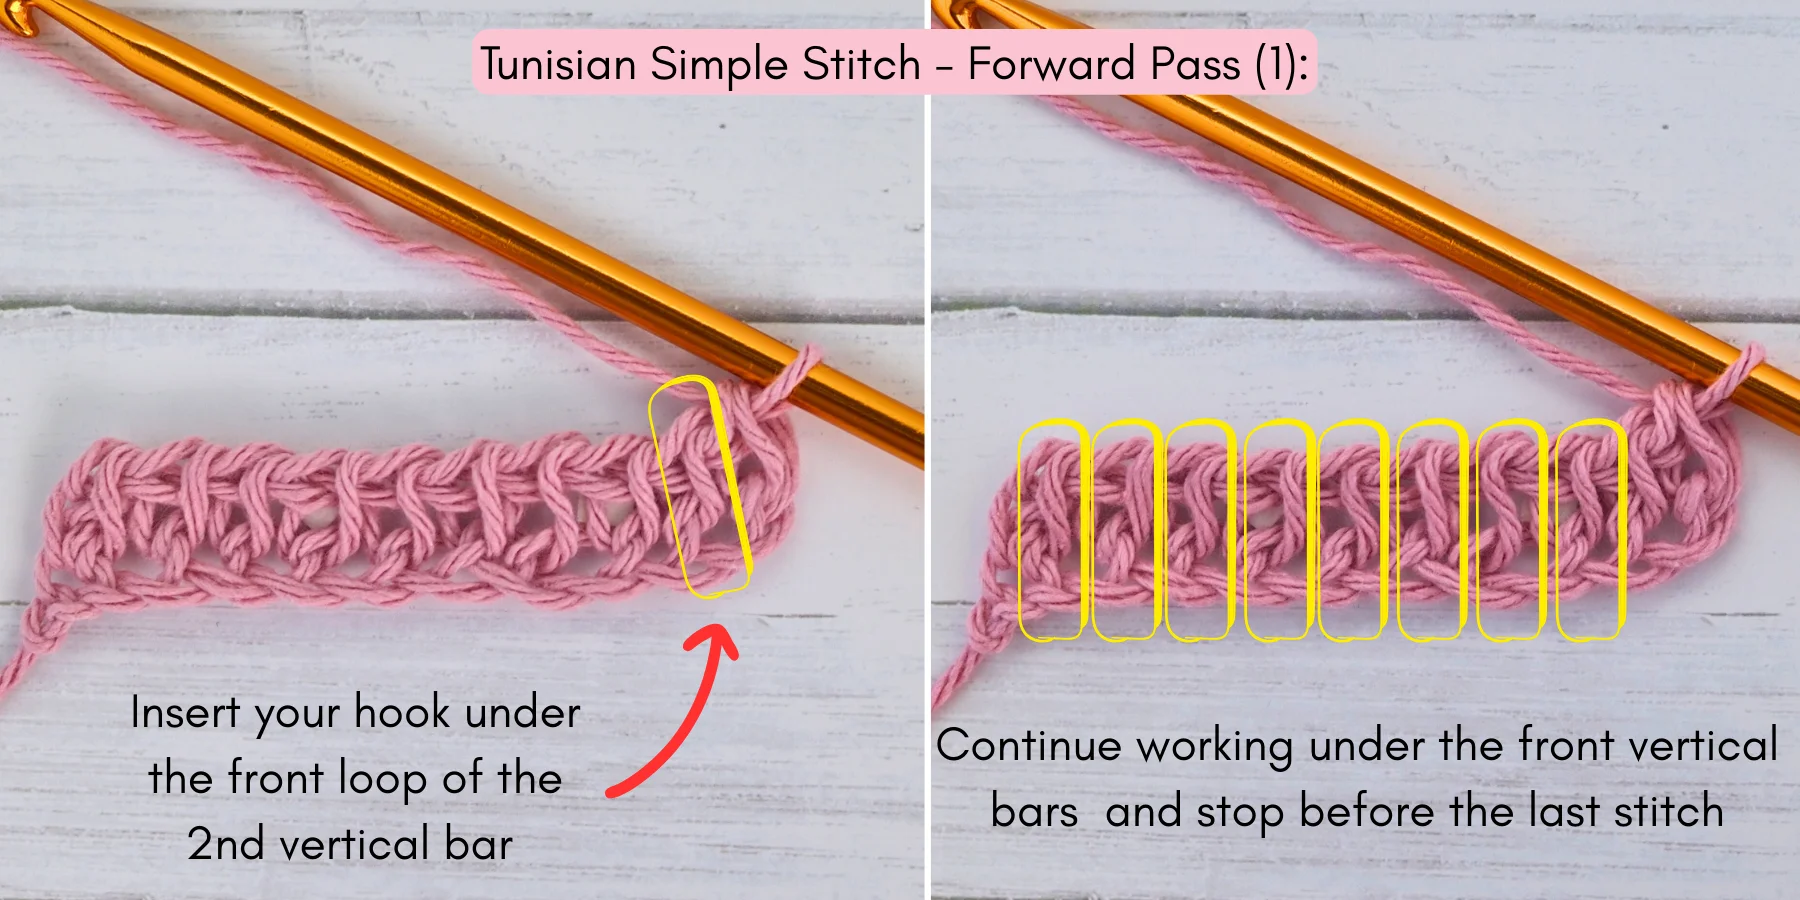
Step 2: First row of TSS: Forward pass
To start *Insert your hook under the front loop of a second vertical bar created in the row beneath. Yarn over, and pull up a loop. Continue from * across the row.
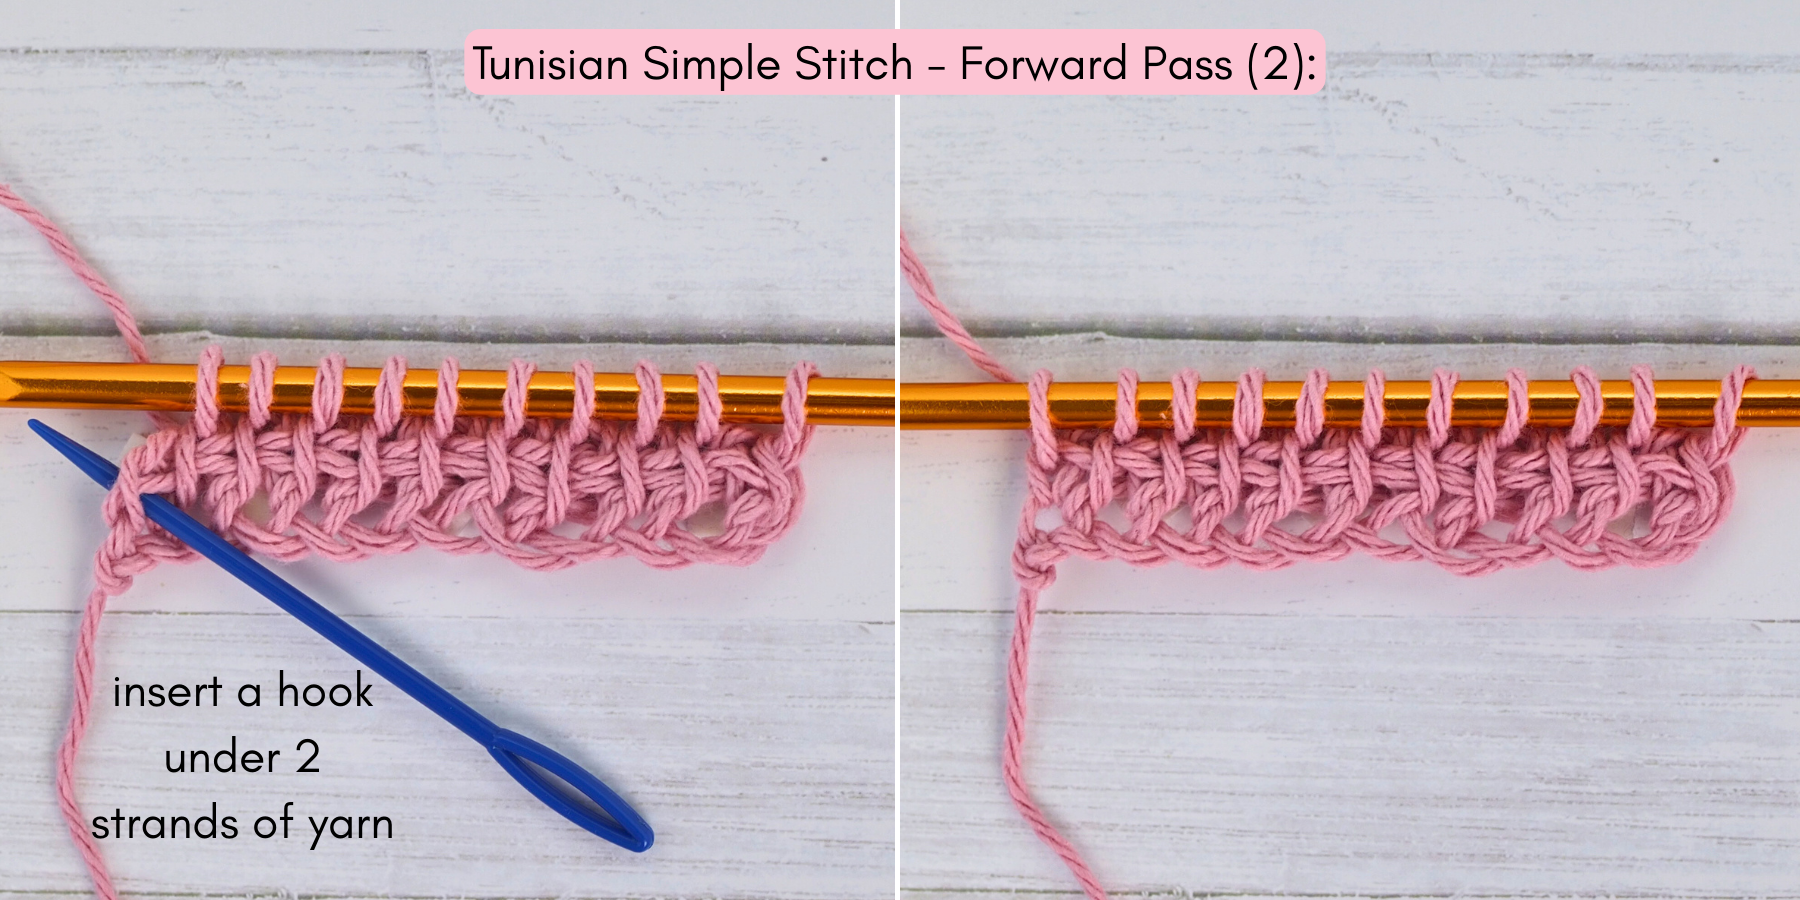
To get a nice even edge, insert your hook in the last loop under 2 strands of yarn instead of one as you can see in the photo below. The place to insert your hook is marked by blue needle. Yarn over, and pull up the last loop.
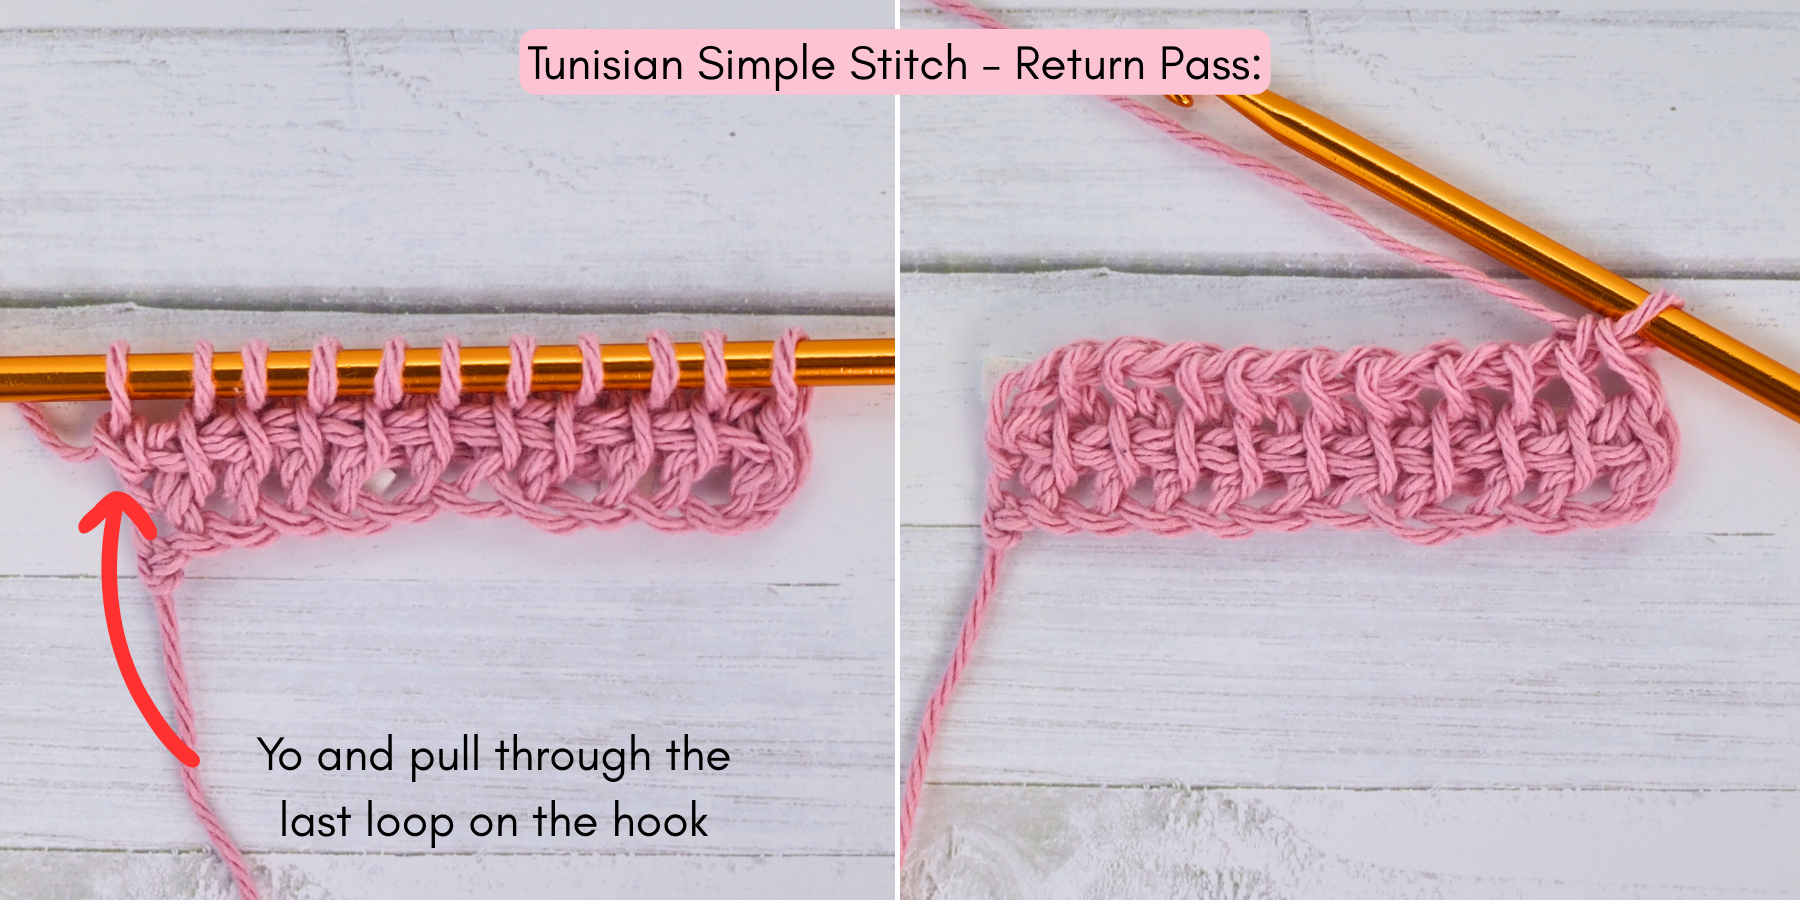
Step 3: First row of TSS: Return pass
Yo and pull through the last loop on the hook. Next, * yo and pull through 2 loops on the hook. Repeat from * to the end of a row when only one loop will be left on the hook.
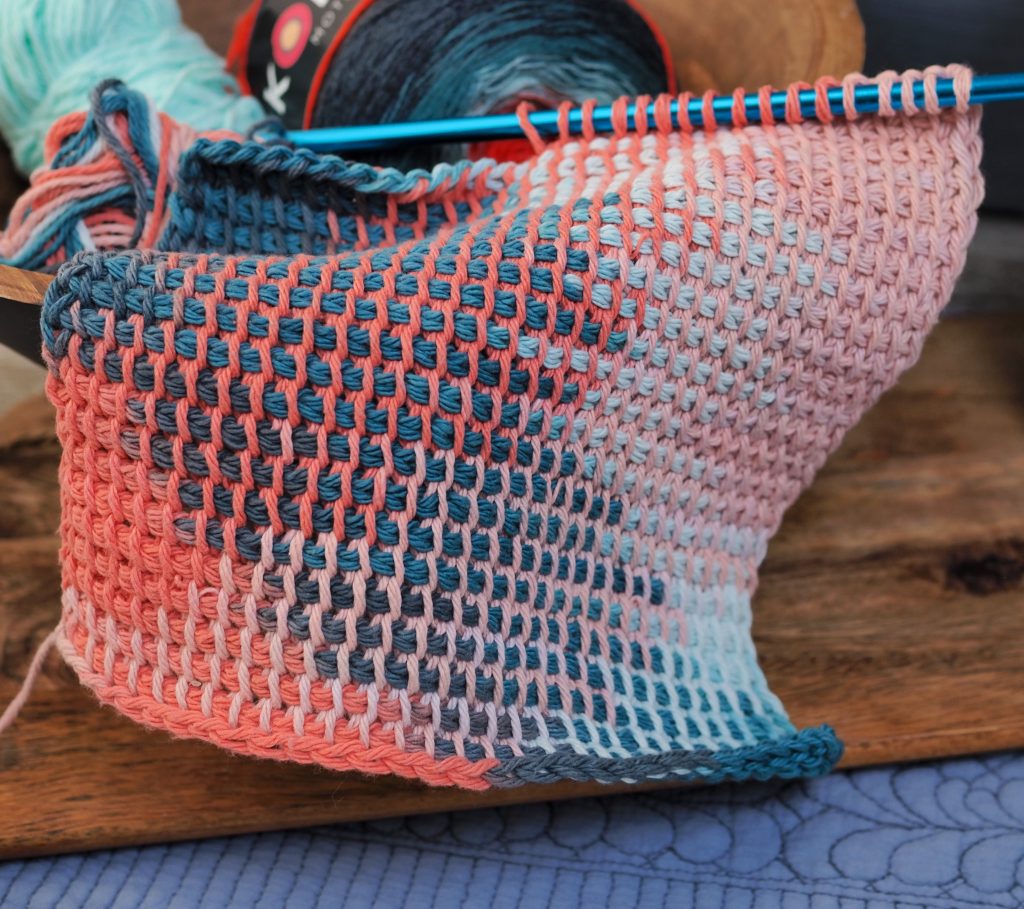
Step 4: Next rows of TSS
Continue working the forward and return passes, as described in Steps 2 and 3, until the height of your swatch matches its width. I made 25 rows.
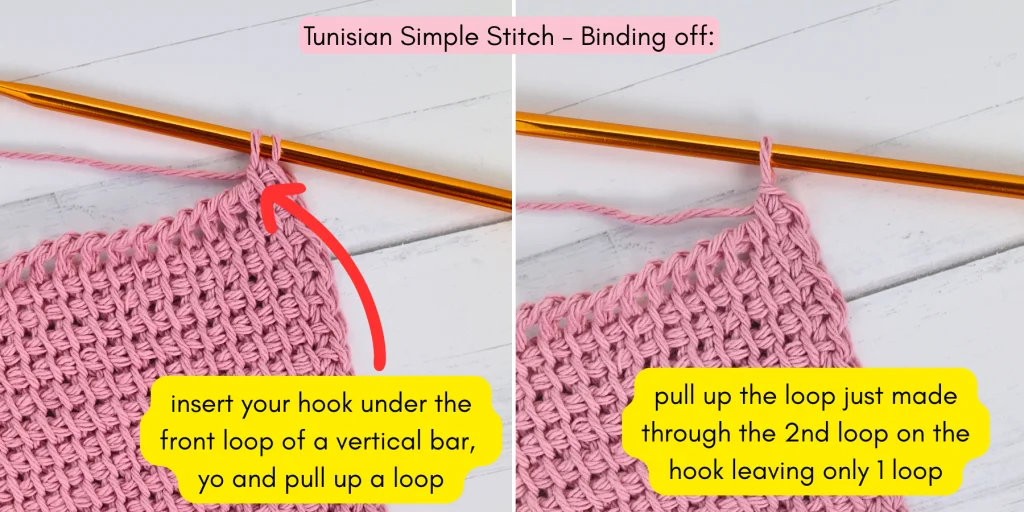
Step 5: Bind off – The last row of TSS
Binding off a Tunisian crochet project is similar to slip stitching.
To finish the last row of TSS, *insert your hook under the front loop of a vertical bar, yo and pull up a loop (2 loops on the hook). Then pull up the loop just made through the second loop on the hook leaving only 1 loop on the hook. Repeat from * to the end of a row.
Part 2: Make a border
Without finishing the yarn, start a row of sc stitches along the side of your square. Ch1 and a sc in each row and stitch and 3sc into each corner. Sl st to the begining ch1.
Attach yarn B (for a border, I used an ombre yarn). Ch3. Skip st and hdc into next. Ch1. *(Skip 1st, hdc, ch1) – continue to around, except in the corers when you are making Ch3 instead of ch1.
Try to make your hdc stitches just before the corner stitch and just after. If your hdc stitch is to be made exactly in the corner, move backward by few sts and extend the distance between 2 hdc stitches by 1 st adding 1ch and skiping 1ch more.
Finish off.
For solid potholders, I made an additional row of sc to made the ombre stitches pop up. To do that, join the base color of a yarn, ch1. Sc 2 in each space all around, except corners, where make sc 3. Sp st. Wave in the ends.

Thank you and see you in the next tutorial. I would love see your work!
I’ve always wanted to try Tunisian crochet, now I definitely will!