In this article:

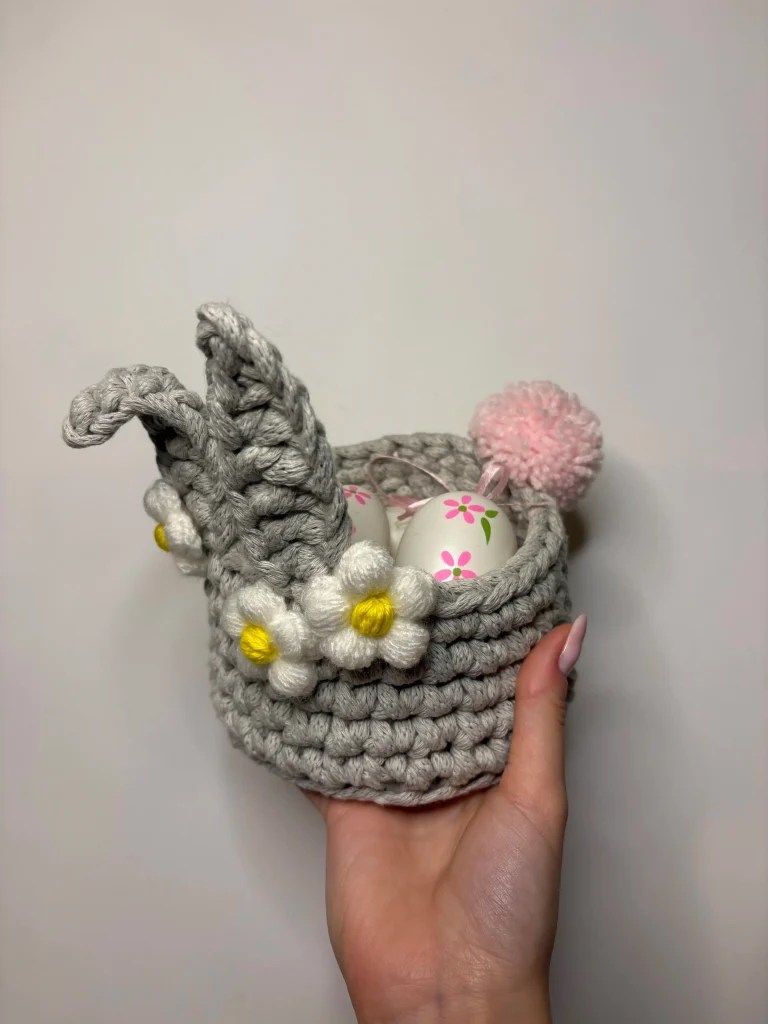
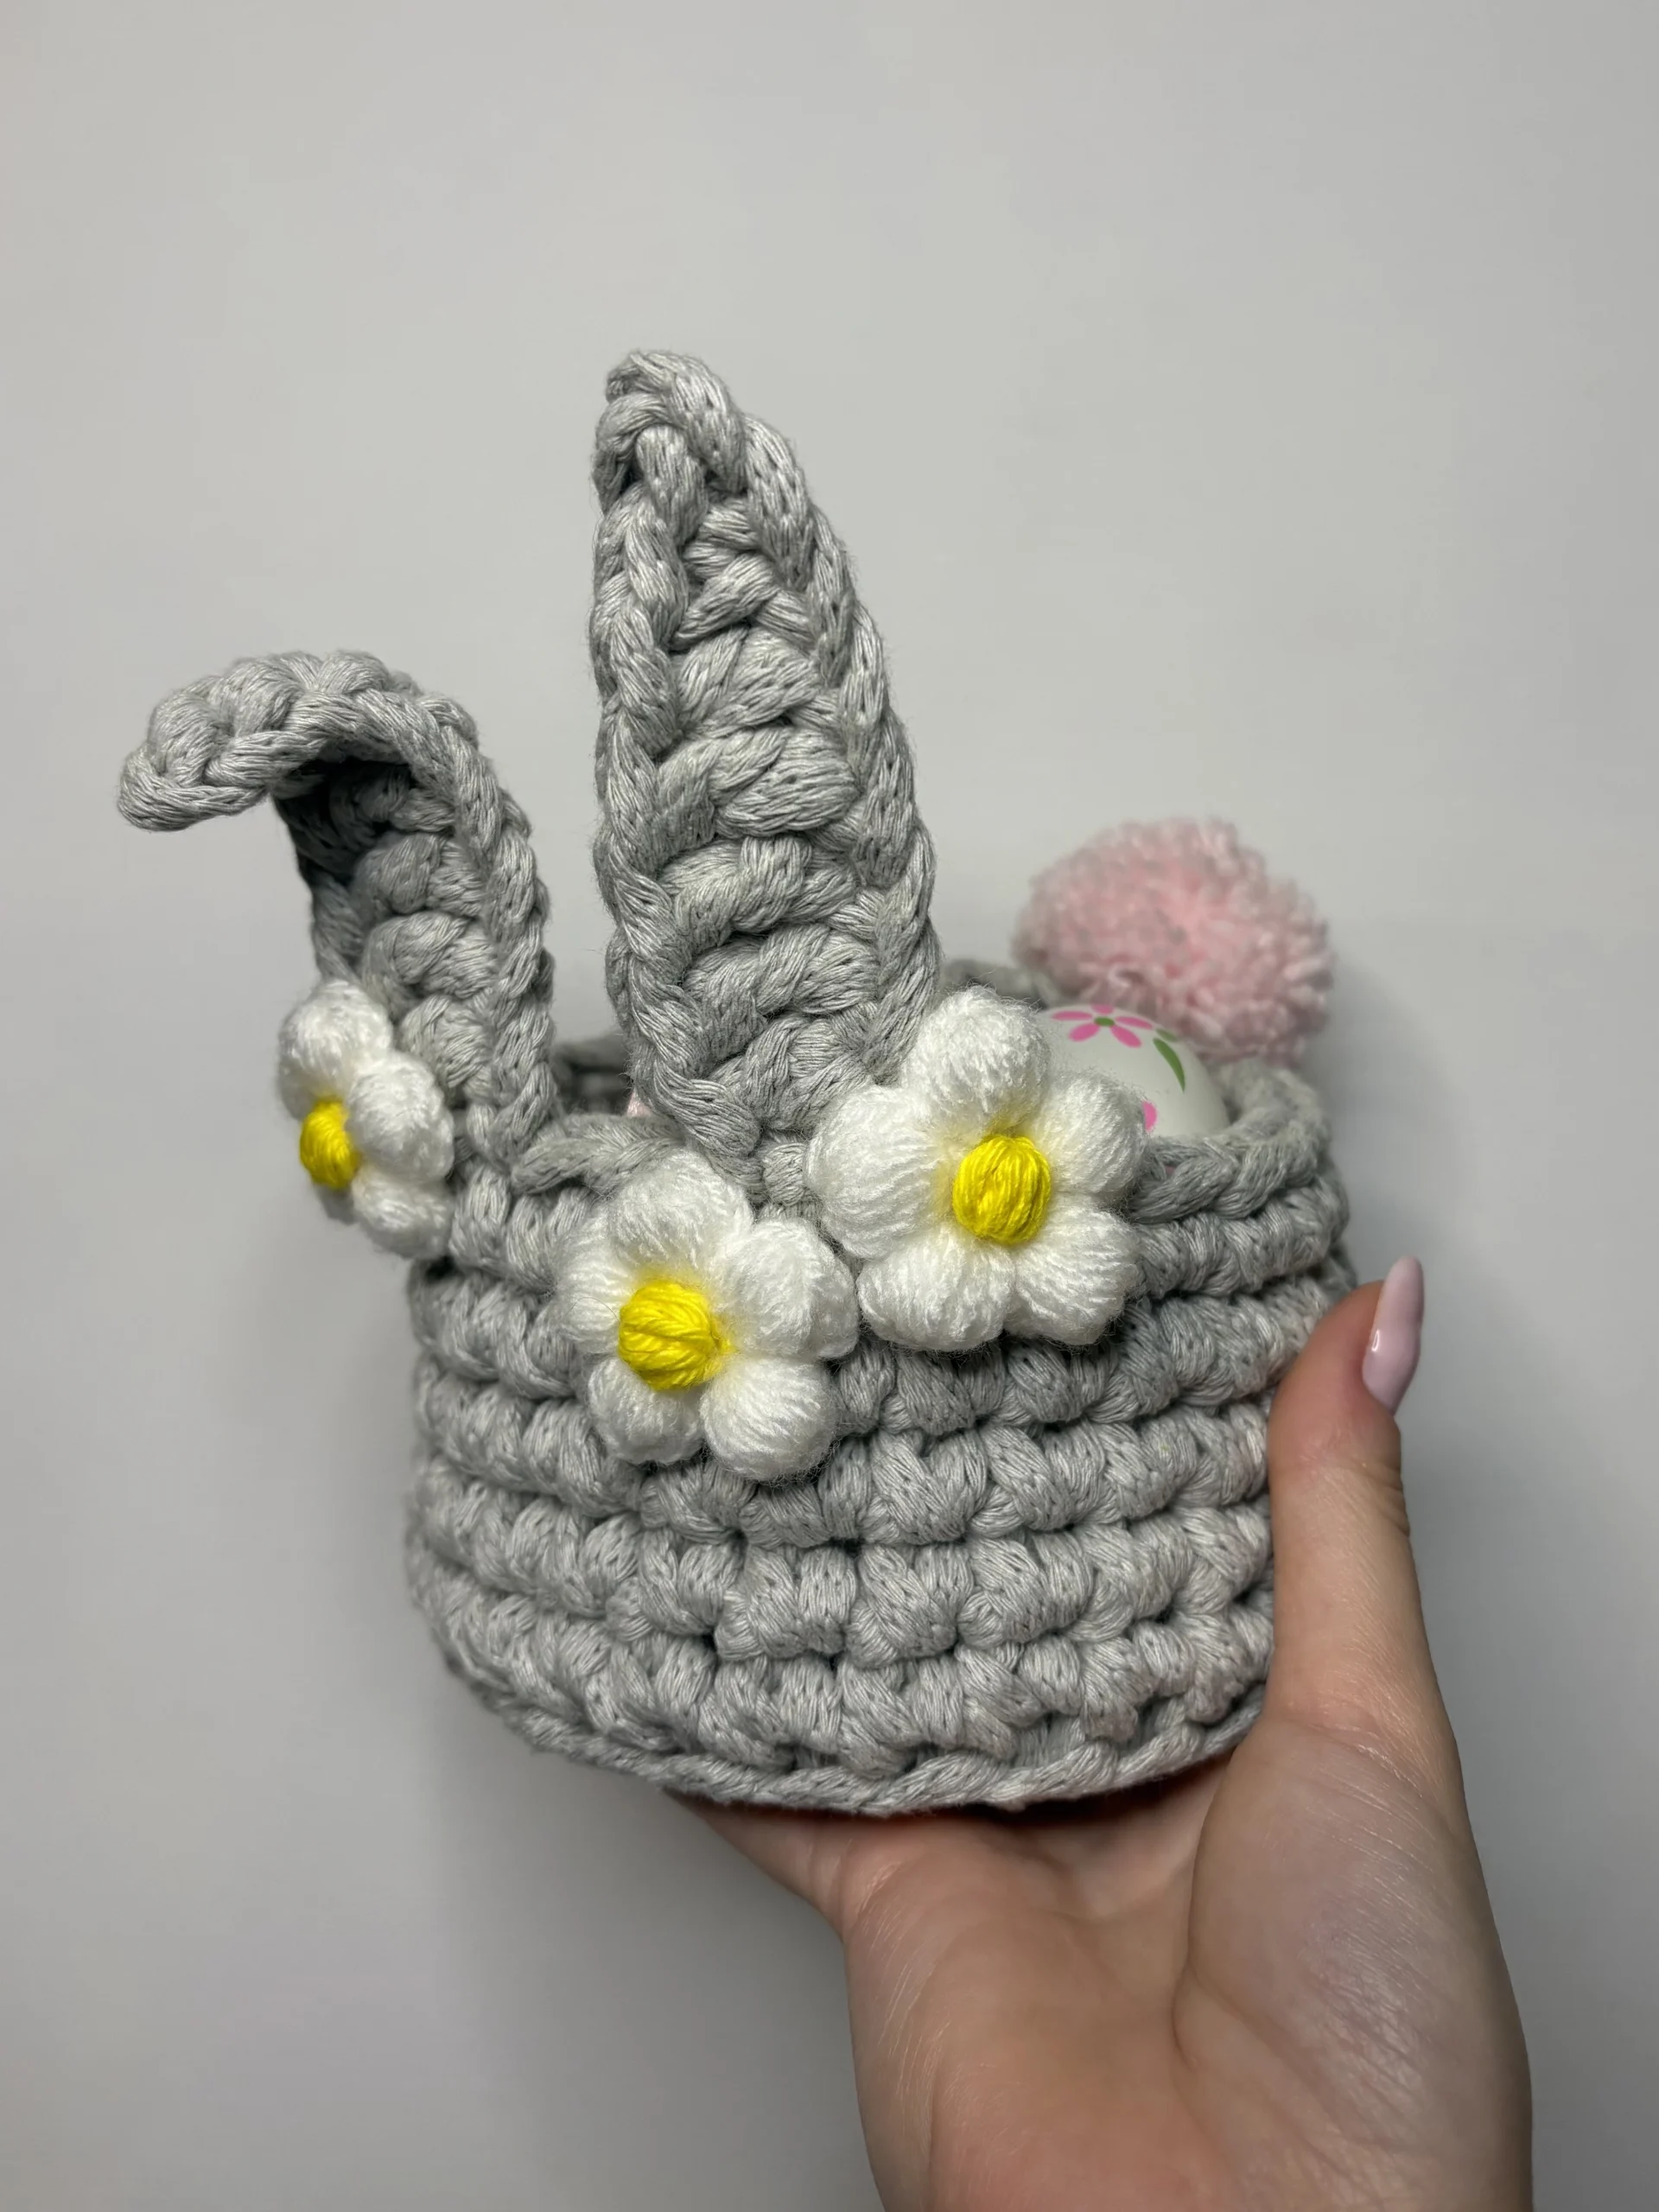
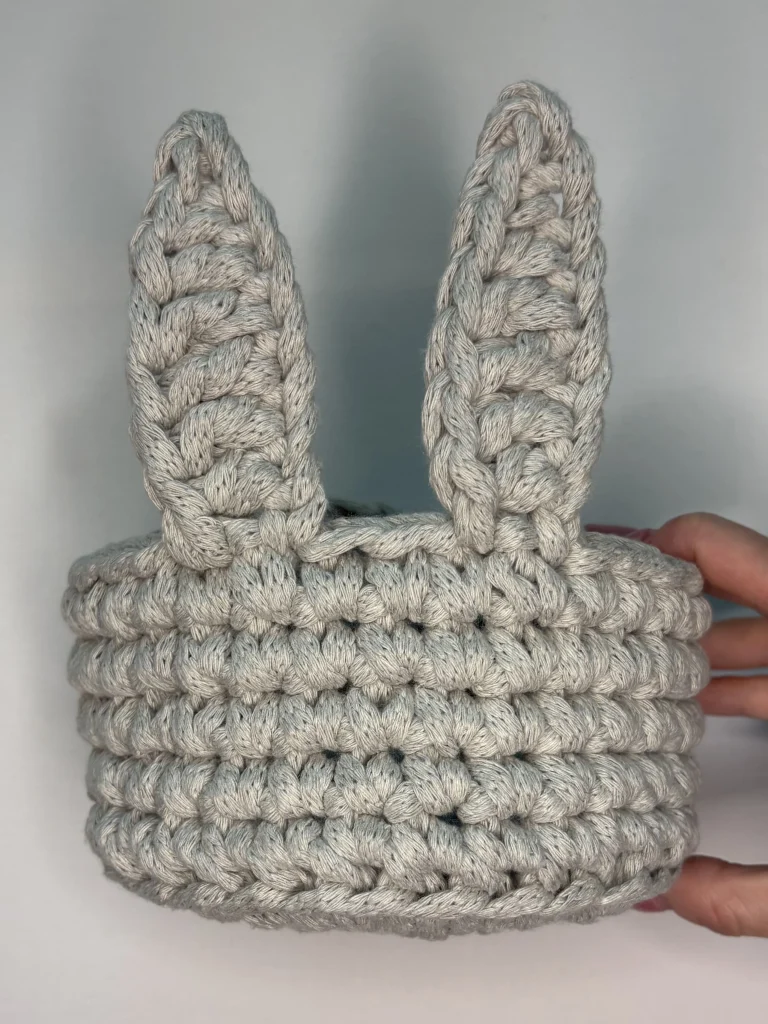
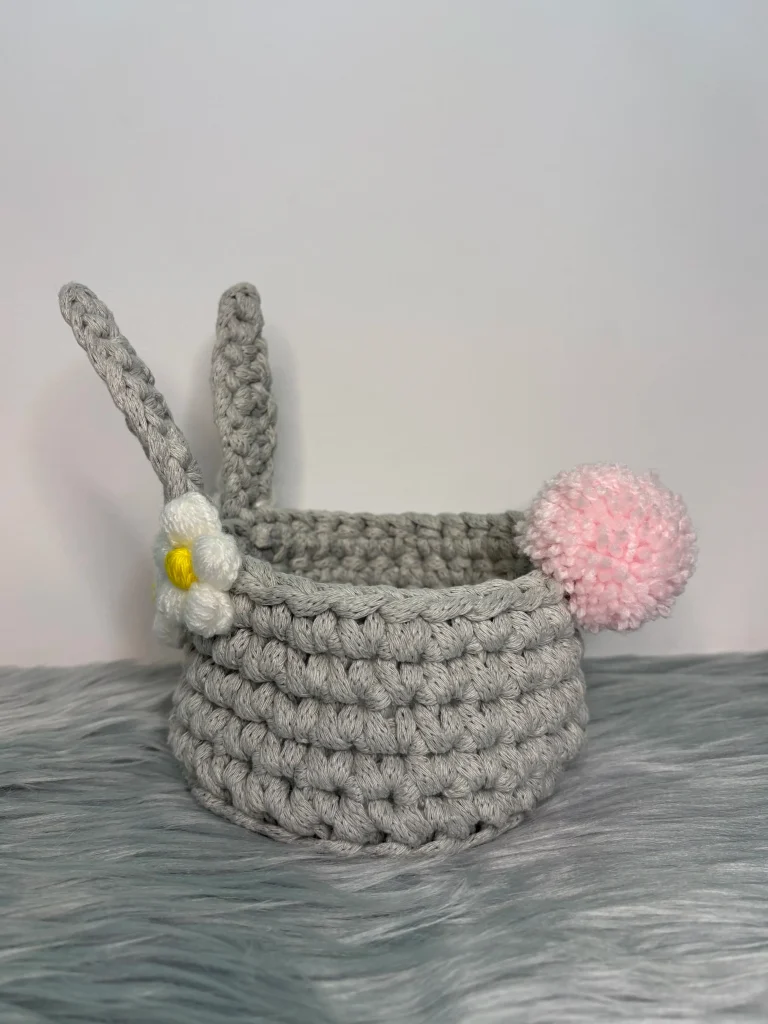
This crochet bunny basket is a small and practical project for Easter. It features simple bunny ears, pompom tail and small daisy details that give it a seasonal look without making the design complicated. The finished height is approximately 16 cm / 6.29″, which makes it a good size for holding a few chocolate eggs, small gifts, or decorative items.
The pattern is quick to complete and doesn’t require advanced skills. The construction is straightforward, so it’s easy to follow and suitable even if you prefer uncomplicated projects. The basket shape is sturdy enough for light use, and the decorative elements are added in a clear, manageable way. You can choose soft pastel shades for a traditional Easter style or adjust the colors to match your own décor.
This bunny basket works well as a table decoration, part of a spring display, or a small handmade gift container. It’s a simple project that adds seasonal detail without taking too much time to make.
In this post, you will find a free pattern for Bunny Basket. Don’t forget to also check our Exclusive Patterns and other Easter posts.
The easily printable Bunny Basket PDF version is available in our shop:
This free crochet pattern was designed exclusively for Your Crochet by Weronika Miechowicz.
About the Author
Weronika has a real passion for crocheting and enjoys creating patterns that reflect her love for handmade, seasonal projects. She shares her designs to inspire others to pick up their hooks and make something fun for themselves, their homes or gifts for their loved ones.
Ravelry | Etsy | YourCrochet Shop
Pattern Notes
This is a beginner-friendly crochet pattern, and I’m using US terms.
Materials and Tools
- Super bulky weight yarn – Alison & Mae Knitted Macramé: grey
- Super fine weight yarn: white, yellow, light pink
- crochet hook: 8 mm, 3.5 mm, 3 mm
- pom pom making set
- tapestry needle
- scissors
- stitch markers
Measurements
- HEIGHT: 16 cm / 6.3″
- DIAMETER: 14 cm / 5.51″
Stitches and Abbreviations
- st(s) – stitch(es)
- ch – chain(s)
- rnd – round
- sc – single crochet
- hdc – half double crochet
- dc – double crochet
- slst – slip stitch
- MR – magic ring
- inc – increase
- yo – yarn over
- scBLO – single crochet back loop only
Notes
- You can make your basket bigger by adding some rows while making the bottom and later while making the walls.
- You can use your own colors of yarn to make it more personalized.

Bunny Basket Video Tutorial – coming soon
Bunny Basket Free Crochet Pattern
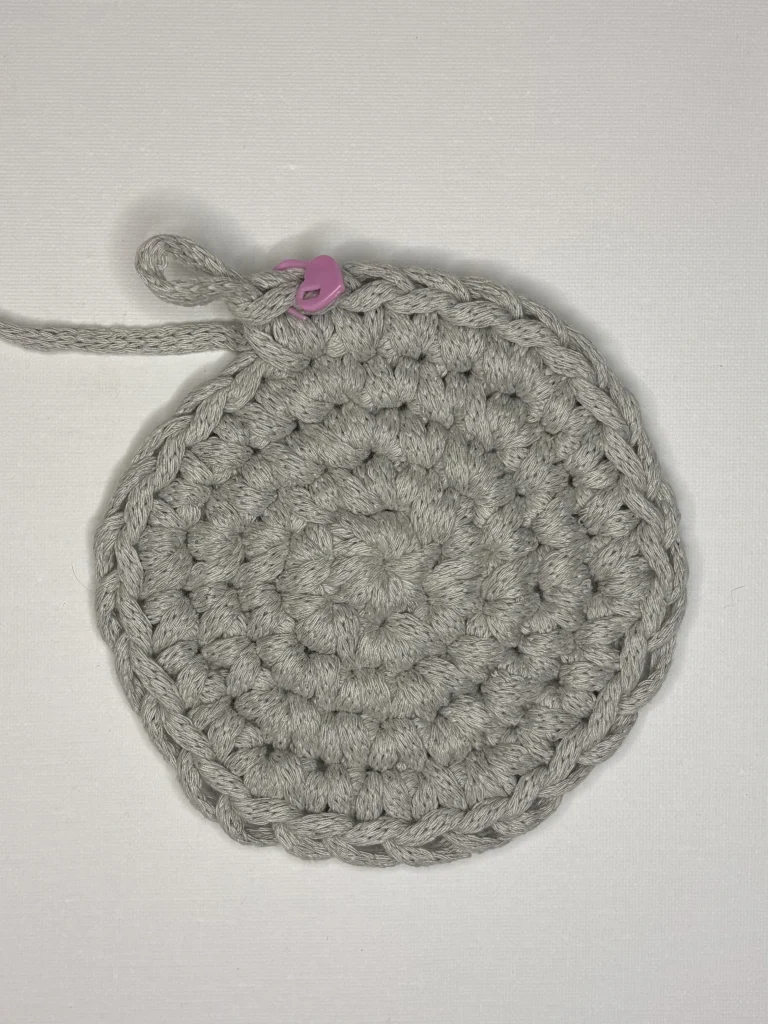
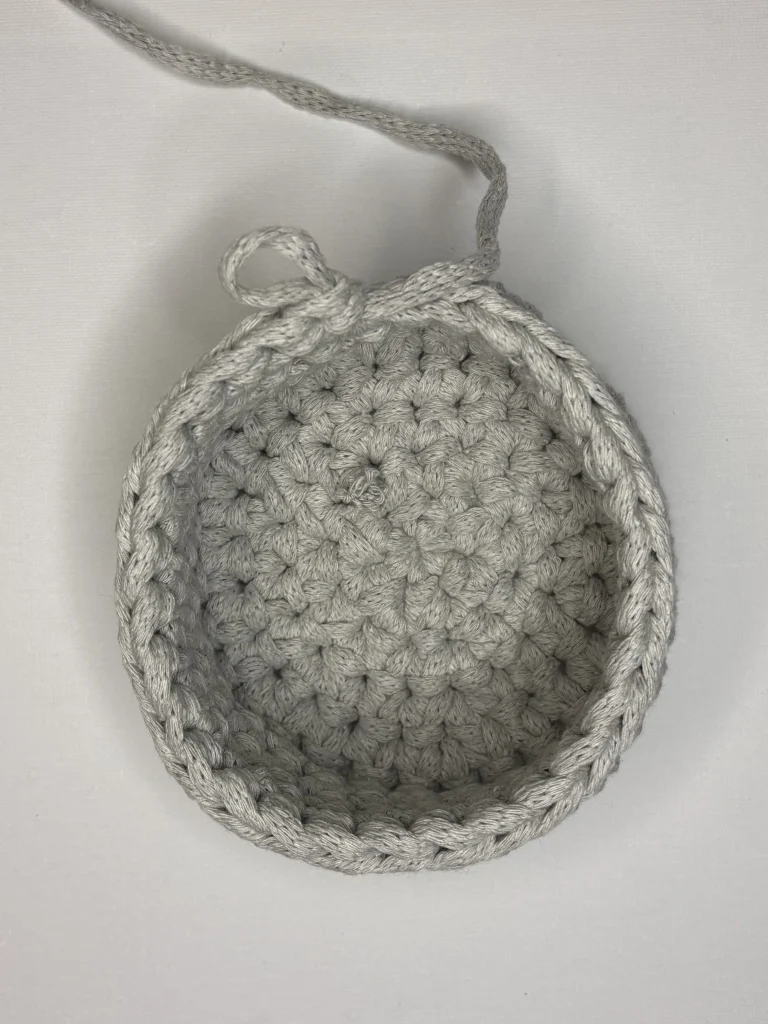
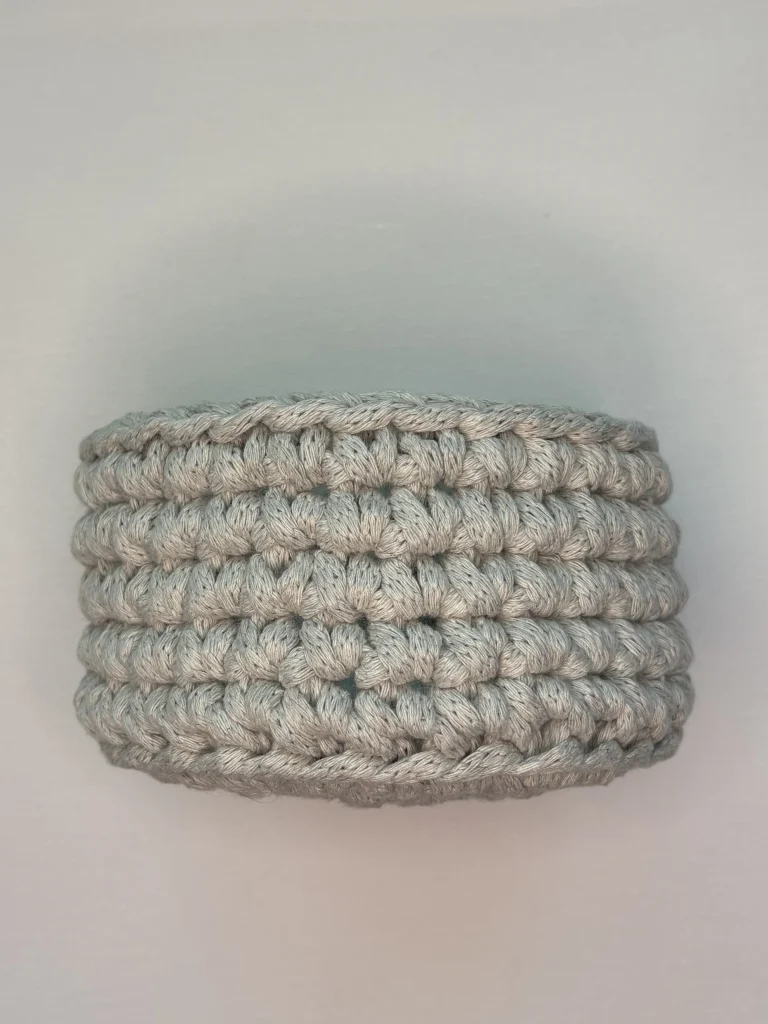
Basket
Using grey yarn and 8mm hook:
Rnd 1: 6 sc in MR (6)
Rnd 2: inc 6 (12)
Rnd 3: (sc, inc) 6x (18)
Rnd 4: (sc 2, inc) 6x (24)
Rnd 5: (sc 3, inc) 6x (30)
Rnd 6: scBLO 30 (30)
Rnd 7-10: sc 30 (30), slst
Fasten off and weave in the end (this is the back of our basket).
The easily printable Bunny Basket PDF version is available in our shop:
Ears – make 2
Using grey yarn and 8mm hook:
Attach the yarn by sc 1 on the front of our basket.
Row 1: ch 9
Row 2: starting into 2nd ch from the hook slst, sc, hdc,dc 3, hdc, slst into the basket edge st (next to the st where we started).
Cut off the yarn, you can tie it with the starting piece and weave in the ends.
Skip 2 sts and repeat the steps to make a 2nd ear.
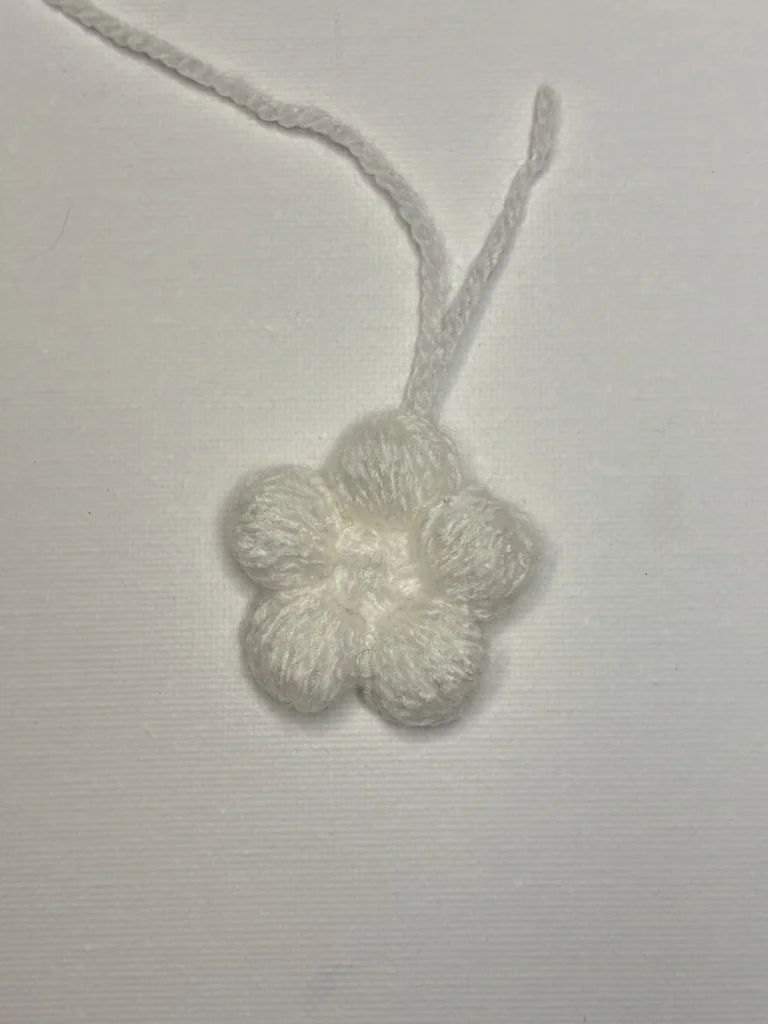
Flowers
hook: 3.5 mm, 3 mm
Make 1 big and 2 small flower.
Using white yarn:
Rnd 1: 5 hdc in MR, slst
Rnd 2: ch 3, [(yo, insert the hook into the hdc st, pull up a loop) 7x, yo, pull through all the loops except the last one, yo, pull through the 2 loops, ch 3, slst into the same hdc st] 5x
Fasten off, tie the ends together, leaving a longer piece for sewing later.
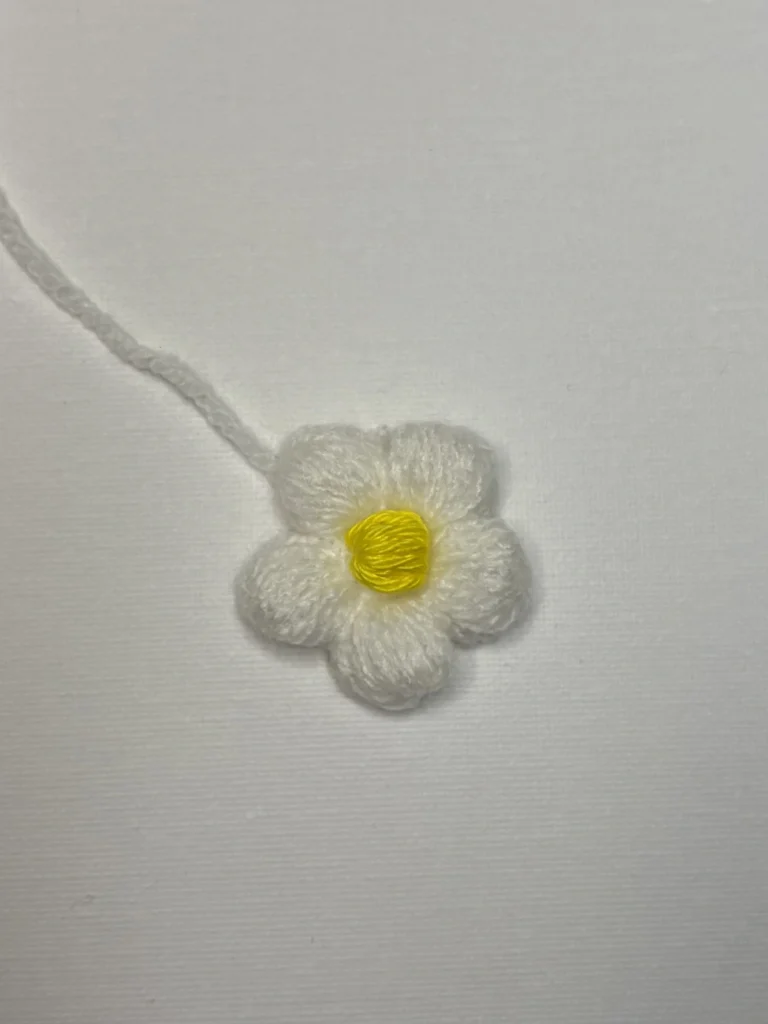
Using yellow yarn:
Attach the yarn anywhere in the center, ch 4, (yo, insert the hook into 3rd ch from the hook, pull up a loop) 5x, yo, pull through all the loops except the last one, yo, pull through the 2 loops
Fasten off, and weave in the end on the opposite side where you joined. Tie the ends together.
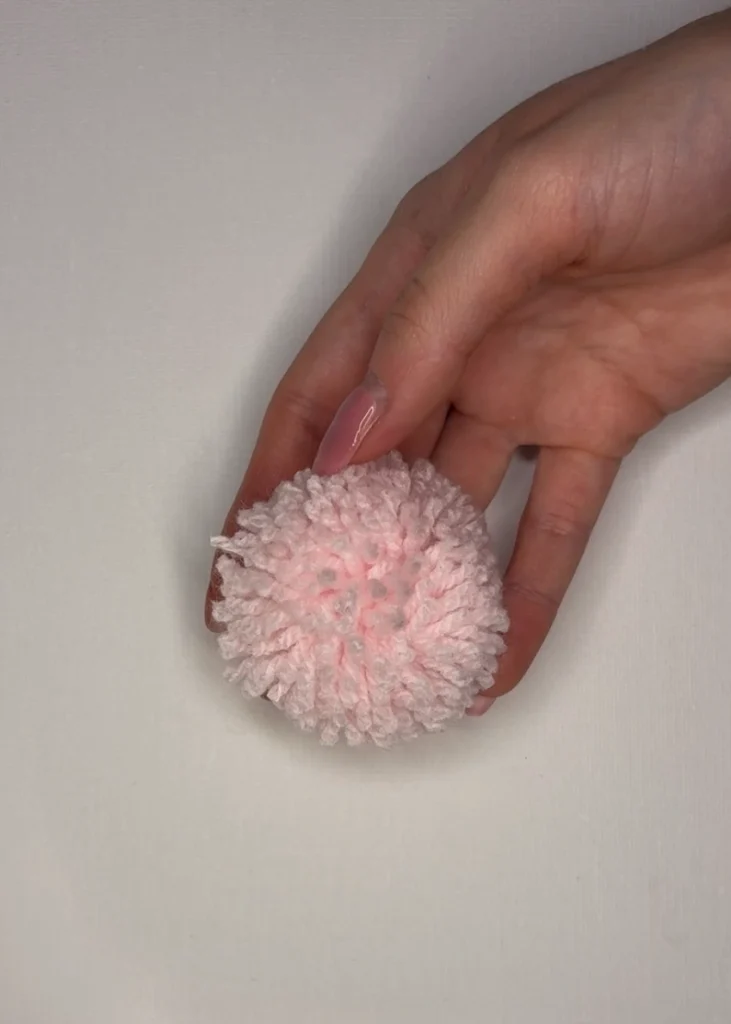
Pompom
Using light pink yarn:
To make a pompom I used a plastic pompom maker kit. You can find pompom tutorial on our website – Steps On How To Make A Pom Pom With Yarn to make it yourself. You can also buy a ready one.
The easily printable Bunny Basket PDF version is available in our shop:
Assembling
1. Attach the pompom on the back of our basket. You can choose the place, I put mine at the edge.
2. Sew up the flowers between the 2 ears. Place them the way you prefer.
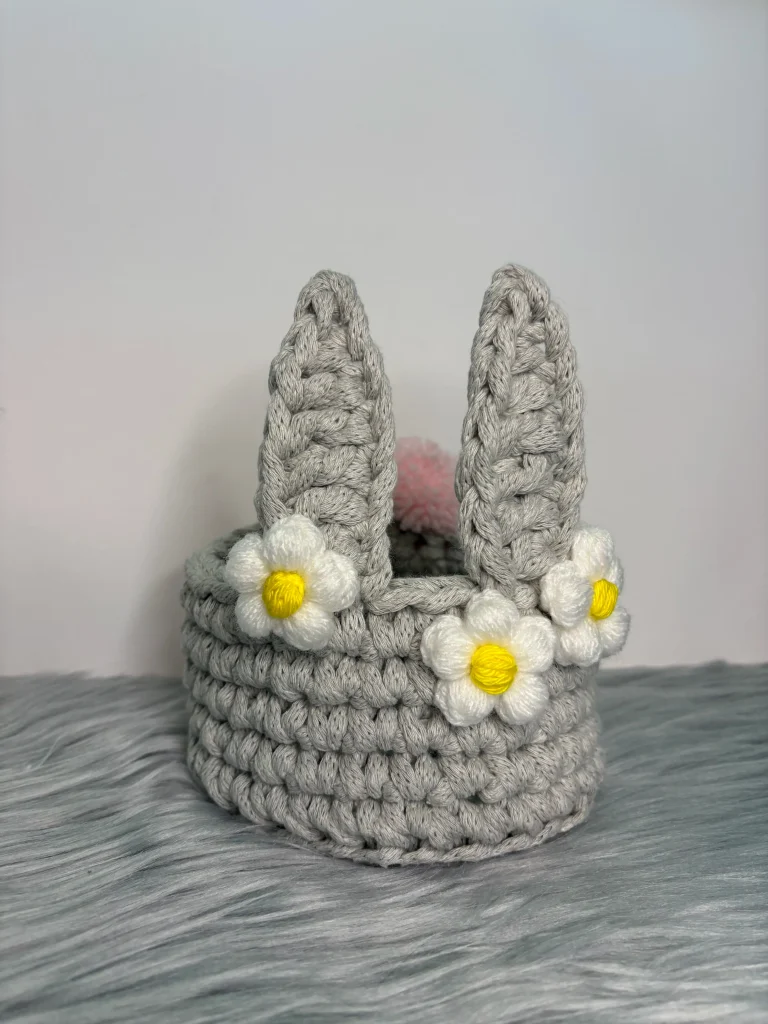
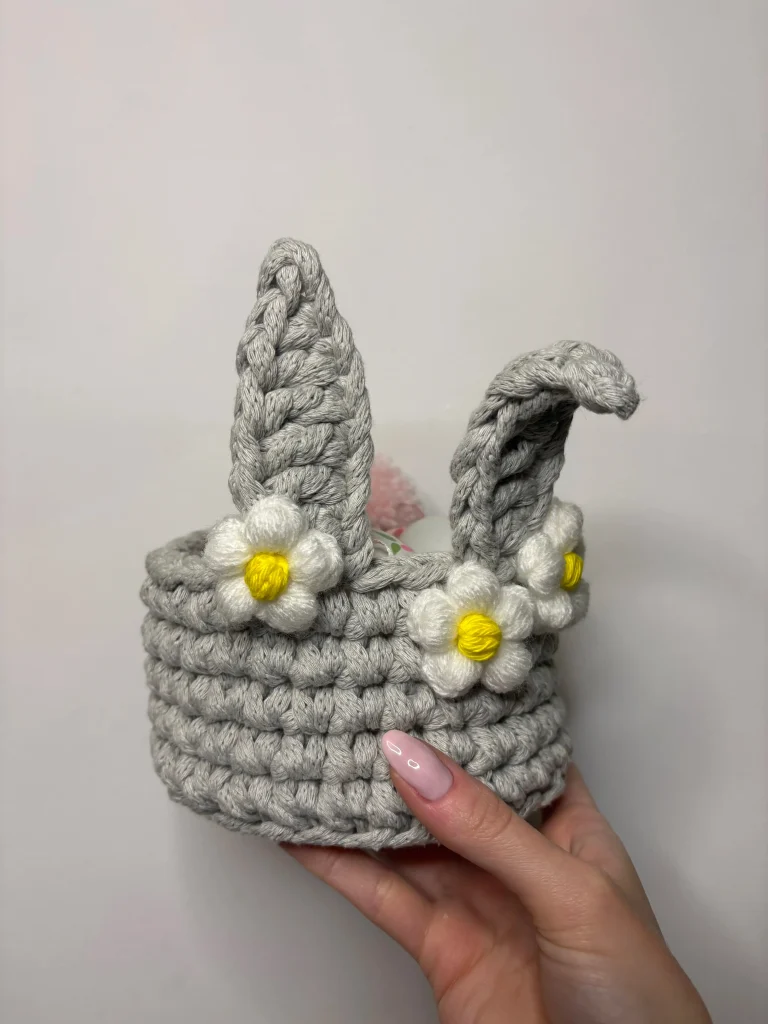
Your Bunny Basket is ready!
The easily printable Bunny Basket PDF version is available in our shop:
Thank you for using this pattern! Let us know how you liked it in the comments section below. 🙂