
In this article:

Are you new to Tunisian crochet and wondering why should you learn it? How hard it can be? I had the same questions as you. I bought Tunisian hooks and learned the basic Tunisian stitches. So, let’s learn Tunisian crochet together! I will explain all the problems I had and the tricks that I found to solve them.
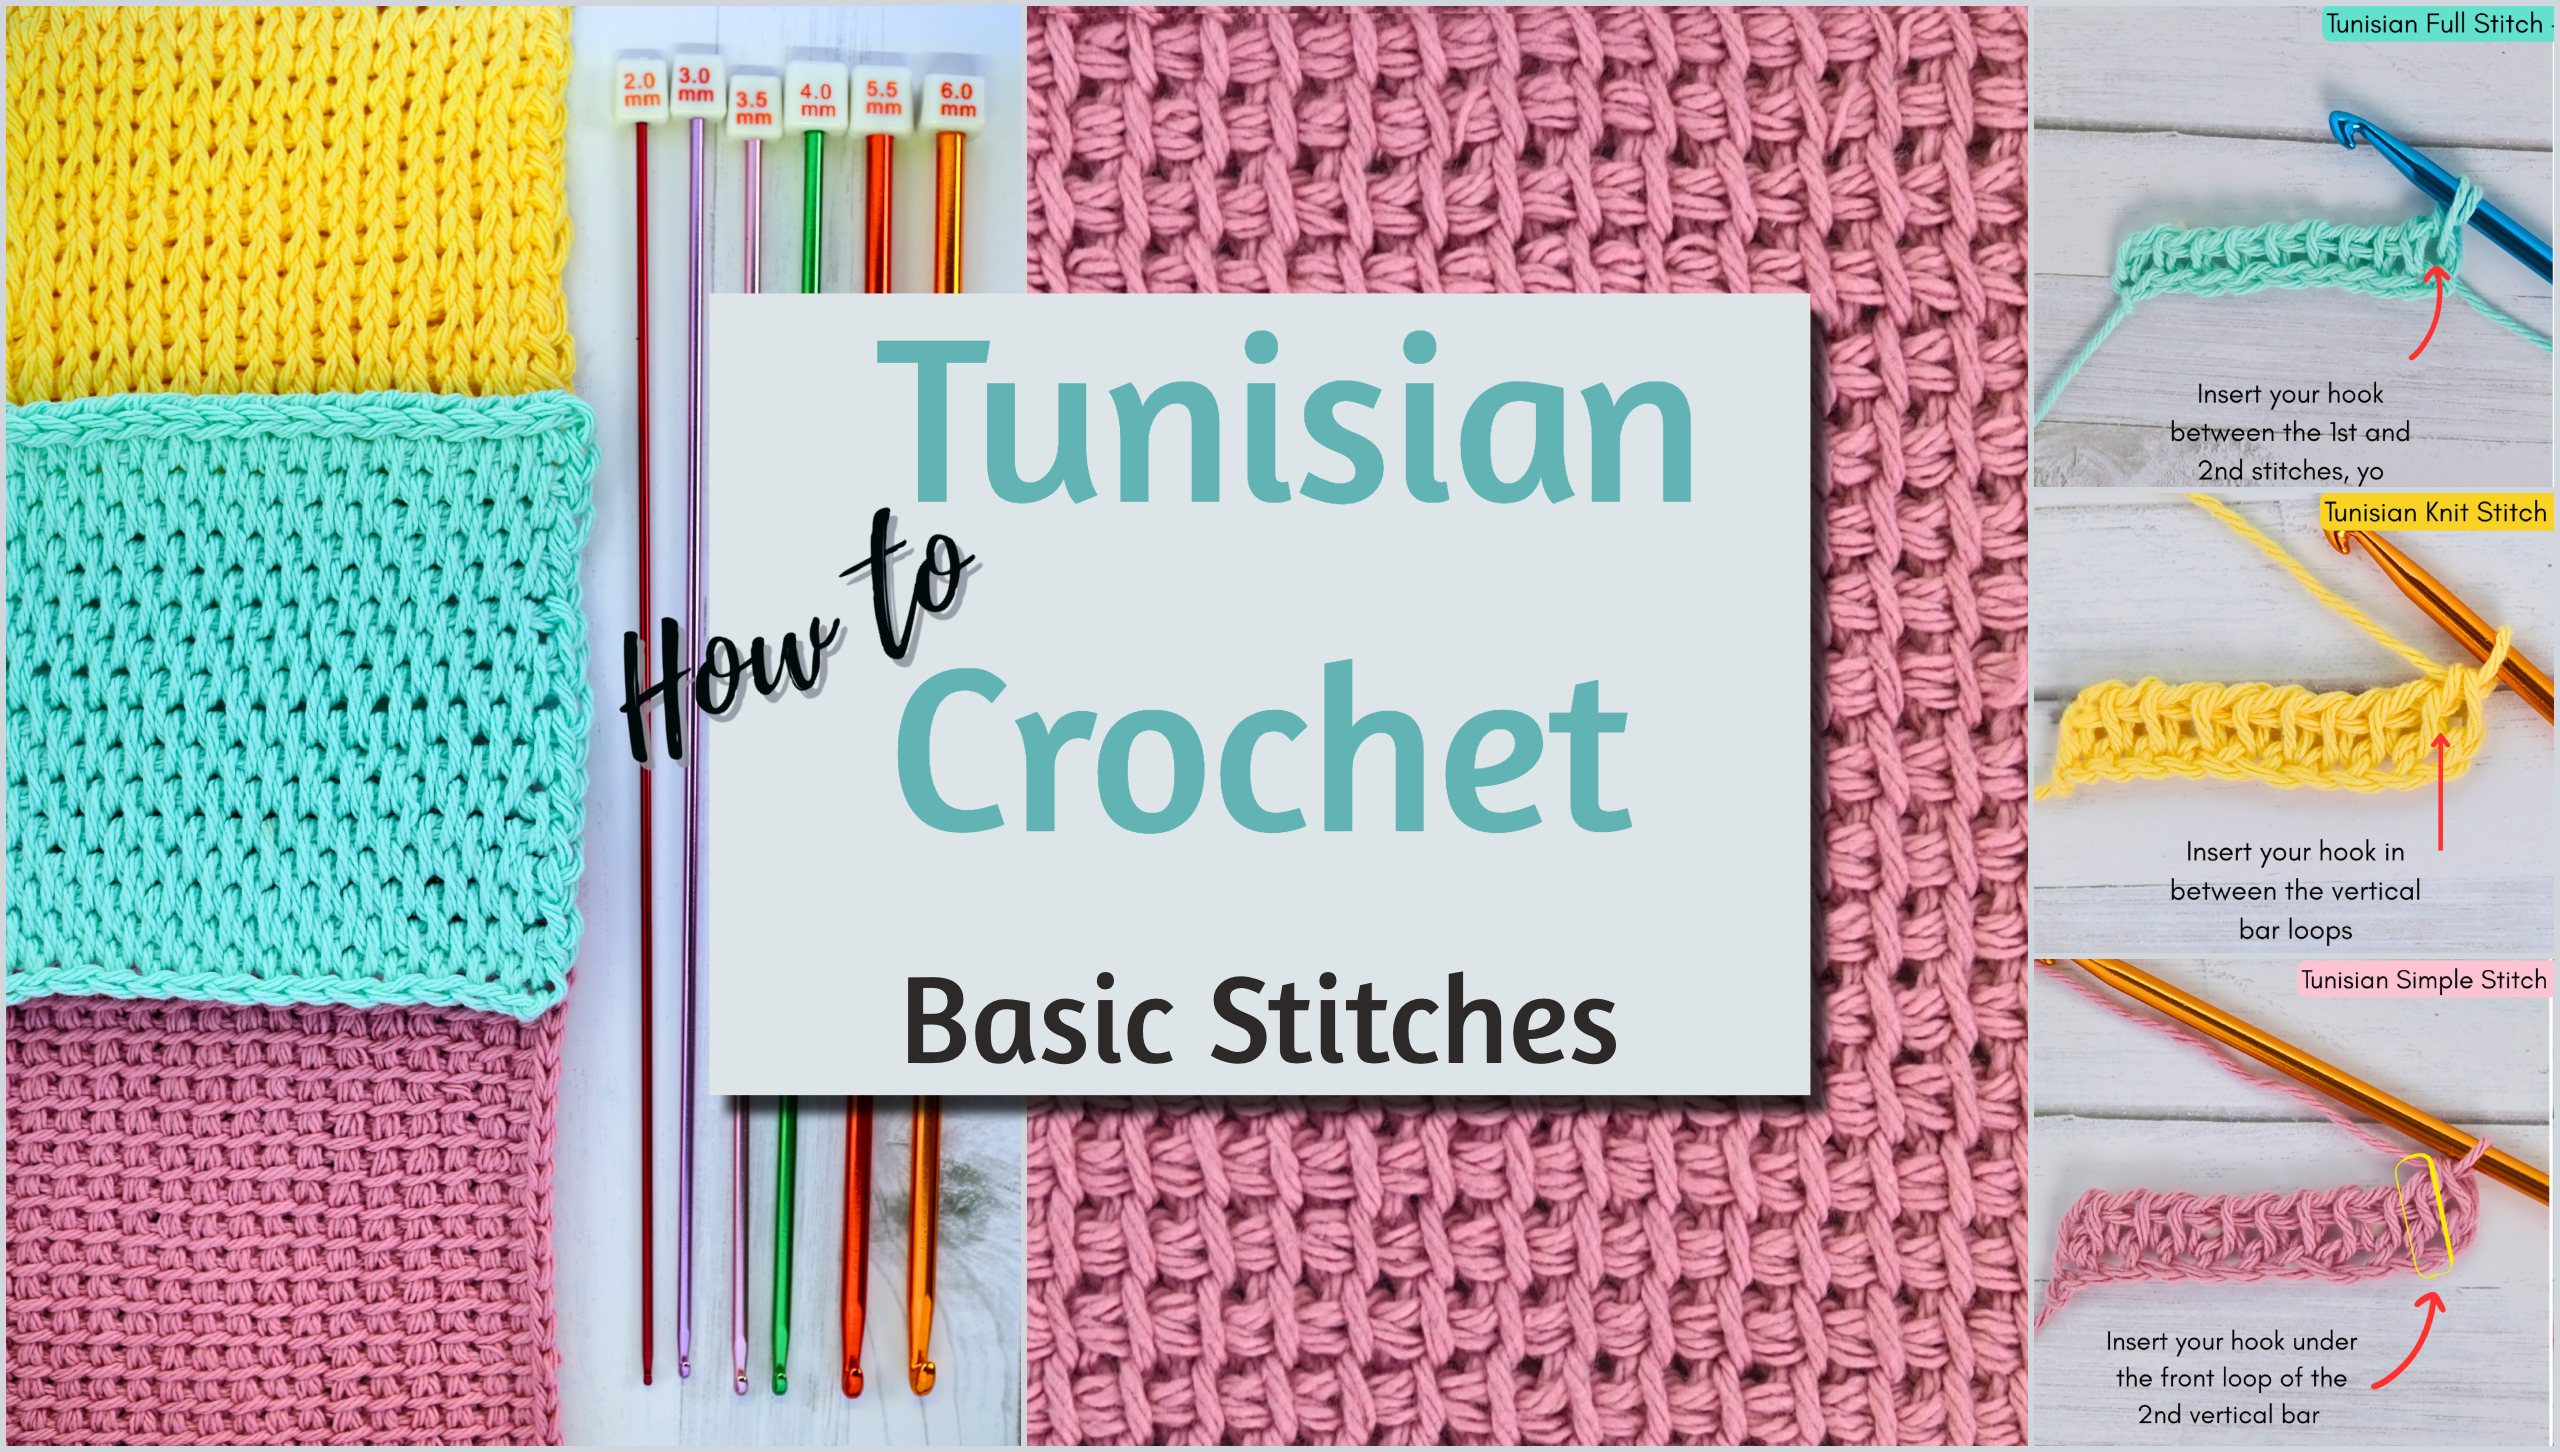
Tunisian crochet is a beautiful blend of knitting and traditional crochet, often called the “Afghan stitch” technique. With its unique look and versatile textures, it opens up a whole new world of creative possibilities for crocheters. Learning the basic Tunisian stitches is the perfect starting point to explore it.
I will focus on the most popular Tunisian crochet stitches – how they look, what you can use them for, and how to make them.
The Basic Stitch: Tunisian Simple Stitch (TSS)
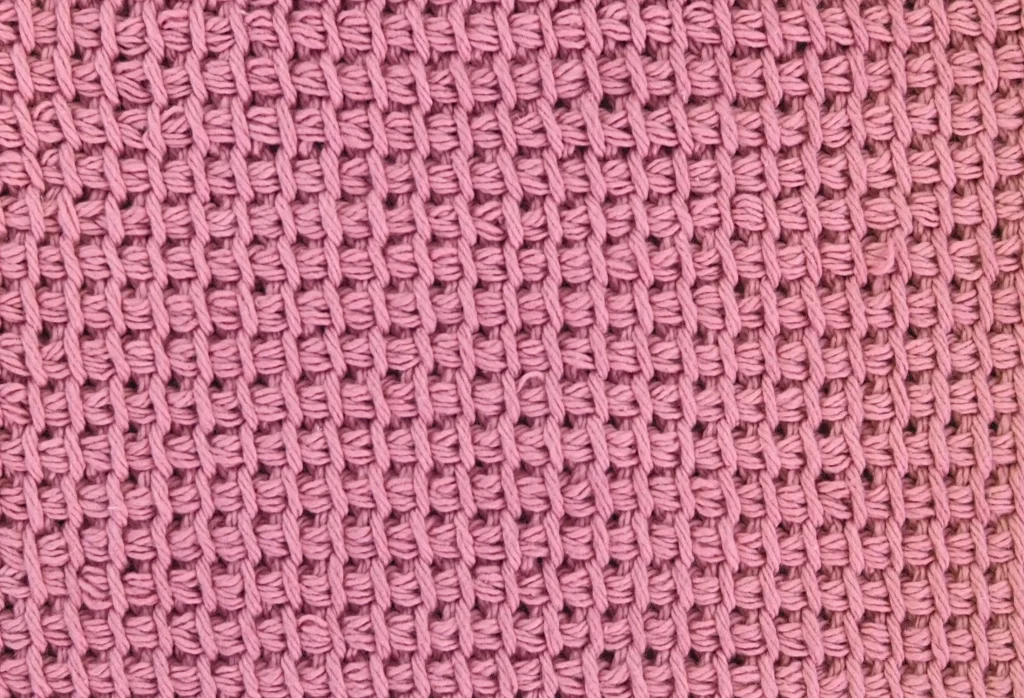
The Tunisian Simple Stitch features characteristic rows of vertical bars that creates a grid-like look. Its dense, warm texture can be used for winter wearables (eg. scarfs) or to isolate items from a surface (potholders, rugs). Its nice, regular look and sturdy texture works perfectly for bags and totes. It’s also perfect to give softness to a modern contemporary interior in the form of pillows, placemats, runners or sofa covers.
Level of difficulty:
Easy, beginner friendly. Frankly speaking, I found this stitch easier and more straightforward than basic crochet stitches, as it is harder skip a stitch and there is no chaining turns to remember. As all the loops are gathered on the hook, and it also beautifully supports any tension imperfections.
How to make it:
Tunisian Simple Stitch is made by inserting the hook under the front vertical bar of the stitch, yarning over, and pulling up a loop when working a forward pass. Here is the key step of the TSS:
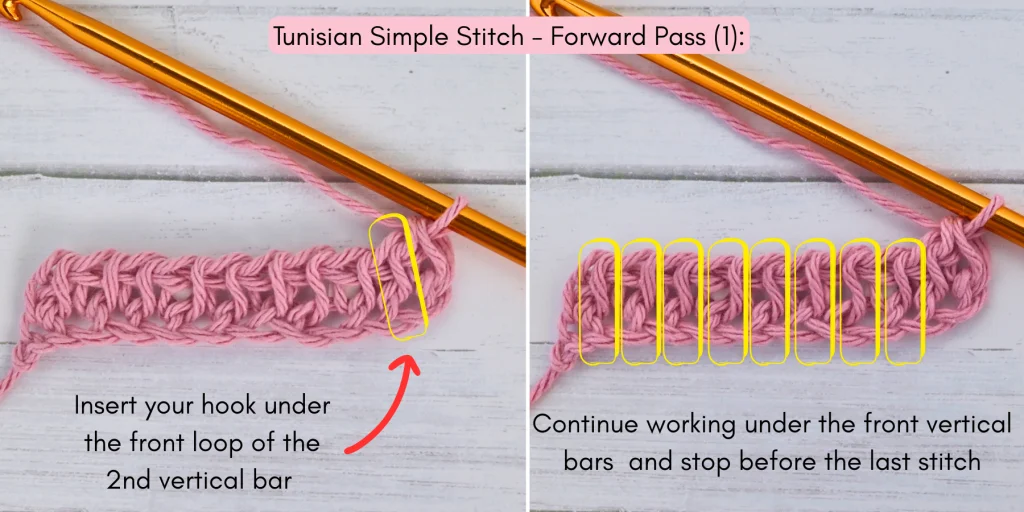
I explained it in detail, step by step, in the Tunisian Simple Stitch tutorial.
Tunisian Knit Stitch (TKS)
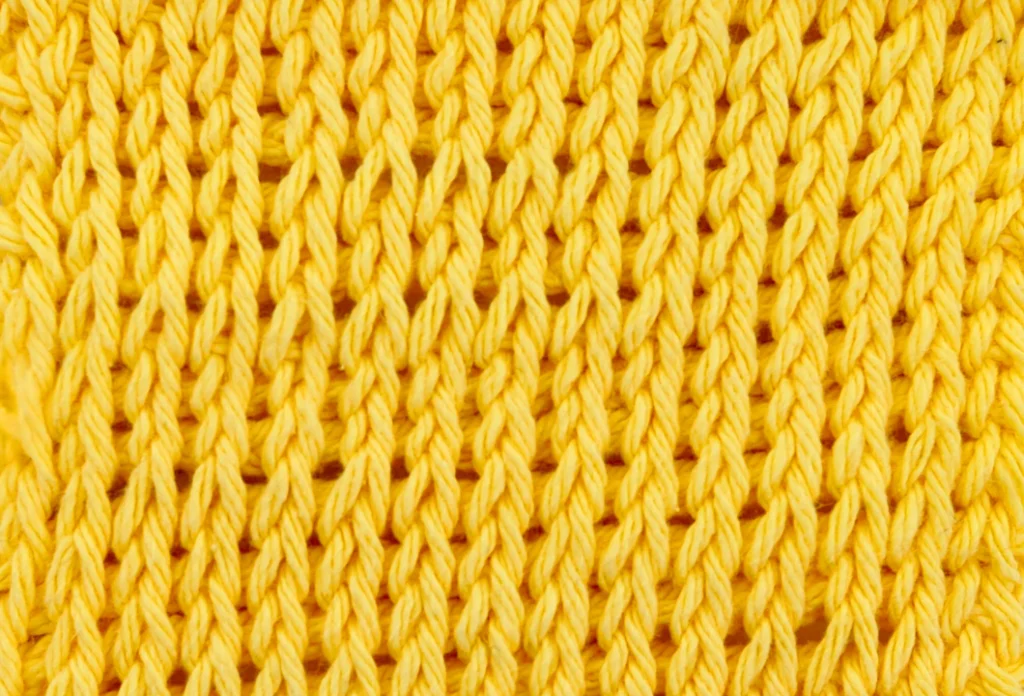
The Tunisian Knit Stitch features characteristic v-s rows that look like knitting. Also, the reverse side of the stitch is quite unique and forms highly differentiated horizontal ridges running across the fabric. As opposed to knitting, Tunisian knit fabric is denser, so it has less stretch. Although its dense (denser than Tunisian simple stitch), it roll up nicely due to ridges on the back, and it feel more elastic.
You can use Tunisian Knit Stitch to make winter scarves, sweaters and blankets. Its elasticity combined with its dense texture makes it exceptionably good for winter socks, neck warmers, etc.
Level of difficulty:
Still would consider it as an easy stitch, although it not so straightforward than Tunisian simple stitch and it’s needs more attention at first.
How to make it:
How to do it: The Tunisian Knit Stitch (TKS) is made by inserting the hook through the center of the stitch between the front and back vertical bars, yarning over, pulling up a loop across the row, when working a forward pass. The key step of the TKS looks like this:

I covered it in detail in the Tunisian Knit Stitch tutorial.
Tunisian Full Stitch (TFS)
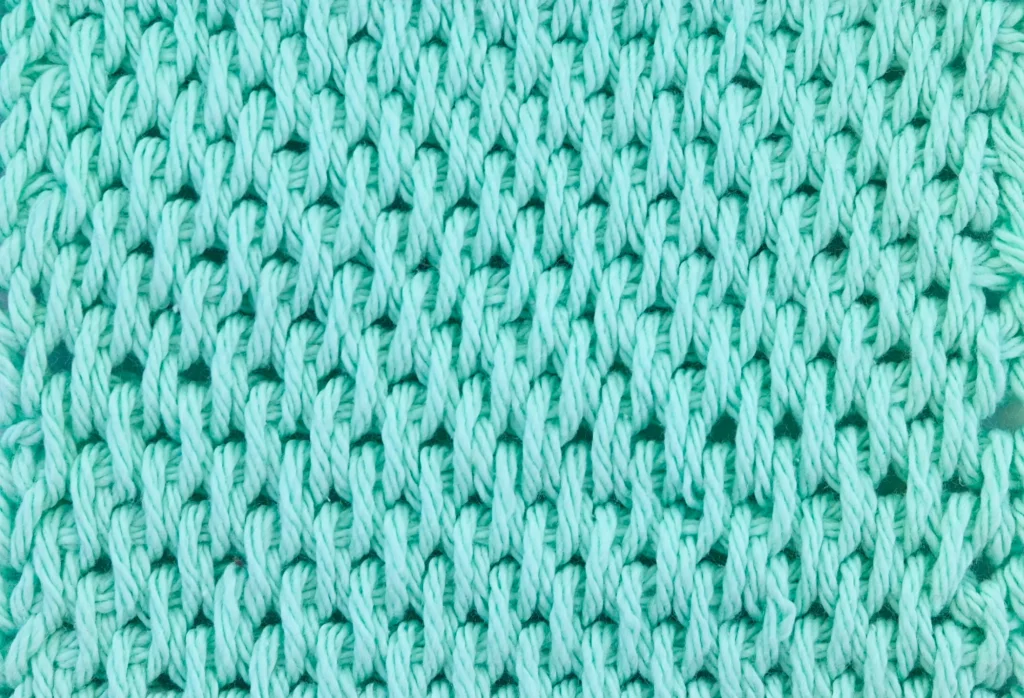
The Tunisian Full Stitch (TFS) is a popular variation in Tunisian crochet that produces a beautiful and dense fabric. With the stitches made by inserting the hook between the vertical bars, we get nice pattern of staggered vertical bars which interlock. It is one of my favorite Tunisian crochet stitches.
Tunisian Full Stitch is great for dishcloths or washcloths (sturdy, good for scrubbing), blankets and afghans (especially when warmth is the goal), scarves and cowls (nice cozy texture, not too airy), cushion covers or home décor (holds shape well) as well as bags and pouches (dense fabric makes them durable).
Level of difficulty:
Easy. I found it easier than the Tunisian Knit Stitch, although alternating skipping a stitch at the beginning or the end of a row while making forward passes can be a bit confusing at first.
How to make it:
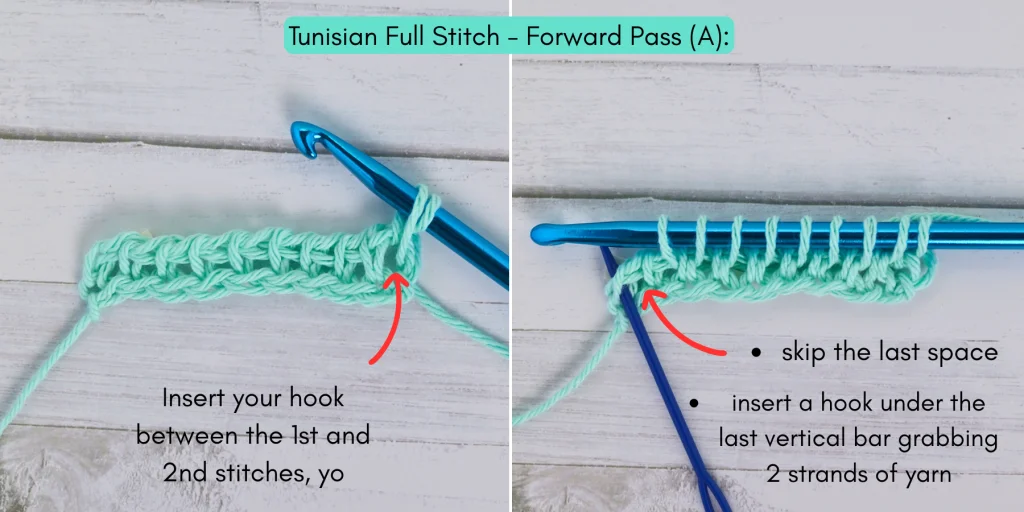
The Tunisian Full Stitch (TFS) is made by inserting the hook between the stitches (under the horizontal space between vertical bars), yarning over, pulling up a loop across the row, skipping the last space and then working a return pass. In the next forward pass we have to skip the 1st space instead of the last. The first forward pass of the TFS is shown below:
As this stitch can be a bit tricky, I suggest you to go follow the full tutorial:
Tunisian Purl Stitch (TPS)
Creates a knit-like purl bump on the fabric, similar to purl stitches in knitting.
How to make it:
The Tunisian Purl Stitch (TPS) is made by bringing the yarn to the front, inserting the hook from right to left under the front vertical bar, yarning over from front to back, pulling up a loop, and then completing a return pass.
Tunisian Purl Stitch works well for textured patterns and stitch combinations (like basketweave, cables, or seed stitch). Also makes stretchy bands for edges, cuffs, and hems when alternated with Tunisnan Knit Stitch.
Tunisian Reverse Stitch (TRS)
Worked from back to front, giving a bumpy, pebbled texture.
How to make it:
The Tunisian Reverse Stitch (TRS) is made by inserting the hook from right to left under the back vertical bar of the stitch, yarning over during front passing.
Tunisian Reverse Stitch creates a purl-like, bumpy surface on the front, giving projects a cozy and textured look. When alternated with Tunisian Simple Stitch, it helps limit curling.
Great for projects such as scarves, blankets, dishcloths, and garments where a softer, less flat texture is desired. Often used for contrasting stitch patterns, ribbing, or textured designs like basketweave.
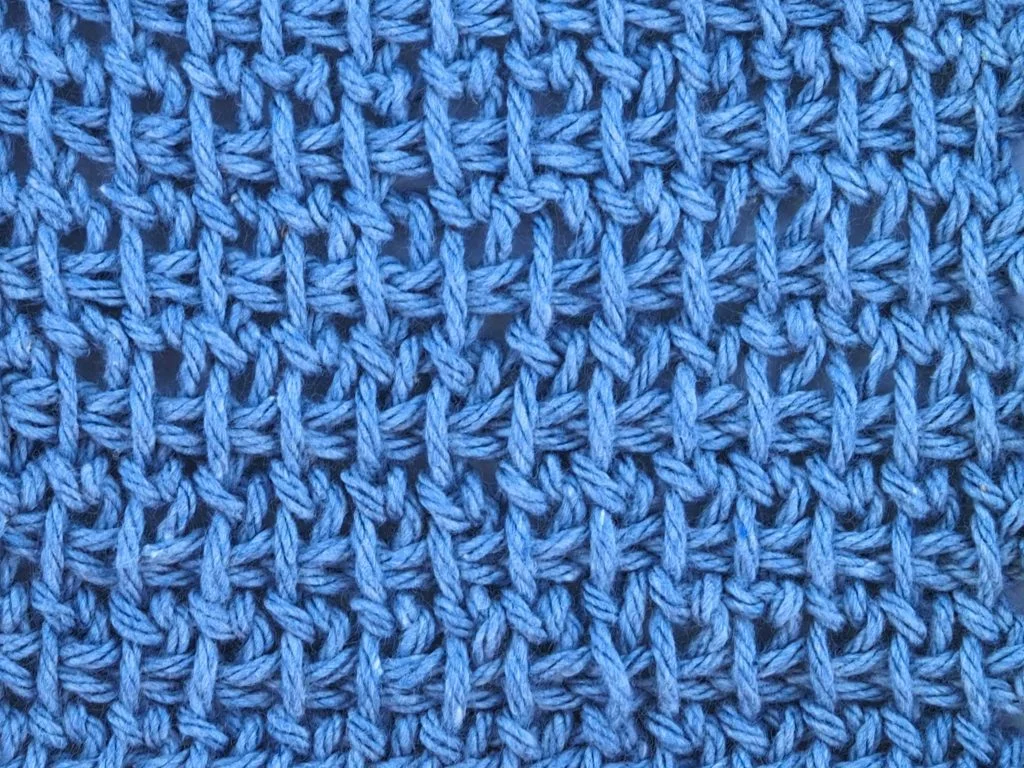
Extended Tunisian Stitches
The Extended Tunisian Stitches are a variation of a regular Tunisian Stitch but with an added chain-like extension. They are made just like their regular versions, but after pulling up a loop you add one extra chain (YO, pull through 1 loop) before moving to the next stitch. This simple step makes the fabric taller, looser, and drapier while reducing curl.
This method can be applied to almost all Tunisian stitches. Most common are the Extended Tunisian Simple Stitch (EXTSS,) Extended Tunisian Knit Stitch (ETKS), Extended Tunisian Purl Stitch (EXTPS), Extended Tunisian Reverse Stitch (EXTRS), Extended Tunisian Full Stitch (EXTFS), or even extended versions of crossed/twisted stitches.
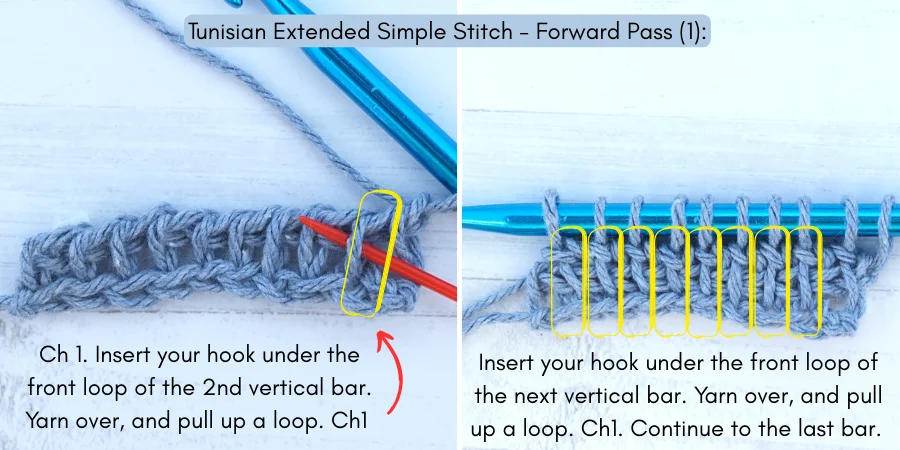
The best stitch to show how to extend any Tunisian stitch is Extended Tunisian Simple Stitch (EXTSS):
Level of difficulty:
Equally easy as the stitch you are extending.
How to make it:
Extended Tunisian Simple Stitch is made by adding one extra chain after pulling up a loop before moving to the next stitch. Here is the key step of the EXTSS:
You may use extended stitches alone, or combine them with their regular version or other stitches.