
In this article:

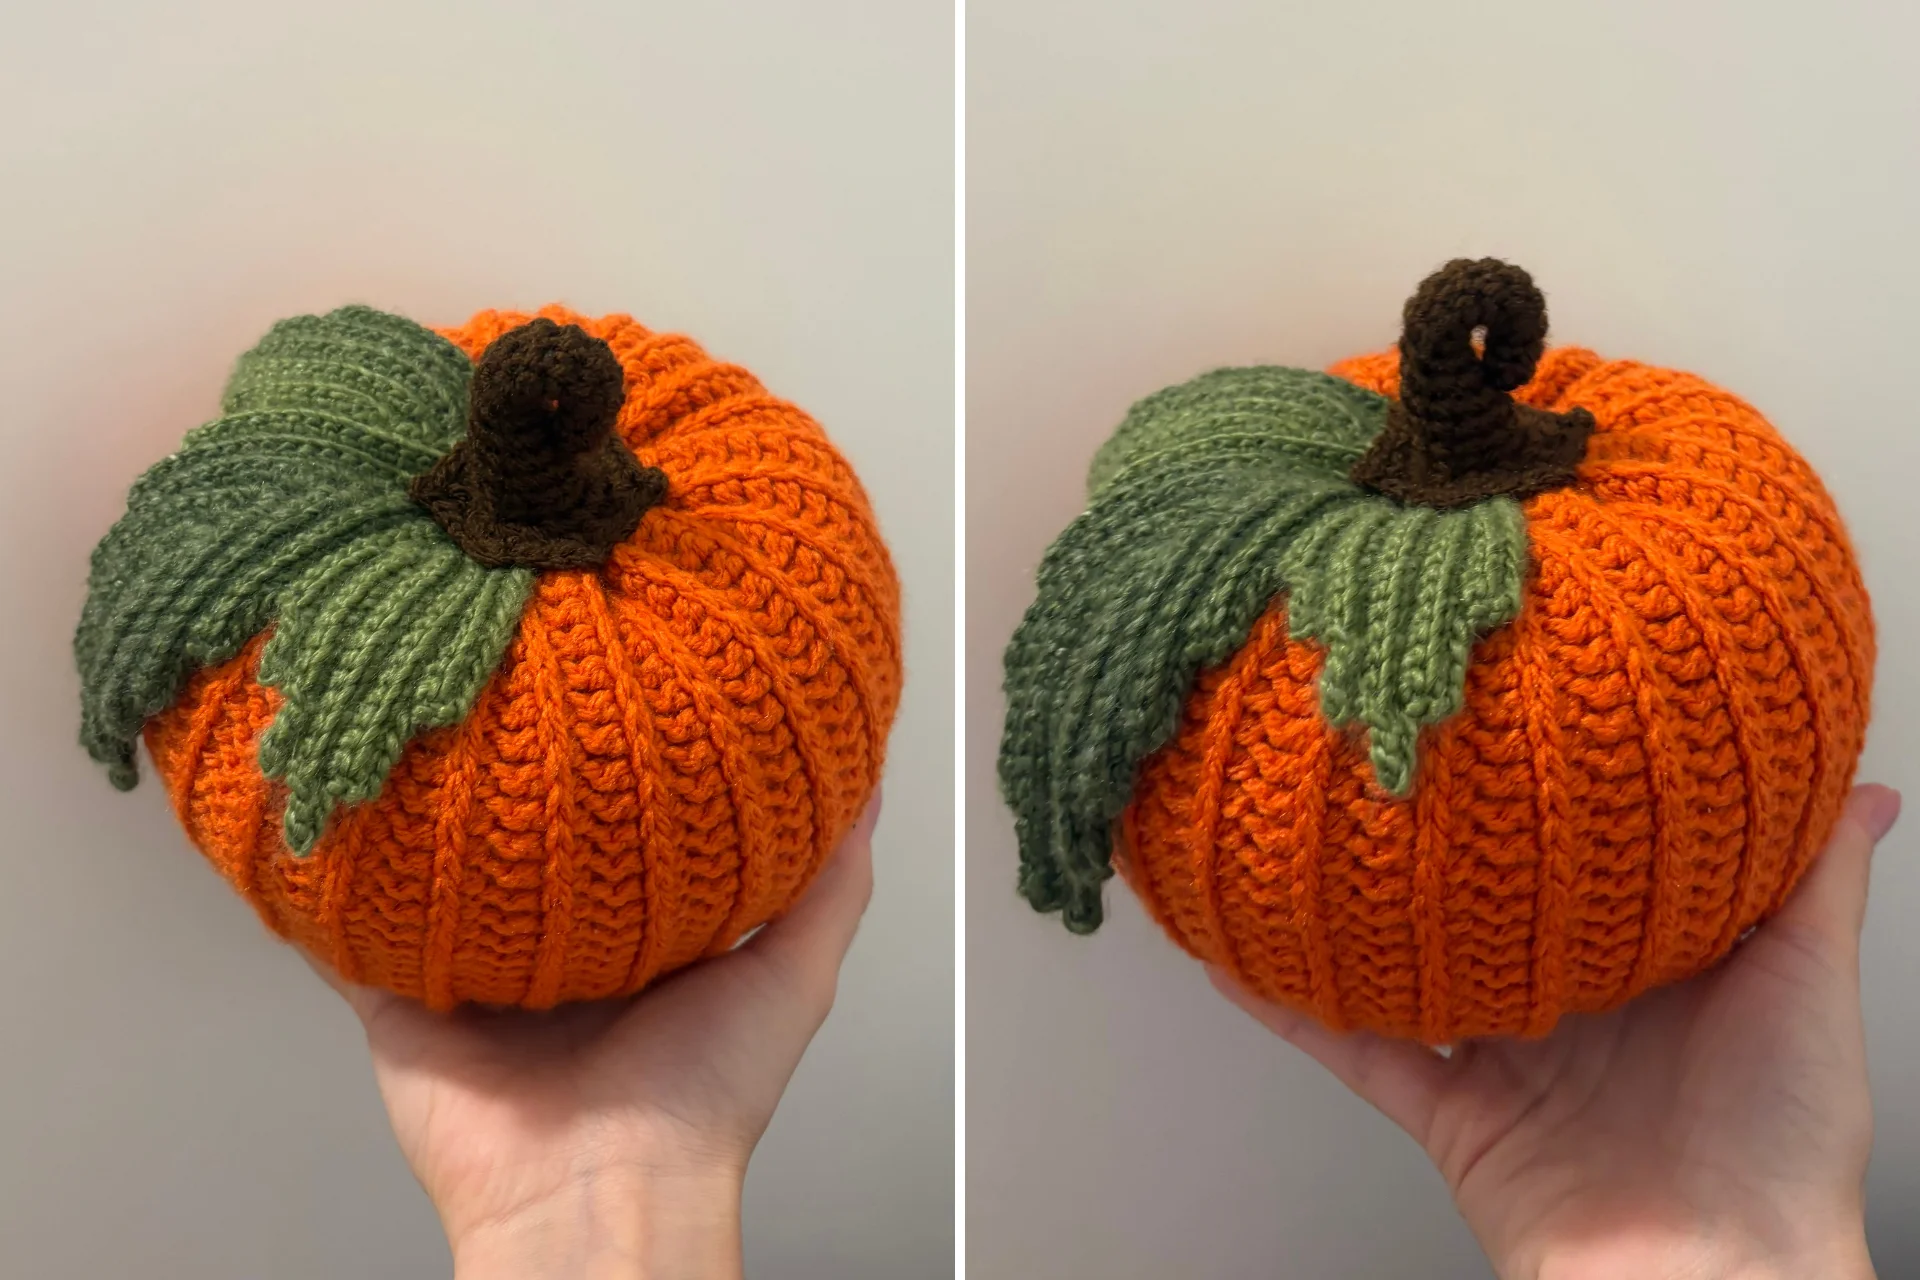
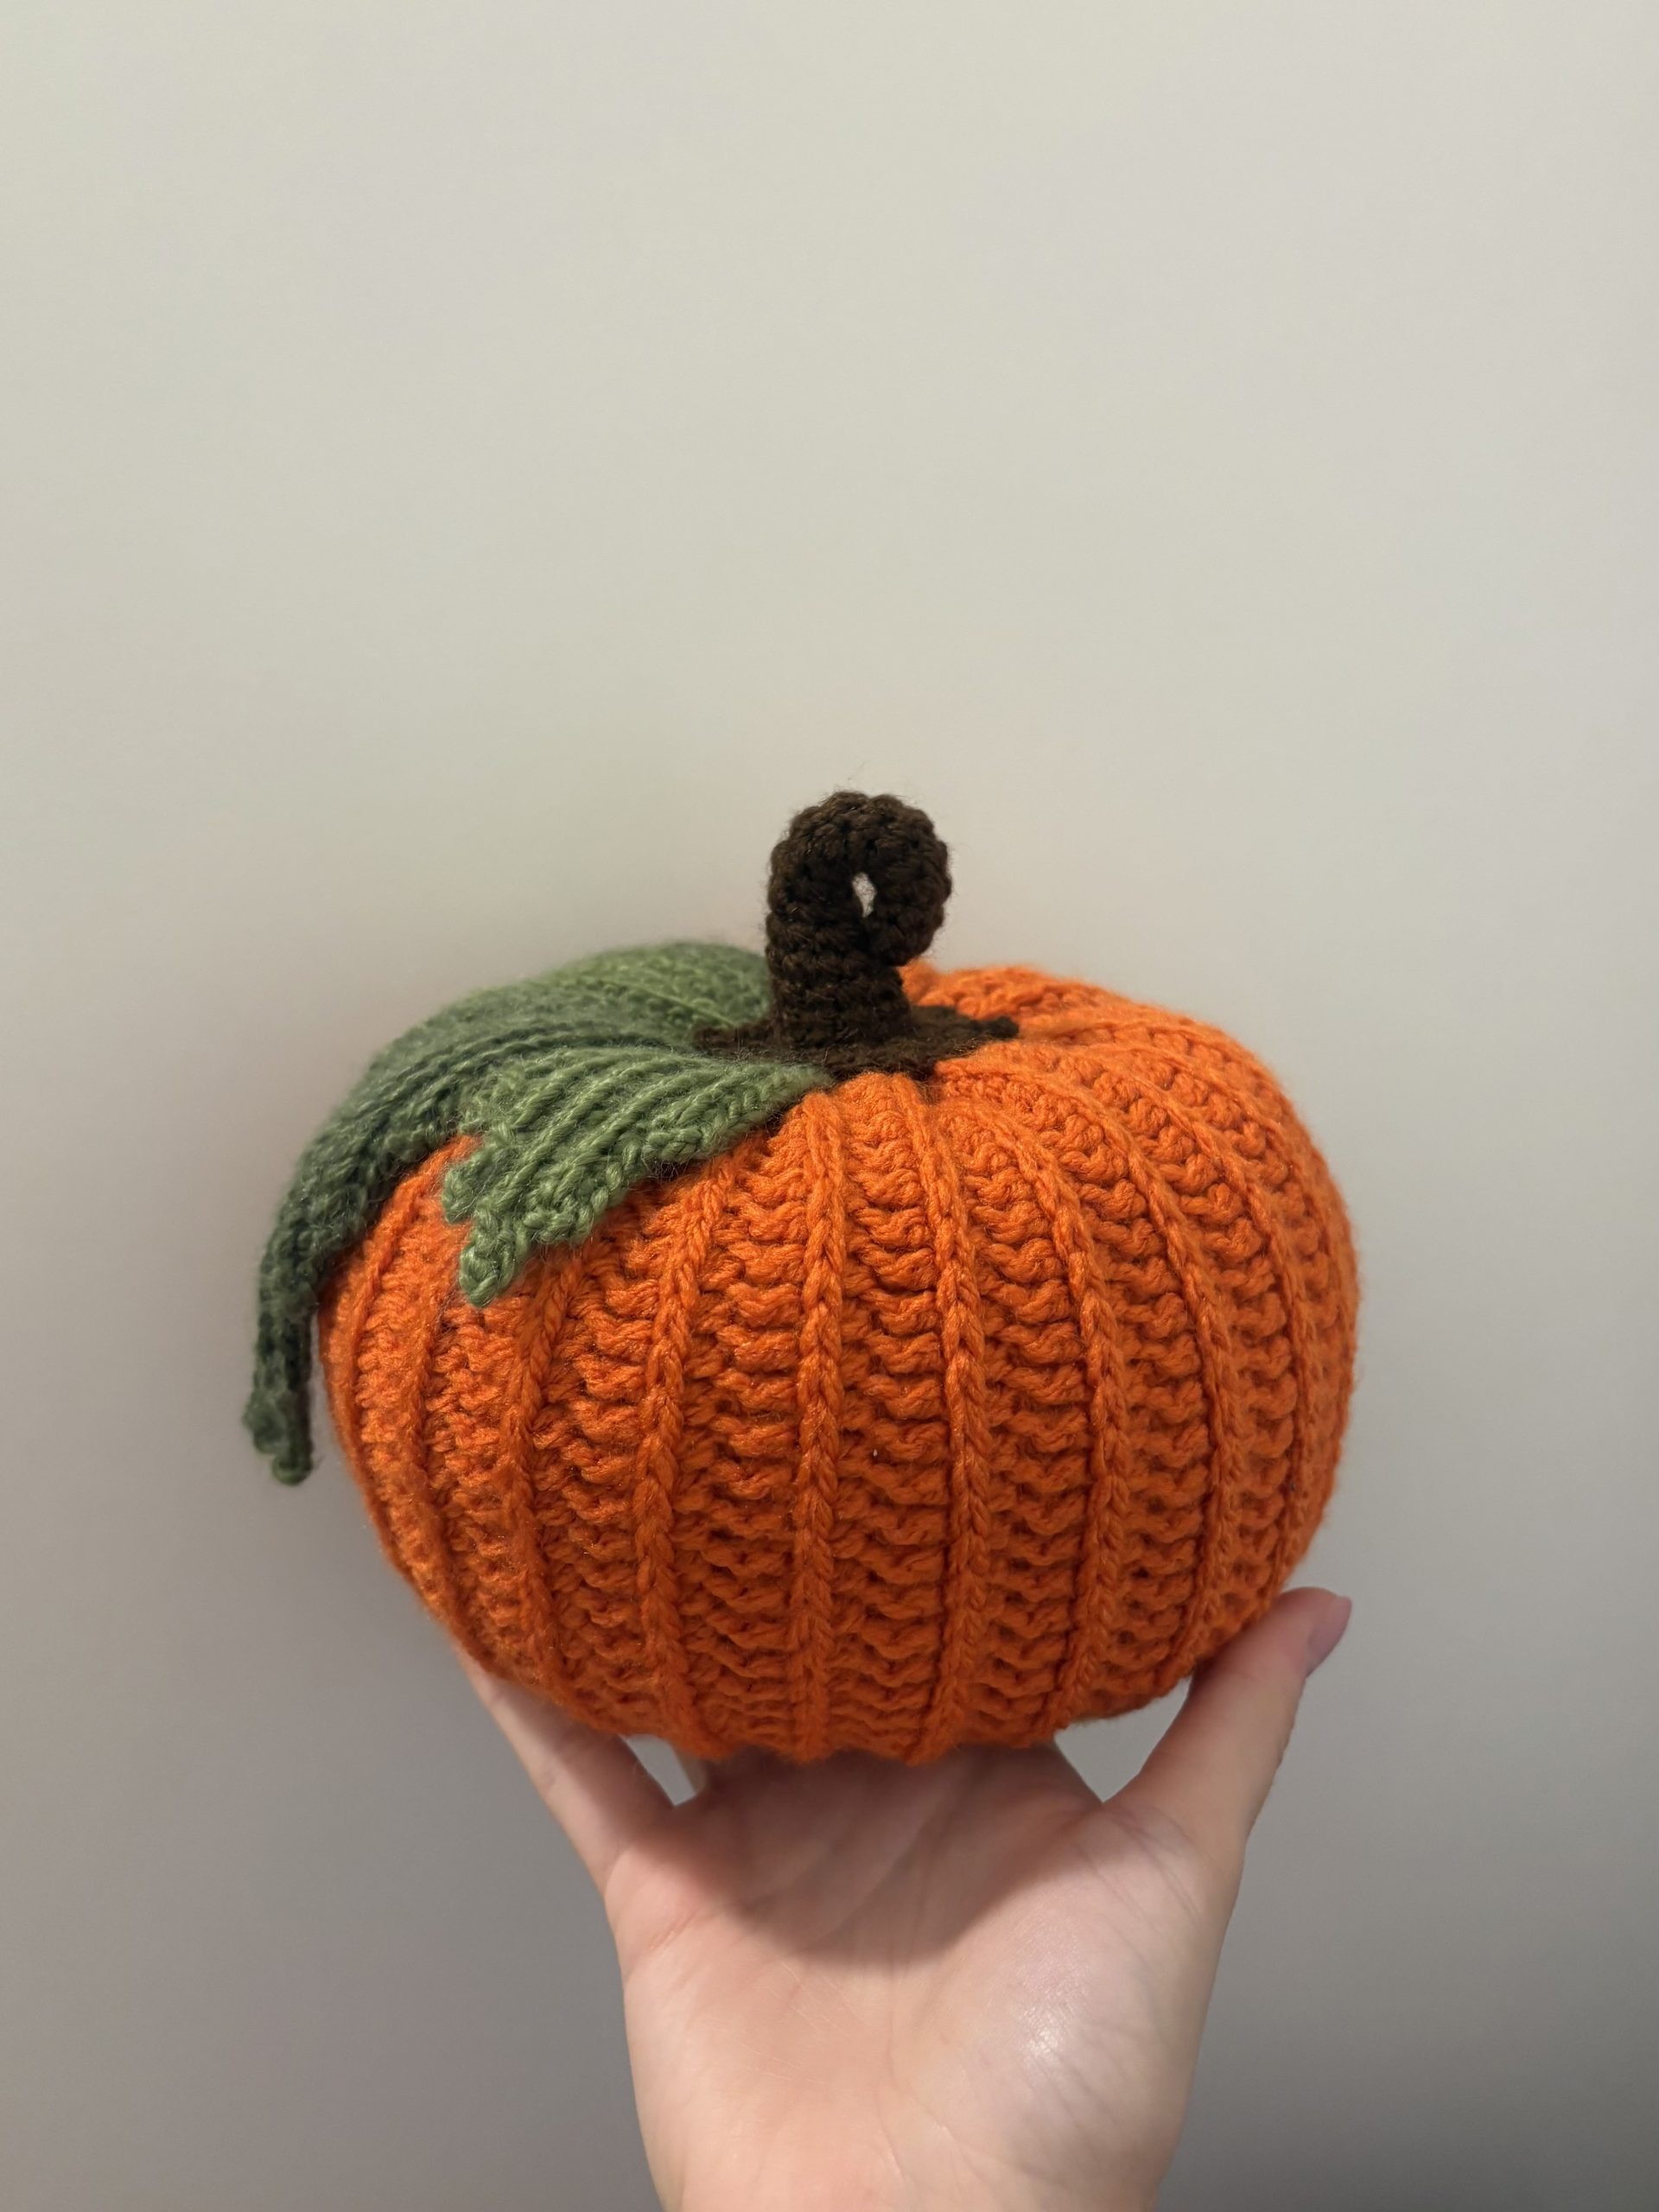
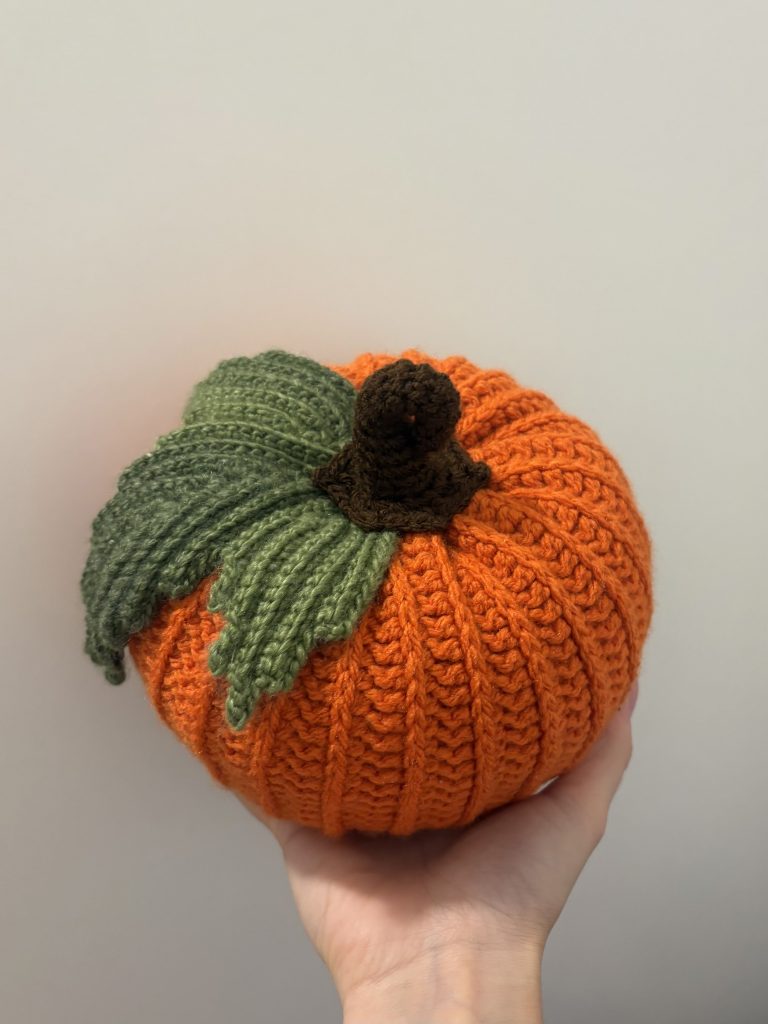
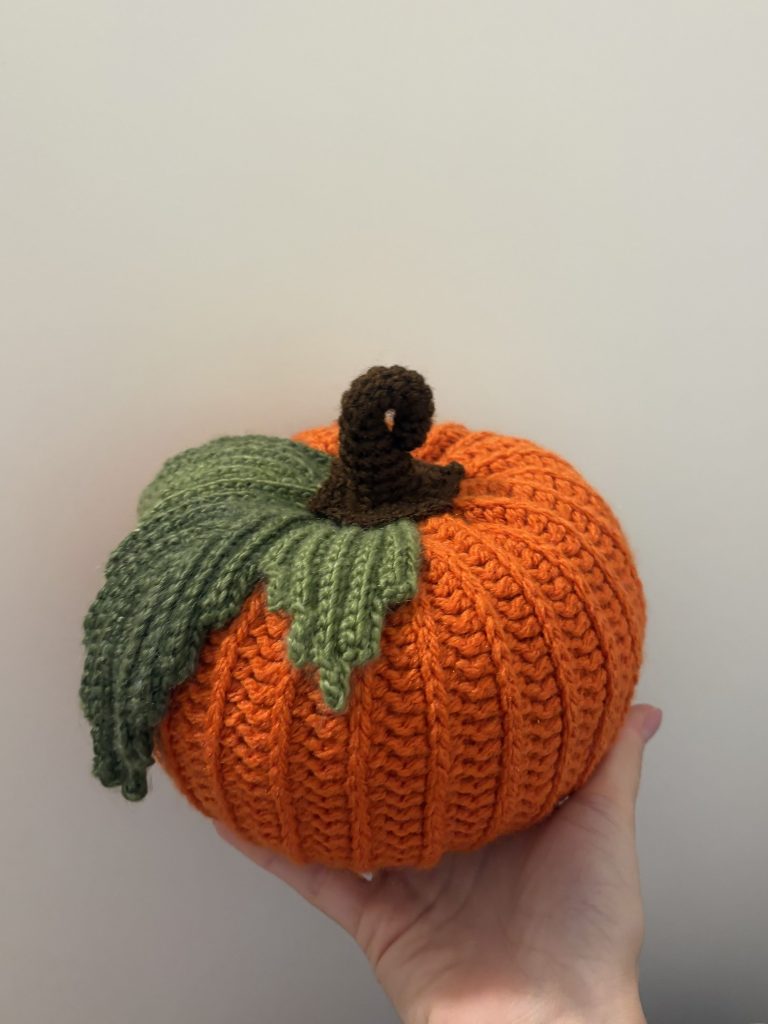
A crochet pumpkin is a classic fall project that you can make in different sizes and colors. It’s an easy way to add seasonal accents to your home, and the pattern works up quickly for a satisfying finish. Don’t worry if you are a beginner as this pumpkin pattern includes clear step-by-step photos and assembly instructions to guide you through.
Whether you are decorating for Halloween, Thanksgiving, or simply want to add an autumnal, cozy touch to your home, this pattern is perfect for that. An orange pumpkin is obviously a classic, but other earthy tones such as beige, brown, tan, khaki or moss are trendy and equally suitable. If you looking for something more playful, then go for pastels or bright and bold colors.
This crochet pumpkin is 15 cm/5.9″ but you can easily adjust the size by changing the yarn weight and hook size. Try chunky yarn for big and squishy pumpkin pillow or centerpiece, or light yarn for cute mini pumpkins that can become a table decor or a garland. Pumpkins like these also make wonderful handmade gift or market stalls bestsellers.
In this post, you will find a free pattern for the crochet pumpkin. Don’t forget to also check our Complete Guide to Free Crochet Fall Patterns.
The easily printable Crochet Pumpkin PDF version is available in our shop:
This free crochet pattern was designed exclusively for Your Crochet by Weronika Miechowicz.
About the Author
Weronika has a real passion for crocheting and enjoys creating patterns that reflect her love for handmade, seasonal projects. She shares her designs to inspire others to pick up their hooks and make something fun for themselves, their homes or gifts for their loved ones.
Ravelry | Etsy | YourCrochet Shop
Pattern Notes
This is a beginner-friendly crochet pattern, and I’m using US terms.
Materials and Tools
- Fine weight yarn – Lea: green
- Fine weight yarn: brown
- Medium weight yarn: orange
- crochet hook: 3 mm, 5 mm
- stitch markers
- tapestry needle
- scissors
- stuffing
Measurements
- HEIGHT: 15 cm / 5.9” with stem, 12 cm / 4.72” without the stem
- WIDTH: 15 cm / 5.9”
Stitches and Abbreviations
- rnd – round
- st(s) – stitch(es)
- sc – single crochet
- hdc – half double crochet
- dc – double crochet
- ch – chain(s)
- slst – slip stitch
- inc – increase
- MR – magic ring
- TLO – third loop only
- BLO – back loop only
Free Crochet Pumpkin Pattern
PUMPKIN PANEL
Using orange yarn and 5mm hook:
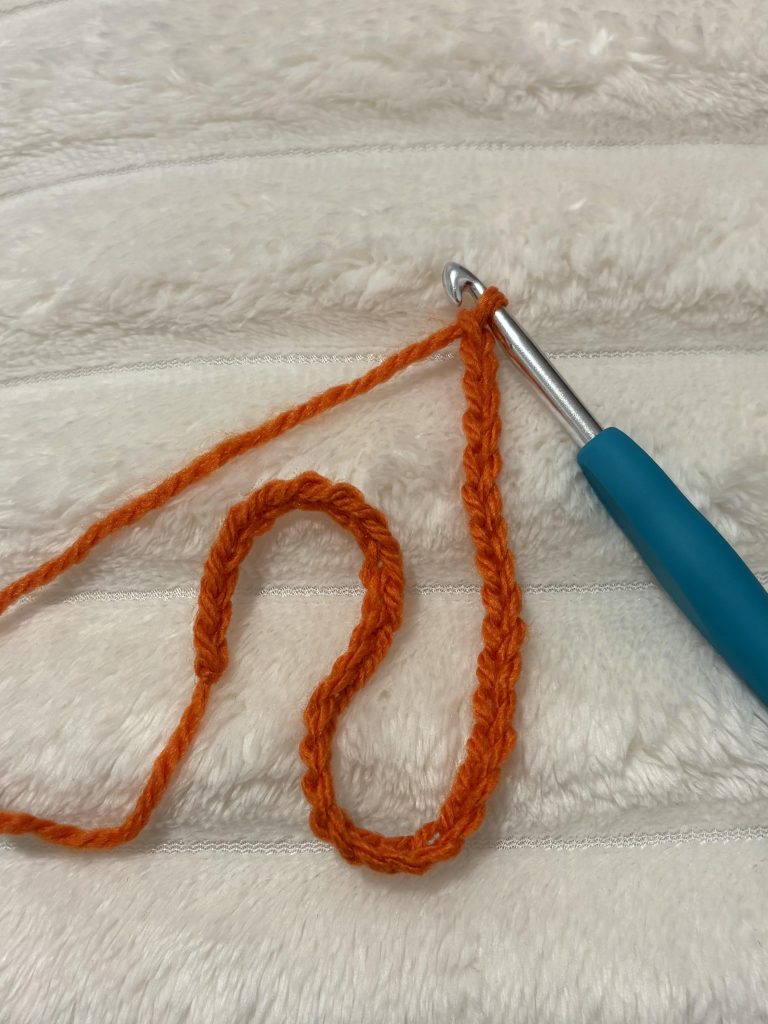
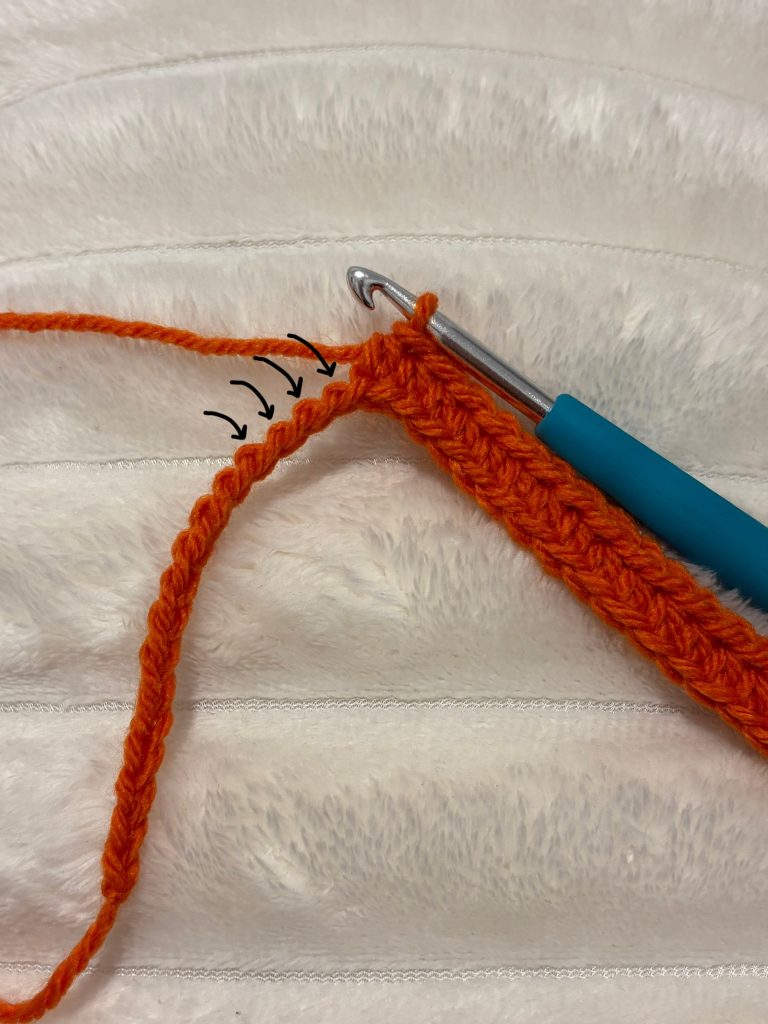
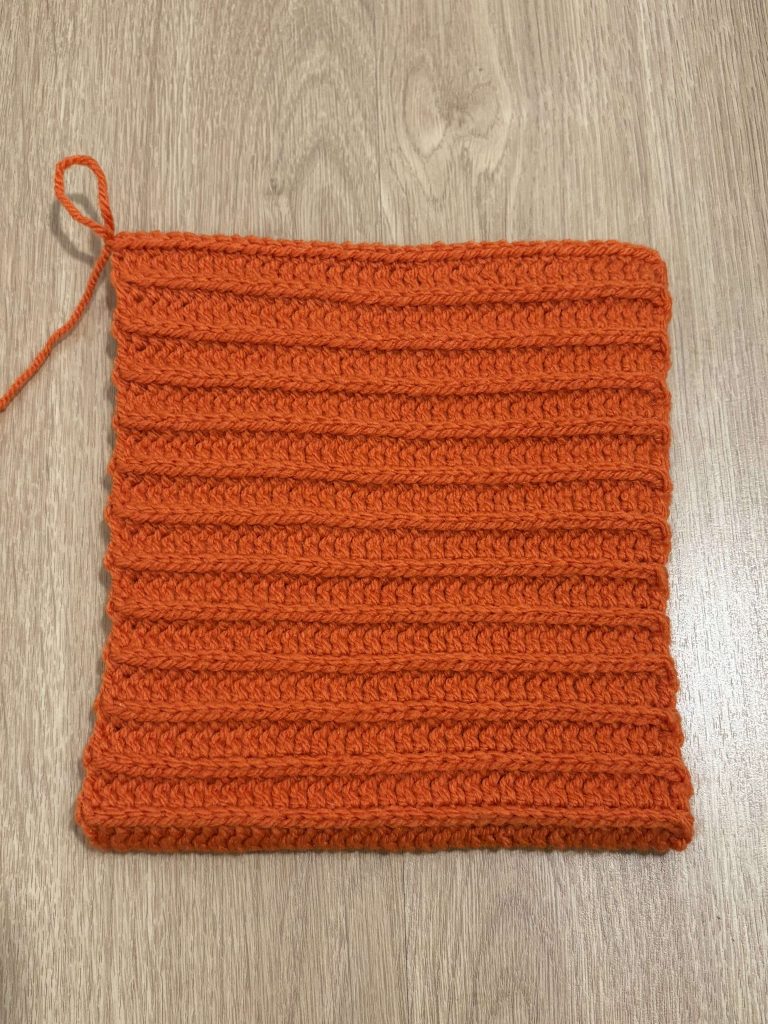
Slip knot, ch 36 (photo 1)
Row 1: Starting from the 2nd ch from the hook hdc 36 in the back bumps (photo 2), ch 2, turn (35)
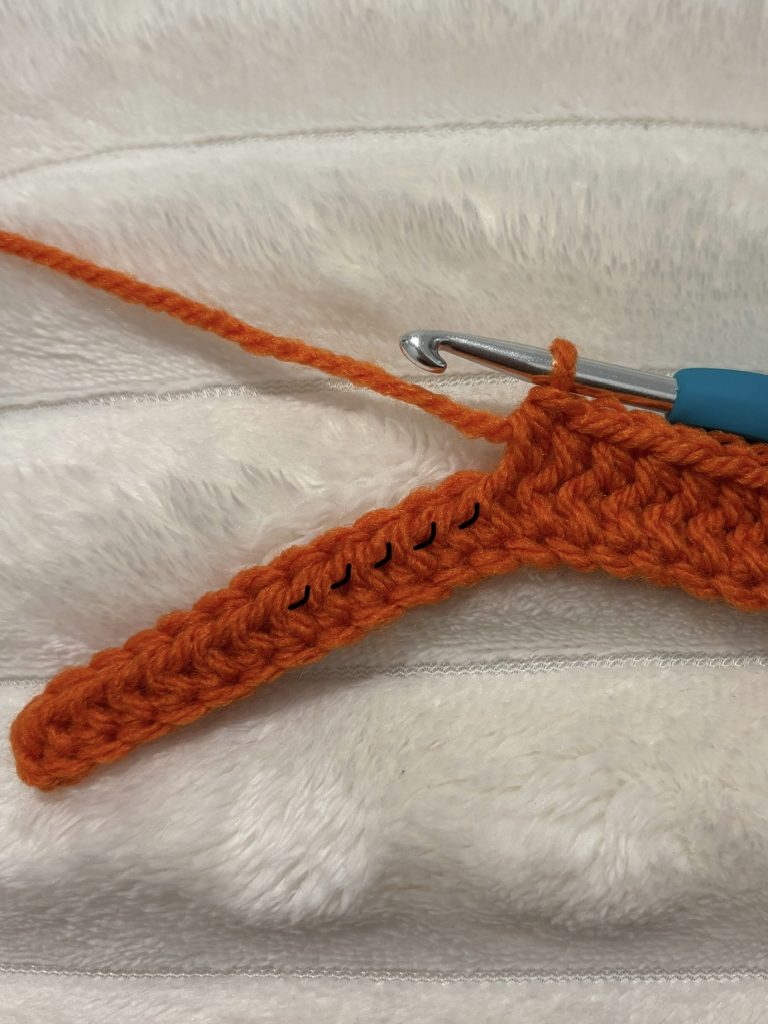
Row 2-50: hdc in TLO 35, ch 2, turn (35) (photo 3)
While finishing a row, DO NOT forget to crochet in the last st of each row (photo 4).
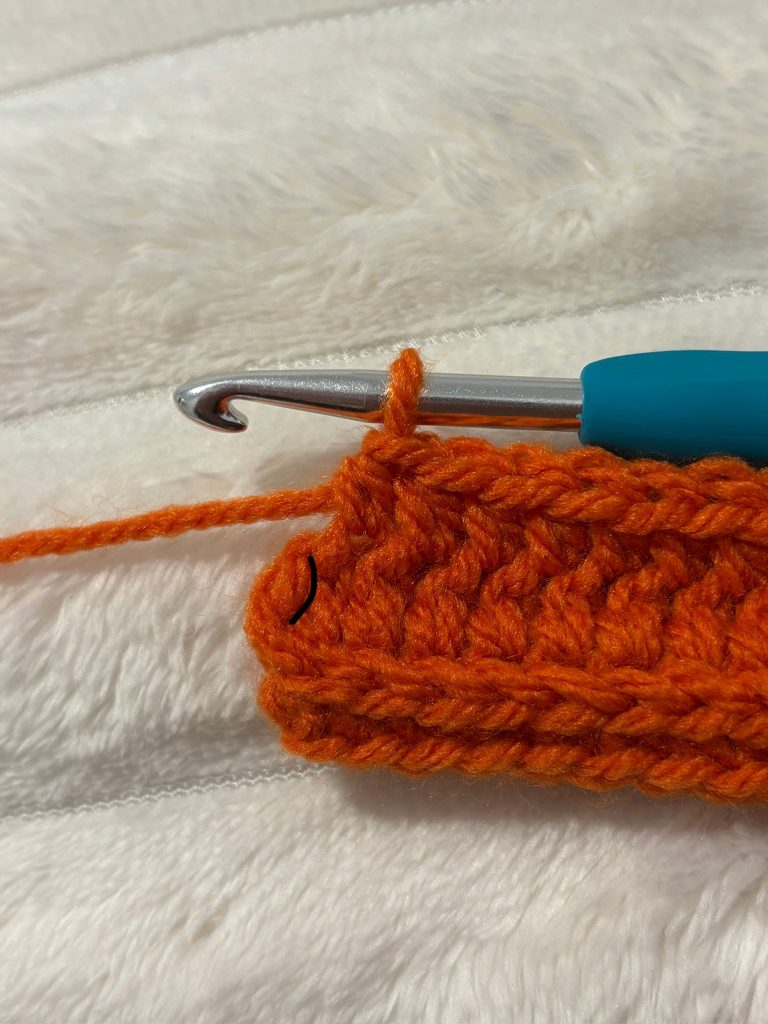
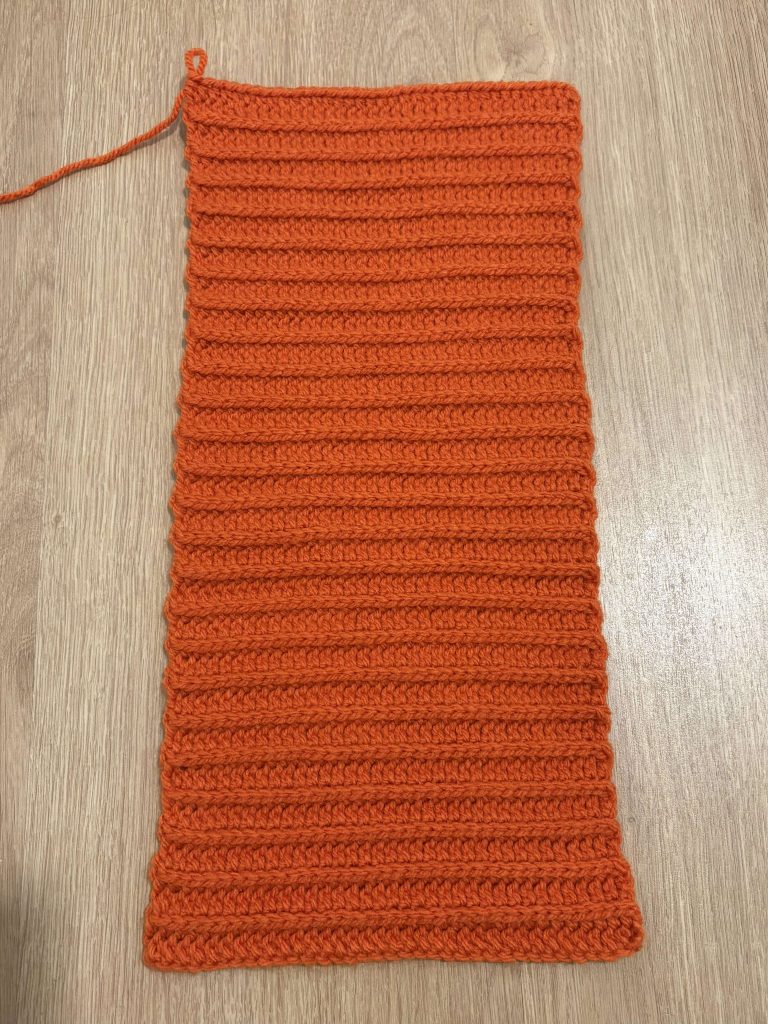
Fasten off, DO NOT cut off the yarn.
(photo 5)
STEM
Using brown yarn and 3mm hook:
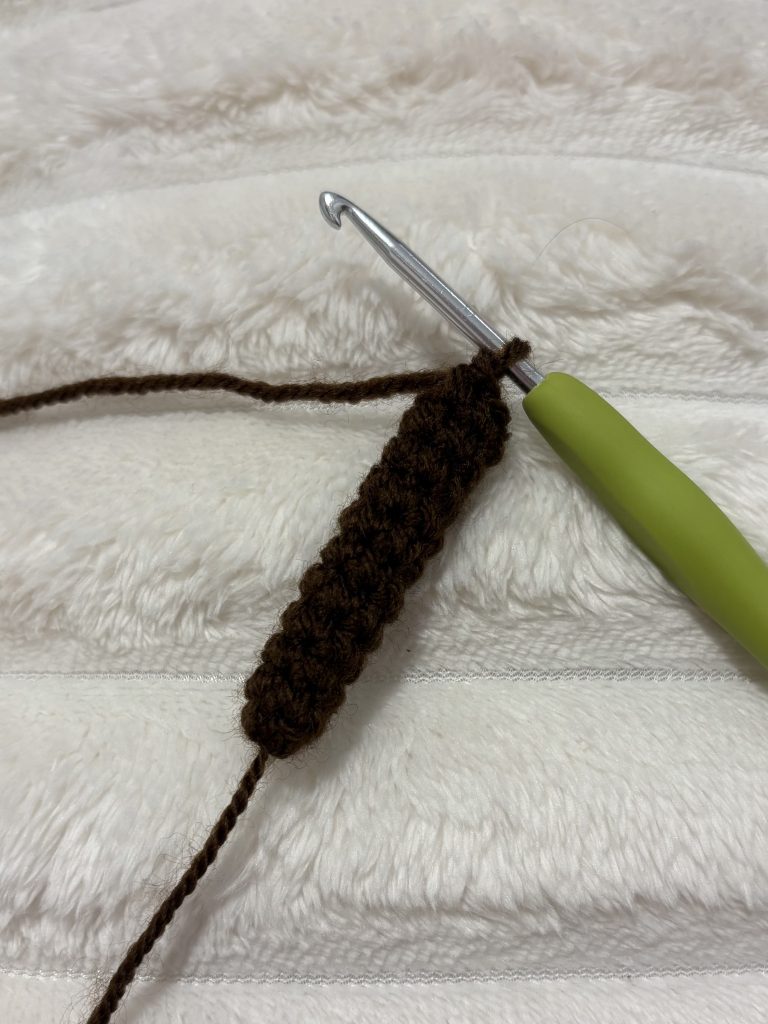
Rnd 1: 6 sc in MR (6) Leave the string you pulled MR with outside. We will need to use it later.
Rnd 2-11: sc 6 (6) (photo 6)
Rnd 12: (sc, inc) 3x (9)
Rnd 13-14: sc 9 (9)
Rnd 15: (sc 2, inc) 3x (12)
Rnd 16: sc 12 (12)
Rnd 17: scBLO 12 (12)
Rnd 18: inc 12 (24)
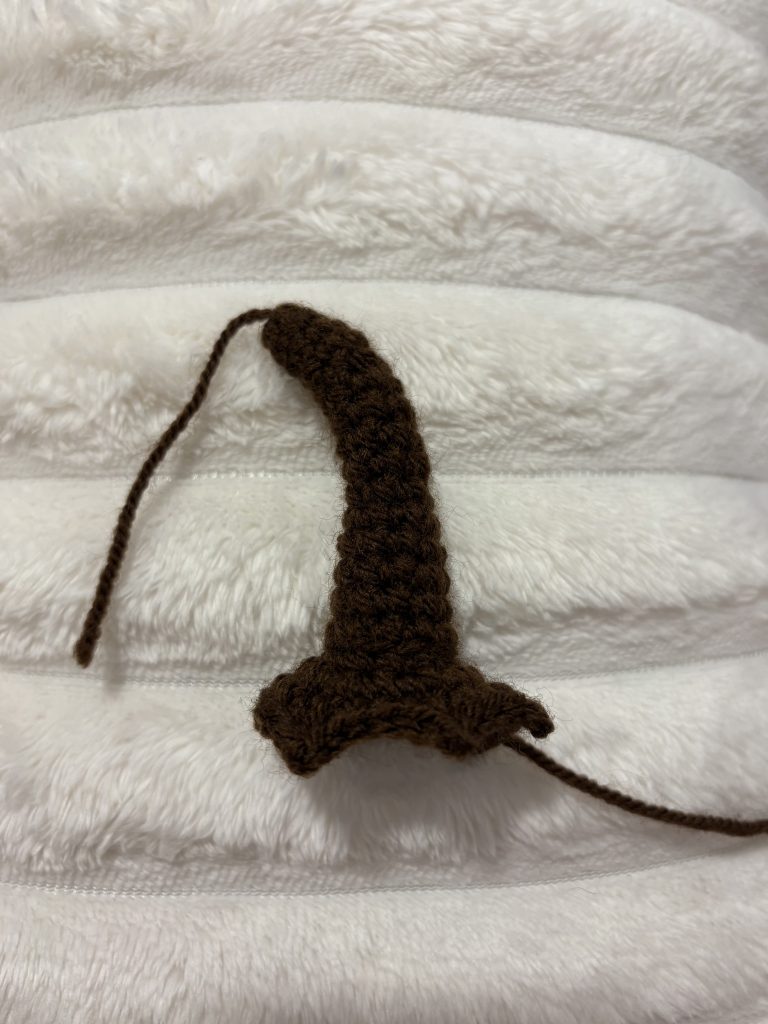
Rnd 19: sc, hdc 2, sc, hdc 2, sc 2, hdc, dc, hdc, sc 2, hdc 2, sc, hdc 2, sc 2, hdc, dc, hdc, slst
Fasten off, cut off the yarn leaving a longer piece for sewing later.
(photo 7)
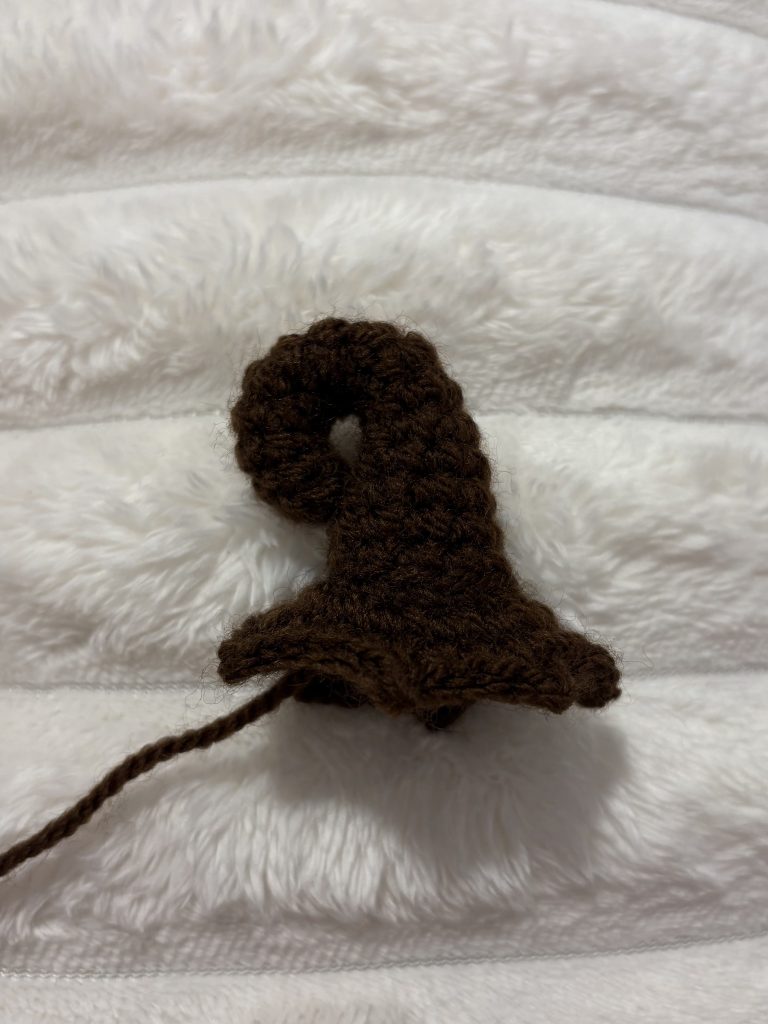
Put some stuffing inside the stem, pull the thread we left before through a hole in the middle of the stem’s height to bend it. Tie is to secure it. Put more stuffing. (photo 8)
The easily printable Crochet Pumpkin PDF version is available in our shop:
LEAF
Using green yarn and 3mm hook:
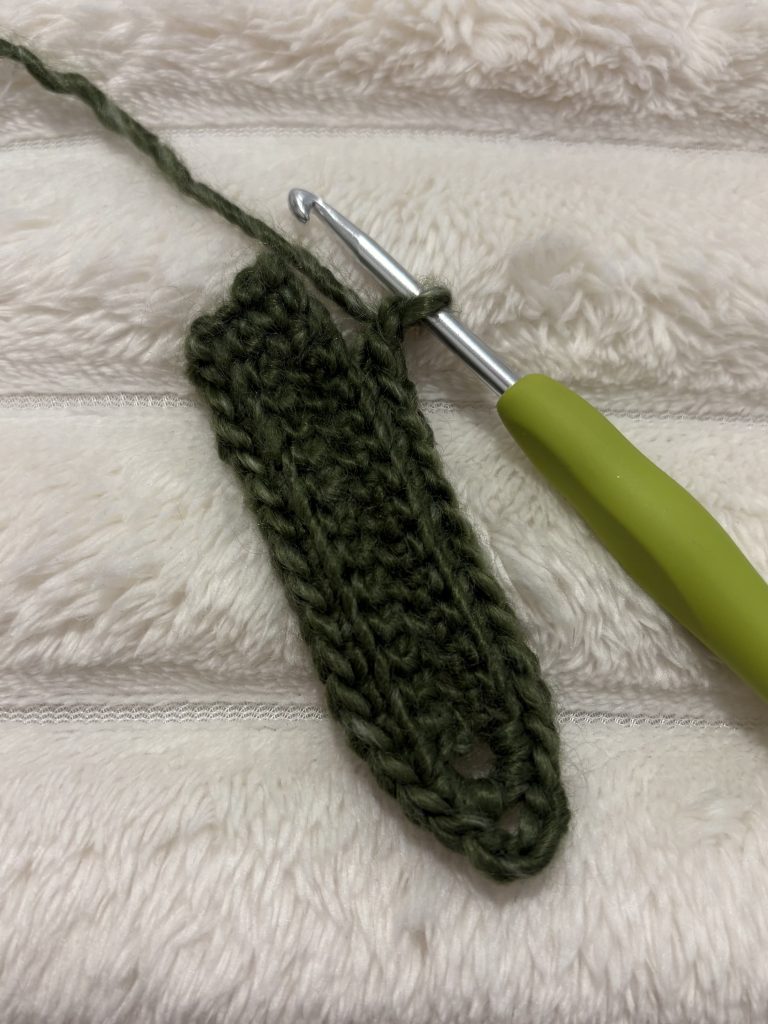
Slip knot, ch 16
Row 1: Starting in the 3rd ch from the hook sc 14, ch 4, sc 14 (on the other side), ch 1, turn
Row 2: skip 1, scBLO 13, (sc 2, ch 4, sc 2) in the ch space, scBLO 11, ch 1, turn
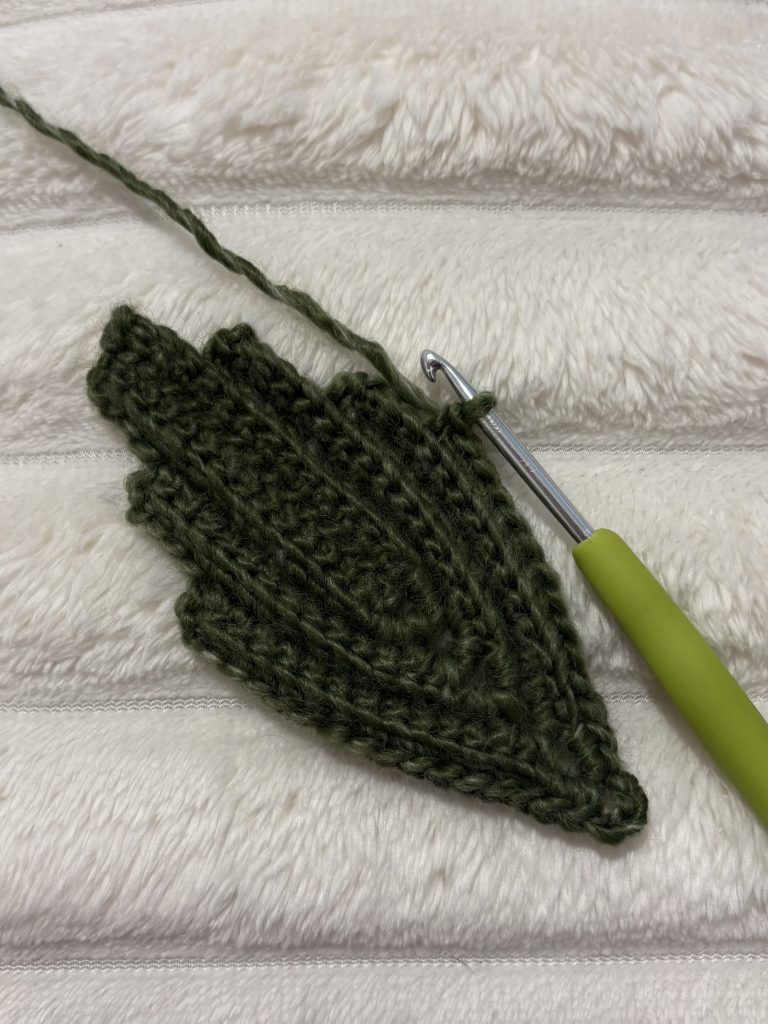
Row 3: skip 1, scBLO 12, (sc 2, ch 4, sc 2) in the ch space, scBLO 12, ch 1, turn (photo 9)
Row 4: skip 1, scBLO 13, (sc 2, ch 4, sc 2) in the ch space, scBLO 11, ch 1, turn
Row 5: skip 1, scBLO 12, (sc 2, ch4, sc 2) in the ch space, scBLO 12, ch 1, turn
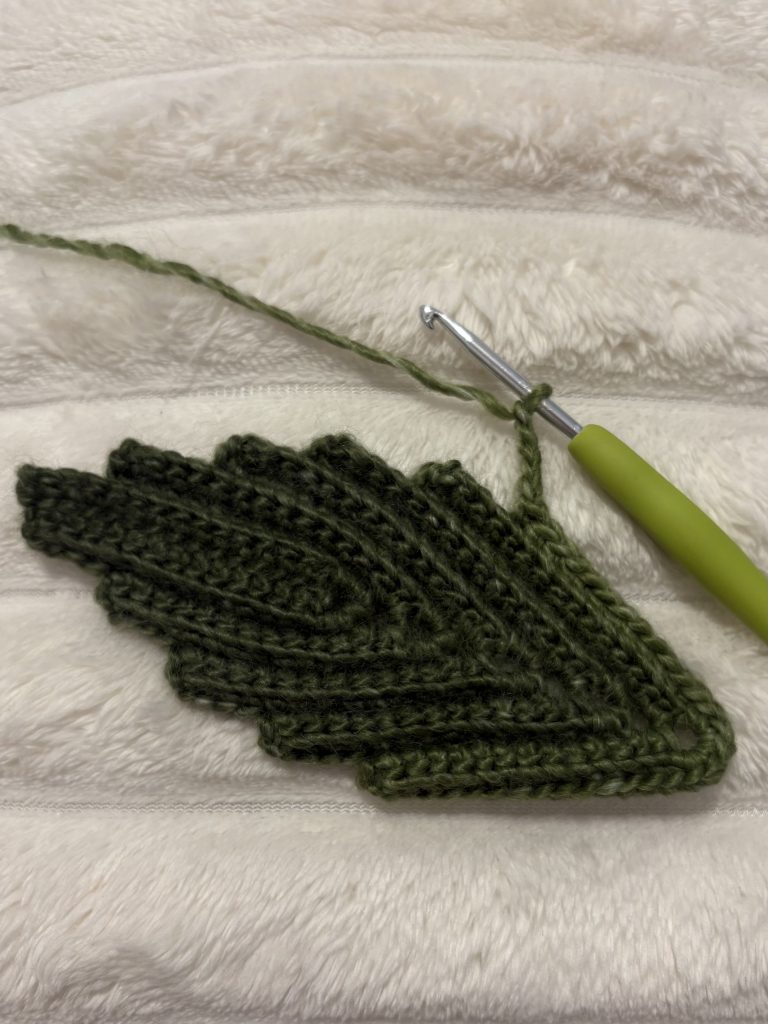
Row 6-8: skip 1, scBLO 13, (sc 2, ch 4, sc 2) in the ch space, scBLO 12, ch 1, turn (photo 10)
Row 9: skip 1, scBLO 13, (sc 5) in the ch space, scBLO 12, ch 5, turn (photo 11)
Row 10: skip 2, sc 3, scBLO 5, ch 1, skip 1, sc, ch 1, turn
Row 11: sc in the ch space, scBLO 9, ch 5, turn
Row 12: skip 2, sc 3, scBLO 11, ch 1, skip 1, sc, ch 1, turn
Row 13: sc in the ch space, scBLO 15, ch 4, turn
Row 14: skip 2, sc 2, scBLO 17, ch 1, skip 1, sc, ch 1, turn
Row 15: sc in the ch space, scBLO 17, ch 1, turn
Row 16: skip 1, scBLO 18, ch 1, skip 1, sc, ch 1, turn
Row 17: sc in the ch space, scBLO 15, ch 1, turn
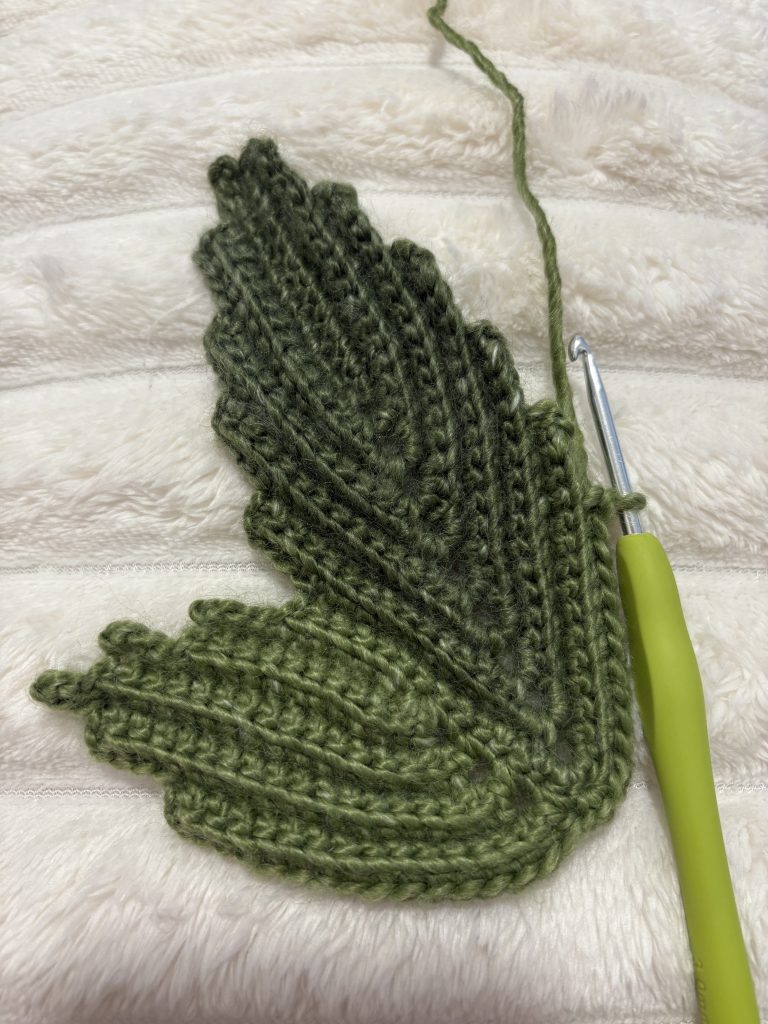
Row 18: skip 1, scBLO 16, skip 1, sc 3, scBLO 12, ch 5, turn (photo 12)
Row 19: skip 2, sc 3, scBLO 5, ch 1, skip 1, sc, ch 1, turn
Row 20: sc in the ch space, scBLO 9, ch 5, turn
Row 21: skip 2, sc 3, scBLO 11, ch 1, skip 1, sc, ch 1, turn
Row 22: sc in the ch space, scBLO 15, ch 4, turn
Row 23: skip 2, sc 2, scBLO 16, ch 1, skip 1, sc, ch 1, turn
Row 24: sc in the ch space, scBLO 17, ch 1, turn
Row 25: skip 1, scBLO 18, ch 1, skip 1, sc, ch 1, turn
Row 26: sc in the ch space, scBLO 15, ch 1, turn
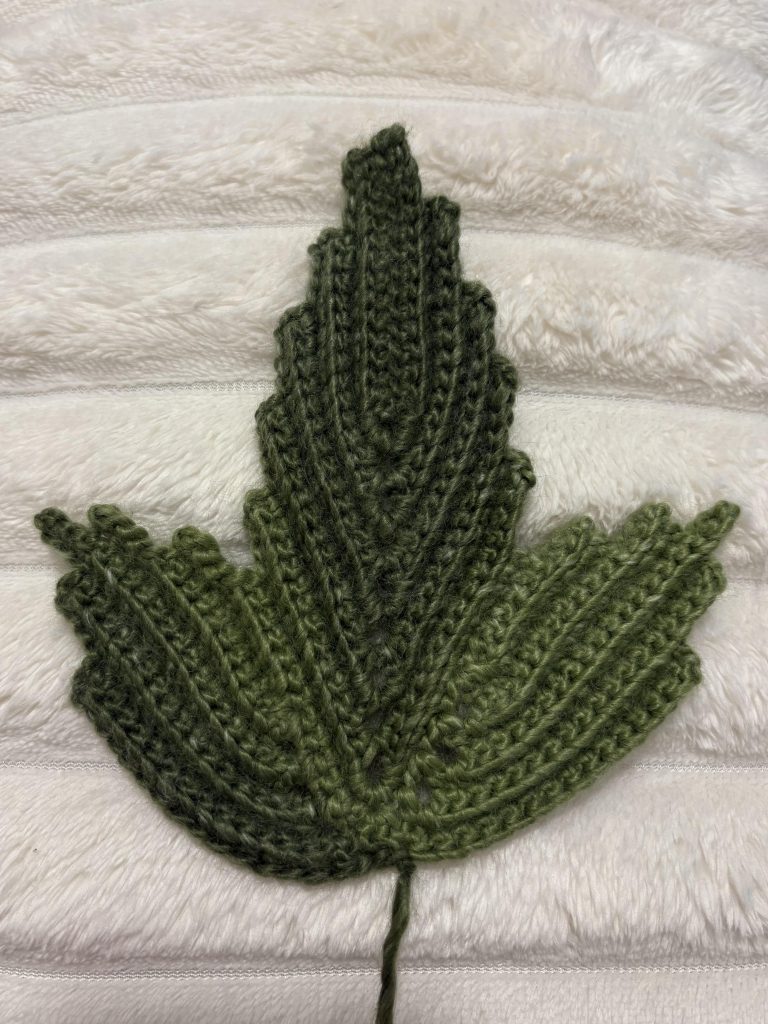
Row 27: skip 1, scBLO 15, ch 1, skip 1, sc, slst
Fasten off, cut off the yarn leaving a long piece for sewing later. (photo 13)
ASSEMBLING
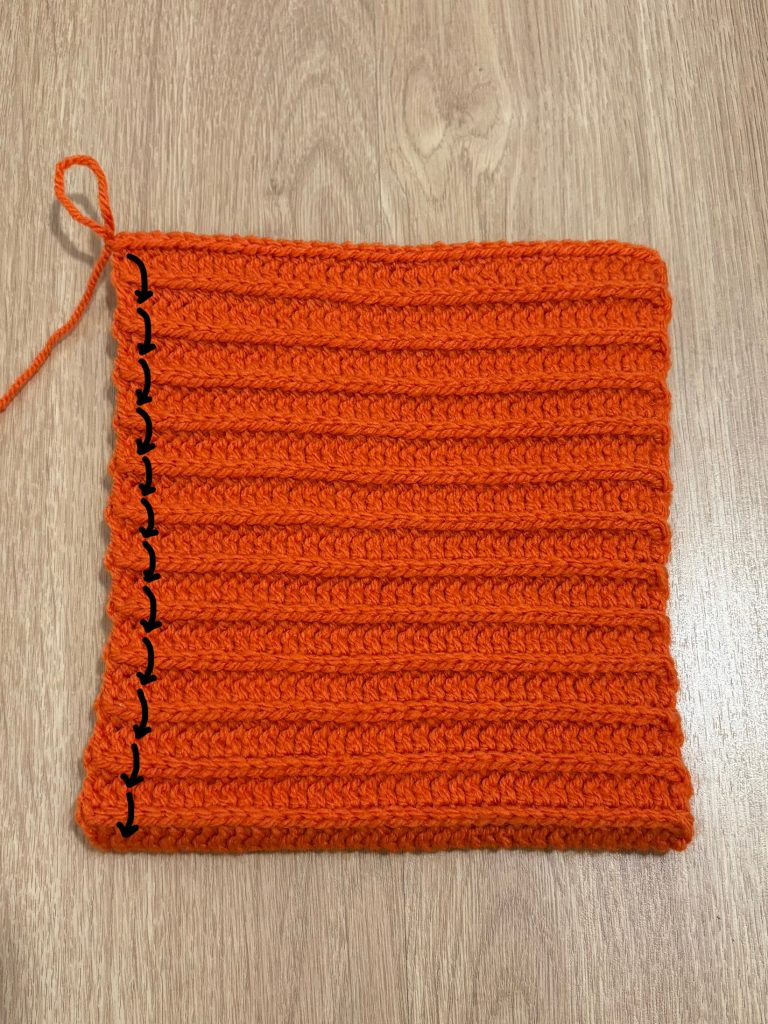
- Fold the pumpkin’s panel in half and sc two sides together. Now you can cut the yarn off but leave a long piece for joining the sides. (photo 14)
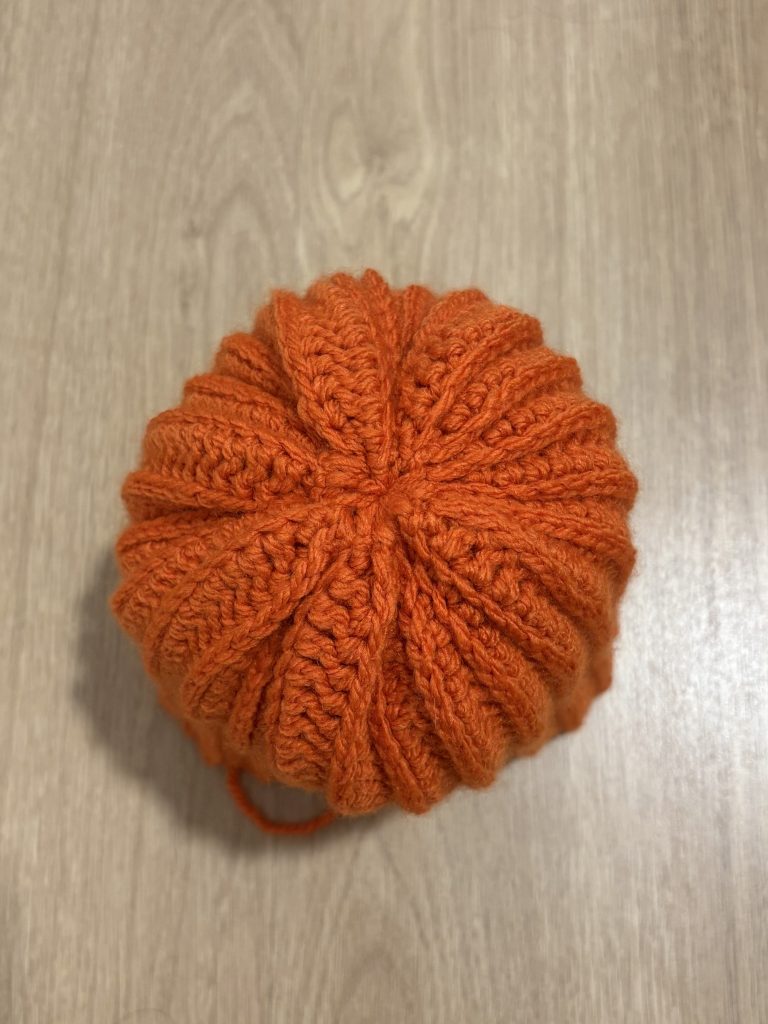
- Using the needle pull the yarn through all the stripes around. (photo 15)
- Pull it tightly and secure by tying. You can repeat pulling the yarn around to close hole completely. (photo 16)
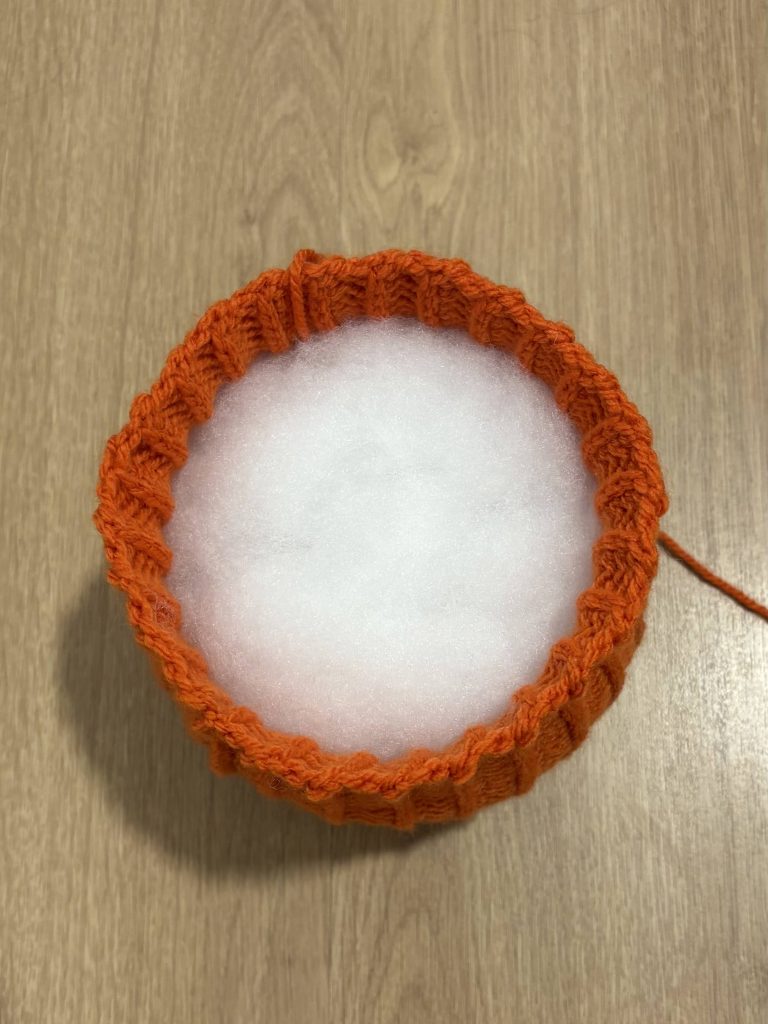
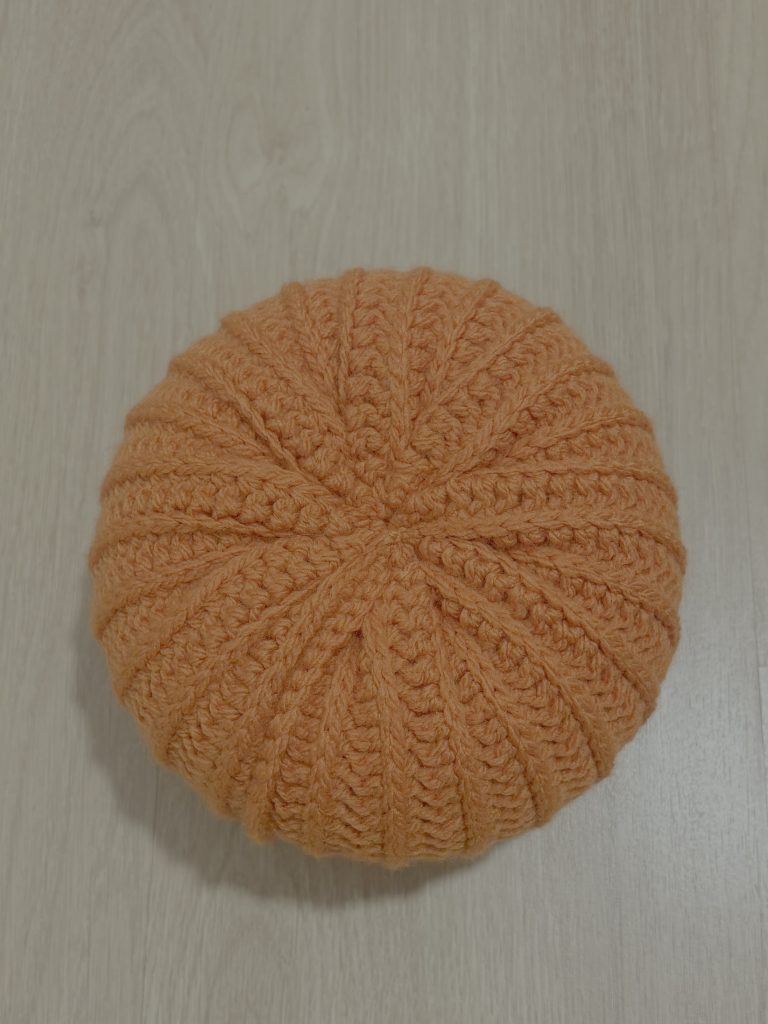
- Now it should look like a beanie hat. Put the stuffing inside it. Make sure it is stuffed enough to keep the shape of it. (photo 17)
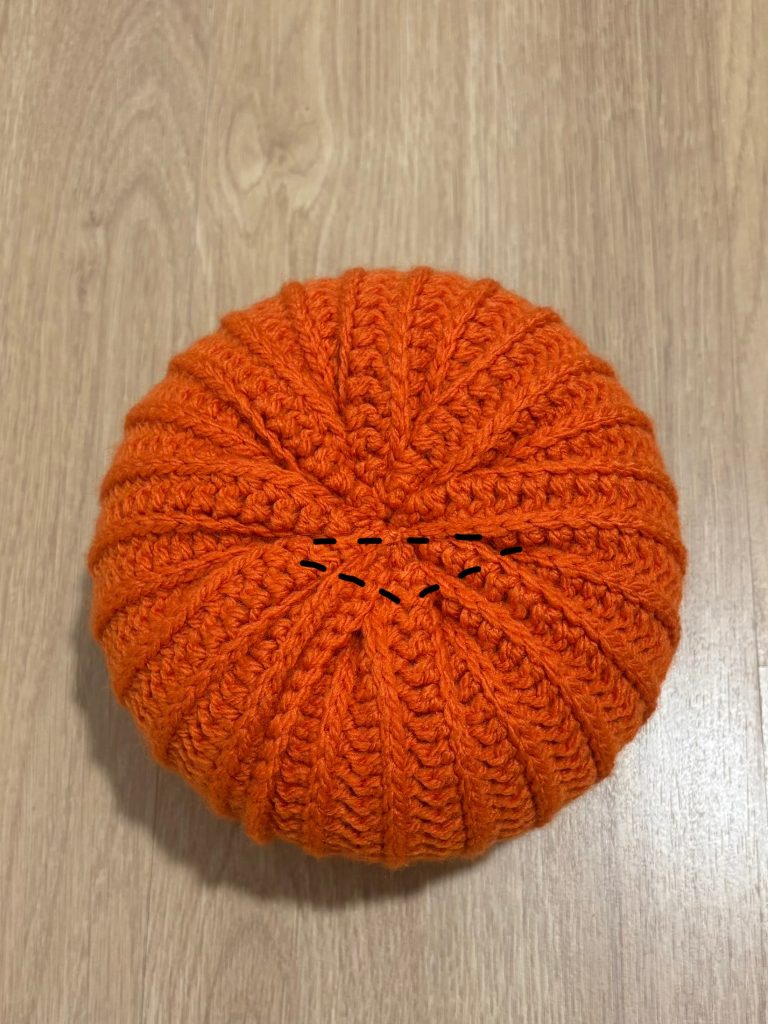
- Pull the yarn through the stripes around to close the pumpkin. (photo 18)

- Tie it a few times to secure it. (photo 19)
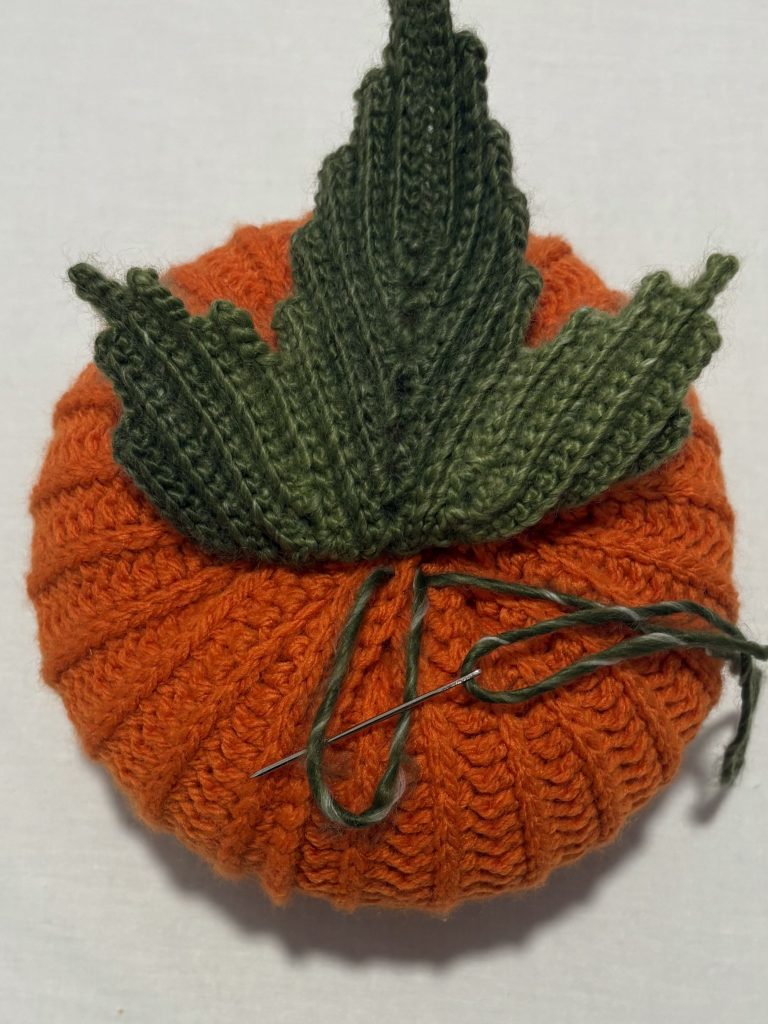
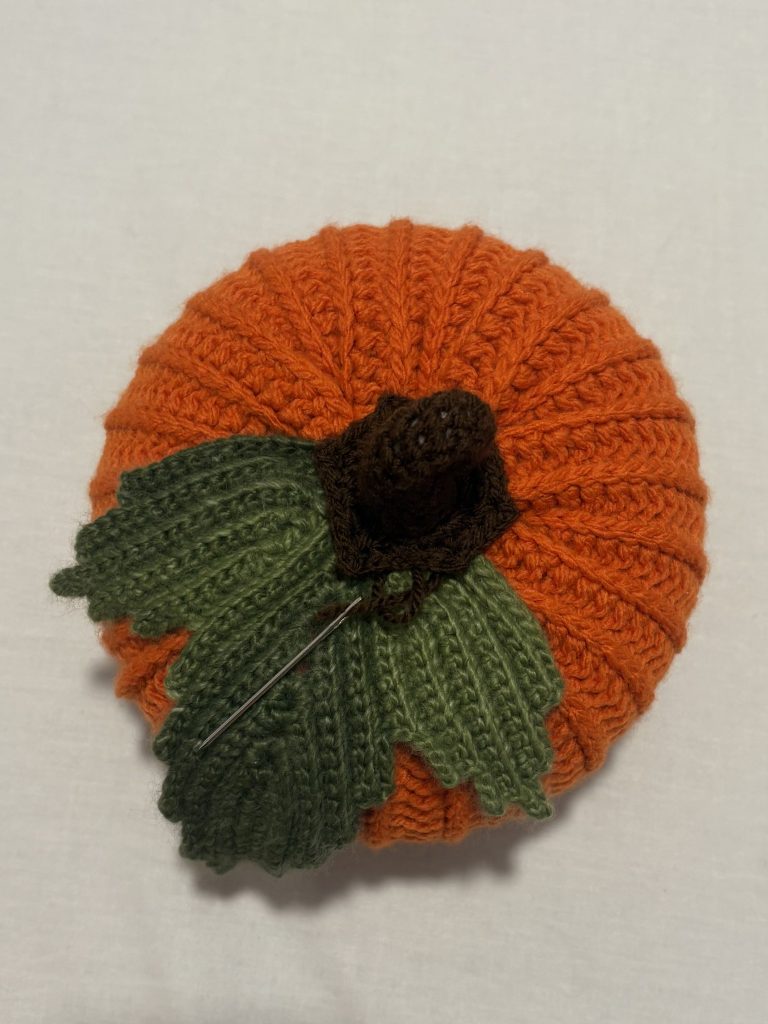
- Now we will be attaching the leaf. If you want, you can just simply glue it, but i chose to sew it.
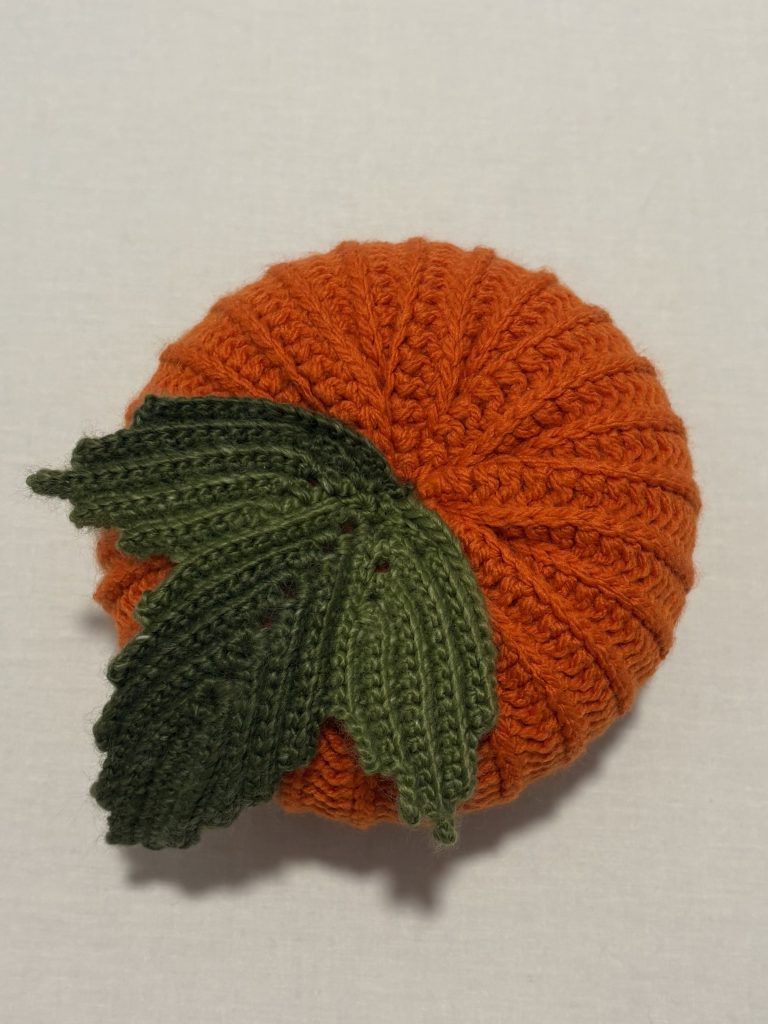
- Place the leaf on one half of your pumpkin. Starting from the middle sew the edge of the leaf. (photo 20,21…)
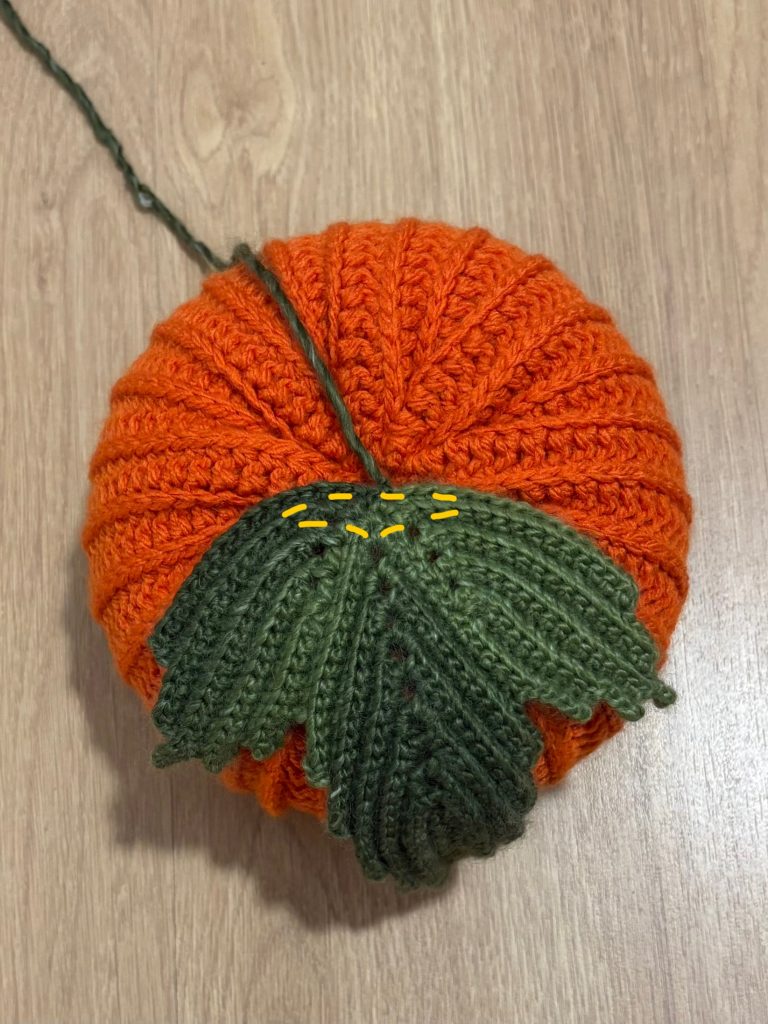
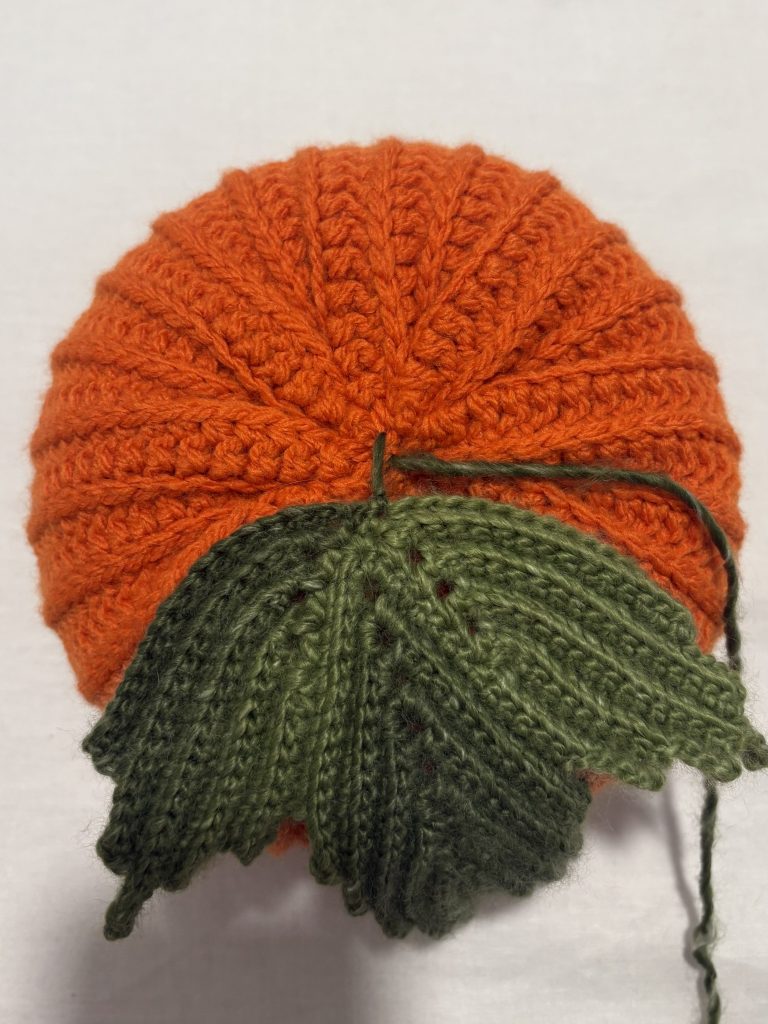

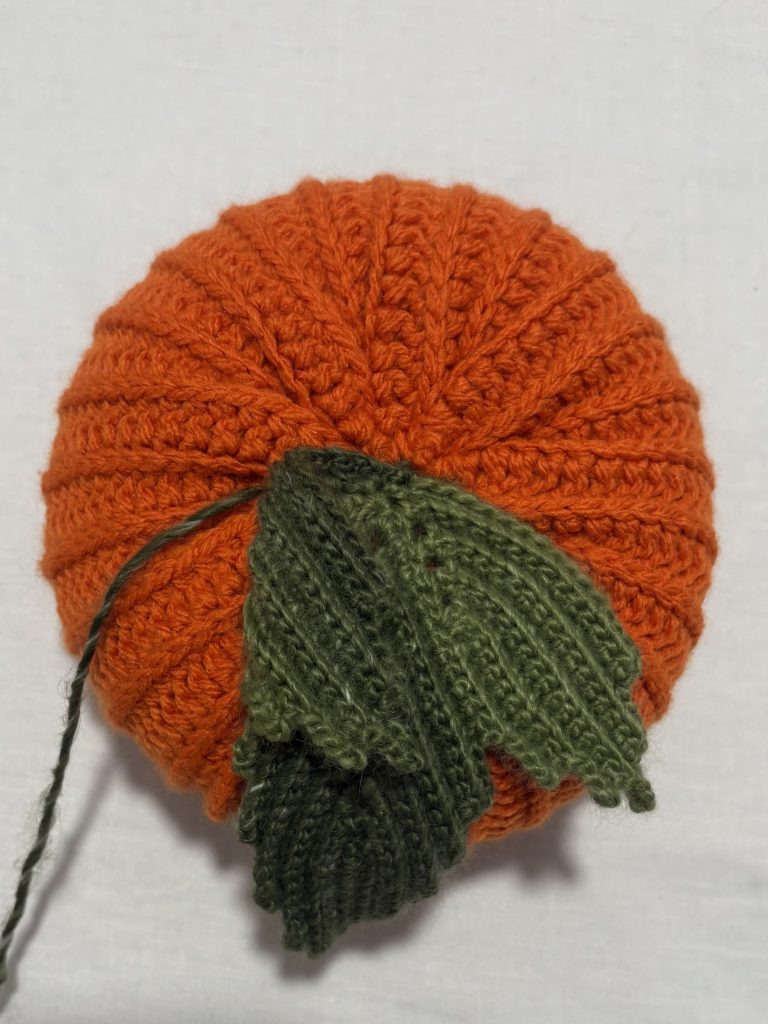
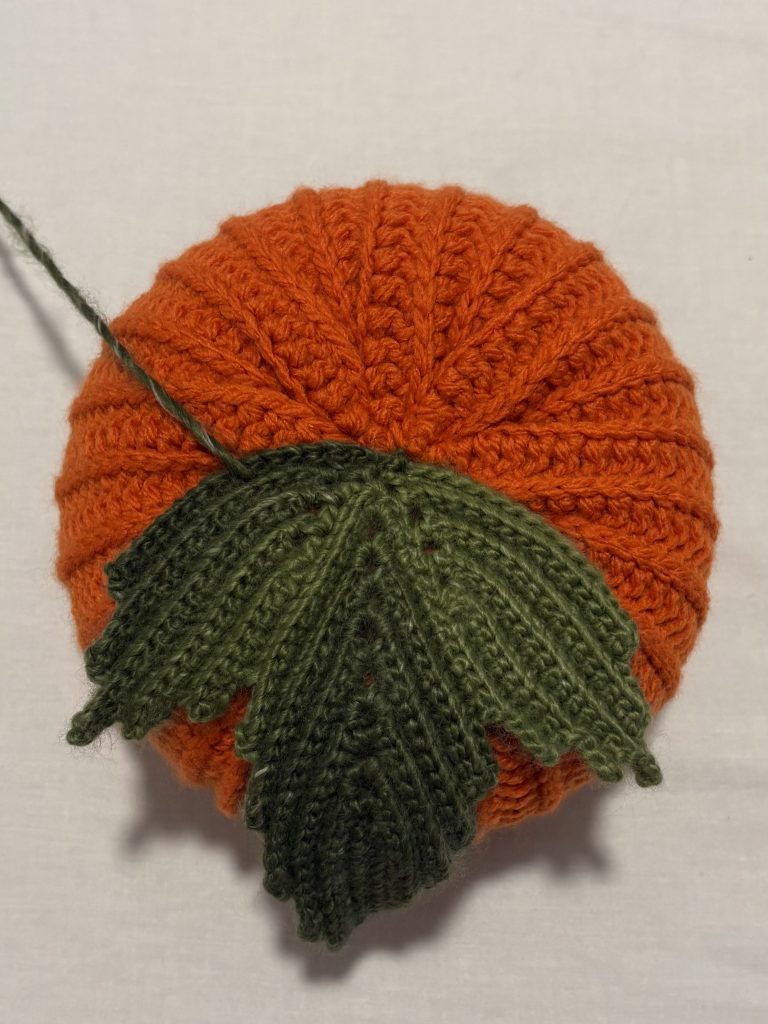
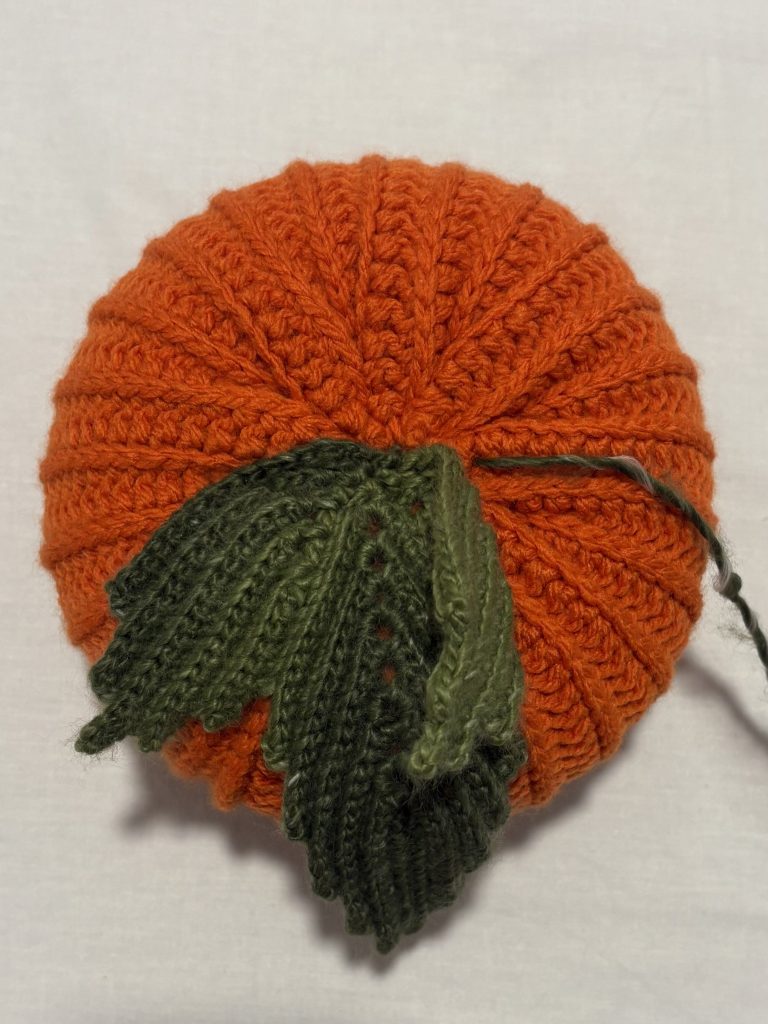
- Make a tie under the leaf to secure it. Hide it and cut off. (photo 28,29)
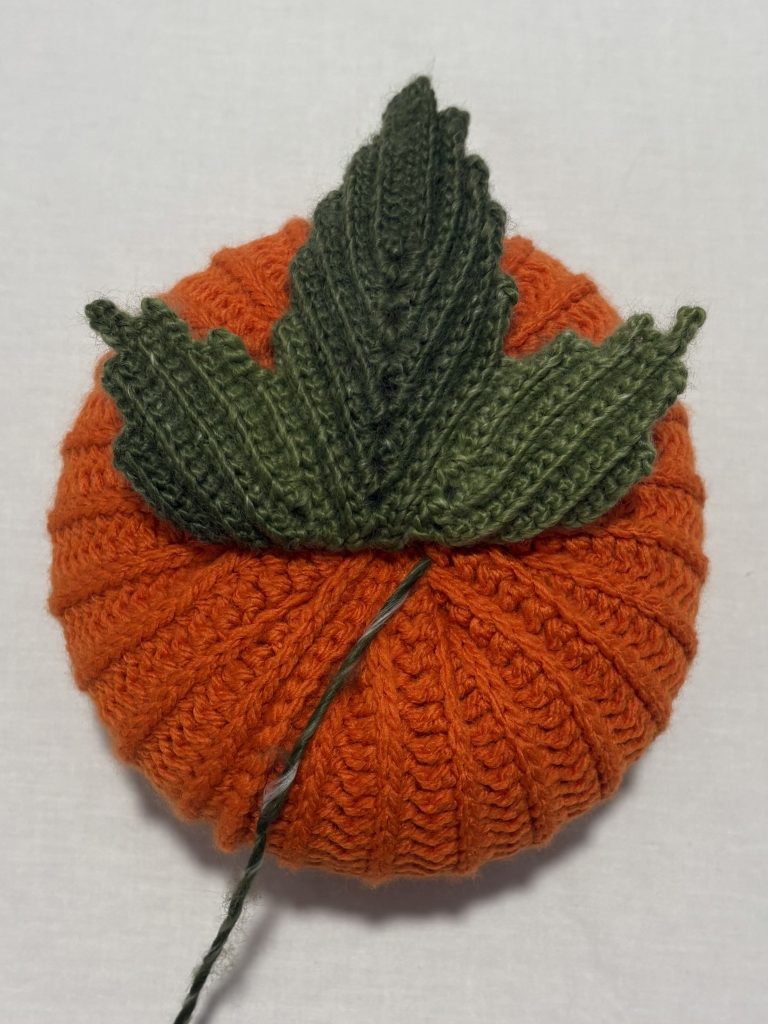
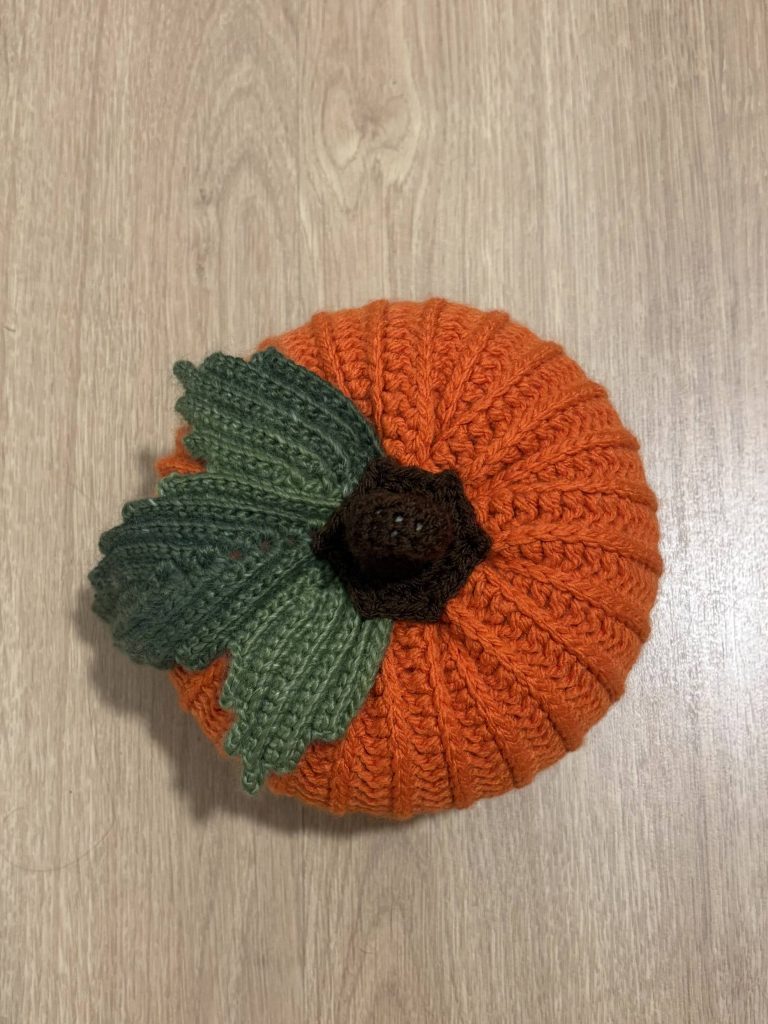
- Place the stem in the center of the pumpkin. We are going to sew the edge of stem around (photo 30,31)
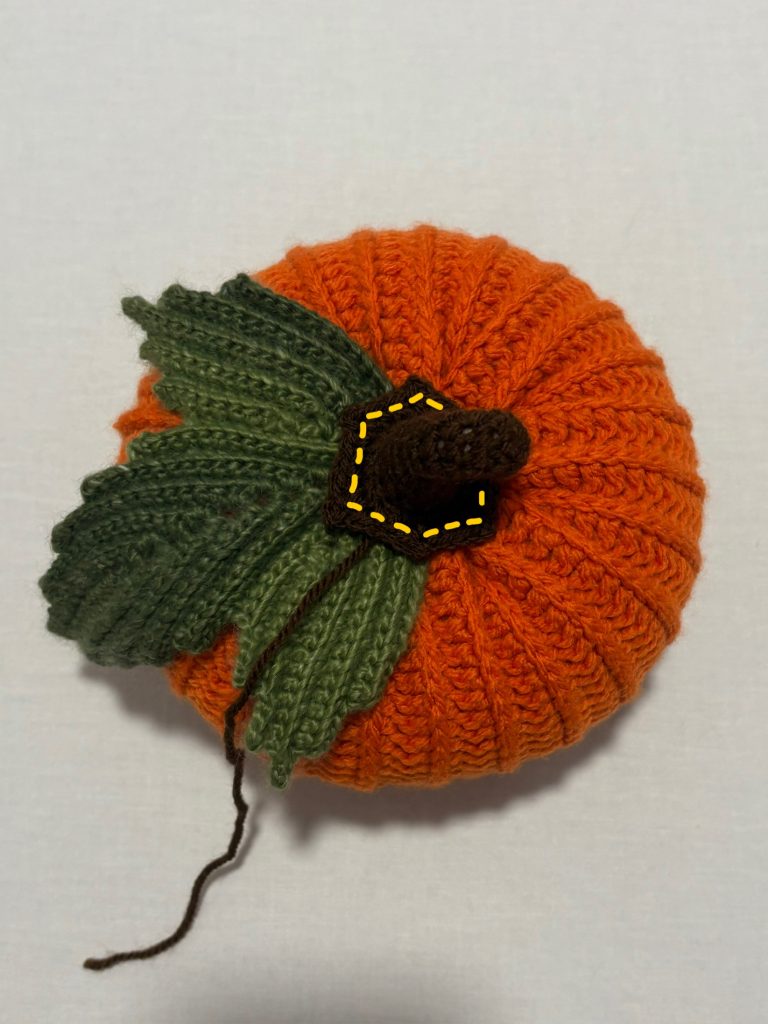
- Make a tie, hide and cut off the yarn. (photo 32, 33)
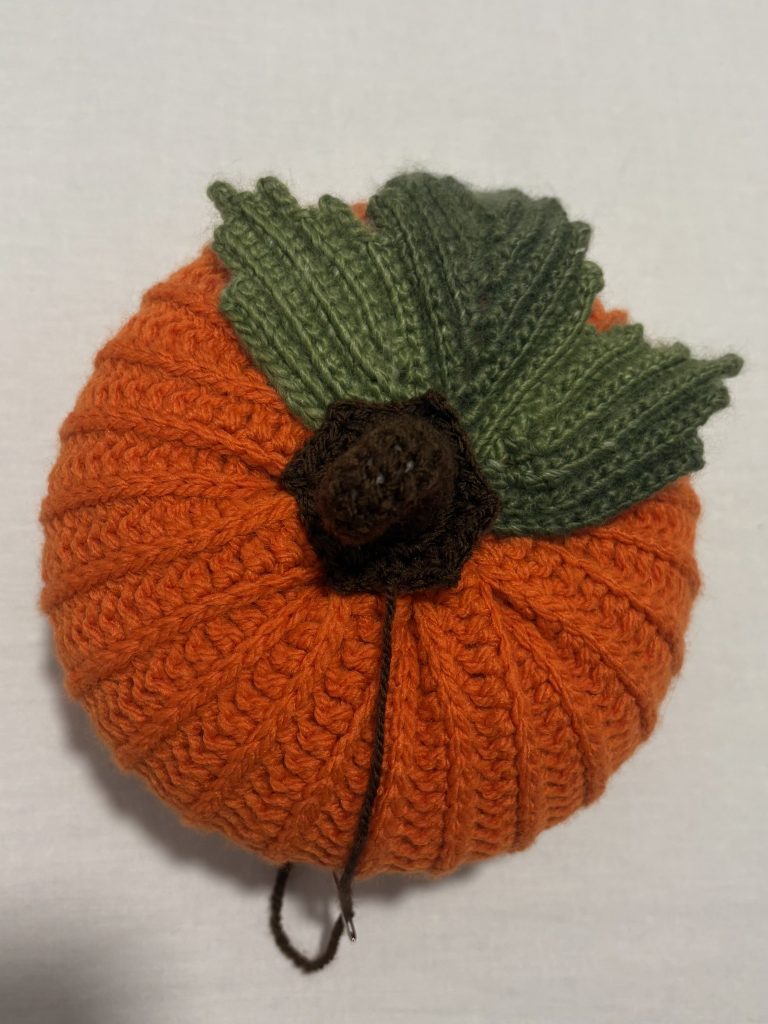
Your pumpkin is ready!
The easily printable Crochet Pumpkin PDF version is available in our shop:
Thank you for using this pattern! Let us know how you liked it in the comments section below. 🙂
Made it and love how it came together
Fabulous! Great timing! Thank you sooooooooooooo. Much!
Love it! One of the easiest and attractive pumpkins I’ve ever done. Thank you
I love the structure! Thanks!
What a beaty! Looks I’ll be making my first crochet pumpkin this year 😉
I love the pattern! Could you change the size of them by adding/subtracting to the width when you first chain the pumpkin?
Help, I’m stuck on the leaf!! Idk what I’m doing wrong. I mess up right around step 10 or 11, than it just all looks wrong. Shoot! I’ve started over a couple times but it keeps coming out wrong when I start on that next leaf or whatever. Frustrating! 🤦♀️😊 I’m not very experienced.