
In this article:

As summer approaches, I feel a surge of energy and a need to refresh my wardrobe with bright, colorful outfits. It is a perfect time to buy something new, but why buy when you can… crochet it?
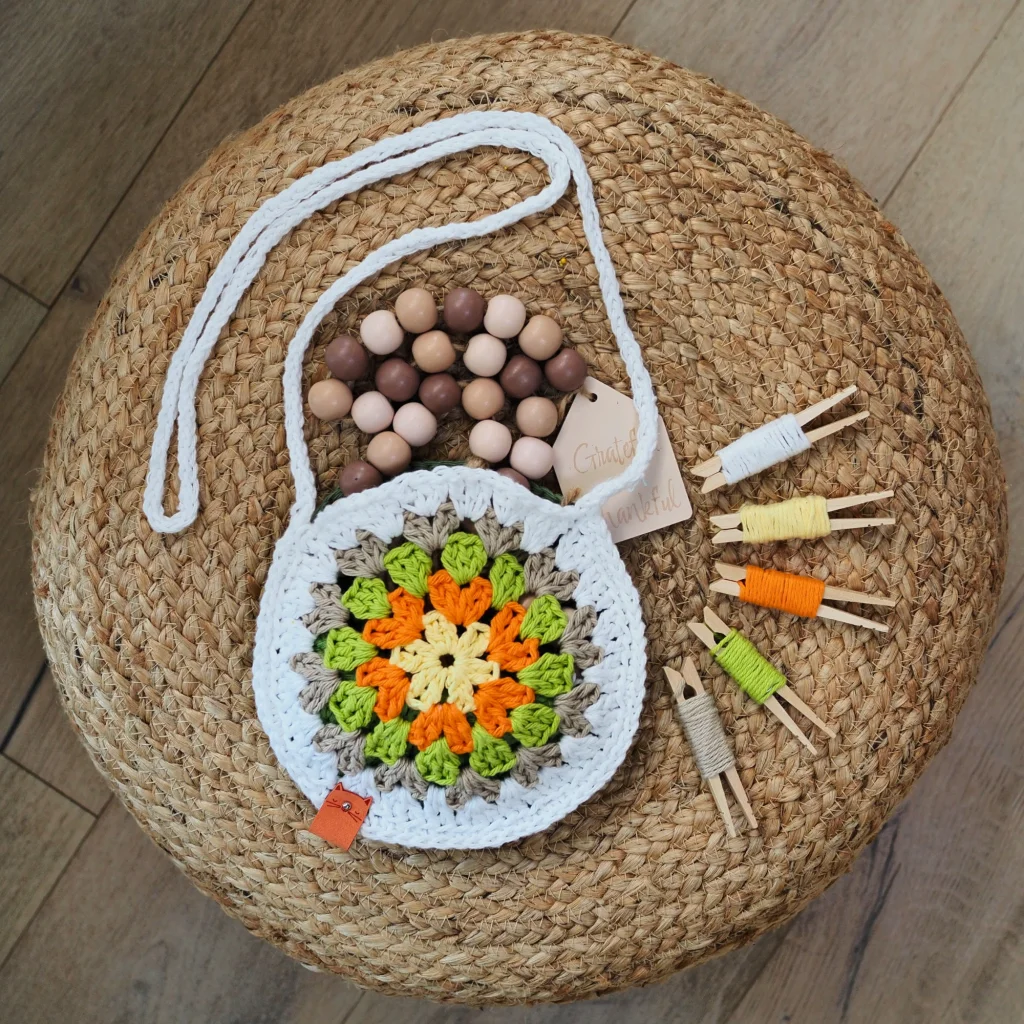
I fell in love with greens and yellows this year, so I decided to use these colors to create a small bag for a few essentials. I want it to be colorful but bright and fresh at the same time.
The pattern was created by a few trials and a tint of mathematical calculations – I especially wanted to match the size of the granny circle and the double crochet circle on the back. Feel free to use it and you may sell items based on the pattern, but I kindly ask you to tag me or link back to the pattern page in return.
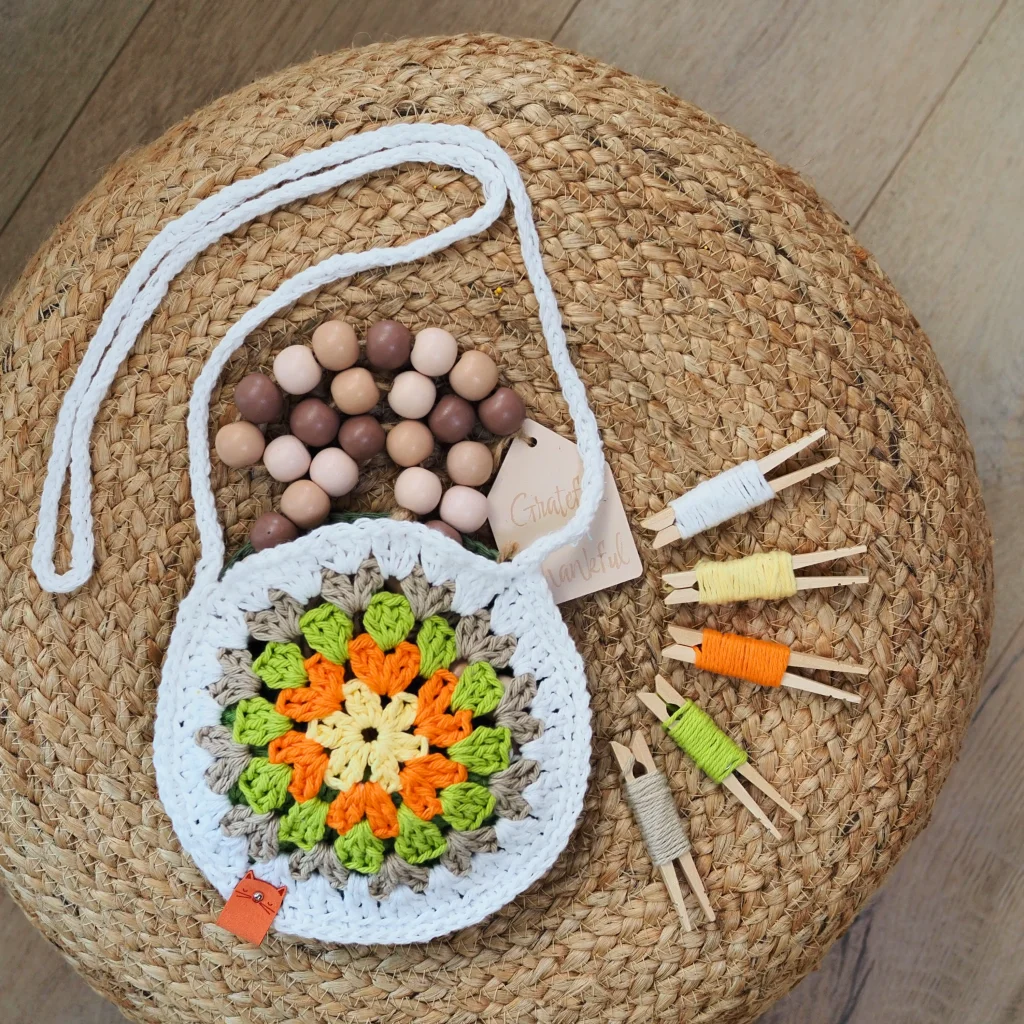
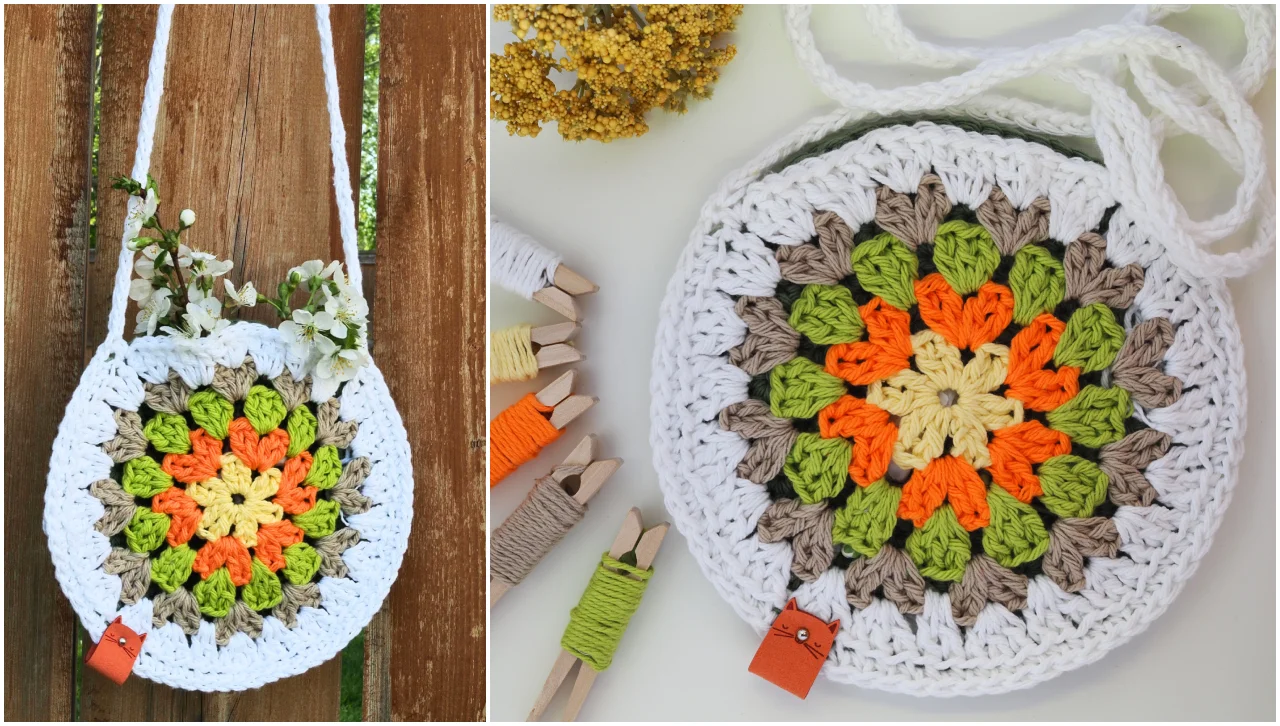
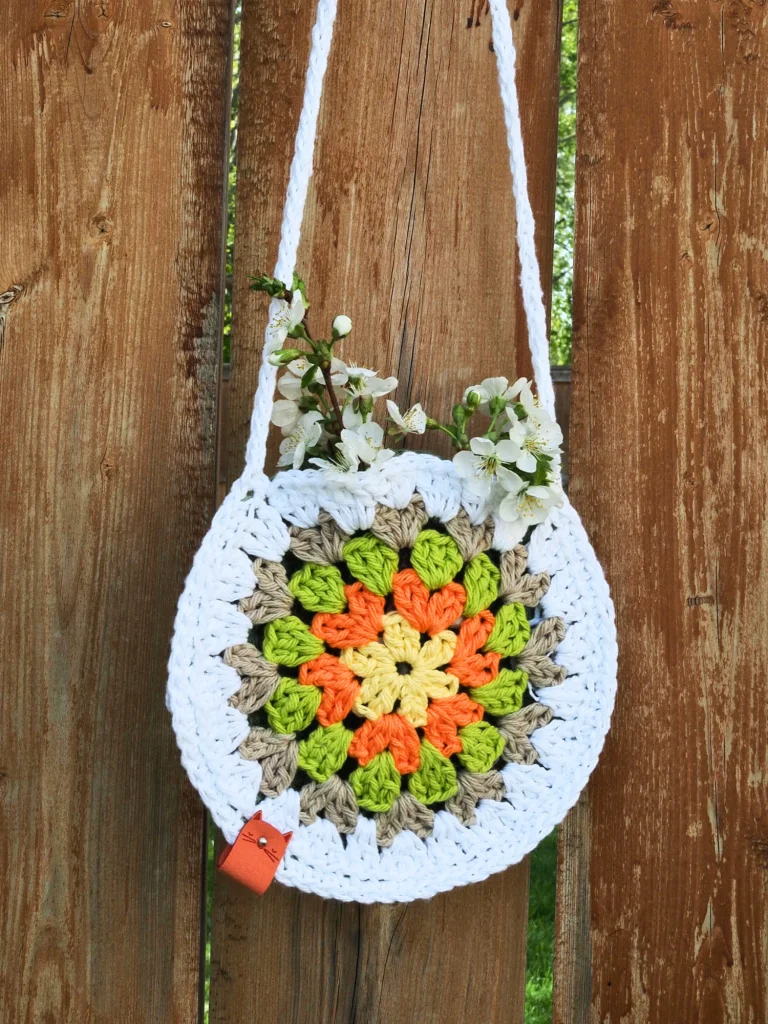
So, finally, this small circle bag in boho style was created. It is a perfect pattern for beginners to learn how to make a granny in rounds. It’s a great small bag for a little princess to elevate her outfit and let her feel more grown-up. So, let your imagination run wild with this easy, fun and colorful celebration of warm weather.
The Circle Granny Square Bag Free Crochet Pattern

To make this crochet bag, you have to crochet three elements: a granny circle, a flat double crochet circle and a handbag strap. Follow the step-by-step instructions below for each of those three elements.
Measurement
The purse is 7″ (19 cm) wide. The strap is 39″ long, but you may adjust it to your needs.
Materials You’ll Need
- Yarn: any cotton worsted weight yarn. I used size 4 Loops & Threads in 5 colors; the same yarn alternative is Lily Sugar n’ Cream Solid Variety 100% Cotton in size Medium (4)
- Crochet Hook: size H/8 (5 mm)
- Stitch Marker: To join layers together
- Scissors: For cutting the yarn at the end
- Tapestry (Yarn) Needle: For weaving in the ends
Abbreviations:
- Ch (s) = Chain stitch(es)
- Sl St = Slip Stitch
- Dc (s) = Double Crochet stitch (s)
- Sc = Single Crochet Stitch
- St(s) = Stitch(es)
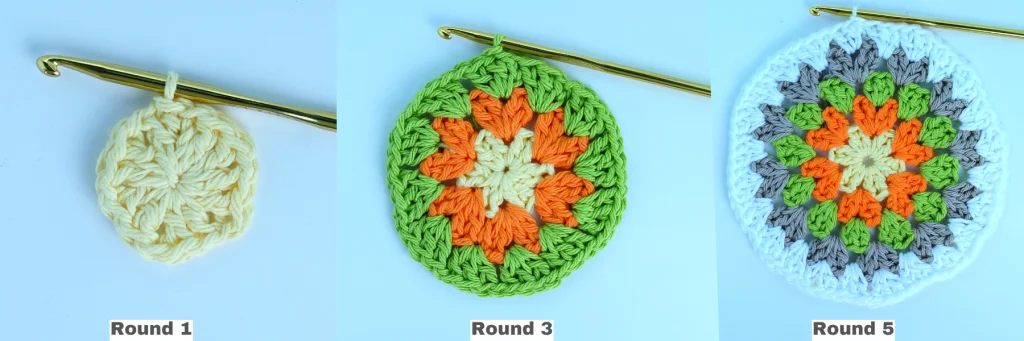
Step 1: Crochet a Granny Circle
This will be the outer side of the bag, so think about your favorite summer outfits and choose colors for your bag accordingly. I used 5 different colors of yarn for this part, plus 1 more for the reverse side. If you struggle with the granny circle, read my beginner friendly tutorial about round granny.
Beginning
Start with a magic ring. You may also use the chain method: ch 4 and sl stitch into the first ch to create a circle.
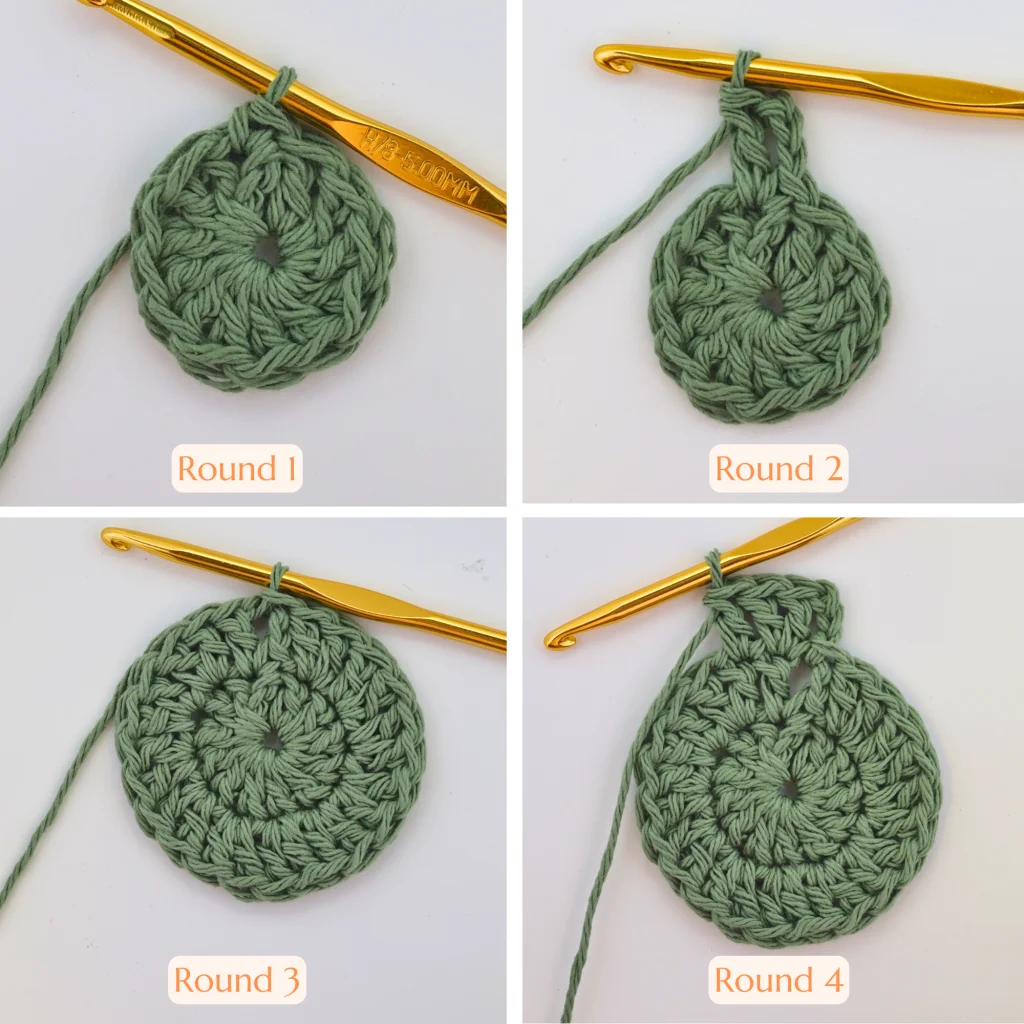
Round 1
Ch3 (counts as your 1st dc), dc1 into the ring, ch1.
(dc2, ch1) – 5 times. Sp st into the top chain of the starting ch 3. At the end of the round 1, you have 6 clusters of 2dc’s separated by ch1 [18 sts]
Round 2
Join the next color with a sl st into any ch-1 space. Ch3, dc1, ch1, 2dc into the same space, ch 1 .
*(2dc, ch, 2dc, ch) repeat from * into each ch-1 space from the previous round. At the end of the second round you have 12 clusters of 2dc’s and 6 chain stitches. Sl st to join. [30 sts]
Round 3
Ch3 with a new color of the yarn, 2dc into the same space, ch1.
*(3dc, ch 1)* 11 times into each space. (12 clusters of 3dc’s plus 12 ch-1 space in total).Sl st to join. [48 sts]
Round 4
With a new color, ch3 into the ch-1 space, 1dc, ch1, 2dc into the same space.
*( 2dc, ch 1, 2dc)* repeat around each ch1 space. Sl st to join. [60 sts]
Round 5
Join the next color into a 1ch space. Ch 3 (counts as your first dc), 2dc into the same space.
3dc into each ch-1 space – repeat all around. Sl st to join. At the end of round 4, you will have 24 clusters of 3dcs [72 sts].
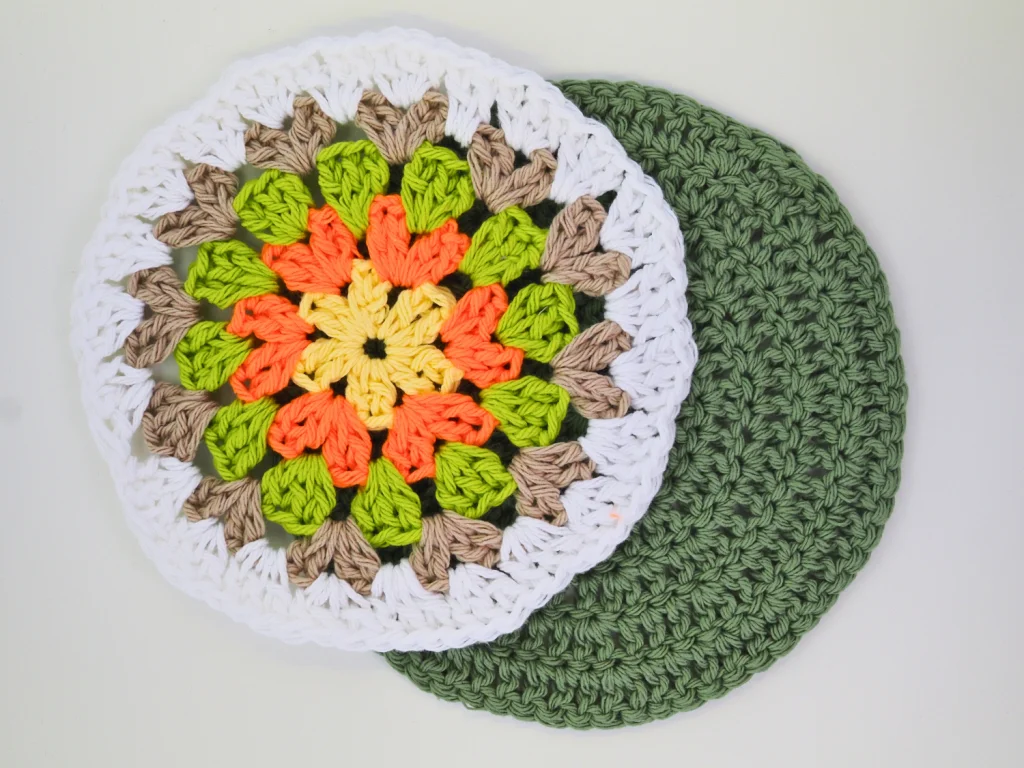
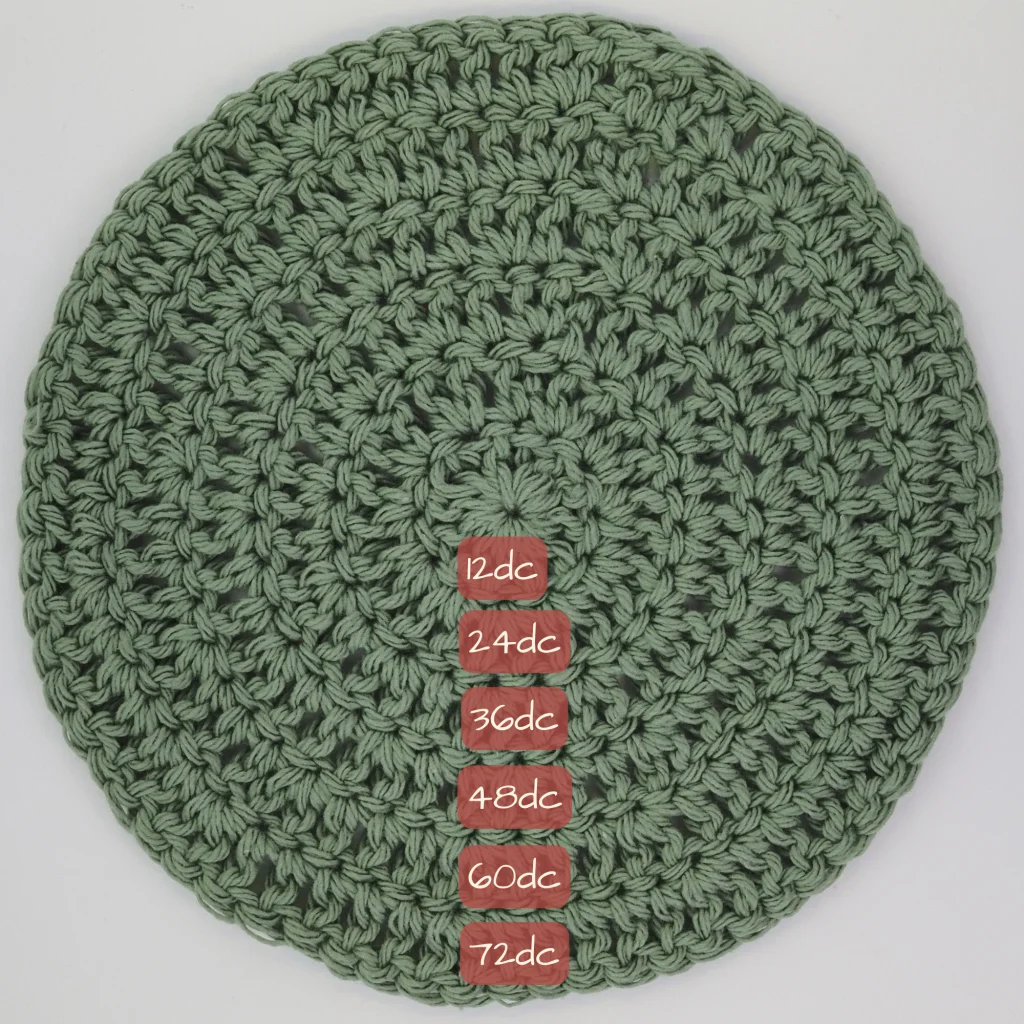
Step 2: Crochet a Double Crochet Circle
With a matching color of yarn, I made a flat double crochet circle.
Both circles must be the same size and what is even more important, their circumferences have to have the same number of stitches. My circle had 6 rounds of dc stitches and 72 sts in the circumference.
I made a detailed tutorial for beginners using exactly the same circle. If you need a step-by-step explanation on how to make the right sized circle or you are not sure how to make it perfectly flat, go HERE.
Here is my backside circle:
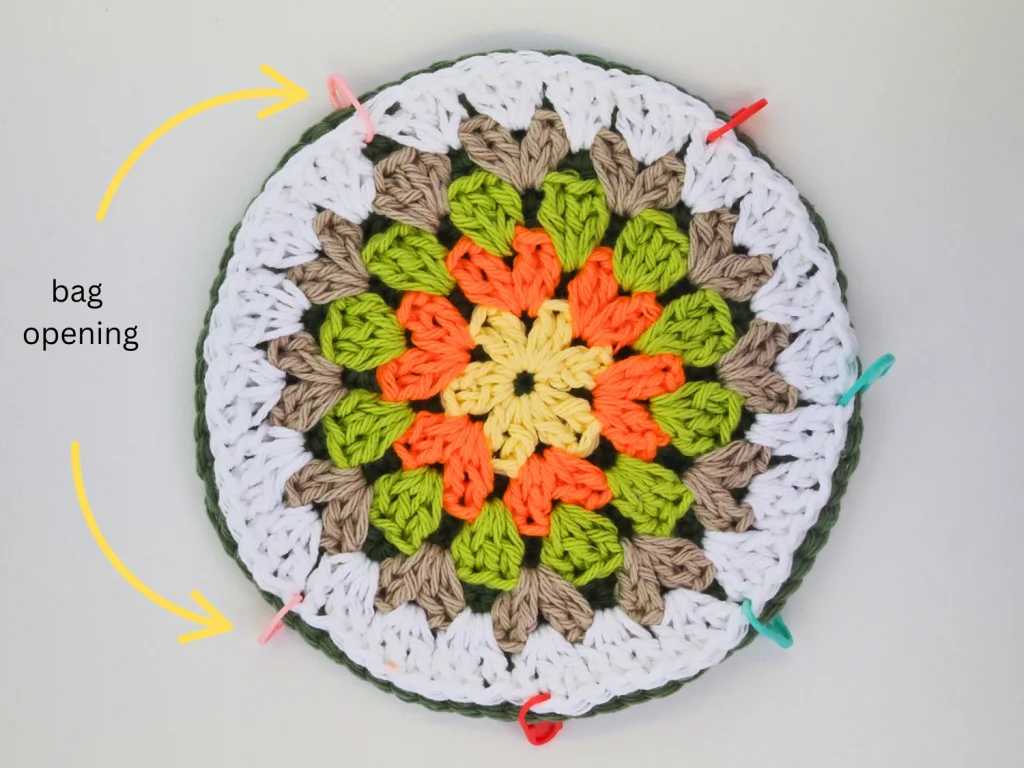
Step 3: Joining the Both Sides of the Purse
Carefully lay down both crochet circles by placing the off sides together. Join them together with stitch markers. I marked the opening of the bag with pink markers. Please see the photo below:
Next, with the same color of yarn as used in the last round of the granny circle, join the yarn in the spot marked with the left pink stitch marker. Ch 1. Sc to join both circles through all 4 loops on the edge. Now, working with a back loop only, join as you go the two halves of the bag with a single crochet joint.
Working around scs into the back loop of the stitches, finish at the right pink marker. Sc through 4 loops (not a back loops).
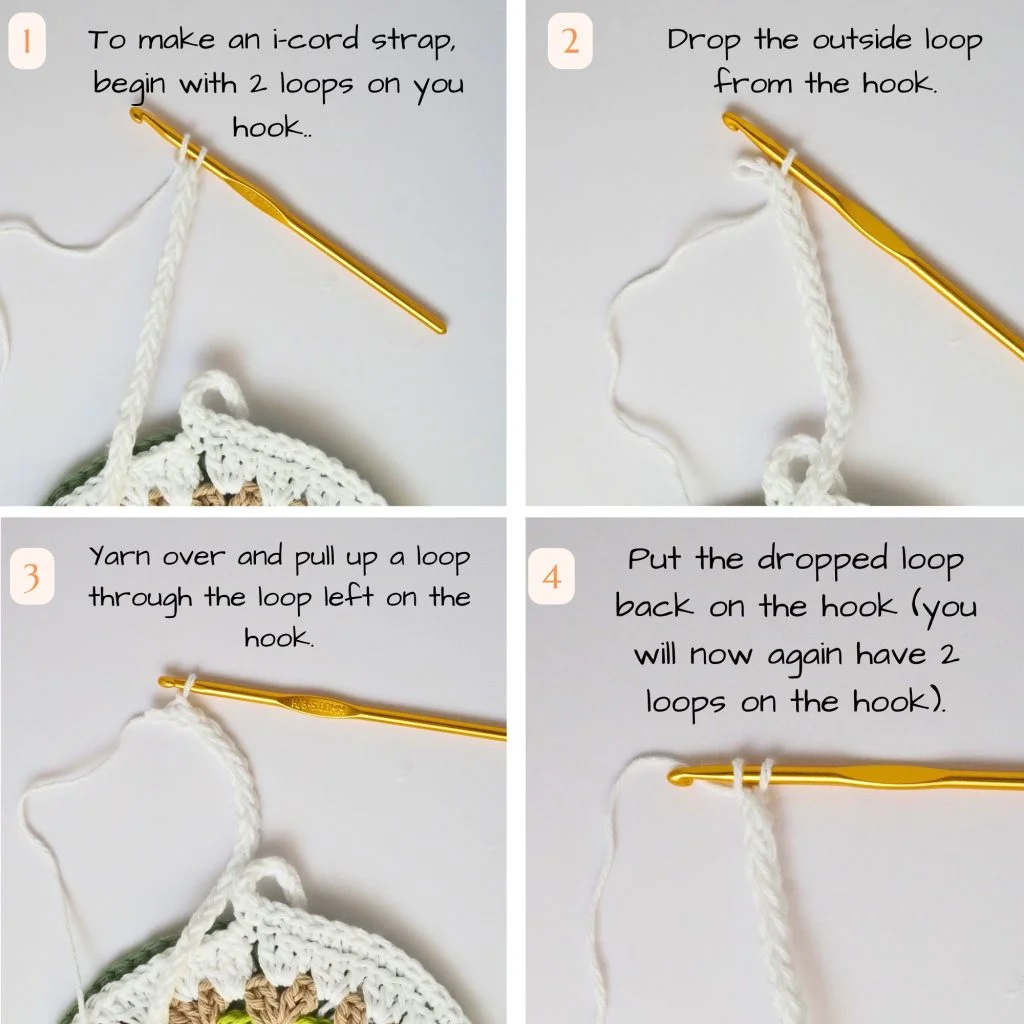
Step 4: Creating a Handbag Strap
Now crochet an i-cord strap. To do that, insert your hook again in the same sc stitch just made and pull up a loop.
* Yarn over and pull up a loop through the first loop on your hook. Drop the loop you just made from your hook and hold it with your fingers. Yarn over and pull up a loop through the second loop left on the hook. Put the dropped loop back on the hook (you will now again have 2 loops on the hook). Repeat from * till your strap will have the desired length. My strap is 39″ in total.
Finally, join your strap with the first stitch of the edge with a slip stitch. Fasten off and weave in the ends.
Finishing Touches of a Crochet Bag
If desired, you can add fringes or beads to personalize your granny bag. As you can see in the photos, I added a cute kitten label. The easy way to make a closure will be sew and magnetic buttons (snaps) – they are invisible when sewn inside.
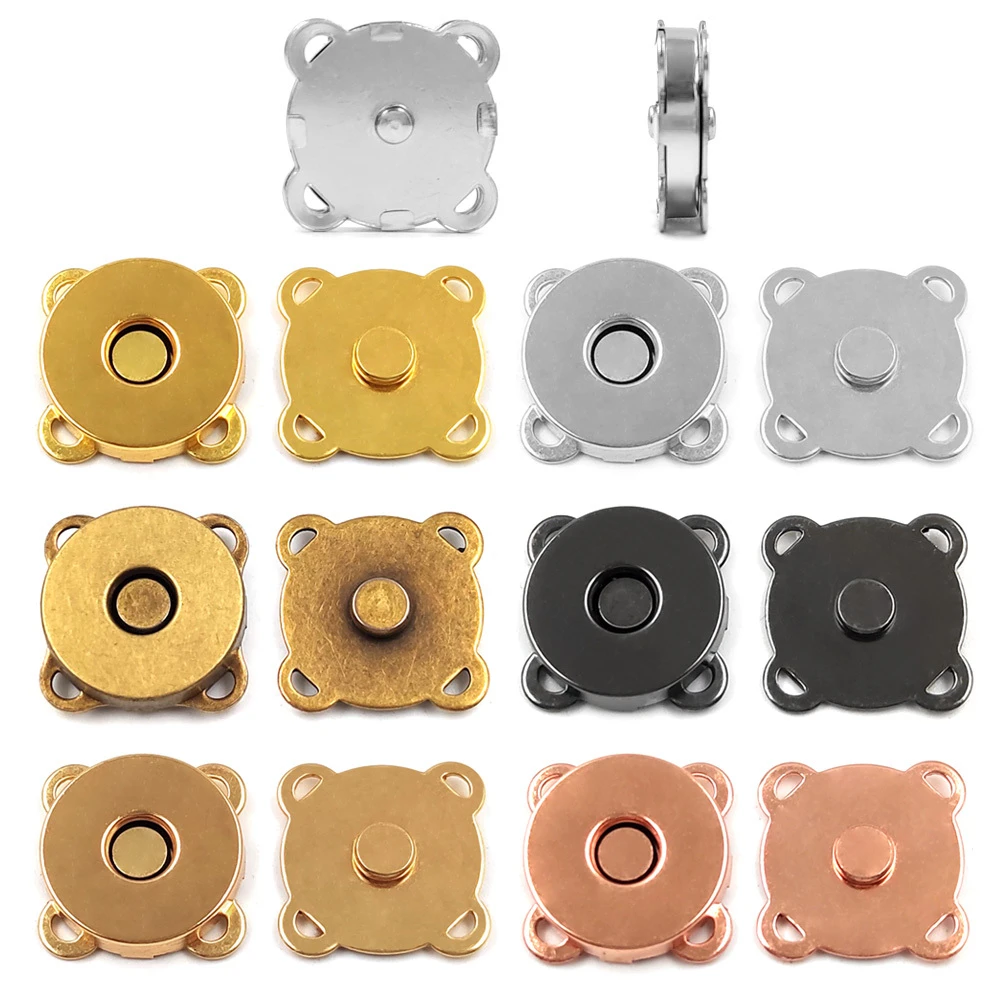
the magnetic snaps are the easy solution for the bag closure
As the reverse of the bag is solid, the same as the join (bottom) I didn’t have to add any lining inside.
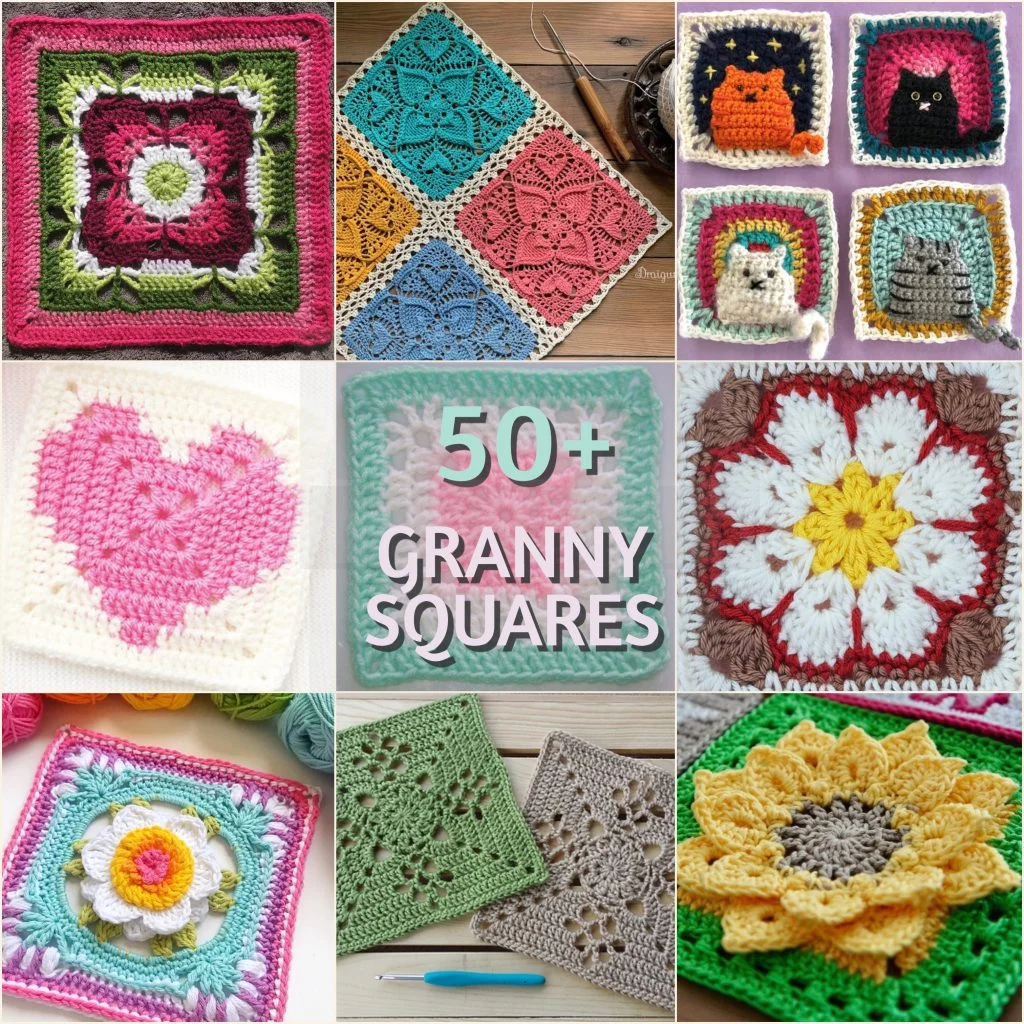
If you want to learn how to crochet a granny square tote bag, below you will find over 50 popular granny squares to use in your next project:
Enjoy! And see you around the next patterns!
Thank you! I’m going to do it for my granddaughter.