
In this article:

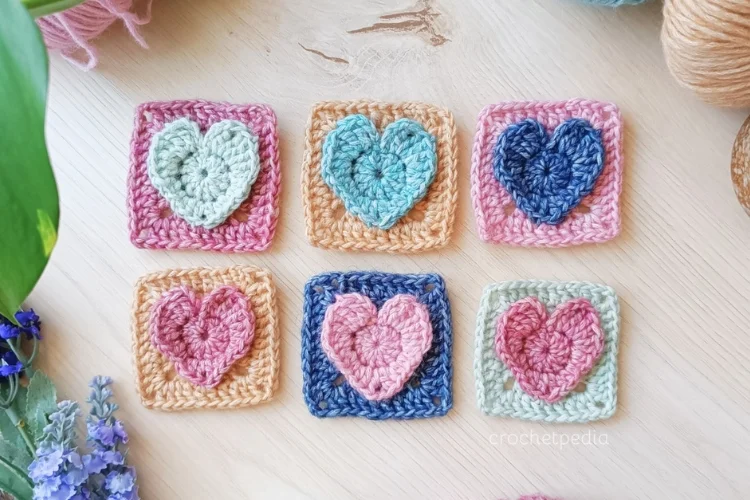
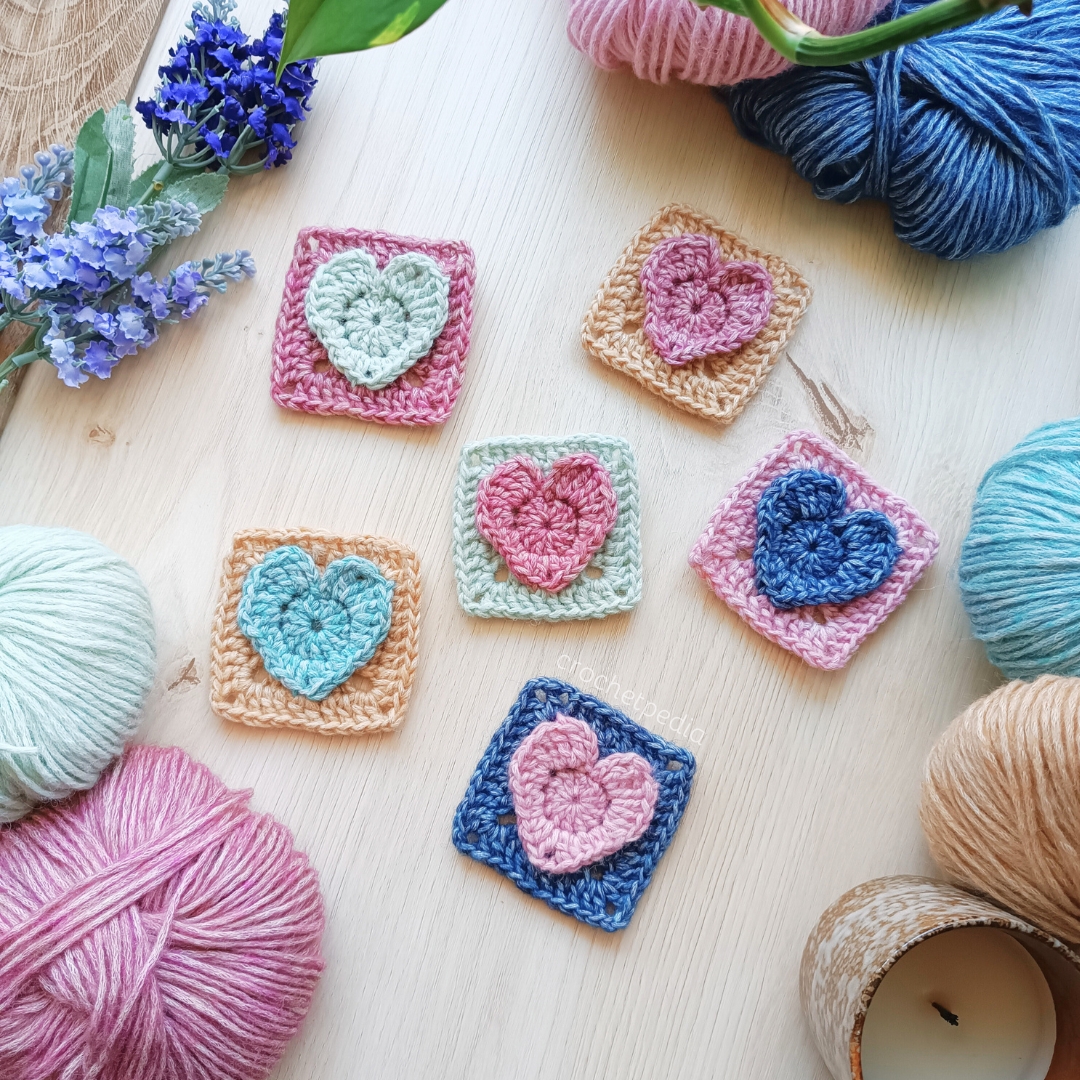
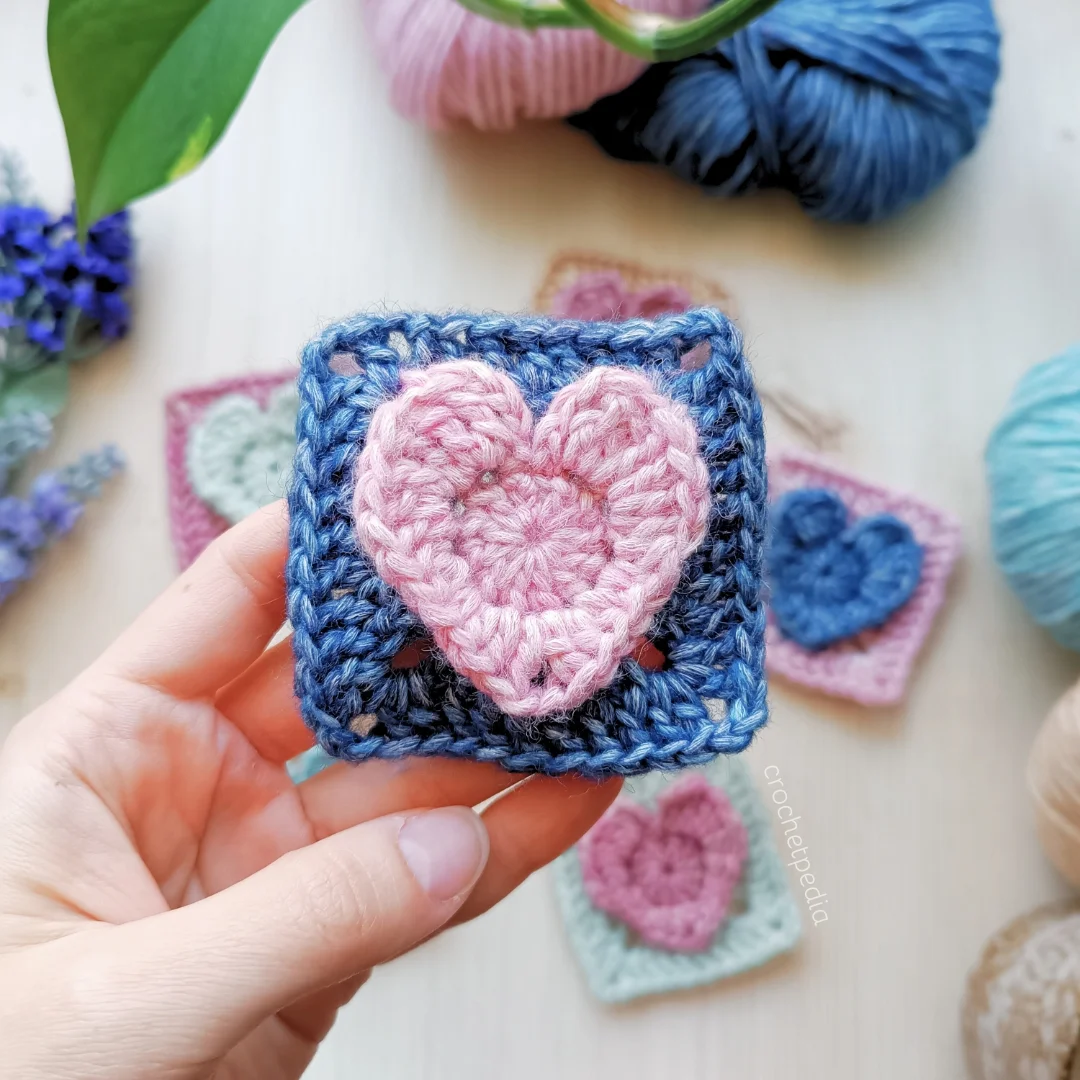
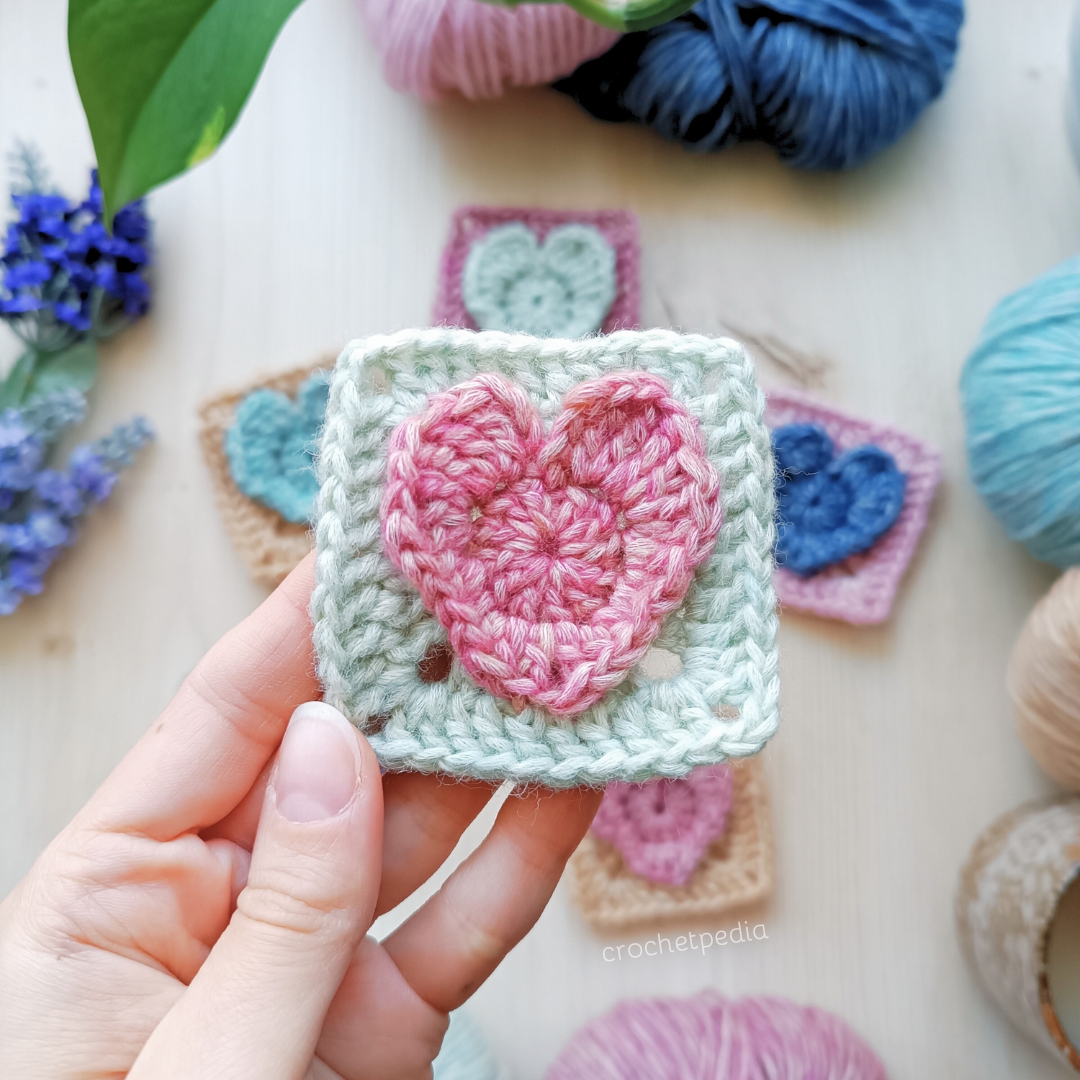
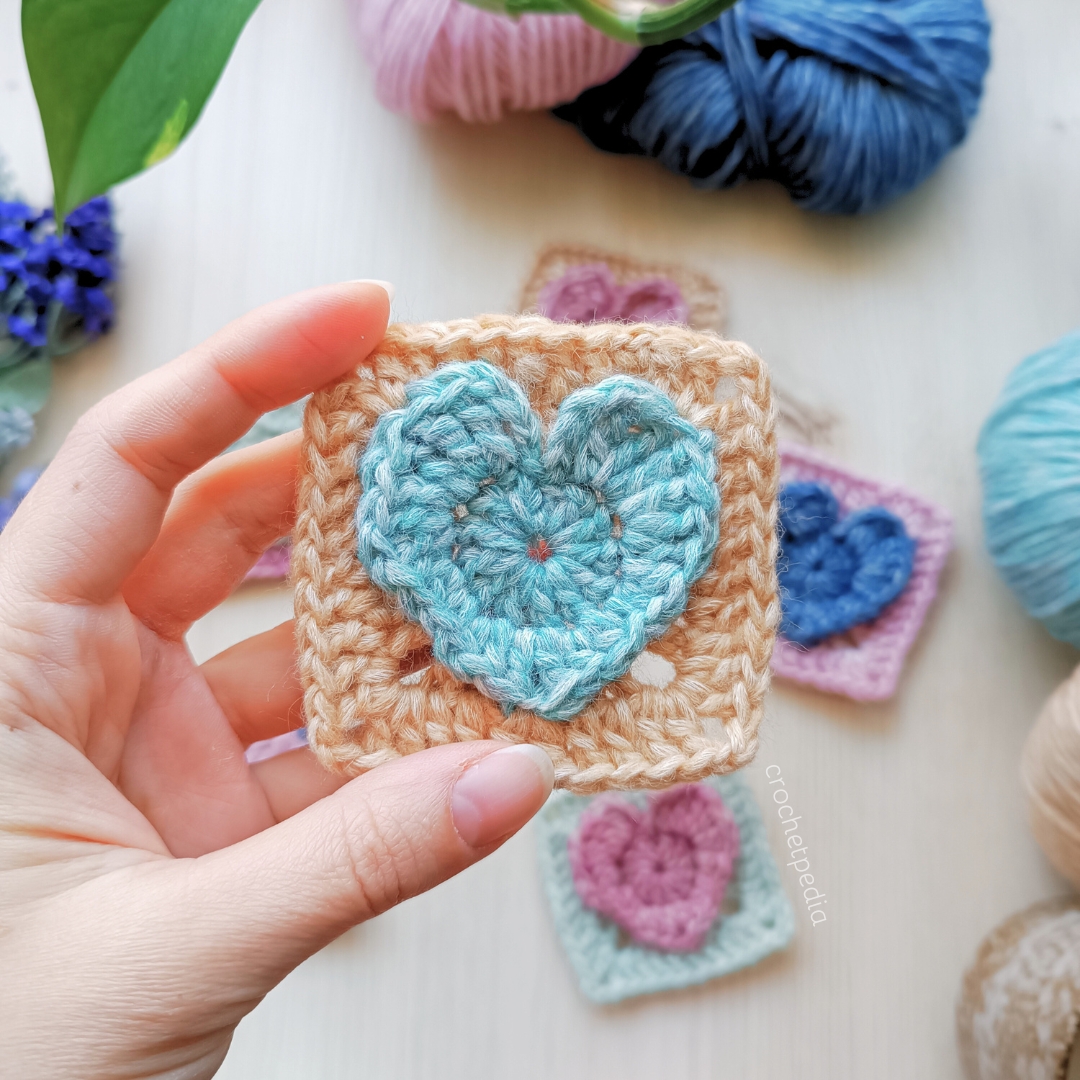
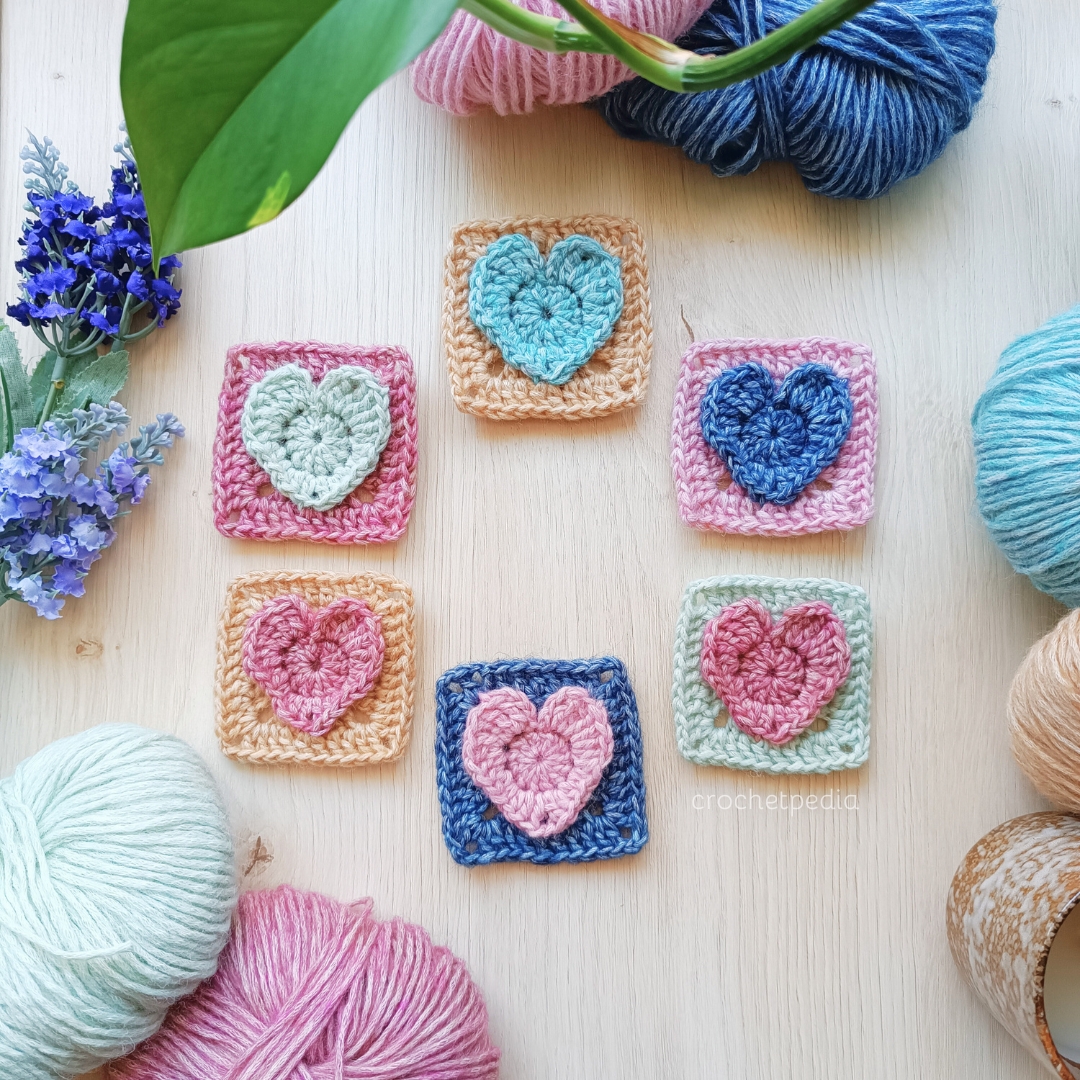
There’s nothing better than a versatile square you can use in various crochet projects. This 3D heart granny square combines a three-dimensional heart motif with a simple square pattern thanks to its clever construction. Unlike other textural pieces in which the top part folds uncontrollably during usage, these hearts will stay in place.
This project will be the perfect choice for ambitious beginners or intermediate crocheters. It involves many techniques, some of which require more experience and keeping the right tension.
The central part of the square can also be used separately as an applique, decoration, or gift topper. In this article, you will find a written pattern and a video tutorial – all created with beginners in mind to make the process easier!
This free crochet pattern was designed exclusively for Your Crochet by Kate from Crochetpedia.
About the Author
Kate comes from a family of makers who never stop creating. She runs Crochetpedia, where she shares her free crochet patterns, video tutorials, and stitch ideas. Follow her if you want to hone your skills, try new techniques, or create something beautiful.
👇 FOLLOW CROCHETPEDIA 👇
Pattern Notes
This is an intermediate project and the pattern uses standard US terms.
Materials and Tools
- Hobbii Portobello yarn – one skein of each color of your choice. One skein is 120 m per 50 g (131 yds per 1.76 oz). The content of this yarn is 60% Cotton, 28% Acrylic, 12% Wool. For one square I used about 2 g (0,07 oz) of yarn in total. I used the colors: Open Sea (79), Turkish Blue (88), Wild Berry (56), Antique Rose (53), Nougat (09), and Misty Green (113). You can use any other Worsted-weight yarn.
- 3.5 mm crochet hook
- scissors
- yarn needle (optional)
Measurements
- The heart is 6,5 x 6,5 cm (2.56 x 2.56 in). Your style of crocheting and the choice of yarn and hook may affect the size.
Stitches and Abbreviations
- MR – magic ring
- ch – chain stitch
- sl st – slip stitch
- sc – single crochet
- hdc – half double crochet
- dc – double crochet
- tr – treble crochet
- st – stitch
- ch-sp – chain space
- increase
- FLO – front loop only
- BLO – back loop only
- standing dc – standing double crochet, a type of chainless start to the round
- C1, C2 – different colors of yarn.

3D Heart Crochet Granny Square Video Tutorial
3D Granny Heart Square Free Crochet Pattern
This pattern has two parts. First, we make a heart motif in C1 (color 1), working the second round of stitches into the front loop only. Then, using C2 (color 2), we work in the back loops to build the square “behind” the heart. In round four we “catch” the heart in three places to attach it to the square underneath. This helps the heart motif lay flat.
Crochet Heart Motif
In C1 – color one.
Start
Round 1
3 ch, 11 dc into the loop, close with a slip stitch.
Round 2
In this round, all stitches are worked through the front loop (FLO).
Ch 4, 3 tr in one st, 3 dc in one st, 2 hdc in one st, 1 sc, 2 hdc in one st, *1 dc, 1 ch, 1 dc* all in one st, 2 hdc in one st, 1 sc, 2 hdc in one st, 3 dc in one st, 3 tr in one st, 4 ch, sl st (also in the front loop, between the “bumps”).
Weave the yarn to the wrong side of the work, cut it, and secure the ends.

Squaring The Heart
Turn the heart over and look at the inner circle. We will work the stitches into the “lines” that create the circle outline. Count them – you should have 12, with one at the bottom and one at the top of the heart. If you want, you can use stitch markers to keep track of them.
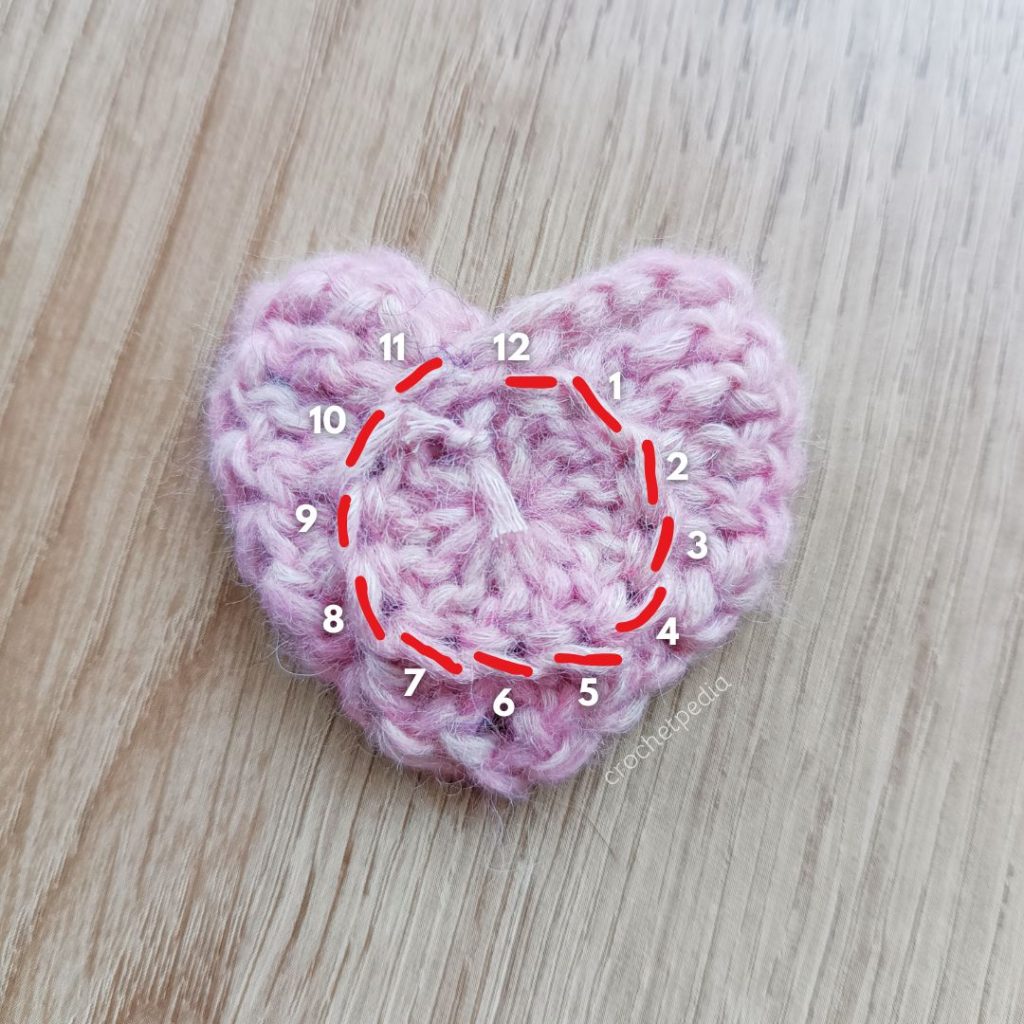
Take the background color yarn. We will start at the stitch number 11 in our picture. The one to the left side from the ‘valley’ at the top of the heart (or to your right if you’re left-handed).
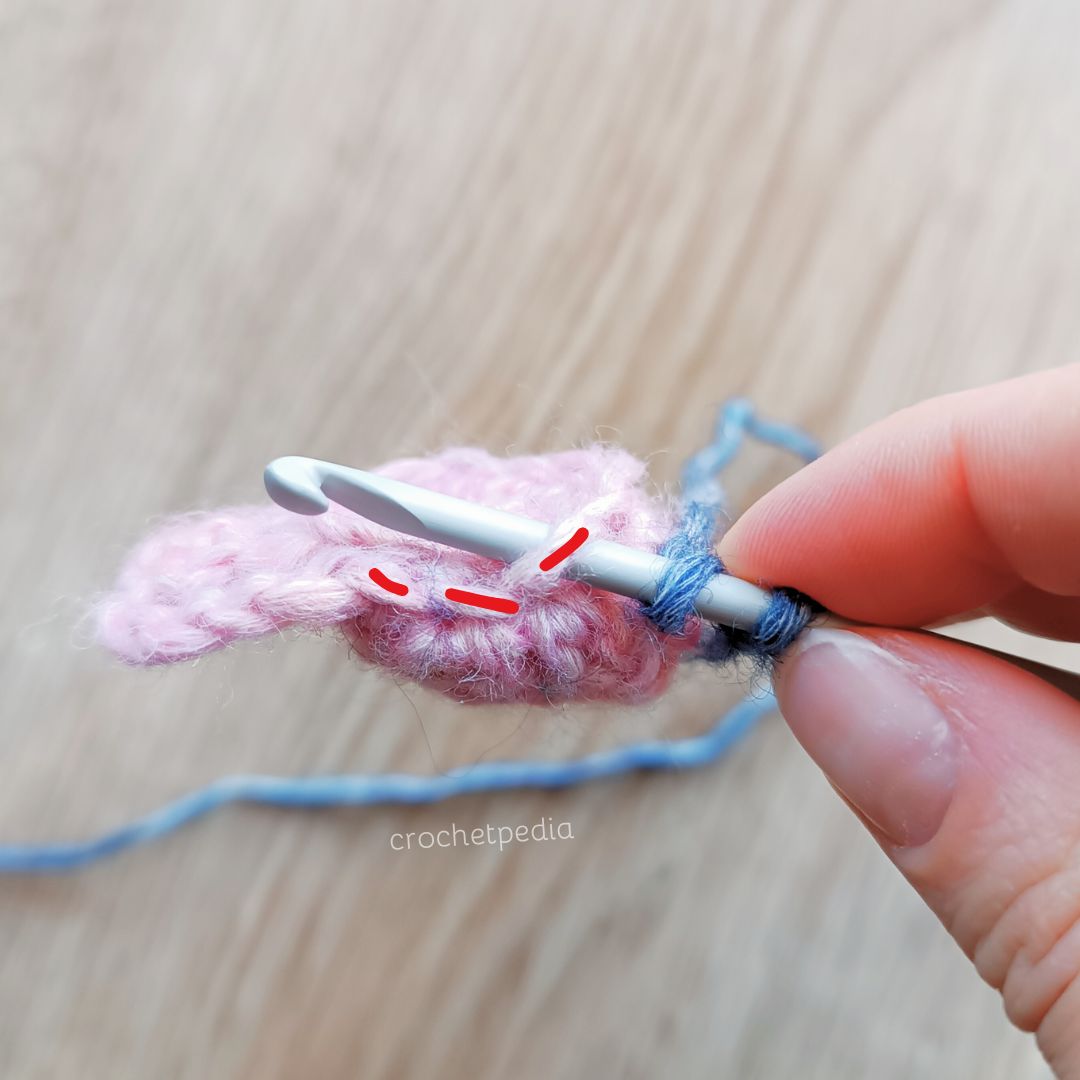
How to Make a Standing Double Crochet
Watch this tutorial on youtube.com by Tamara Kelly from Moogly to see how it’s done.
I always start standing double crochet by tying a slip knot on the hook. Tamara doesn’t do that in the tutorial, but it may help you keep the yarn end on the hook. Then, yarn over, but keep the yarn with your fingers so it doesn’t untwist and unravel. Pull up a loop, and work through the loops on the hook like in a normal double crochet.
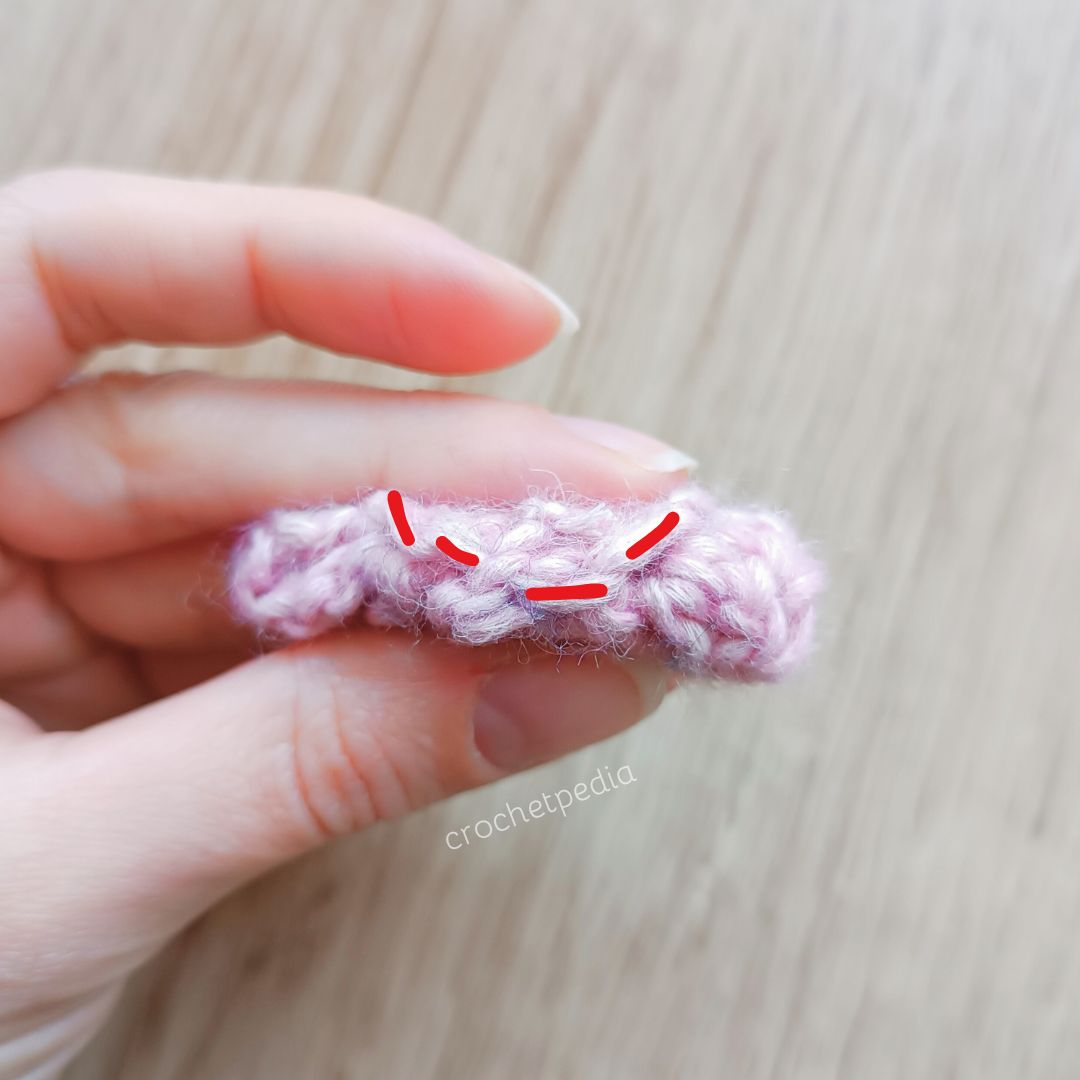
Prep for round 3
Turn the heart right side towards you, and fold it so you can see the ‘lines’ on the wrong side.
Insert your hook in the right stitch (number 11, which now is on your right for right-handed, and on your left for left-handed crocheters), and work a standing double crochet there, as explained above. This is your first double crochet of the round 3.
Continue with the pattern for this round as follows:
Round 3
In C2 – color 2. Remember that the first stitch of this round is a standing double crochet, as explained above.
(*2 dc in one st* x 3, 2 ch) x 4, sl st.
Round 4
In this round, we will continue enlarging the square, while “attaching” the heart motif in three places.
Side 1: 3 ch, 5 dc, *1 dc, 1 dc together with the back loop of the 2nd tr, 2 ch, 1 dc together with the back loop of the 2nd tr (the same one), 1 dc* all in the corner ch-sp,
Side 2: 6 dc, *2 dc, 2 ch, 2 dc* all in the corner ch-sp,
Side 3: 2 dc, 2 dc together with the back loop of the bottom tip-ch1, 2 dc, *2 dc, 2 ch, 2 dc* all in the corner ch-sp,
Side 4: 6 dc, *1 dc, 1 dc together with the back loop of the 1st tr (counting from the hook), 2 ch, 1 dc together with the back loop of the 2nd tr (the same one), 1 dc* all in the corner ch-sp, sl st.
The shortened version of this round’s pattern would look like this:
3 ch, 5 dc, (*2 dc, 2 ch, 2 dc* all in the corner ch-sp, 6 dc) x 3, *2 dc, 2 ch, 2 dc* all in the corner ch-sp, sl st.
It’s done!
Thank you for using this pattern! Let us know how you liked it in the comments section below 🙂
Looking for more heart ideas? Feel free to check out my other design – Crochet Heart Decor Free Pattern!