
In this article:

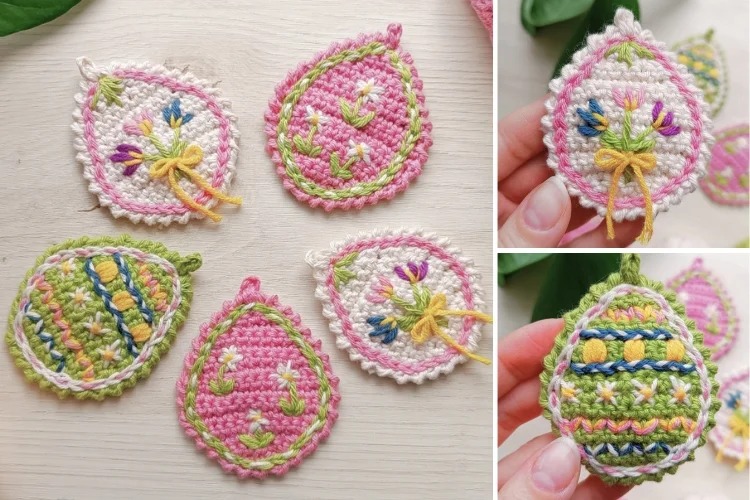
This spring, use your yarn and hook to make something unique and timeless. This crochet egg decor can be whatever you want it to be – a hanging ornament, an applique, or a festive garland. This super quick pattern will help you create a crocheted egg base, which you can later decorate with all kinds of embroidery.
In this post, you will find a free crochet pattern for the egg decor, as well as tips on how to decorate, finish it, and turn it into a garland.
This free crochet pattern was designed exclusively for Your Crochet by Kate from Crochetpedia.
About the Author
Kate comes from a family of makers who never stop creating. She runs Crochetpedia, where she shares her free crochet patterns, video tutorials, and stitch ideas. Follow her if you want to hone your skills, try new techniques, or create something beautiful.
👇 FOLLOW CROCHETPEDIA 👇
Pattern Notes
This is an easy / intermediate project and the pattern uses standard US terms.
Materials and Tools
- Hobbii Friends Cotton 8/4 – 100% Cotton in Fingering weight. I used a bit of each color: 04 Cream, 62 Plum, 79 Open Sea, 54 Pink Berry Smoothie, 108 Pistachio. I also used a random yellow yarn of the same weight I had in my stash.
- 3 mm crochet hook
- scissors
- yarn needle
- REMEMBER! You can use any Fingering weight yarn to achieve a similar effect. If you choose a different yarn weight, remember to use a corresponding hook size, and be prepared for the final product to have different measurements.
Measurements
- The egg is 7 cm (2.75 in) tall. Your style of crocheting and the choice of yarn and hook may affect the size.
Stitches and Abbreviations
- ch – chain stitch
- sl st – slip stitch
- sc – single crochet
- st – stitch
- inc – increase (with single crochet)
- dec – decrease (with single crochet)
- sc3tog – decrease with 3 single crochet stitches
- crab stitch (reverse single crochet)
- surface crochet (for decorating)
- basic embroidery (for decorating)
Crochet Egg Decoration Video Tutorial
Crochet Egg Decor Free Crochet Pattern
First, we create a flat egg shape by working single crochets in rows. Then, we add a crab stitch edging all around. Optionally, we add a loop for hanging. Finally, we decorate the egg with embroidery.
Notes
- This decor is designed to be looked at from the right side only! The wrong side is where the yarn ends live. If you want a two-sided decor, join two pieces together and keep the yarn ends inside.
- The number in brackets (#) signifies how many stitches you have in each row.
- 1 ch at the beginning of the round doesn’t count as a stitch and isn’t included in the overall stitch count.
- inc – increase with single crochet = 2 sc in one stitch.
- dec – decrease with single crochet = sc2tog.
- RS – right side
- WS – wrong side
Start: 3 ch.
RS | Row 1: 1 ch, inc, 1 sc, inc (5) – Yes, we already make increases in the first row. The first increase goes in the 2nd chain stitch counting from the hook.
WS | Row 2: 1 ch, inc, 3 sc, inc (7)
RS | Row 3: 1 ch, inc, 5 sc, inc (9)
WS | Row 4: 1 ch, inc, 7 sc, inc (11)
RS | Row 5: 1 ch, inc, 9 sc, inc (13)
WS | Row 6: 1 ch, 13 sc (13)
RS | Row 7: 1 ch, 13 sc (13)
WS | Row 8: 1 ch, 13 sc (13)
RS | Row 9: 1 ch, dec, 9 sc, dec (11)
WS | Row 10: 1 ch, 11 sc (11)
RS | Row 11: 1 ch, dec, 7 sc, dec (9)
WS | Row 12: 1 ch, dec, 5 sc, dec (7)
RS | Row 13: 1 ch, dec, 3 sc, dec (5)
WS | Row 14: 1 ch, dec, 1 sc, dec (3)
RS | Row 15: 1 ch, sc3tog (1)
Edging
Learn how to finish crochet with crab stitch (reverse single crochet) with this video tutorial.
- Do not turn the work. Chain 1 and work crab stitches all around the edge of the egg, going clockwise. It translates to roughly 1 stitch per row, but pay attention to the flatness of the egg. If the edges start to go upward, you should add more stitches to the edging. End in the sc3tog at the tip.
- (OPTIONAL) Chain 3 for the loop, or however many you want to make the loop bigger.
- Slip stitch back into the top of the egg and wave the end to the wrong side.
Adding Embroidery to Crochet Easter Egg Decor
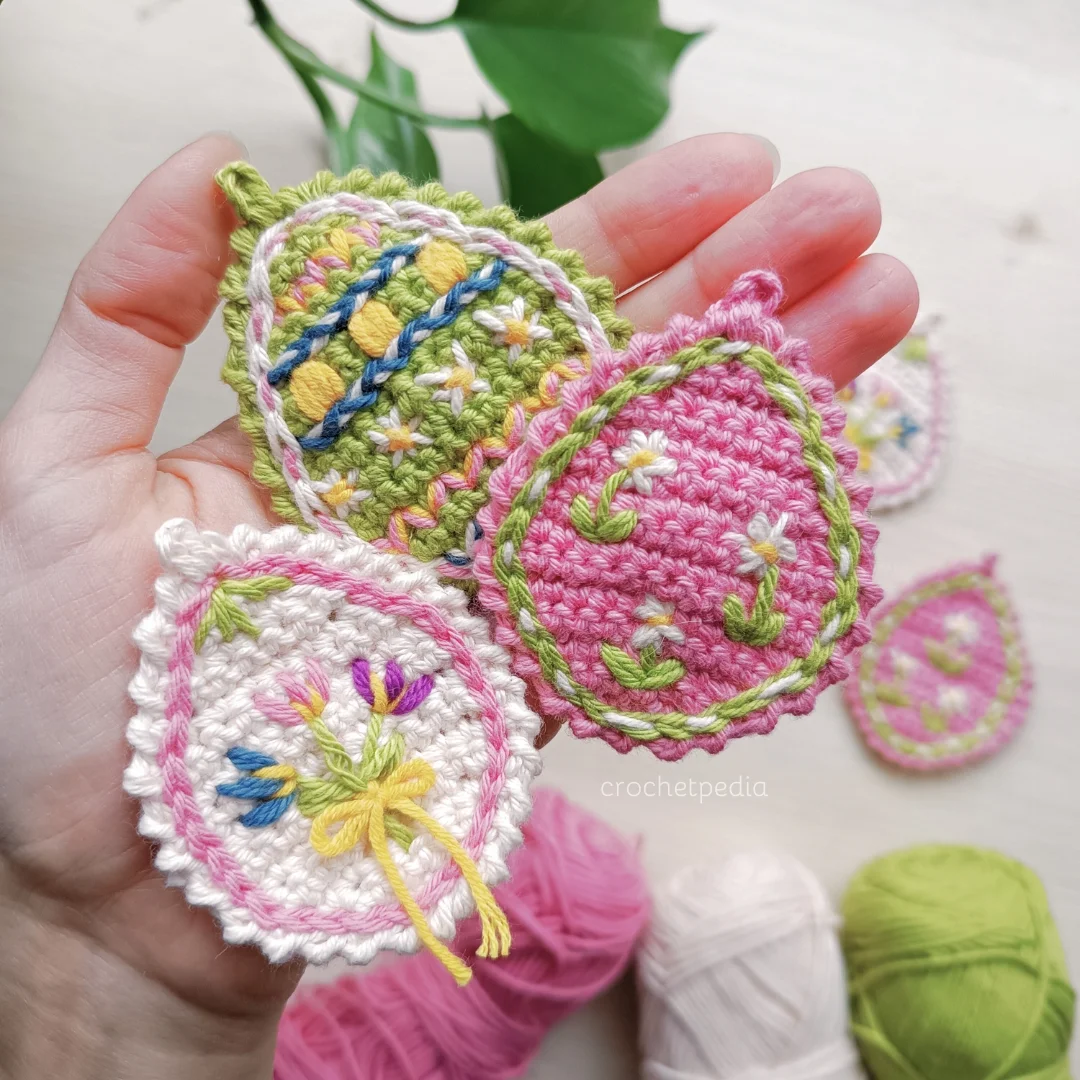
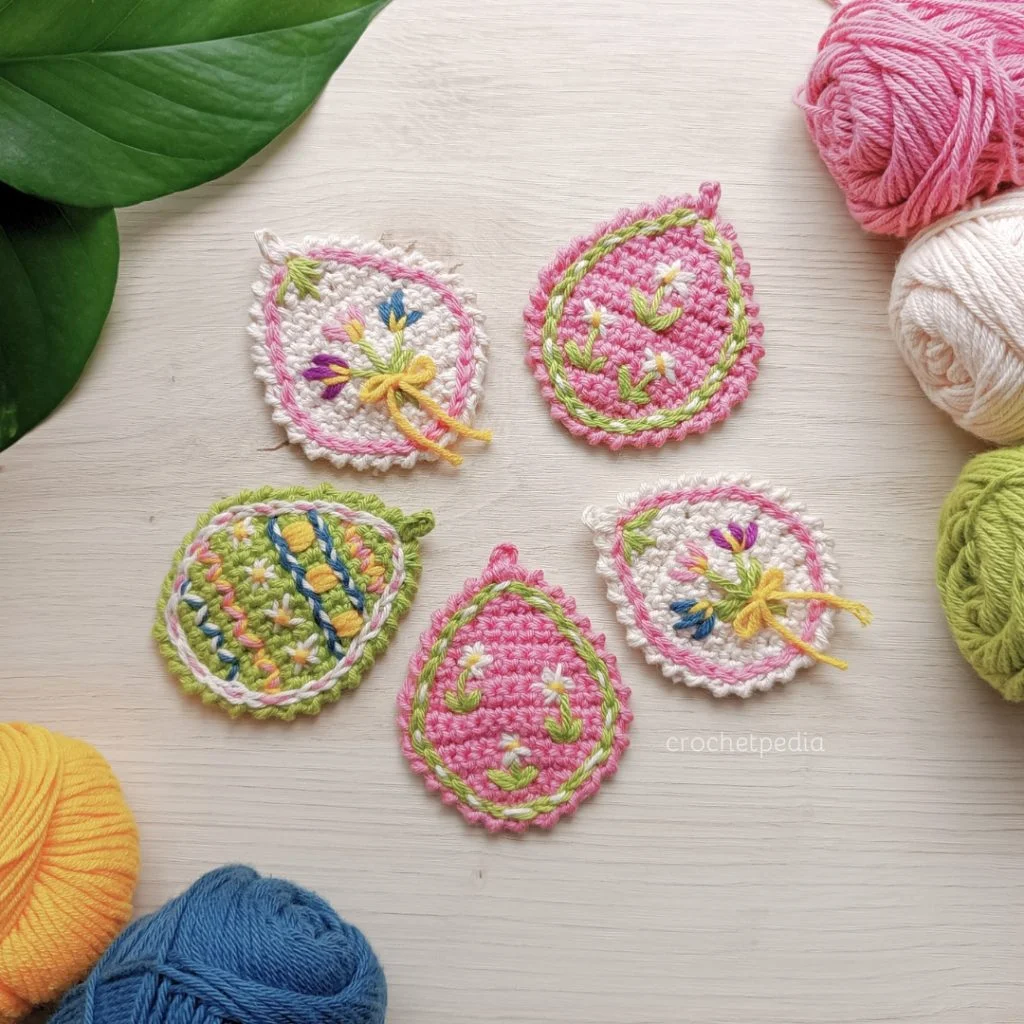
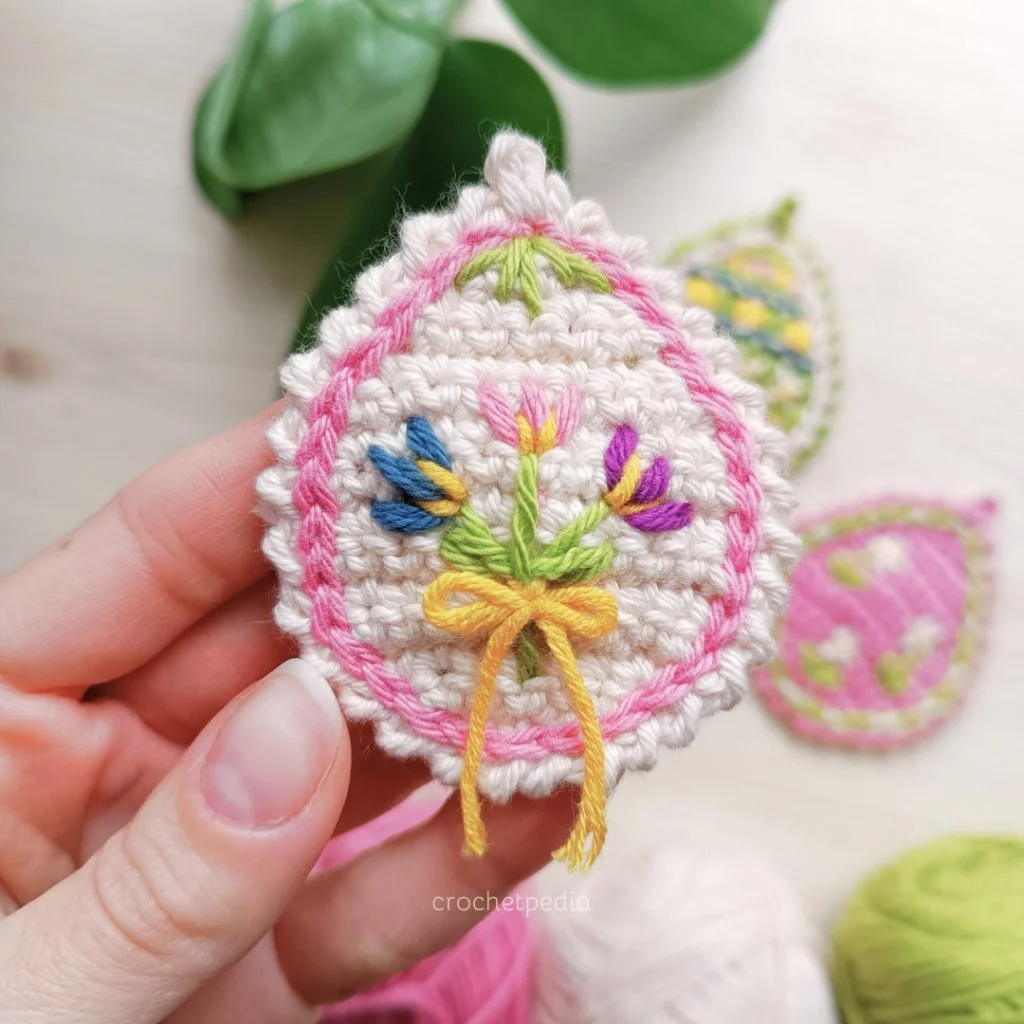
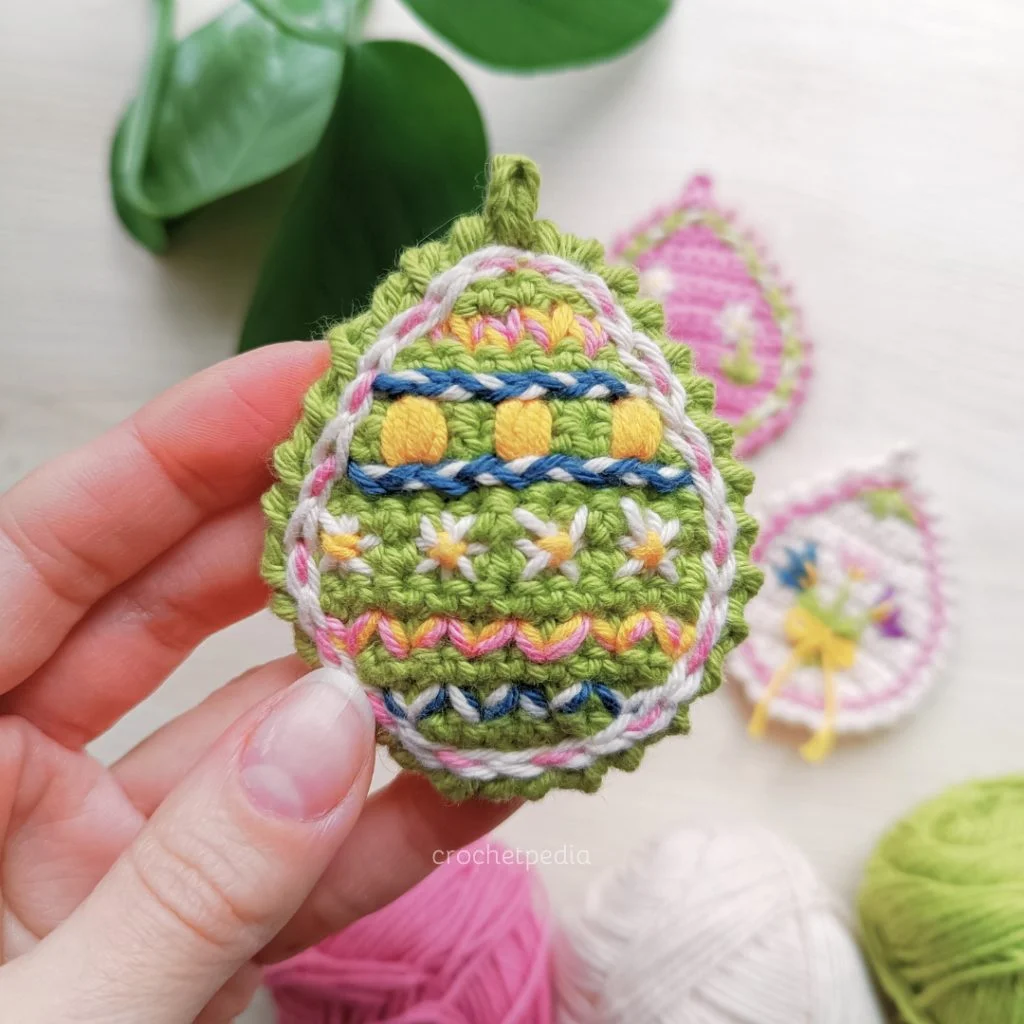
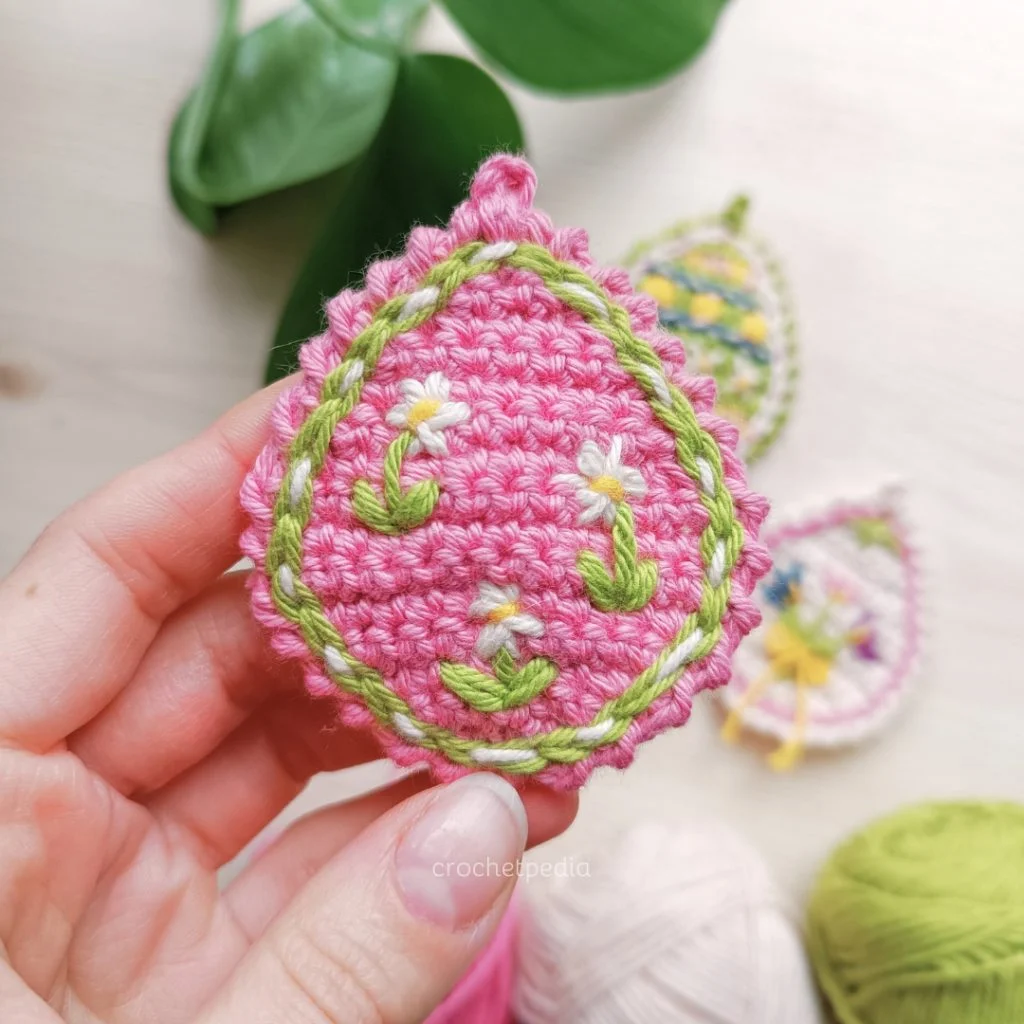
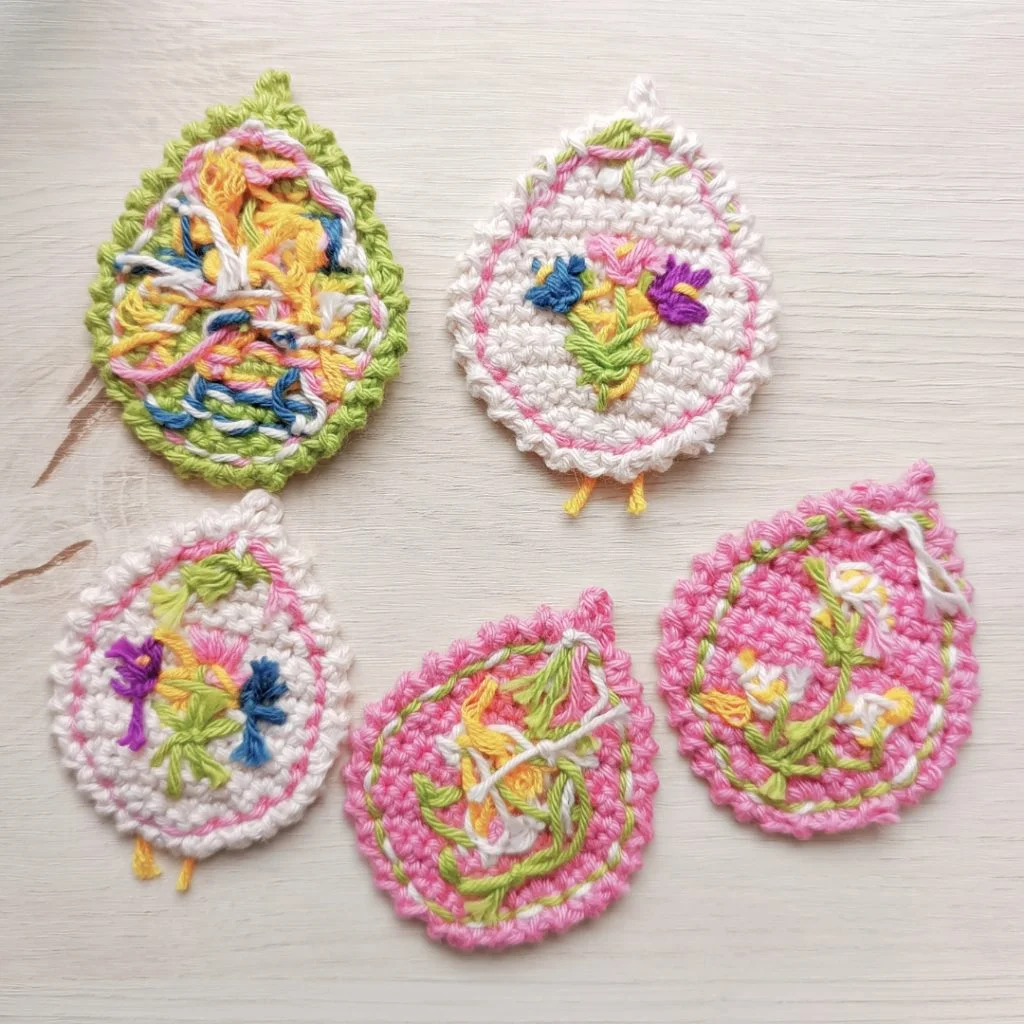
Let’s admit it – the embroidery is what makes this project worthwhile. As you can see, I’m no pro at this (just look at these wonky flowers!), but it doesn’t matter. Let your creativity guide you, or copy one of my ideas!
Design Your Own Easter Egg
I came up with three spring-inspired designs that you can copy. Depending on the background color, the motifs will be more or less visible, so experiment and see what type of color palette works for you.
How to Add Embroidery
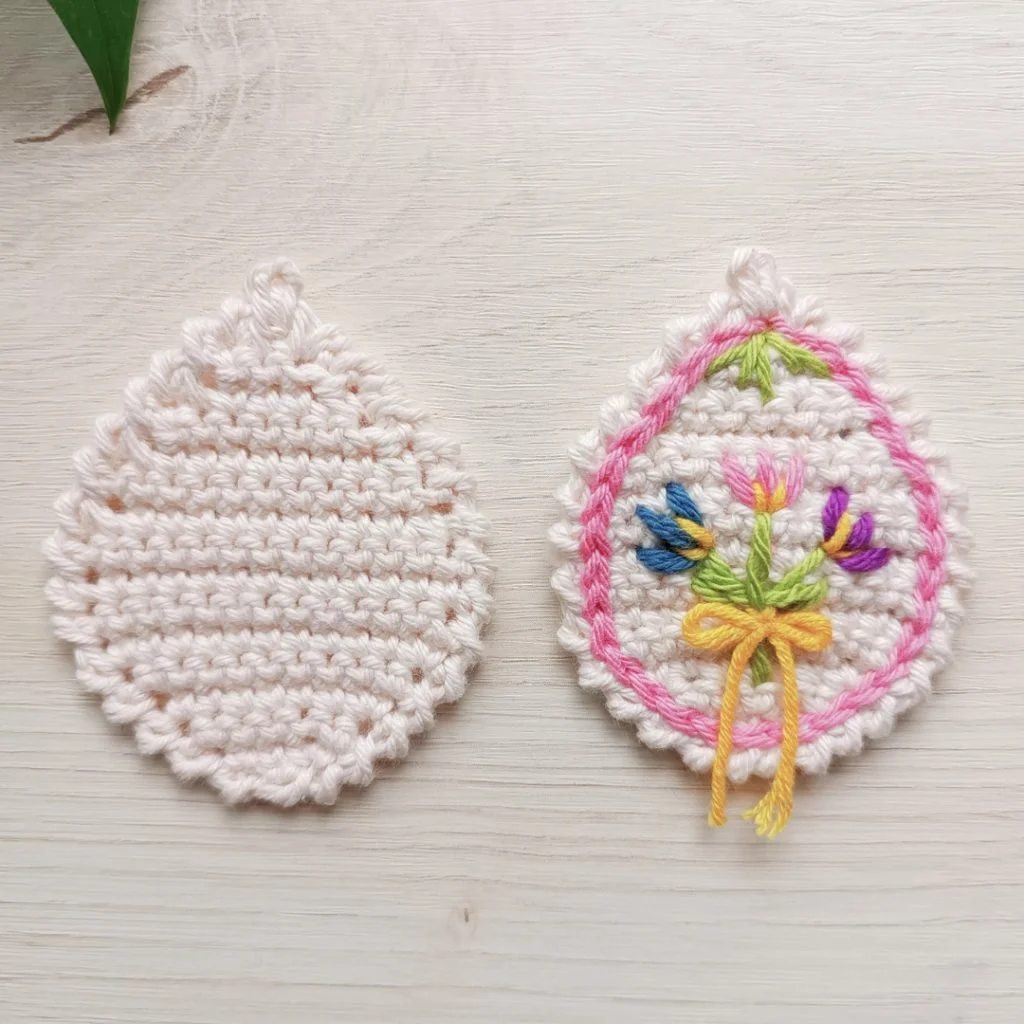
Below you can see a comparison of the undecorated egg and decorated one. Quite a difference, huh?
I used surface crochet to hide the ugly holes near the crab stitch edging. I show how to do it in my video about slip stitches.
Every other motif was created with super basic embroidery and a yarn needle. Let’s make it clear – embroidery on crochet is harder than on fabric. Why? For example, we’re using a blunt needle that likes to go between the stitches. It doesn’t always suit the design, especially organic, rounded motifs.
I experimented with using two yarn colors at once, tying a piece of yarn on top (the yellow bow!), embroidering over the surface crochet (two-toned border!), and unraveling it many times. It’s a work of trial and error, so just let yourself be creative and go with it.
To have a place to start, you can learn basic embroidery on crochet with this video tutorial.
Finishing Tips and Tricks
As I mentioned, this project is meant to be viewed from the right side only. You can see why below…
I am super messy about my yarn ends, but it seems impossible to keep them in order when using so many colors. If you plan to hang these ornaments against the wall or use them as an applique, there’s no problem – the yarn ends will be hidden!
However, if you want the wrong side to look nice, you have basically two options:
- Join two embroidered eggs and sew them together wrong sides inside. This will create a two-sided ornament. You can either sew the parts with yarn and needle or use the edging as a join – working it through both parts at once.
- Sew a piece of colorful fabric on the back or use iron-on adhesive fabric used for sewing.
Disclaimer: I haven’t tried any of these options, so I can’t guarantee the effect.
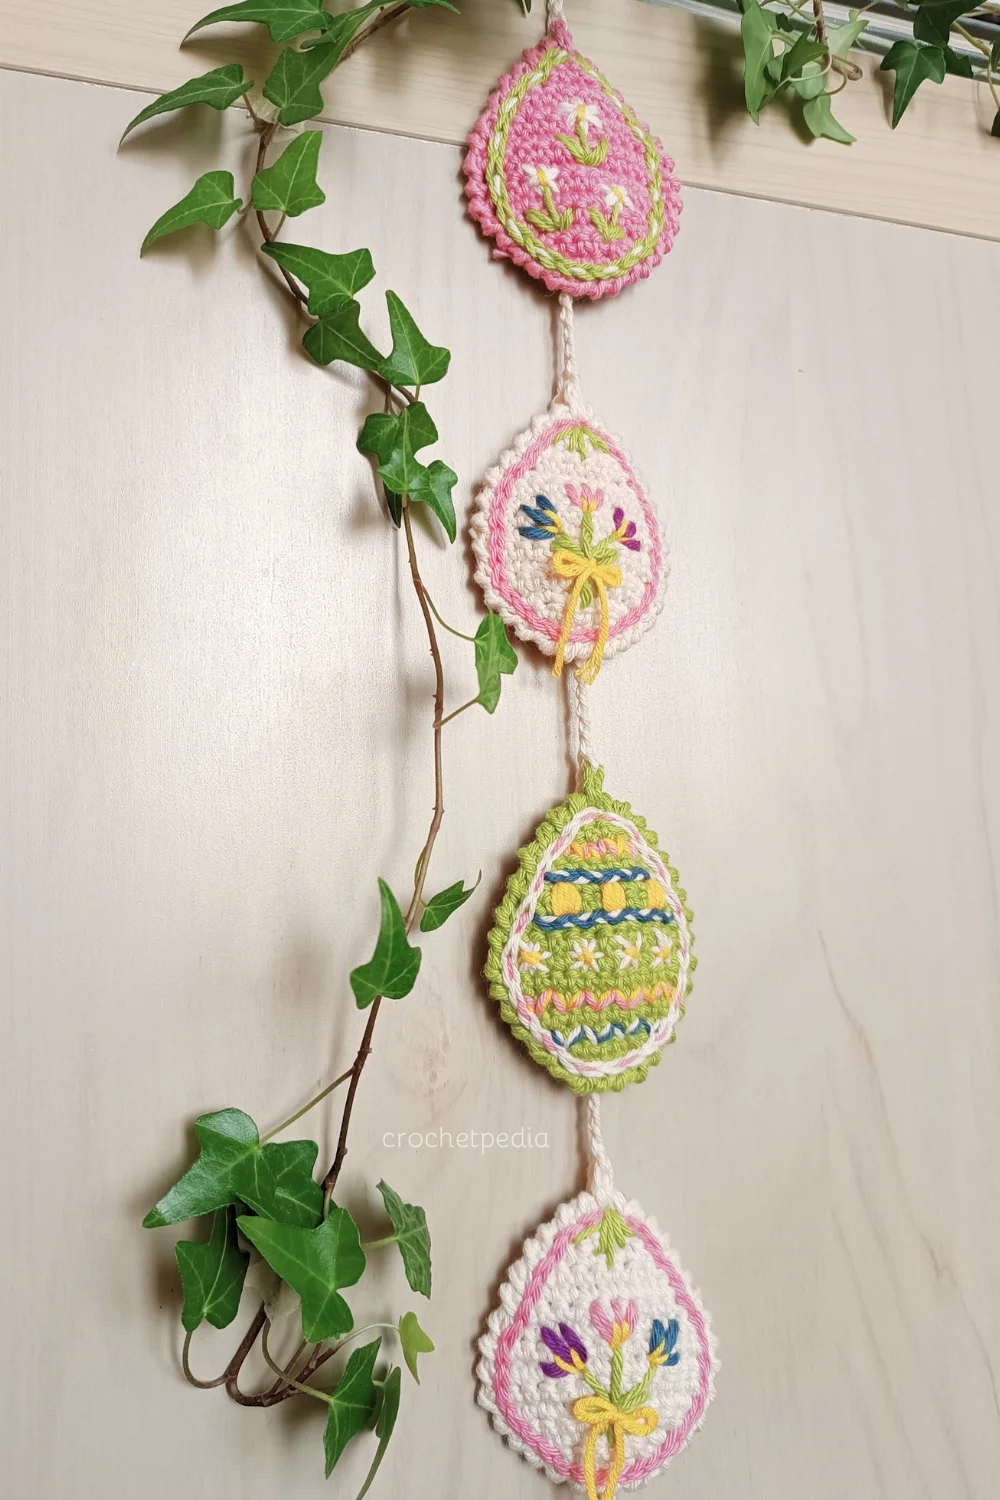
How to Make an Easter Egg Garland
- Chain however many stitches you want to start. This piece will be used to tie the garland. The length of your garland is totally up to you.
- When you’re ready, work a single crochet through the loop of the egg ornament.
- Continue making chain stitches until you’re ready to attach another egg.
- Keep an equal number of chain stitches in between the eggs.
- For a vertical garland (see below), attach the bottoms of the eggs to the chain as well – I used small pieces of yarn and tied them.
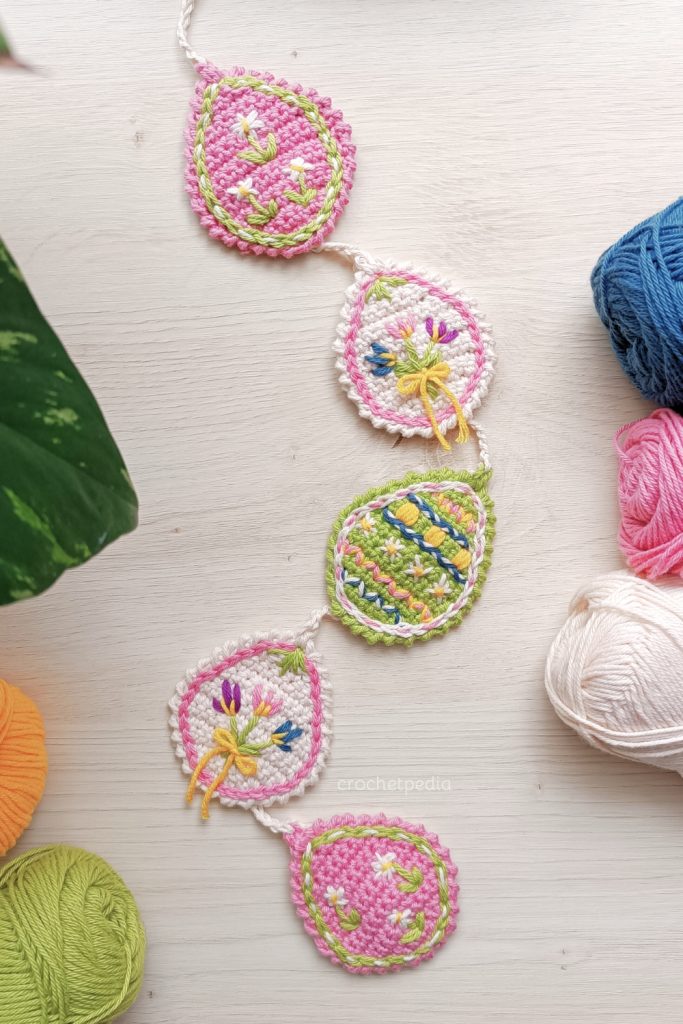
It’s done!
Thank you for using this pattern! Let us know how you liked it in the comments section below 🙂
Absolutely cute. I can’t wait to make this.