
In this article:

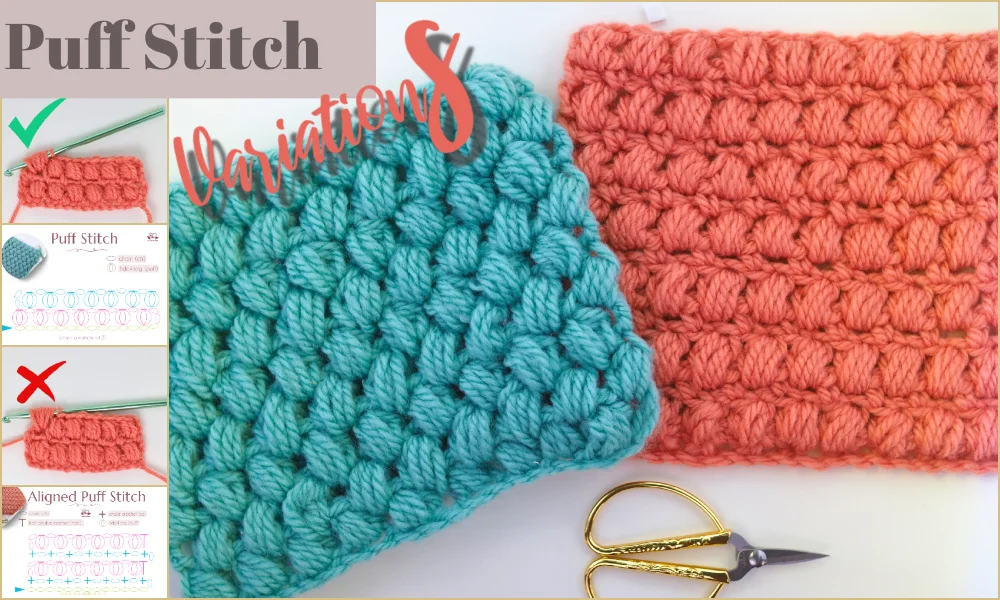
The puff stitch is easy and fun stitch to learn. The double-sided bobbles formed by puff stitch give a dense, warm structure. That’s why it is very popular in winter hats and blankets and is also often used in baby cardigans. The characteristic ‘puff’ look texture also goes along with flowers and creates realistic looking petals, so is often used to pop up flowers both in appliques and blanket squares.
The puff stitch can be used as the only stitch throughout an item. You can also add only one row of puffs as an accent, e.g. in a winter hat. There is also one more amazing way you can use the puffs. The deep, dimensional texture of this pattern distinguishes it visually from the background and allows you to create any graphic design. Similar to the corner-to-corner stitch (C2C) technique, we can treat a single bobble as a pixel to imitate a pixelated image. From letters or simple geometric shapes, through more complicated patterns like animals, rainbows or boats, to creating scenes or reflecting photos or faces.
What is a puff stitch?
The puff stitch adds dimension to your project and a characteristic elegant texture. To get the puff stitch, you make a cluster of 3 or more unfinished loops in one stitch and connect them with a loop. This creates a round, dimensional bubble that pops up from the rest of the texture.
What is in this post?
In this tutorial, we will go through the puff stitch technique together, step-by-step. I will cover the topic from everything you need to know to get started even if you have never crochet before. For each step, in addition to a detailed explanation, there is a photo tutorial waiting for you, for a better understanding of the instructions.
Firstly, I will explain how to make a most popular puff stitch and how to make a single puff with a detailed photo tutorial. Then, we will move to alternate techniques of the puff stitch. Finally, we will discuss some frequently asked questions and tips. Also, I will share with you my favorite pattern ideas where you can practice the puff stitch you just learned.
Basic (Braided) Puff Stitch: Crochet Pattern and Detailed instructions
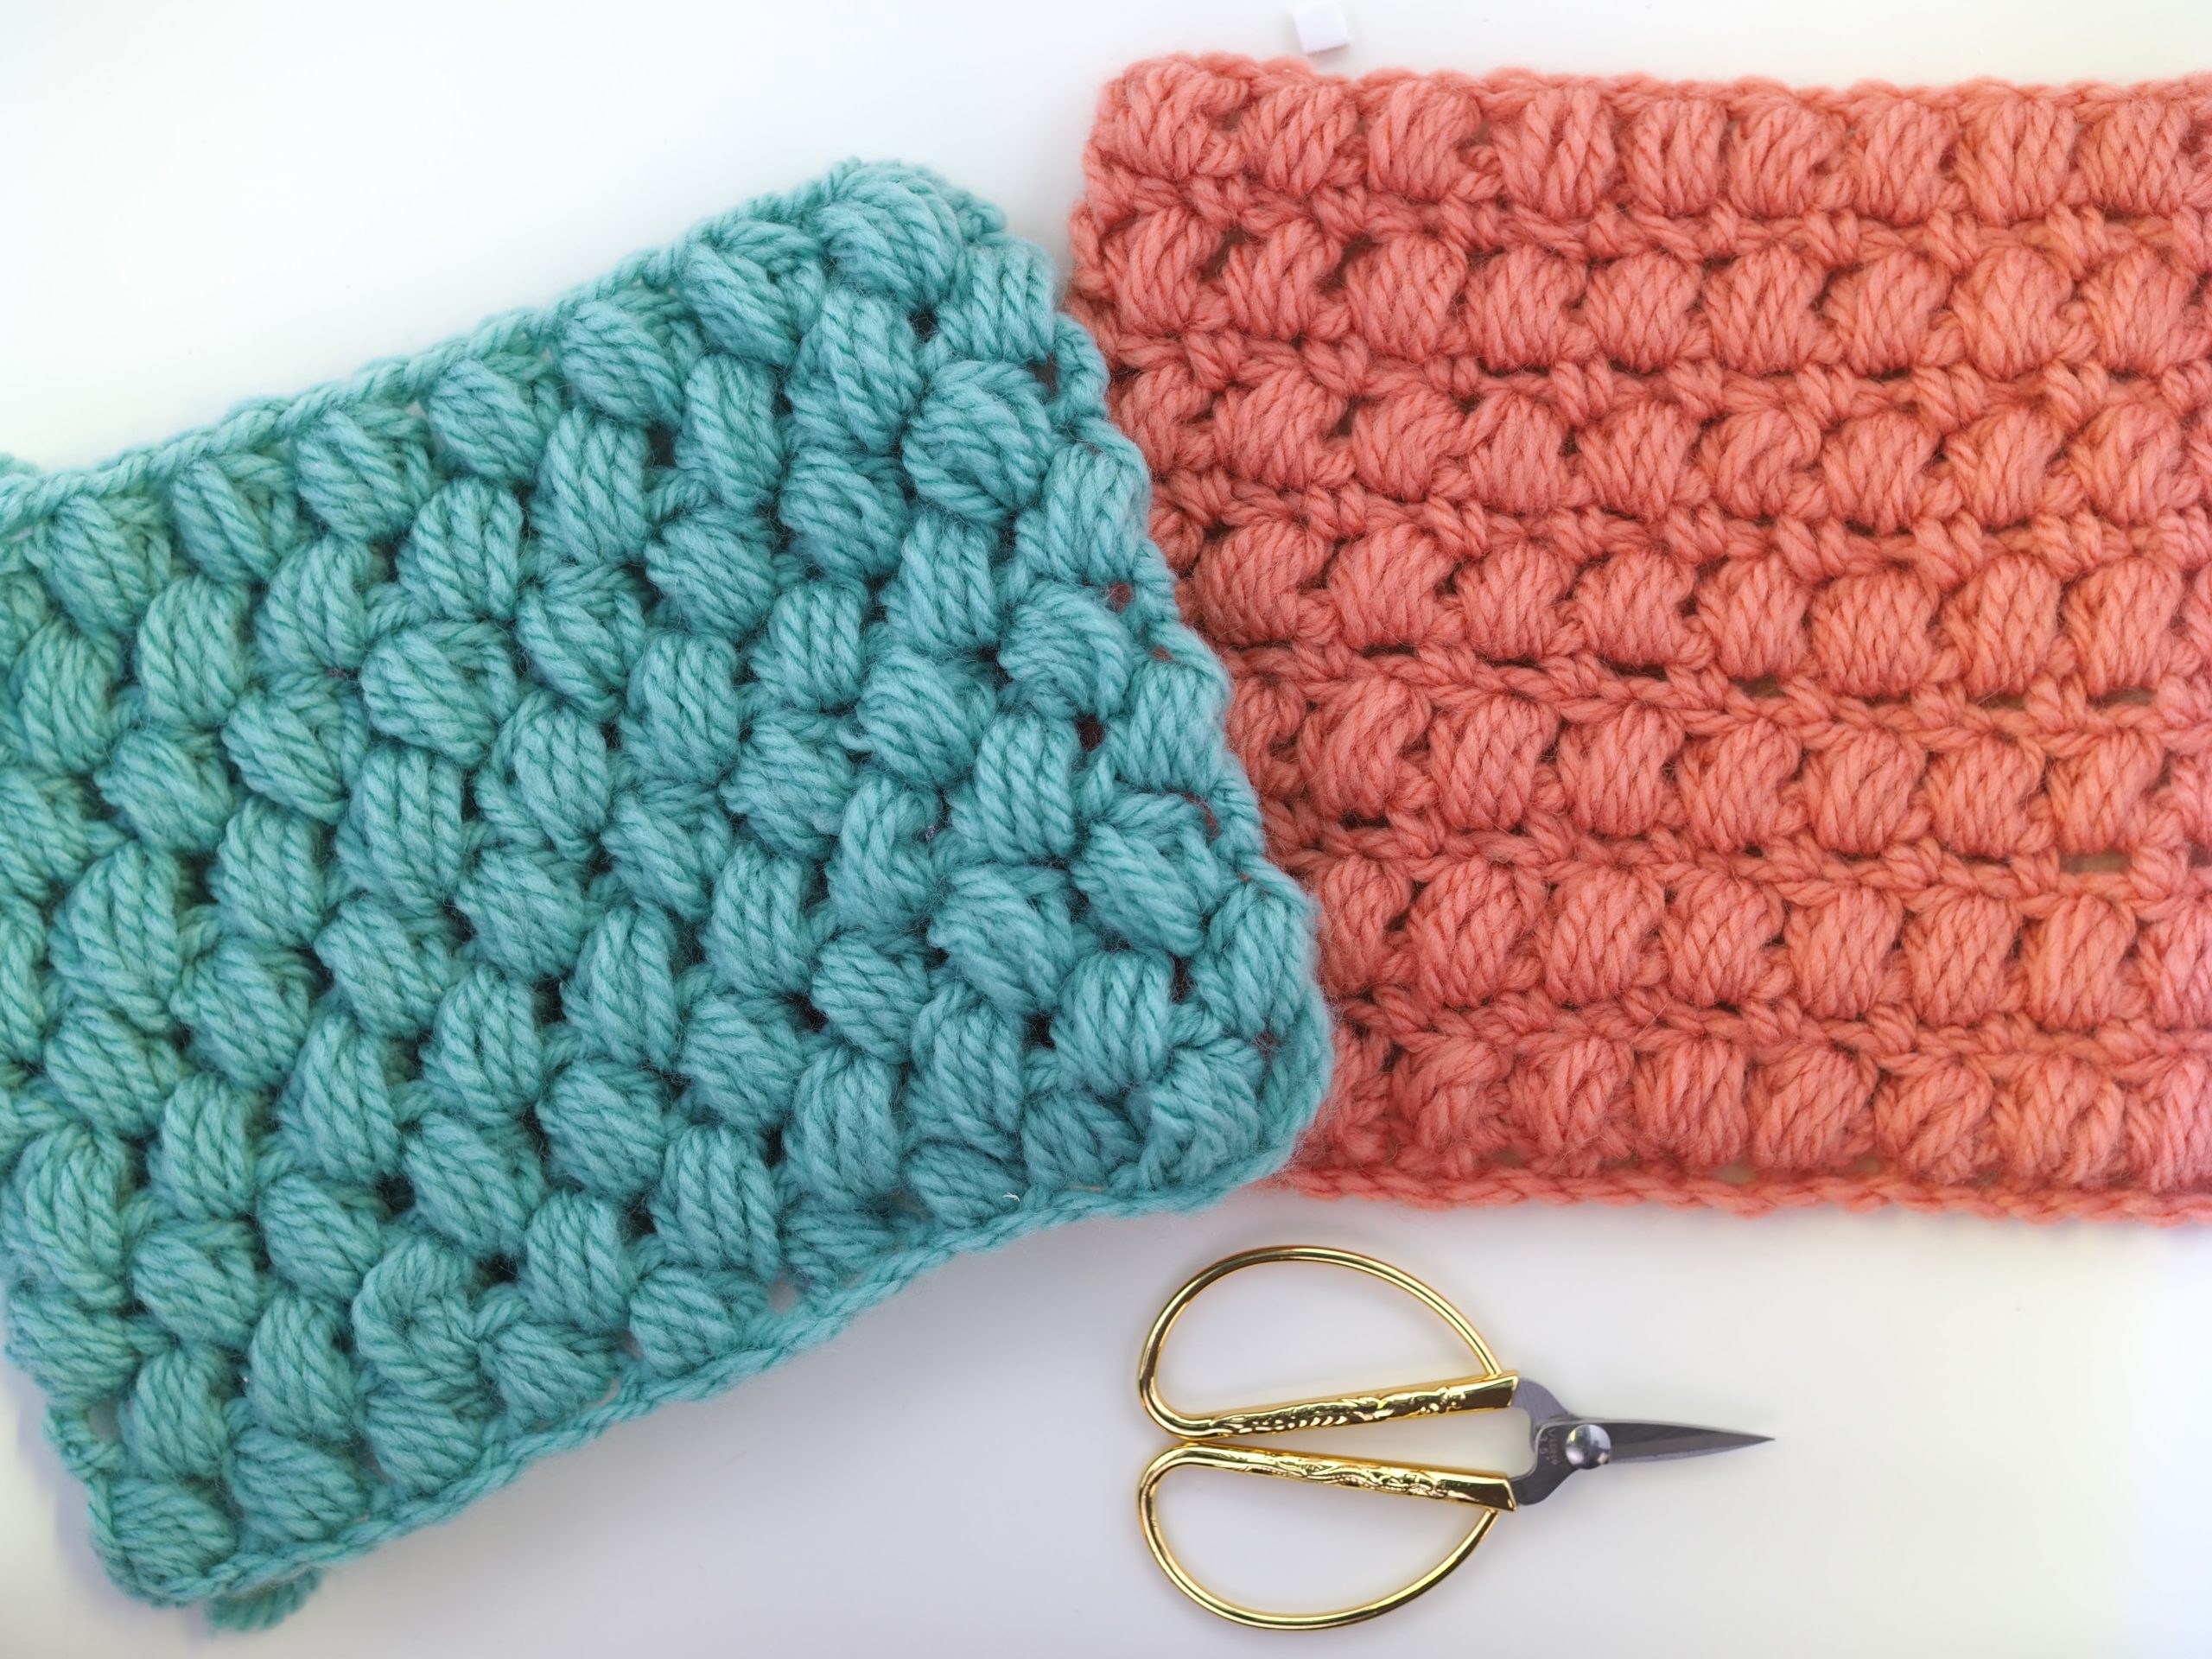
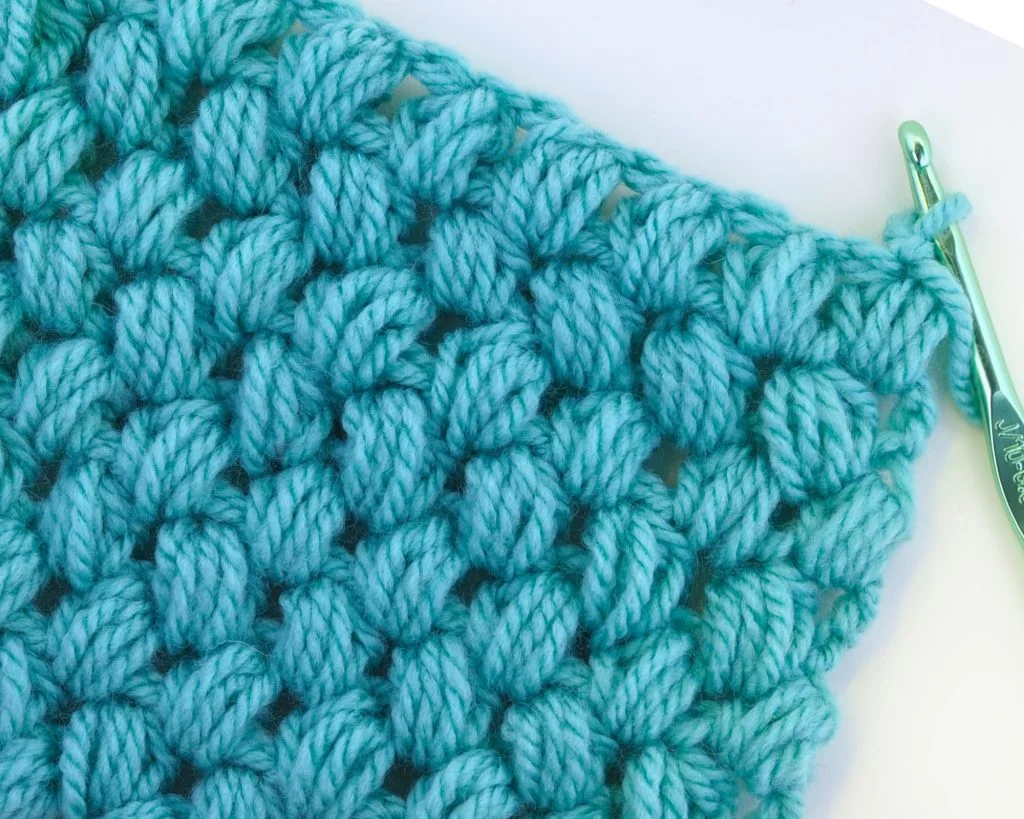
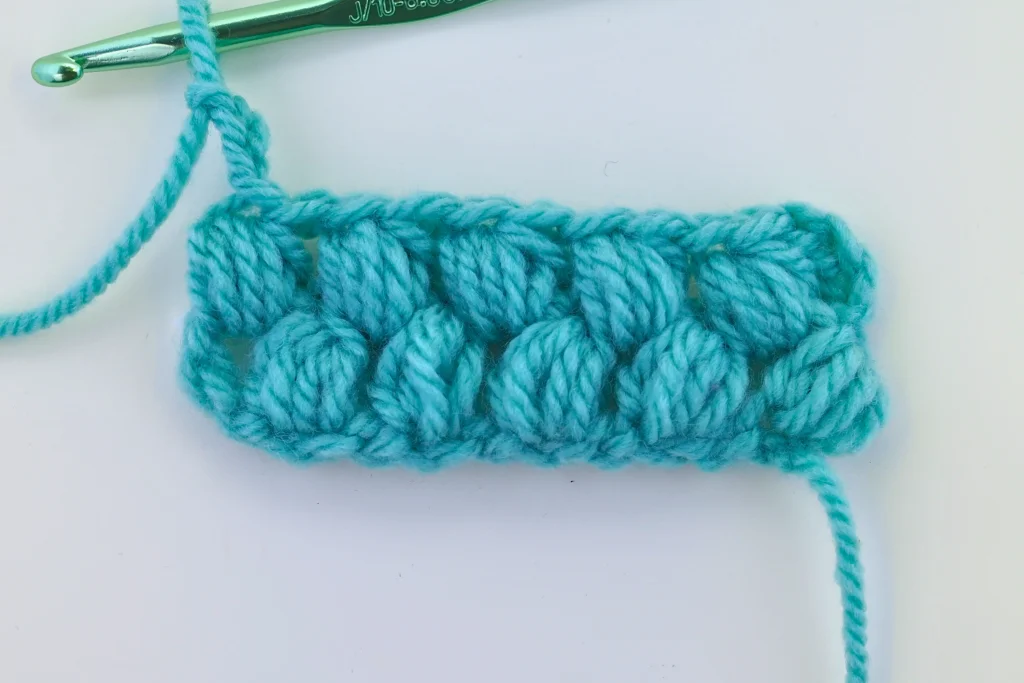
A braided Puff Stitch is the easiest among the puff stitch family. You just need a foundation chain and then you make puffs from the beginning to the end of the each row. As the puffs in continuous rows are made in-between puffs the preceding row, this stitch creates zig-zag like texture.
Materials you’ll need
some yarn
To crochet the puff stitch can use any yarn you already have. However, if you are a beginner, I suggest for you to practice with a smooth yarn.
a crochet hook
Use a crochet hook in the size corresponding with your yarn. You will find a recommended hook sizes on a yarn label.
scissors to cut yarn tails
a yarn needle or tapestry needle (for weaving in ends)
Abbreviations Used and the Pattern Notes
The standard crochet abbreviations I used in this tutorial are:
- ch = chain stitch
- puff = puff stitch
- yo = yarn over
- st /sts = stitch/es
This tutorial is written in US terms.
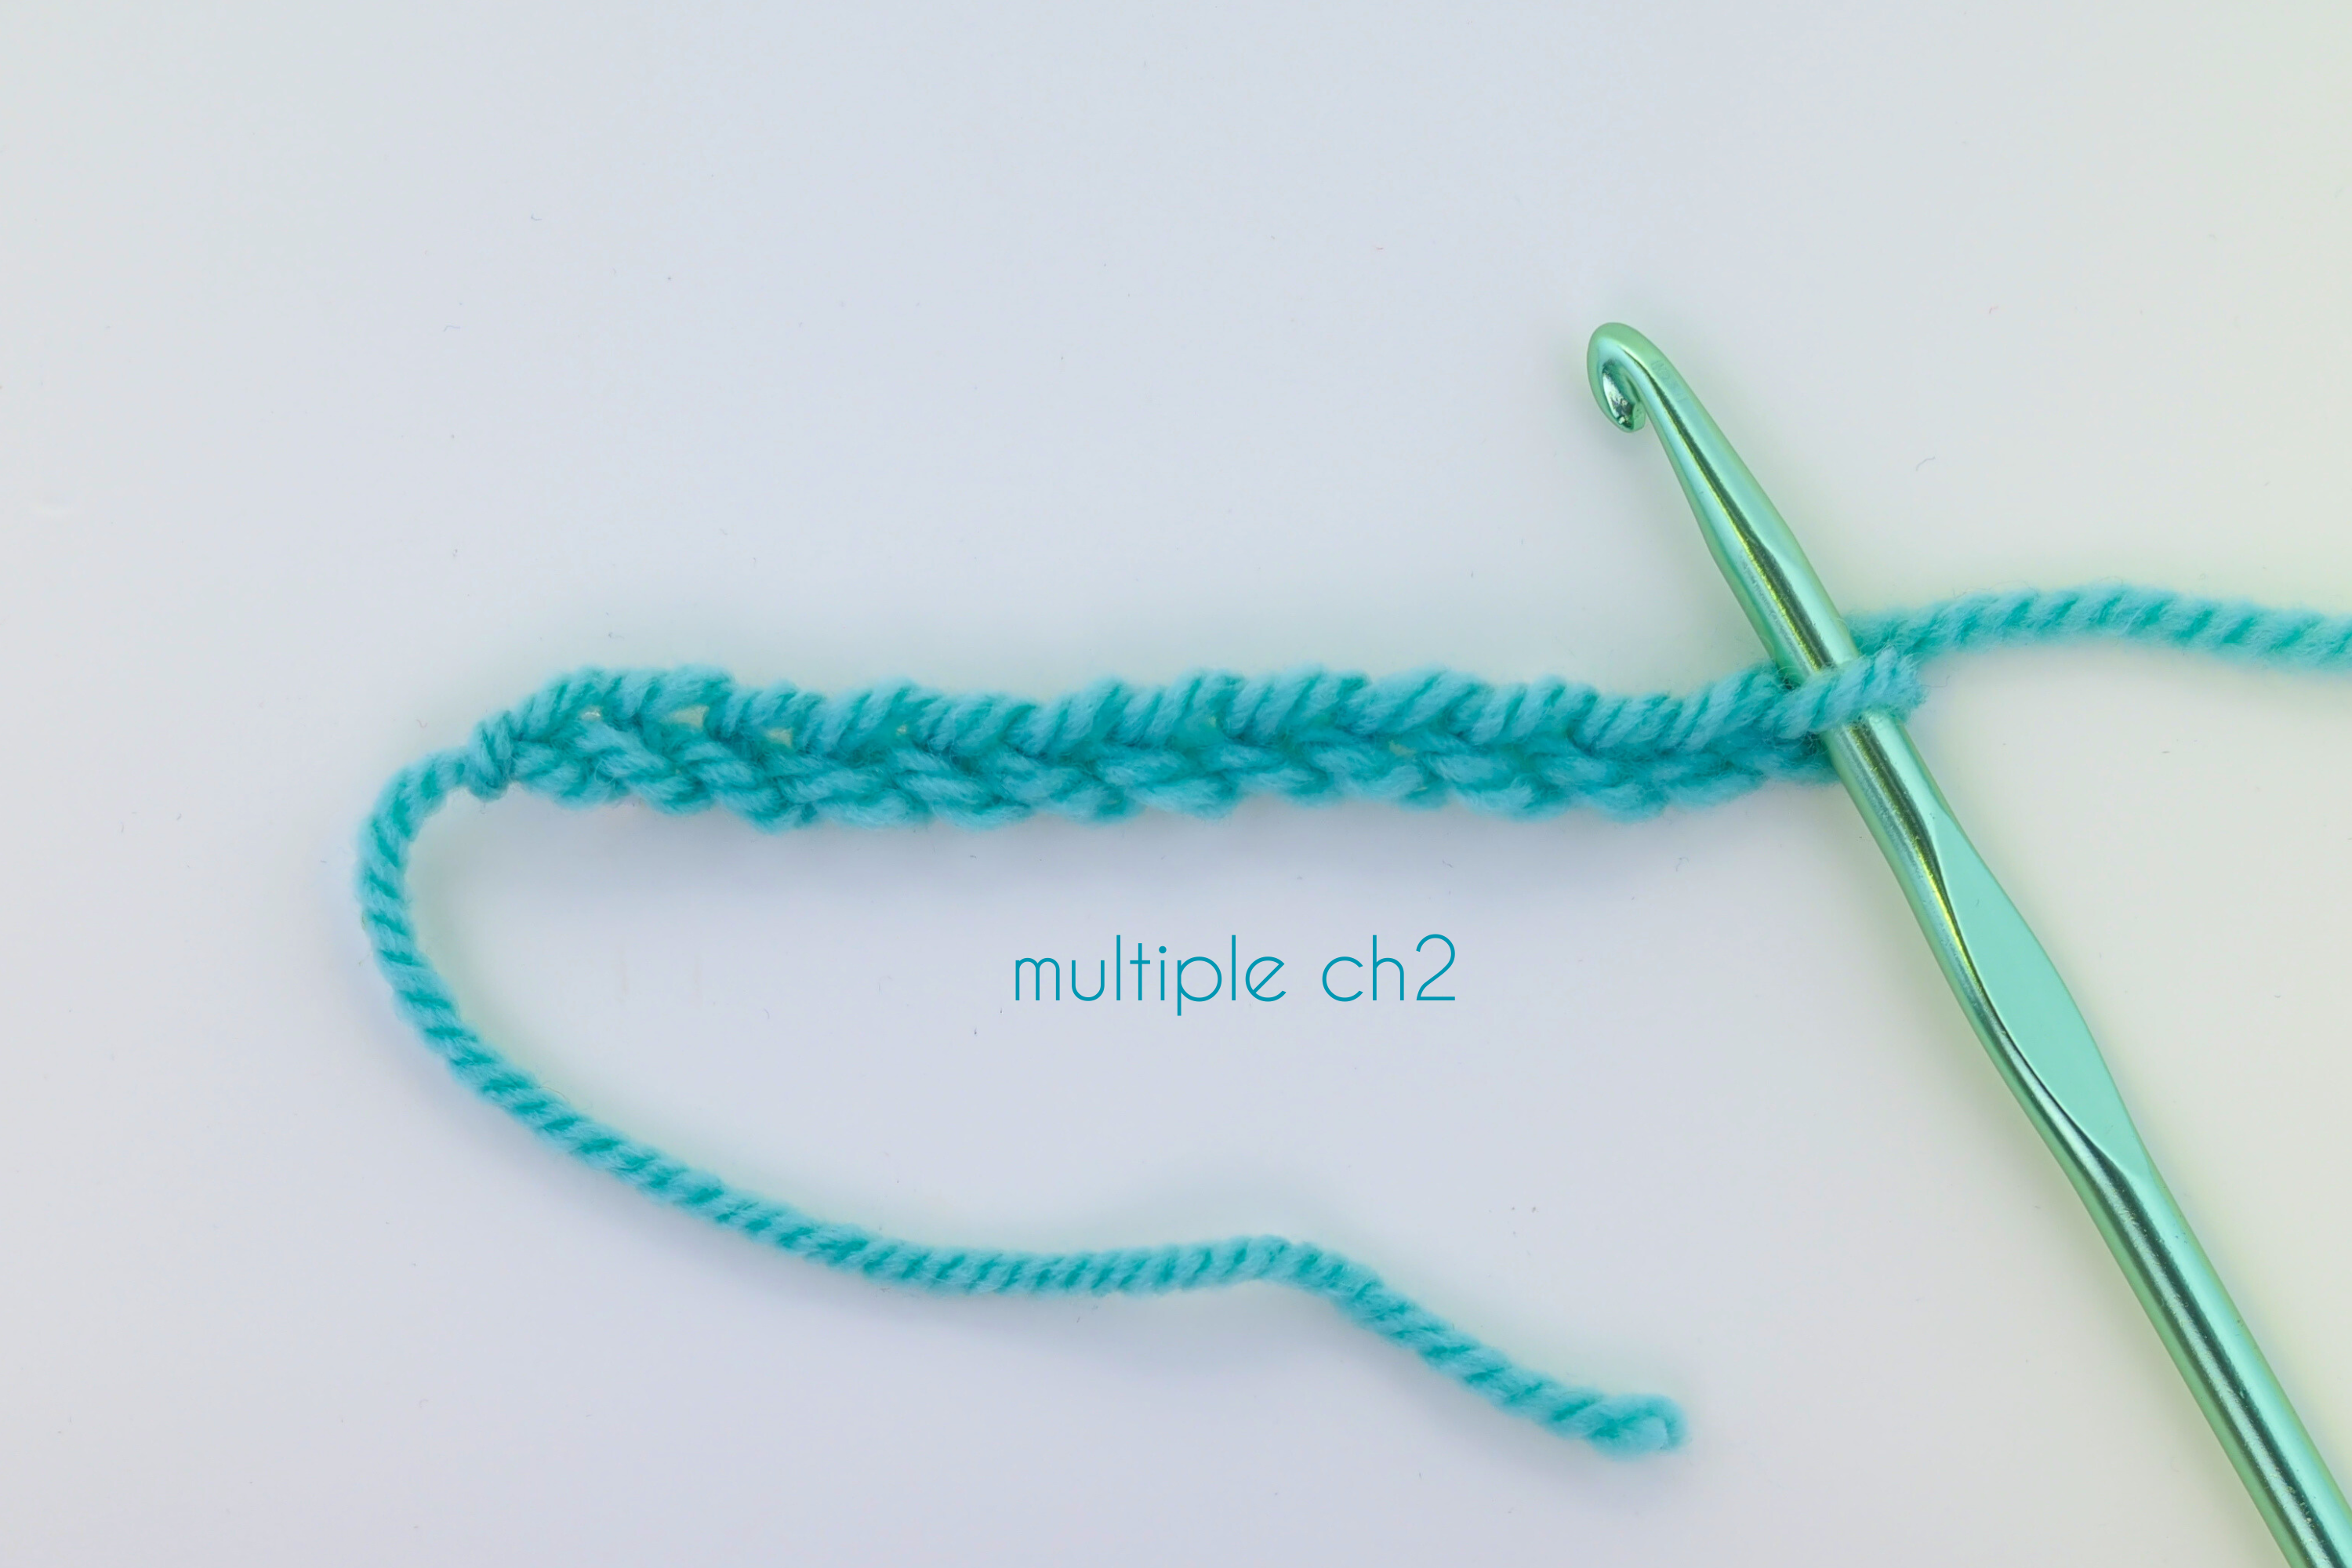
Foundation
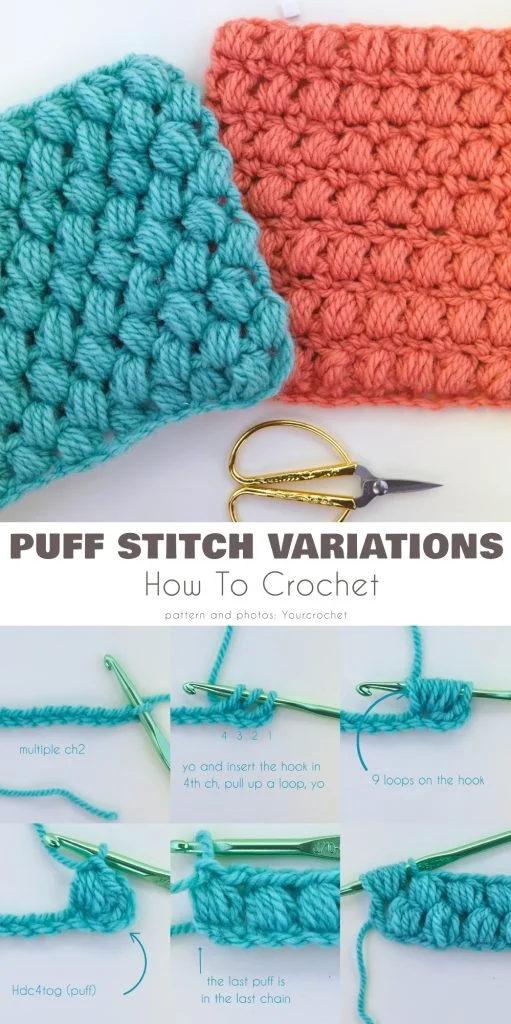
Start with an even number of chain stitches (multiply 2).
Row 1
Skip the first 3 ch. We will be working into the 4rd ch.
Crocheting a Puff
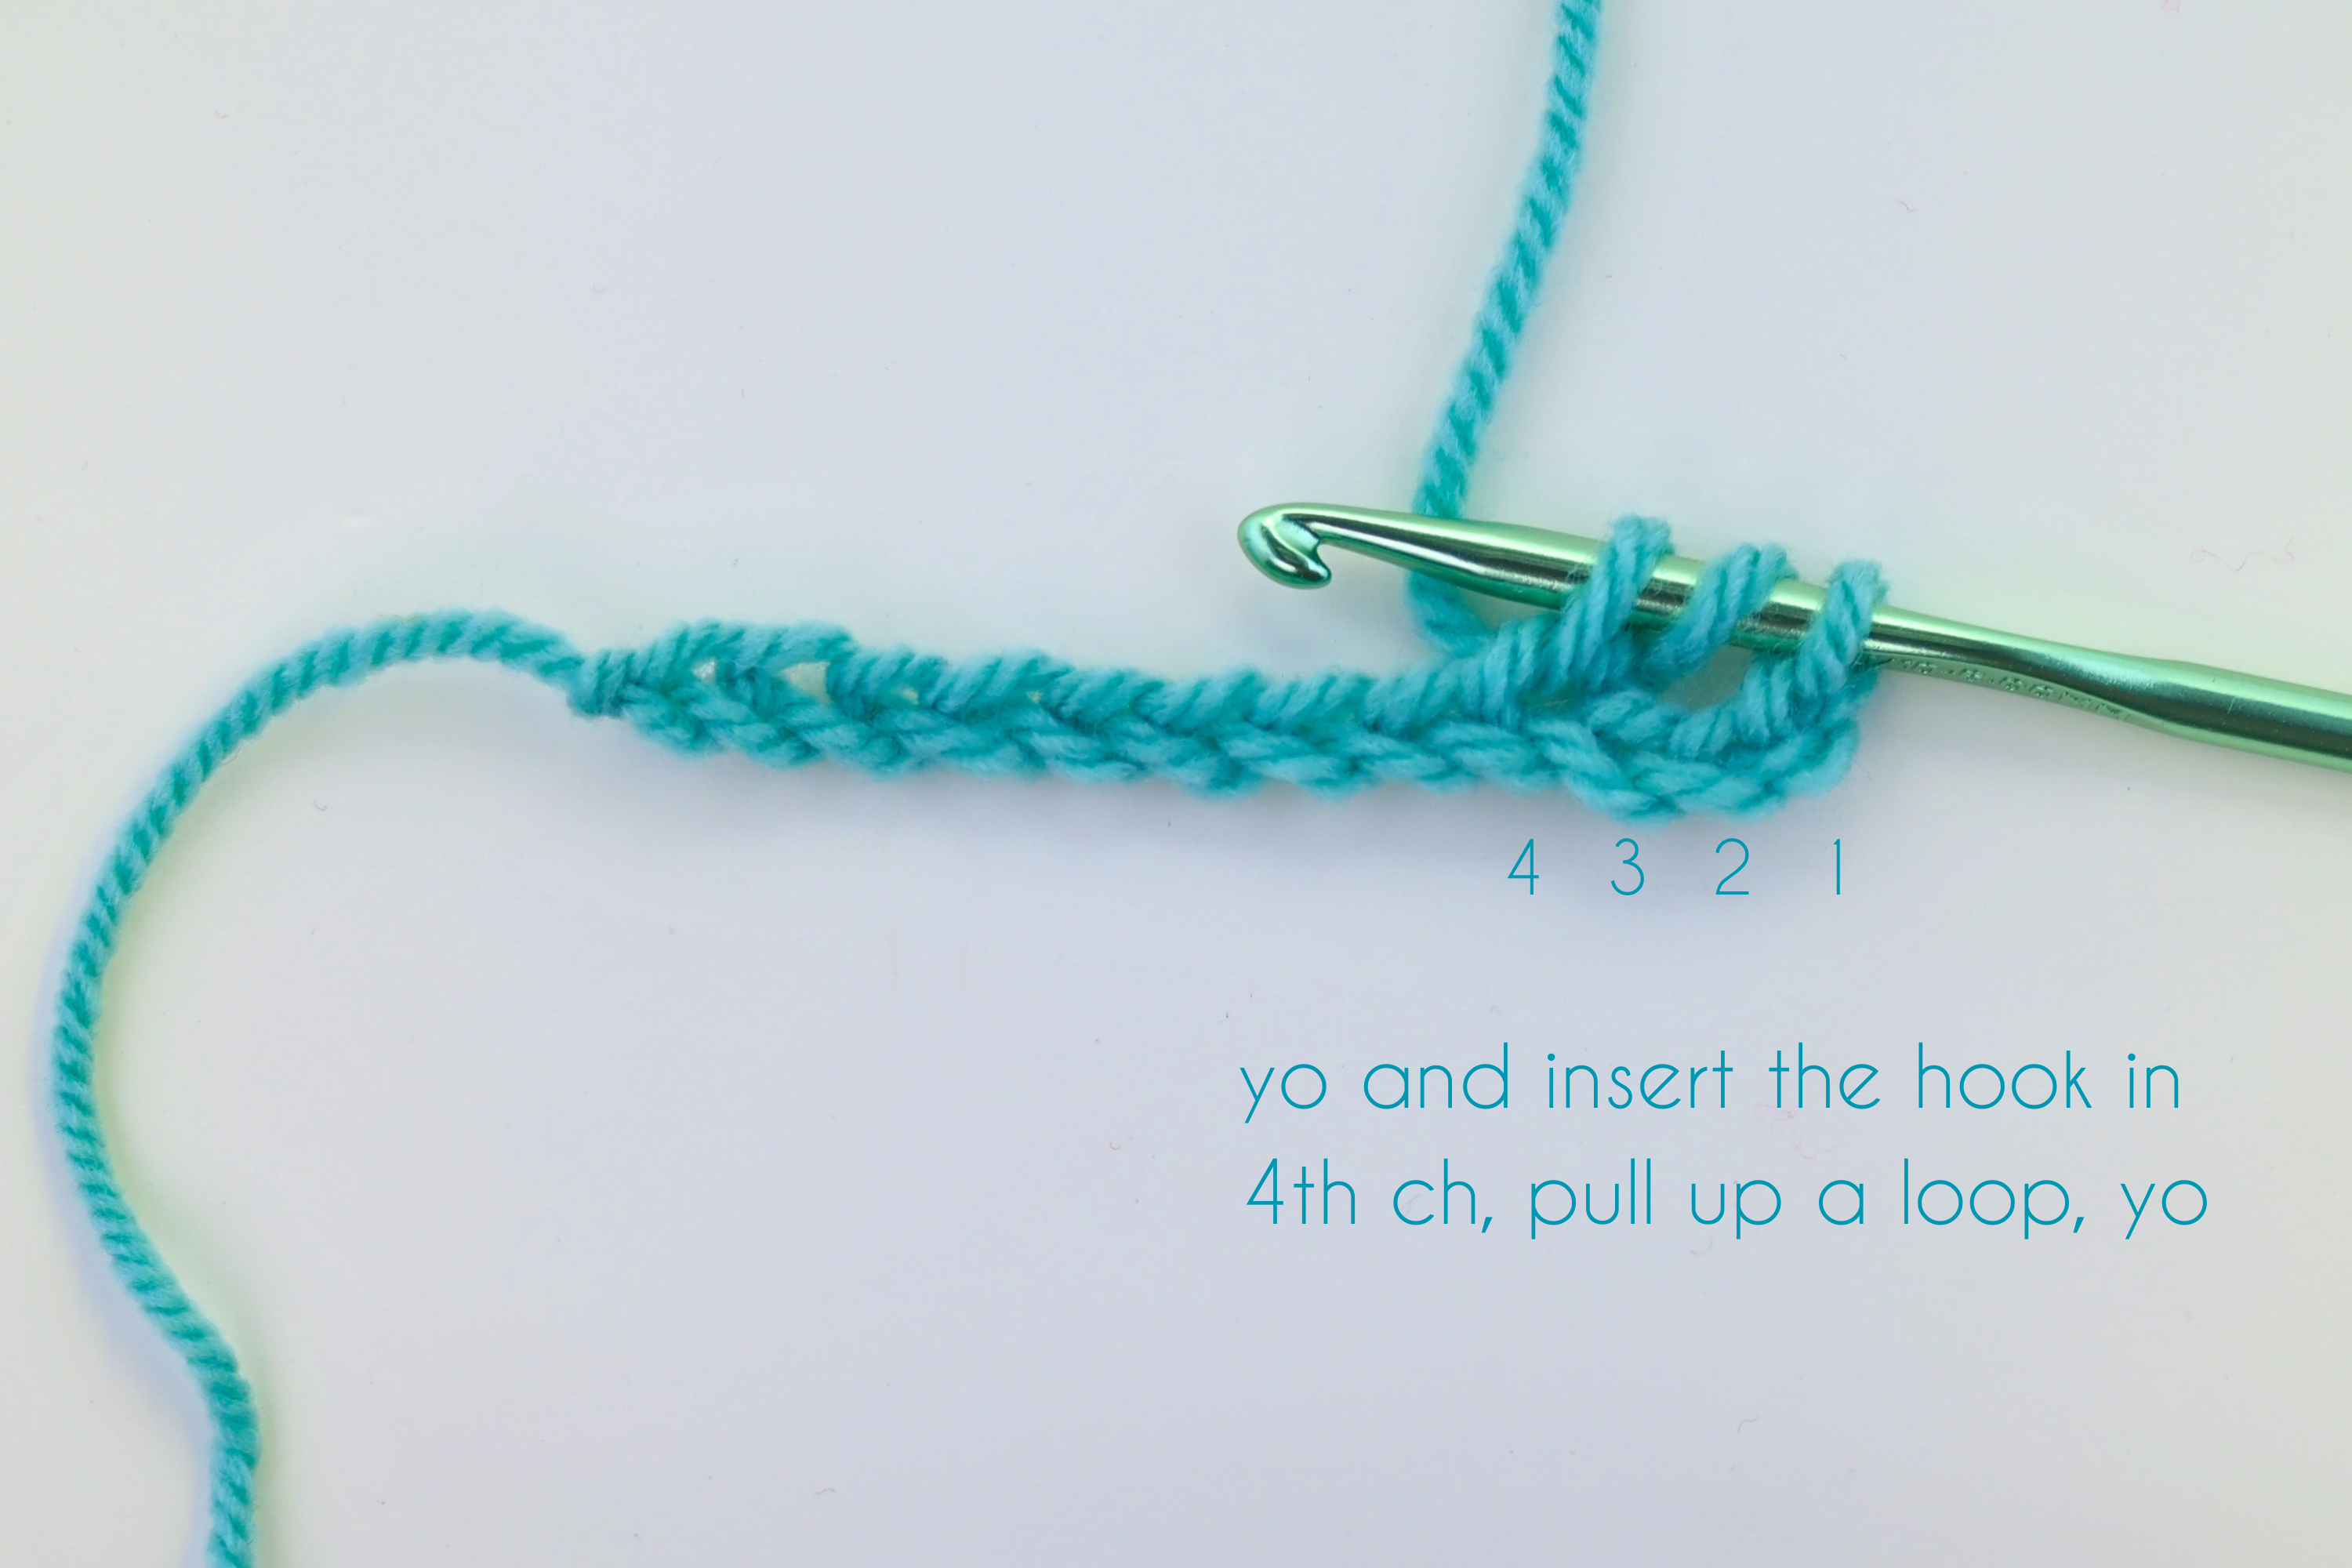
Step 1
Yo and insert your hook into the chain, grab the yarn and pull through. (You have 3 loops on your hook).
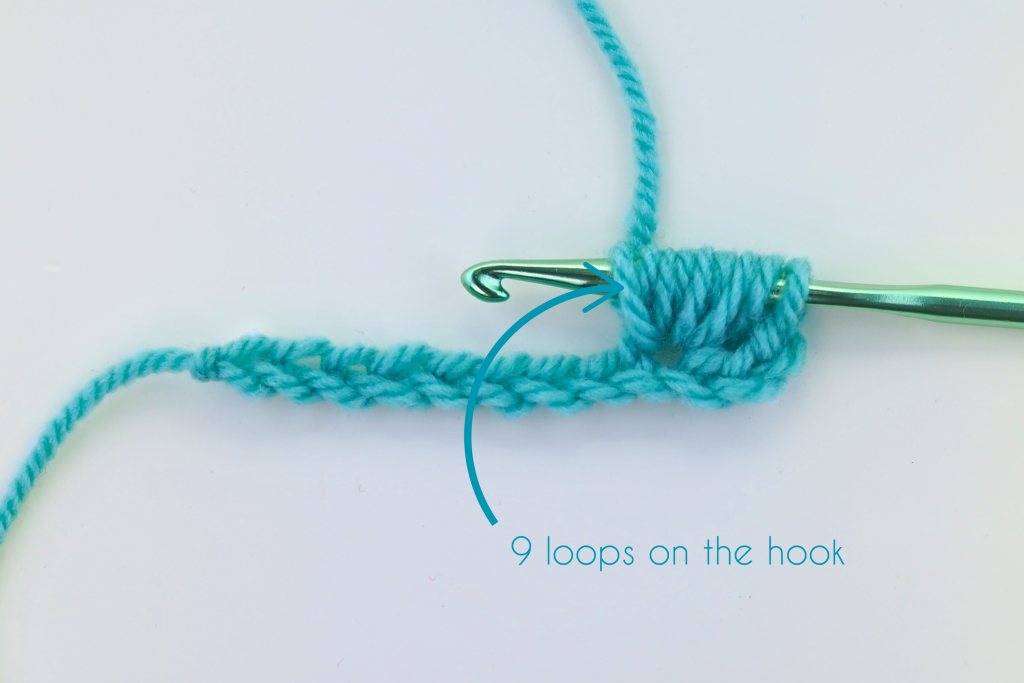
Step 2
* Yo, insert the hook into the same chain again, grab a strand of yarn and pull through again. * Repeat form * a few more times. (I yarned over 4 times, which gave me a total of 9 loops on my hook).
Step 3
Yo and pull through all the loops on the hook to join them. Ch 1 to secure your puff.
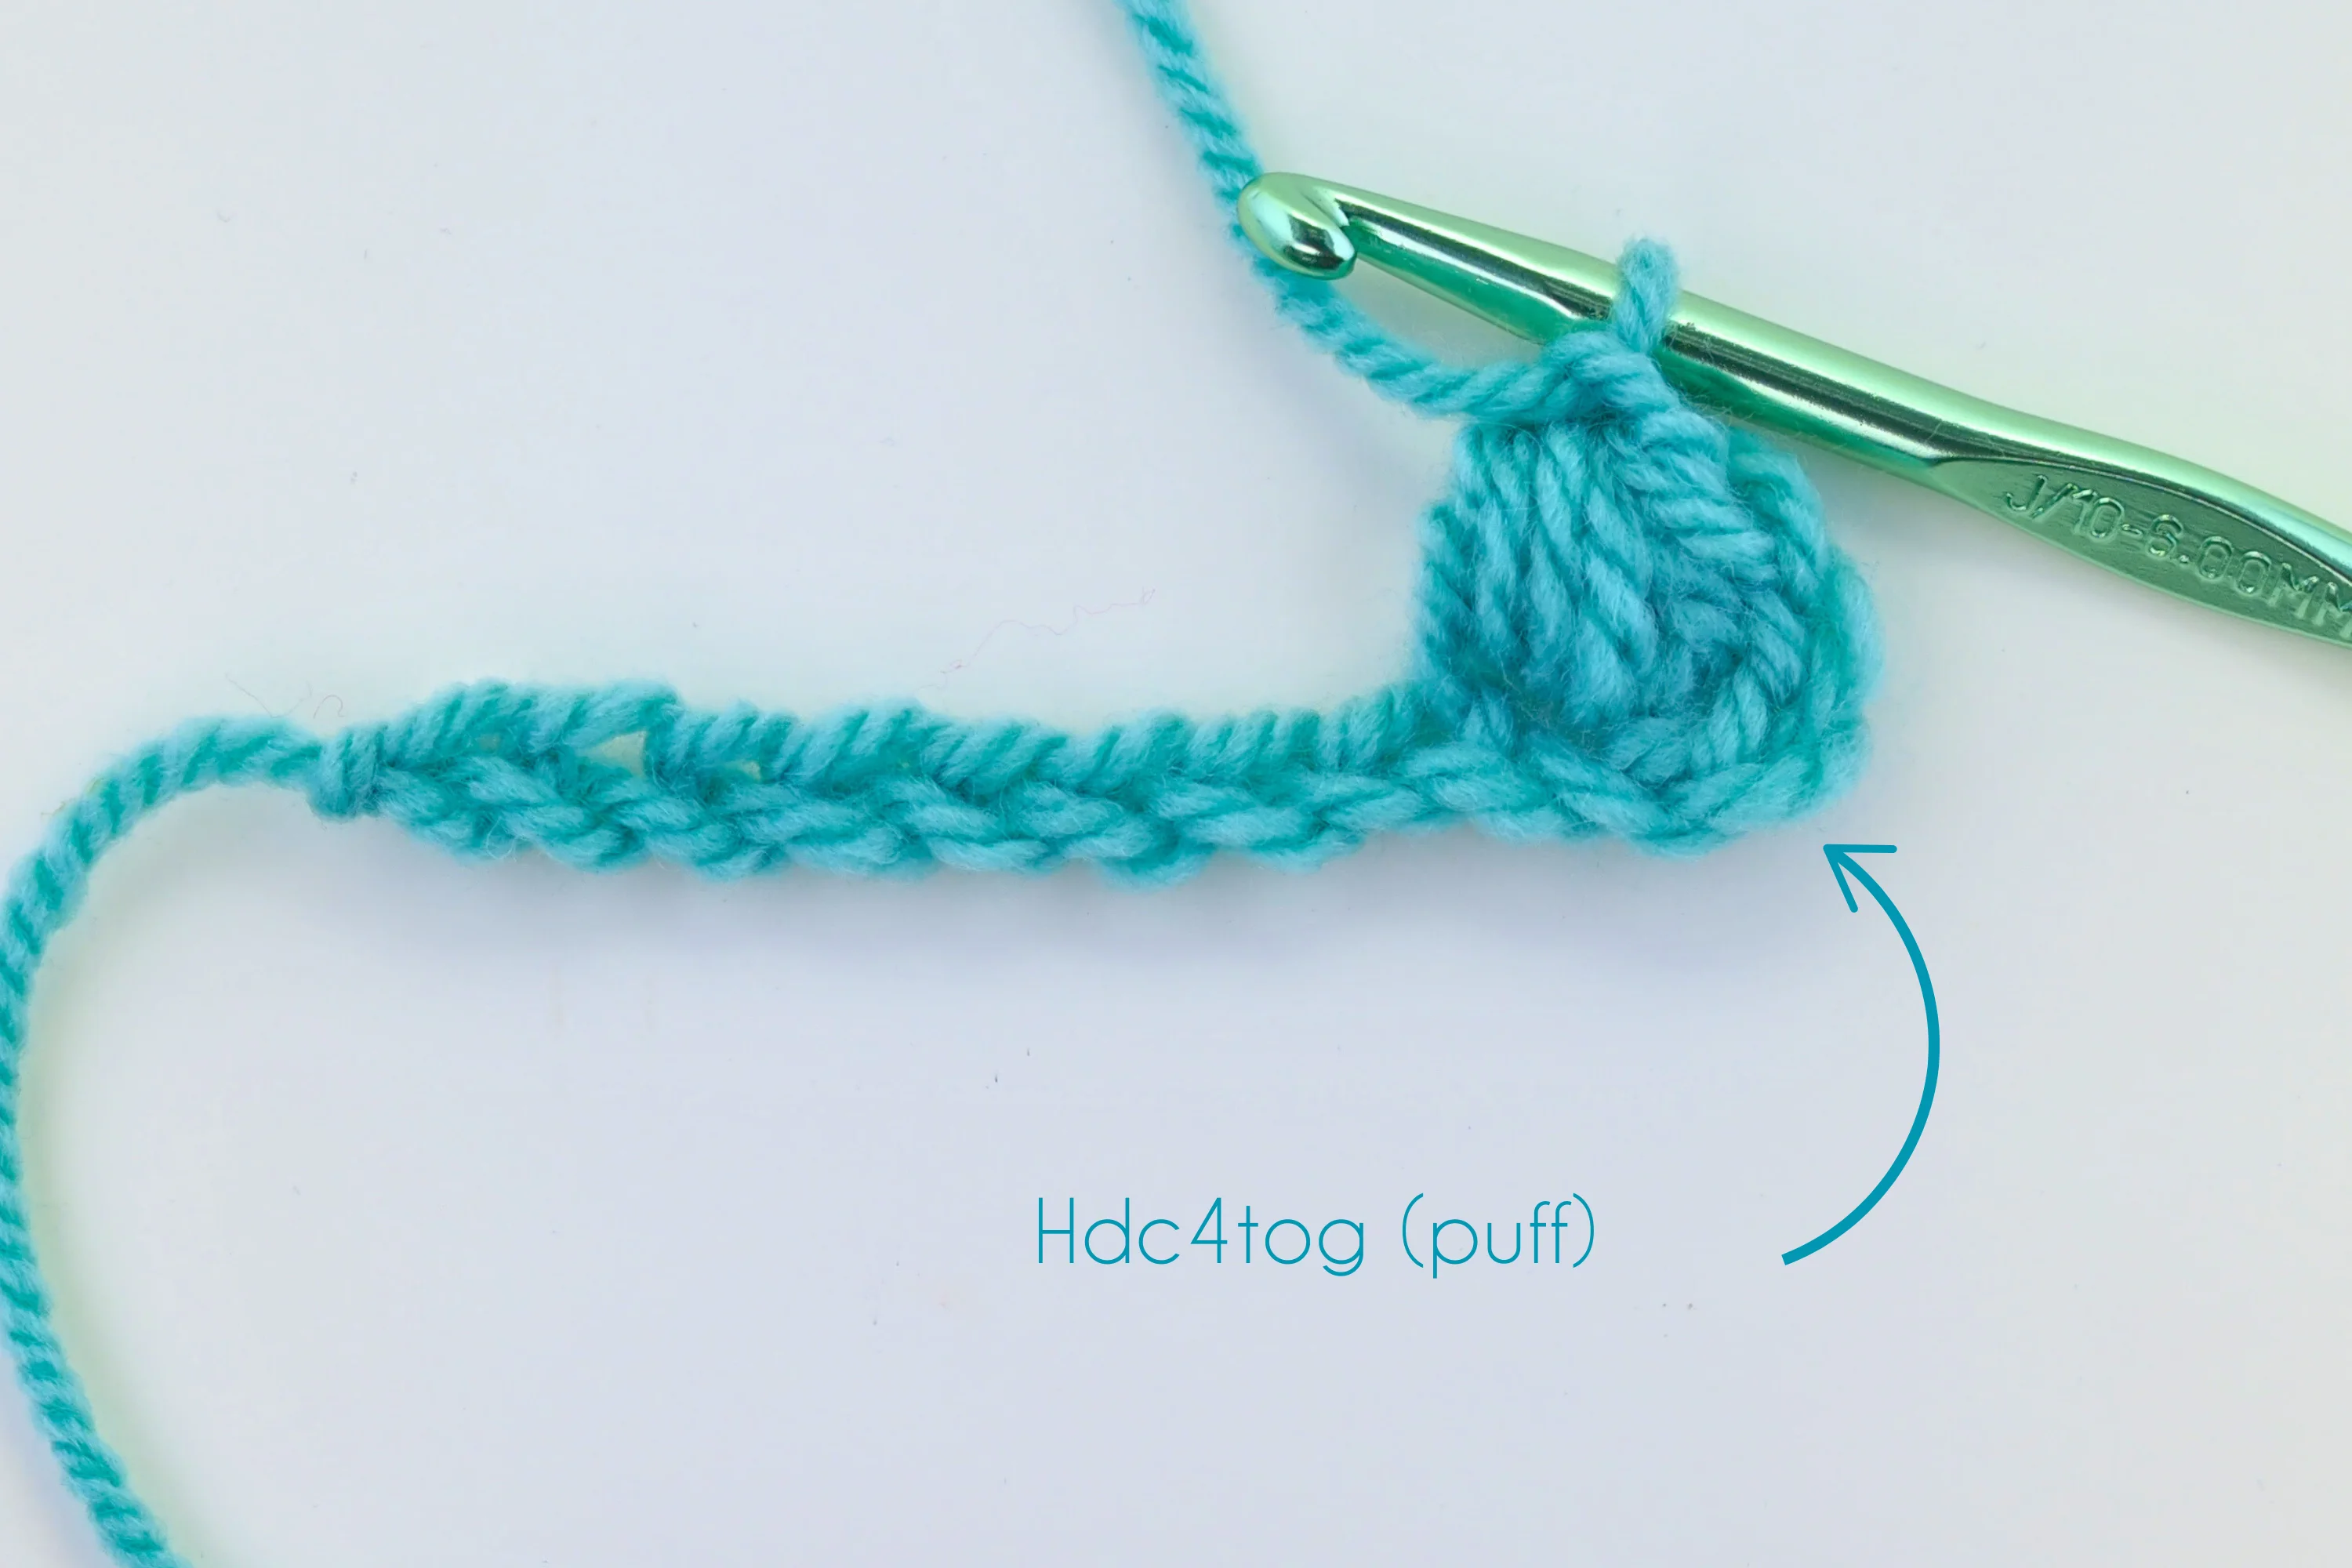
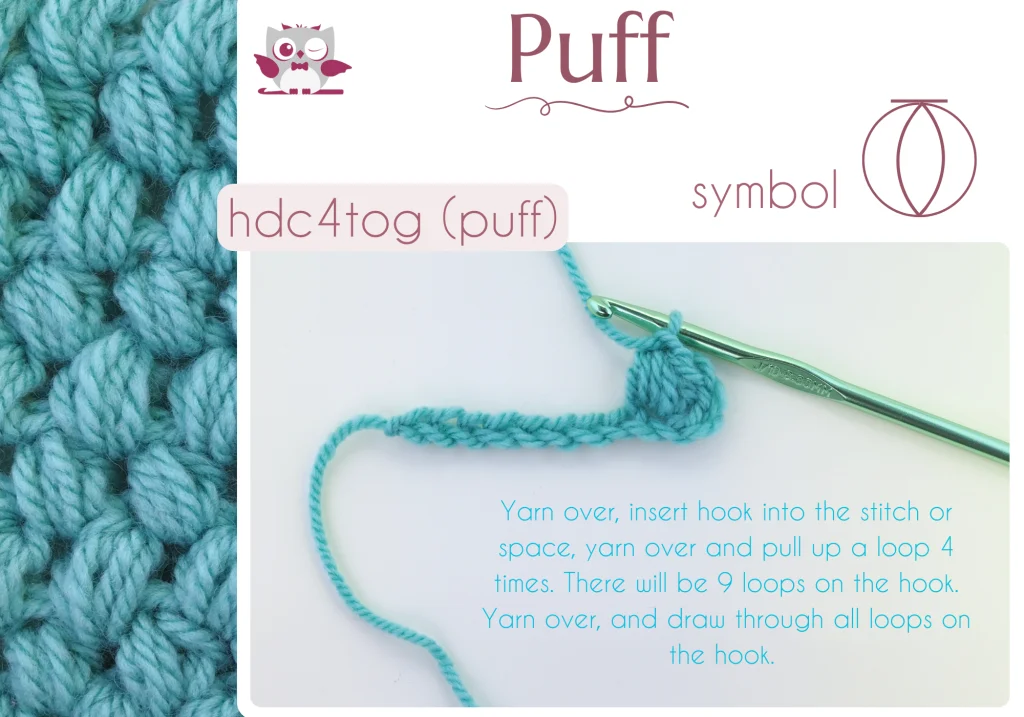
Congratulations, you have just made your first puff. Yarning over, inserting the hook into the chain, grabbing a strand of yarn and pulling through is the same as making hdc. That’s why it is often described as Half Double Crochet 4 together or hdc4tog.
Actually, this kind of symbol (hdc4tog) is more often used in patterns than the description “puff stitch’’. Firstly, it is shorter and more convenient. Secondly, it is more precise. It describes what stitch technique is used to make a puff (they can be made from single, double or treble crochets as well) and how many stitches in one chain the pattern wants you to make. So, instead of hdc4tog it can also be hdc3tog, hdc5tog and etc.
Steps 1, 2 and 3 showed how to make a single puff (or first puff in a row). We will continue now to make the puffs to the end of the row.Let’s make some more puffs in that row then.
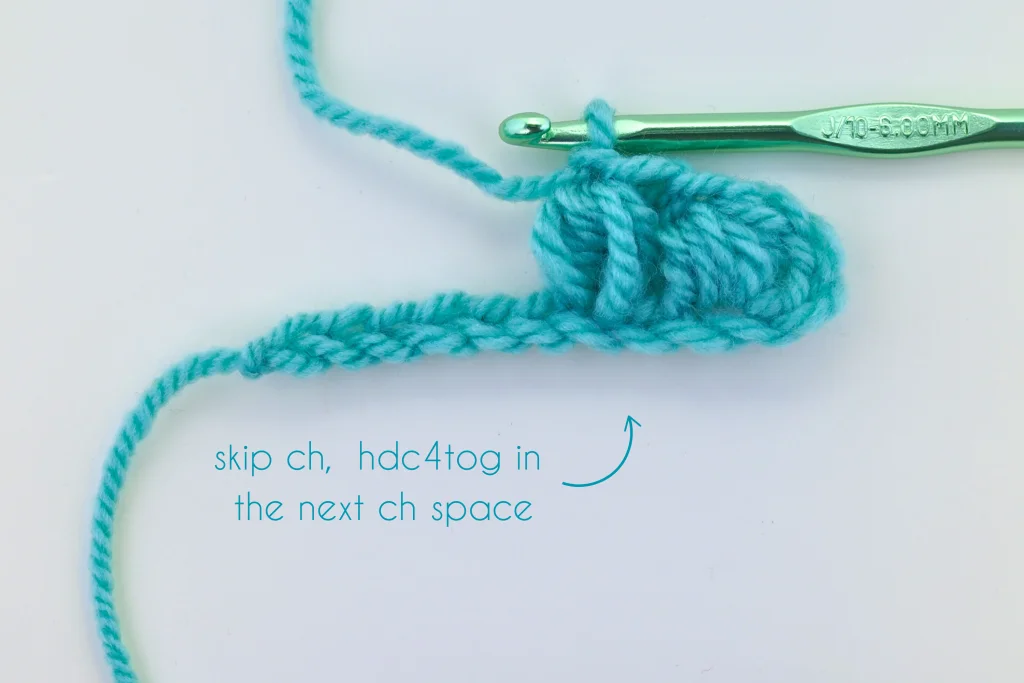
Step 4
Skip one chain. Repeat Steps 1,2 and 3 into each second chain to the end of the row.
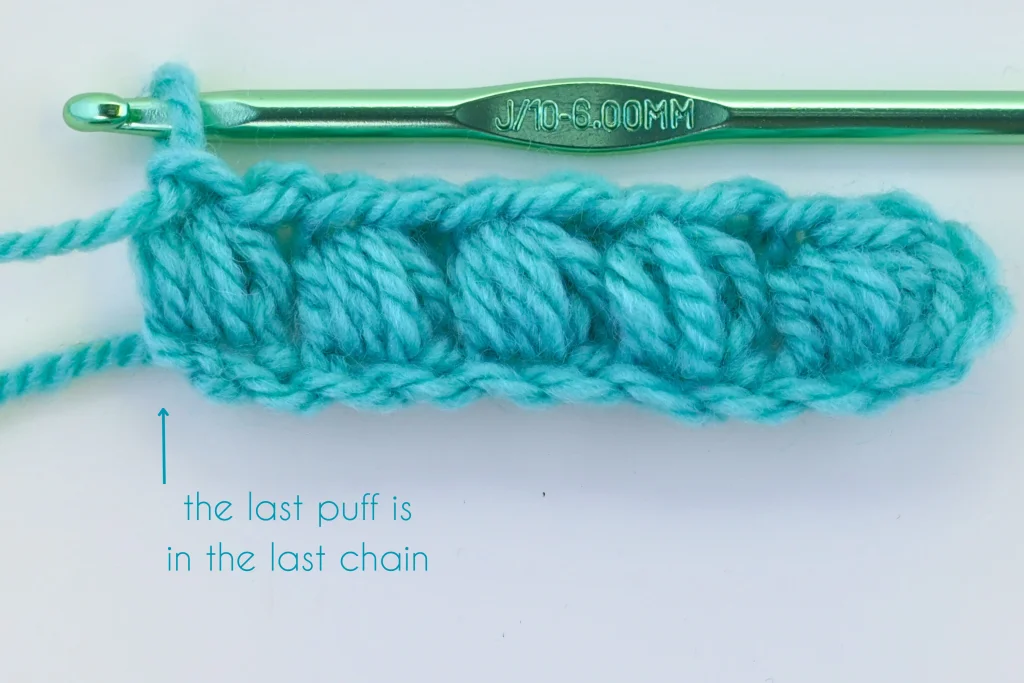
Finish with the last puff made in the last chain of the foundation chain.
Row 2
Chain 2 and turn your work.
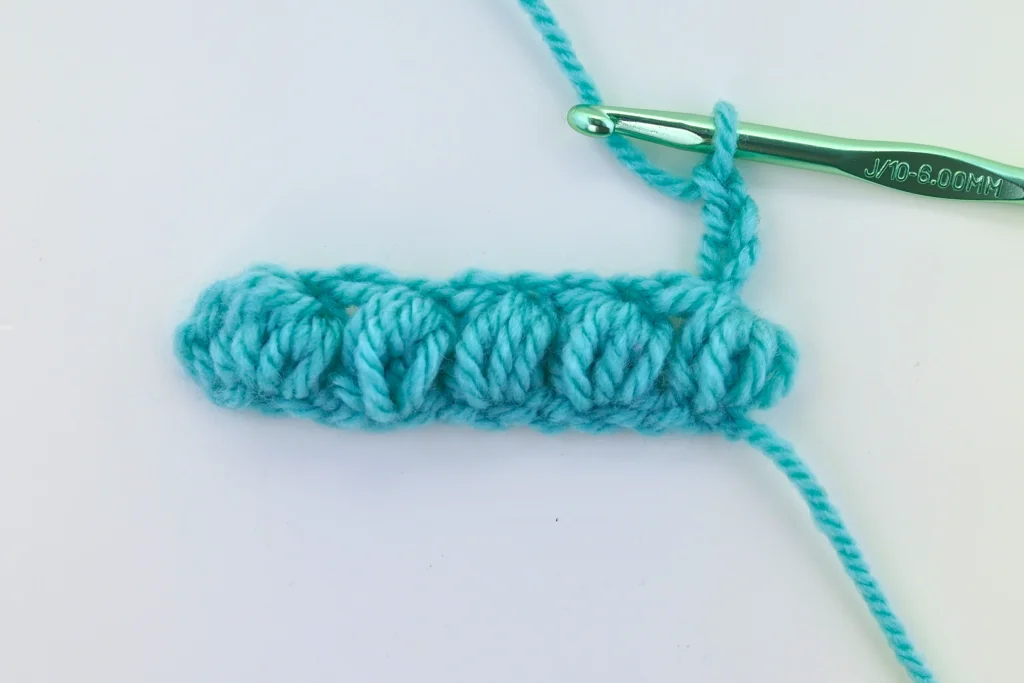
Make a puff (steps 1, 2, 3) in ch 1 space between the puffs from the previous row.
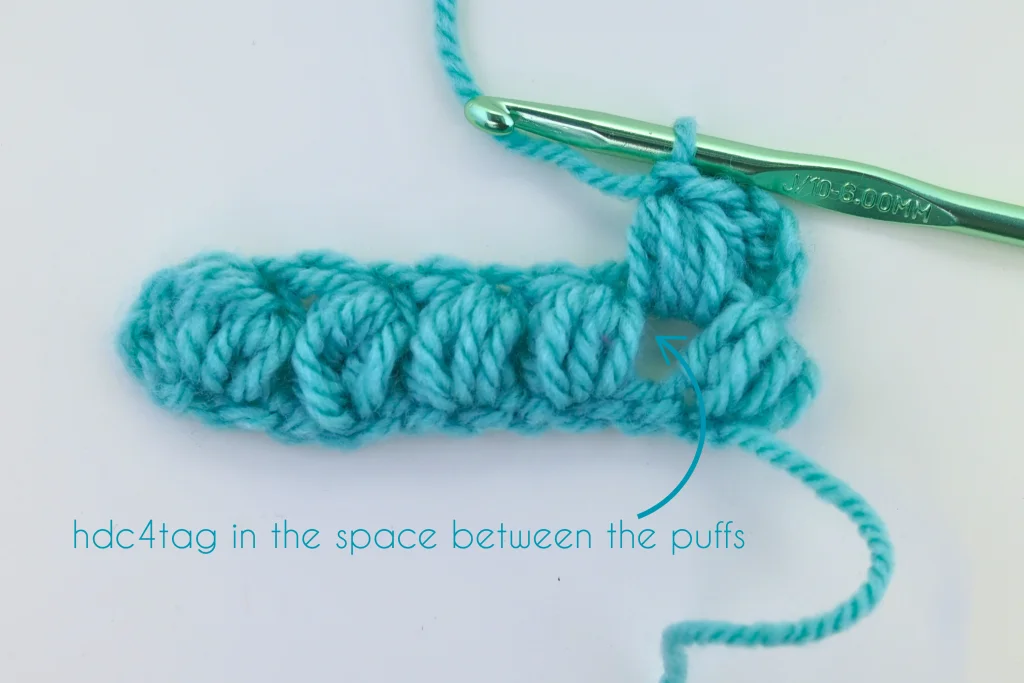
Continue the row of puff stitches to the end. The last puff will be made into the turning chains from the beginning of the previous row.
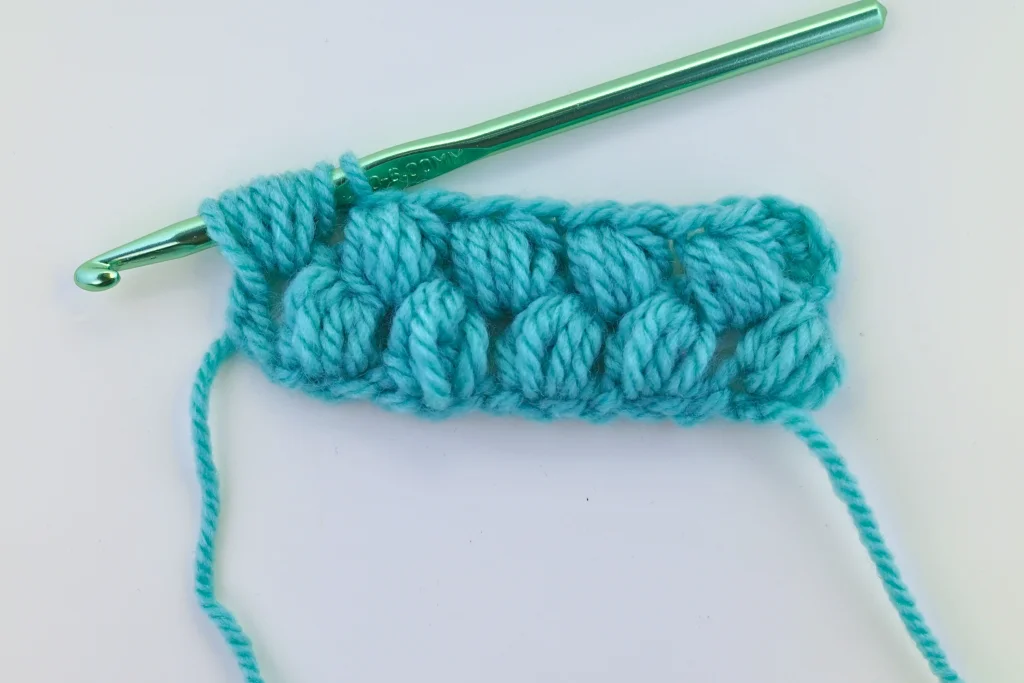
Row 3
Repeat row 2 to get the desired number of rows.
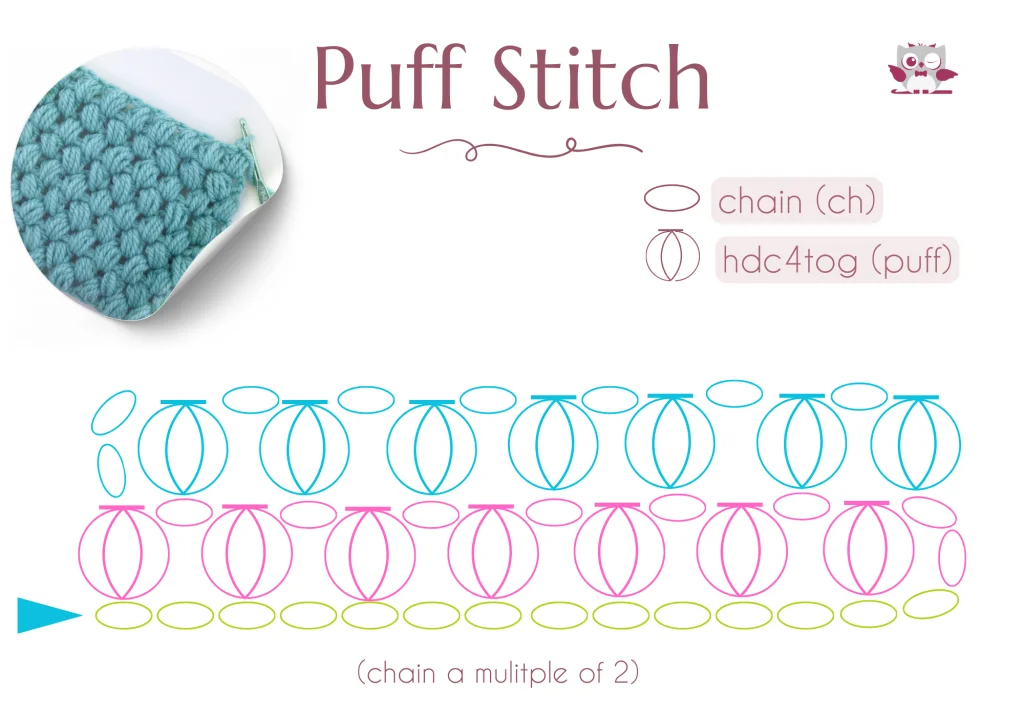
Wasn’t hard at all, was it? Below is a graphic to help you to memorize how to make a puff, and which symbol represents puffs in the crochet diagrams and patterns.
The Puff Stitch Crochet Diagram
The crochet patterns are often written in a graphic forms called diagrams. Below you can see how the puff stitch we’d just made looks as a diagram. You can save it at Pinterest for the next time:
Aligned Puff Stitch
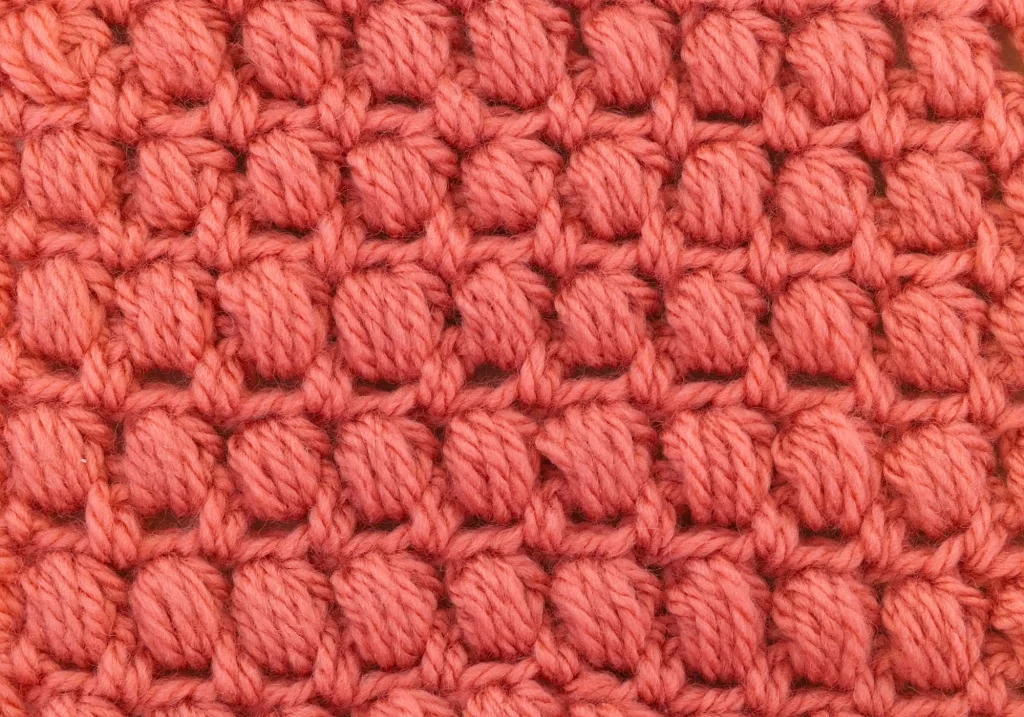
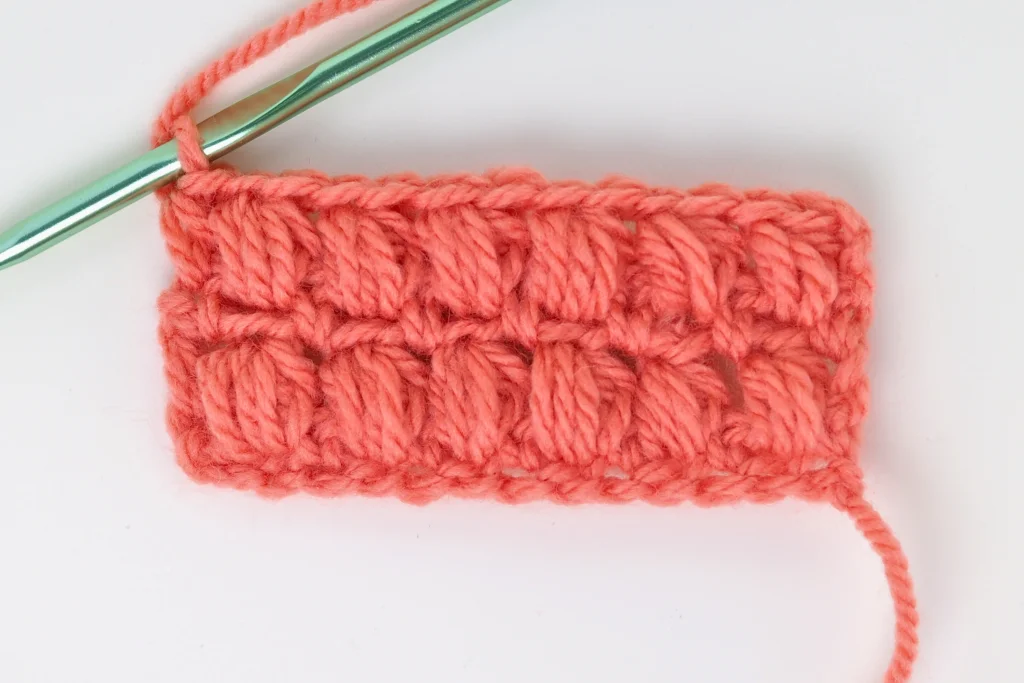
The aligned puff stitch is very easy to work with. While in a braided puff stitch the puffs creates a zig zac texture, in the aligned puff they are evenly spread in rows.
The rows of puffs are separated by the rows of single crochets and chains which gives the texture a lacy look, but also tensile strength. As a result it makes it a perfect stitch for most projects, especially bags. As the puffs give a dense texture, it is most popular for winter items, like hats, scarfs and often alternates with other stitches in all kinds of outfit items.
The row of single crochets gives the texture more height and it grows a bit faster than the braided puff stitch.
Abbreviations Used and the Pattern Note
The standard crochet abbreviations I used in this tutorial are:
- ch = chain stitch
- yo = yarn over
- st /sts = stitch/es
- sc = single crochet
- hdc =half double crochet
- puff (hdc4tog): Yarn over, insert hook into the stitch or space, yarn over and pull up a loop 4 times. There will be 9 loops on your hook. Yarn over, and draw through all loops on the hook. Secure with a chain.
This tutorial is written in US terms.
Foundation
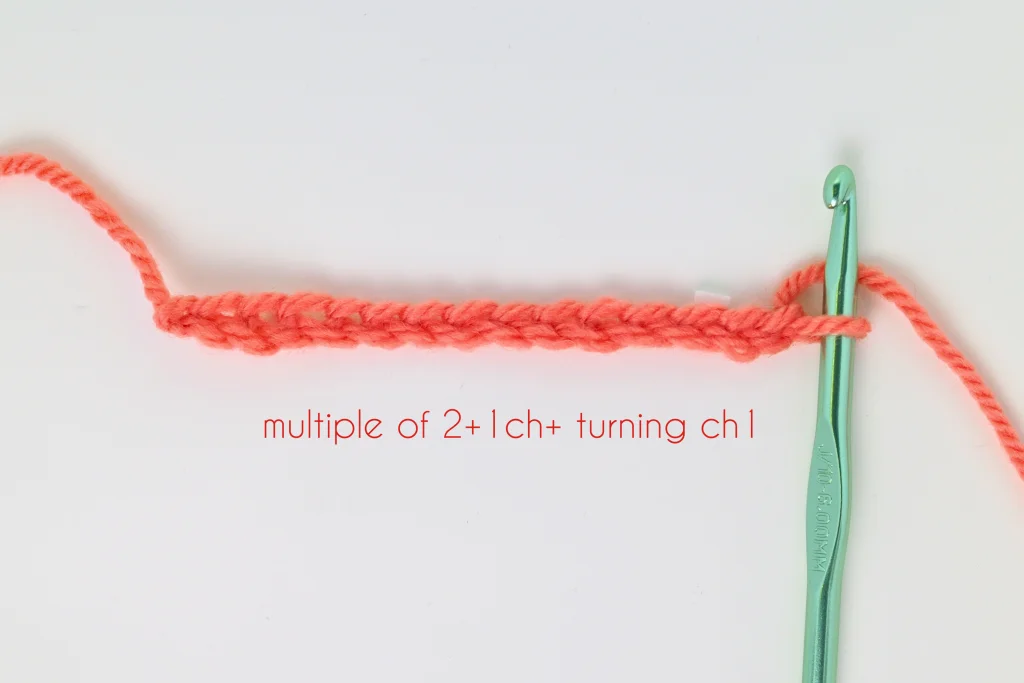
Start with an odd number of chain stitches (multiple of 2+1). Ch1 for turning ch.
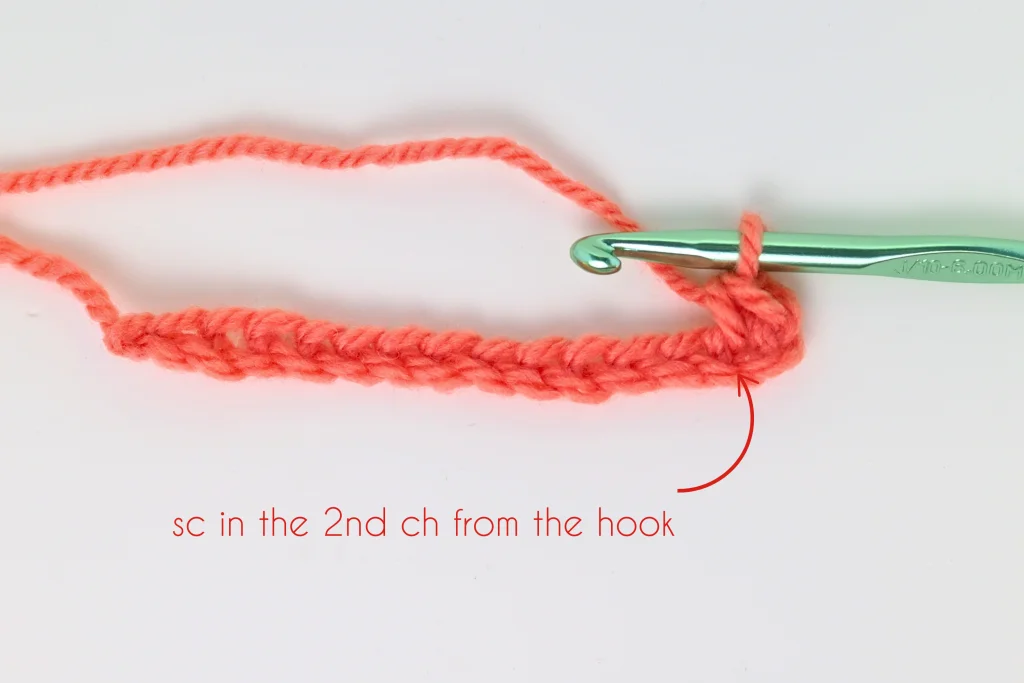
Row 1
Sc in the 2nd ch from the hook.
Ch1, skip 1ch and 1sc in the next ch. Repeat to end of the row. The last sc is done in the last st of foundation ch. Turn.

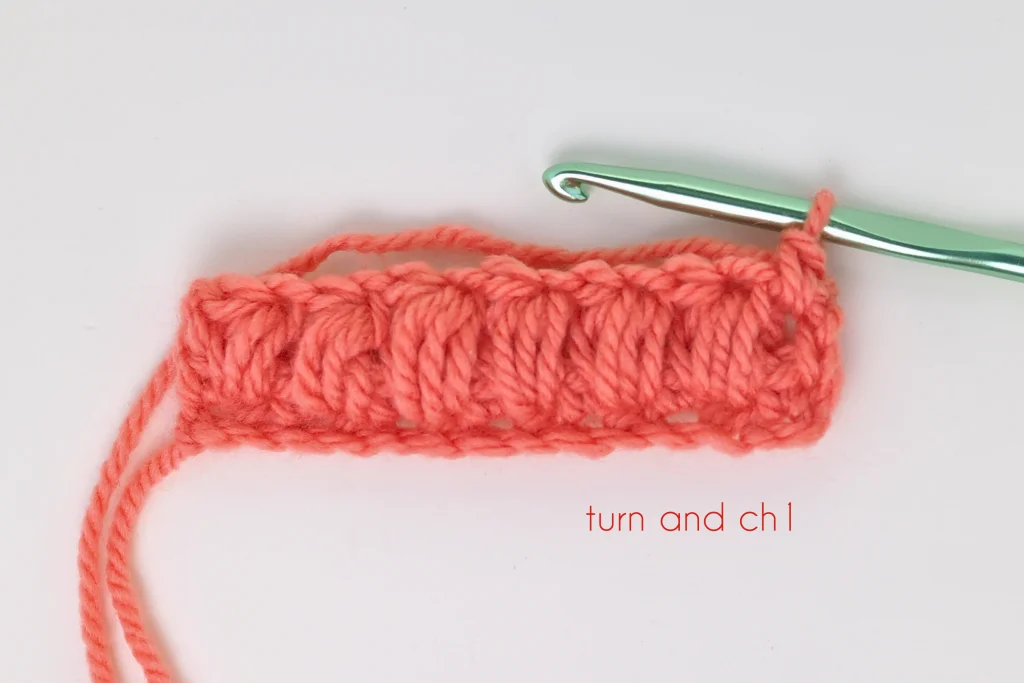
Row 2
Ch 2. *Skip sc and make a puff into the next ch space.
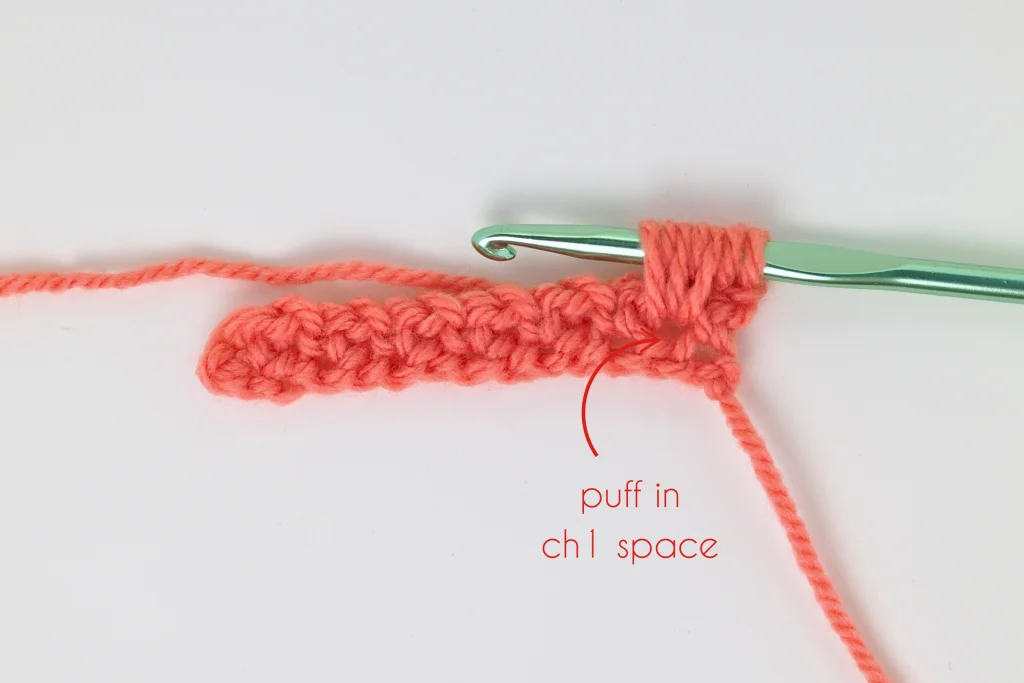
Repeat form * to the end of the row.
Hdc in the last sc.
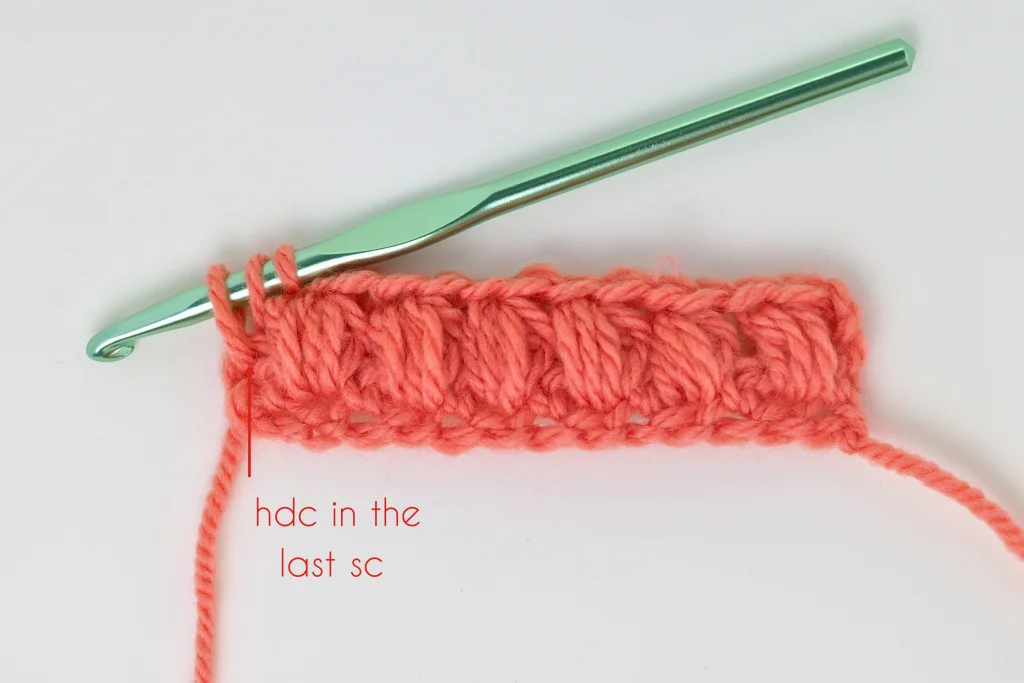
Turn.
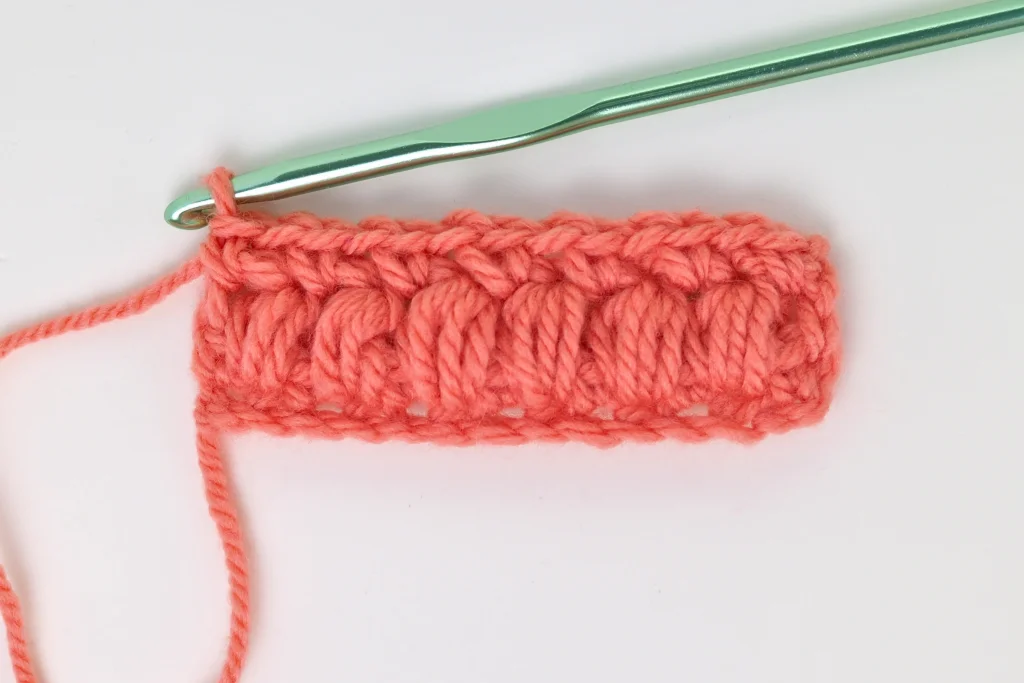
Row 3
Ch 1, sc in the first hdc, *ch1, skip 1ch, sc in the next ch space, repeat from * to the end of the row. Sc in the 2nd of ch2. Turn.
Repeat rows 2 and 3 alternating.
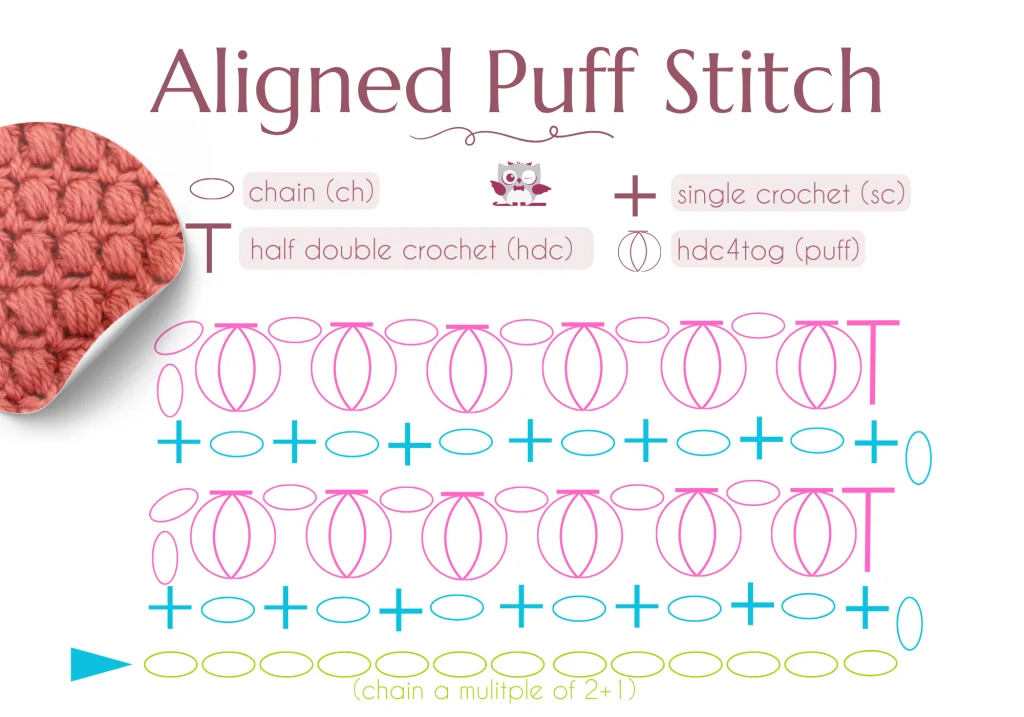
The Aligned Puff Stitch Crochet Diagram
Below you can see how the aligned puff stitch we’d just made looks as a diagram:
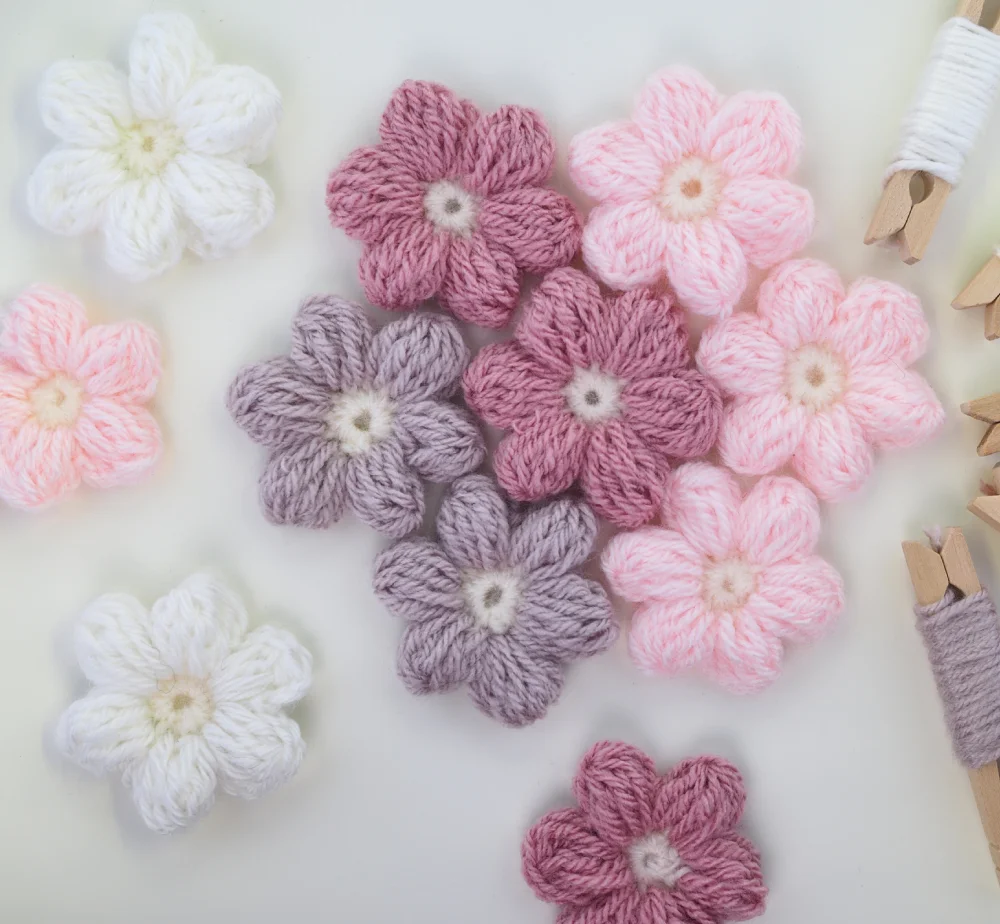
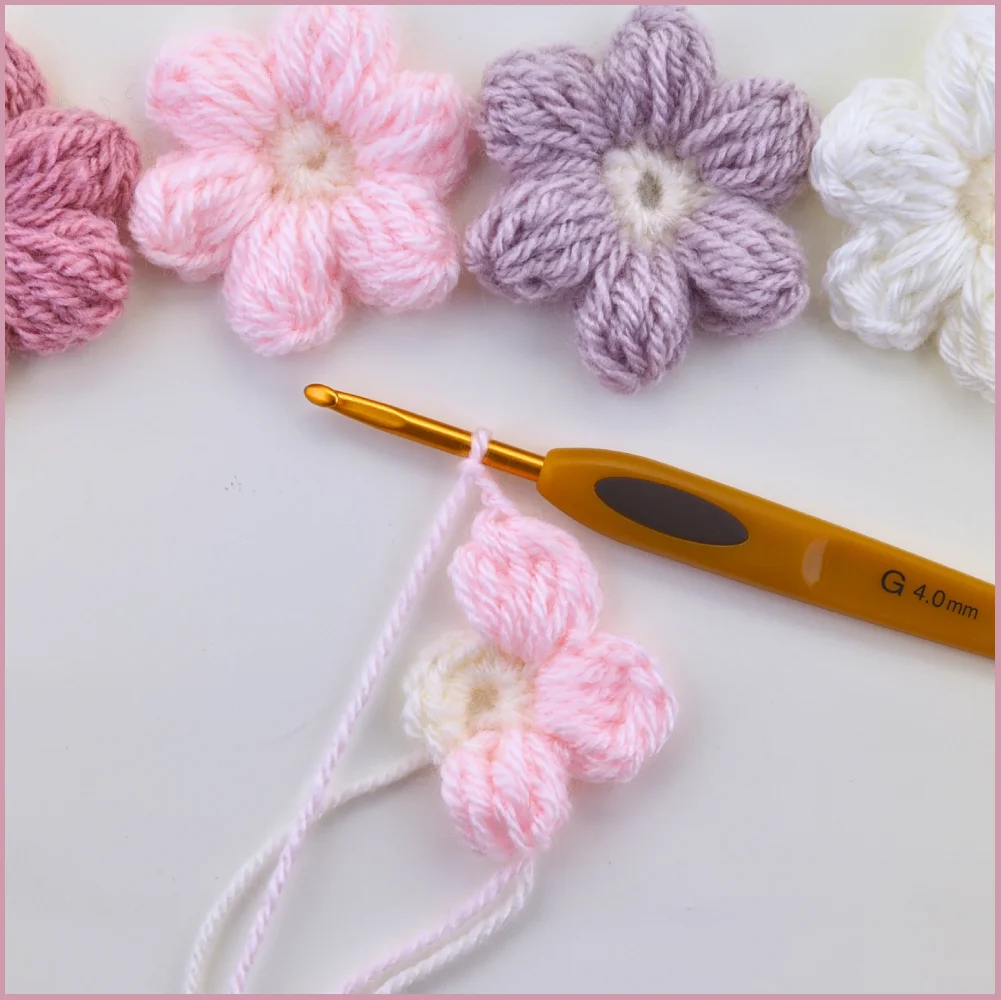
Puff Flowers
Puff flowers are a very popular accent to crochet items. They can be joined together to create a bigger item, e.g. a pillow or bag. They are easy to make and one flower only takes a few minutes.
How to make a Puff Stitch Flower
Abbreviations Used and the Pattern Note
The standard crochet abbreviations I used in this tutorial are:
- ch = chain stitch
- yo = yarn over
- st /sts = stitch/es
- sc = single crochet
- mr = magic ring
- sl st = slip stich
This tutorial is written in US terms.
With yarn color 1, start with a MR. Ch1. Work 12 sc into MR. Insert your hook into the first sc, grab a yarn color 2 and pull through.
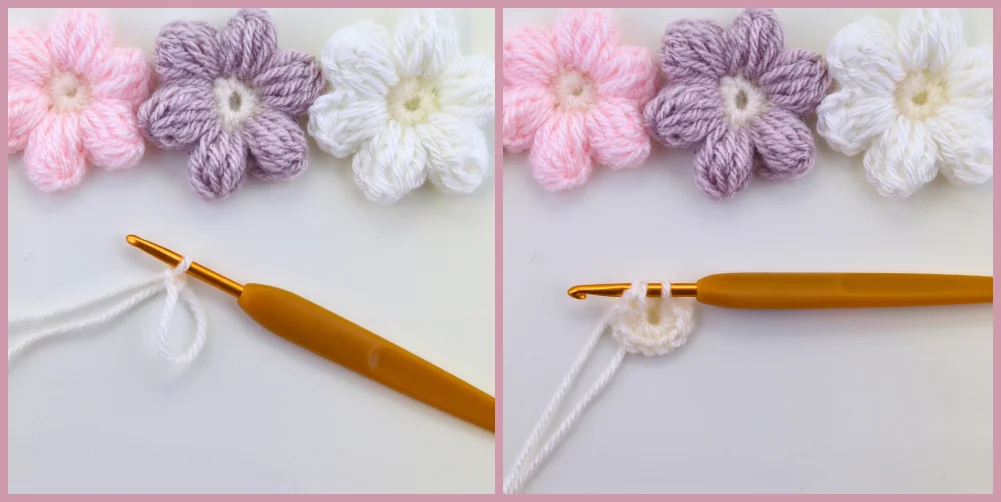
First Petal:
Ch3.
Working in the 1st stitch, *yo, insert the hook, pull up a loop. Yo and pull through 2 loops on the hook. Repeat from *twice. You will have 4 loops on your hook.
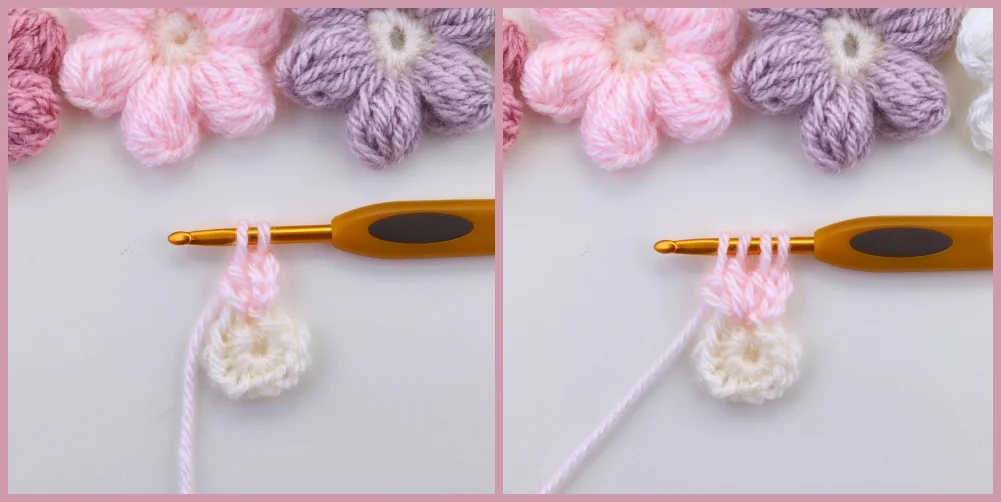
Working in the next stitch repeat from * 3 times.
Yo and pull through all 7 loops on the hook. Ch3 and sl st in the same stitch.
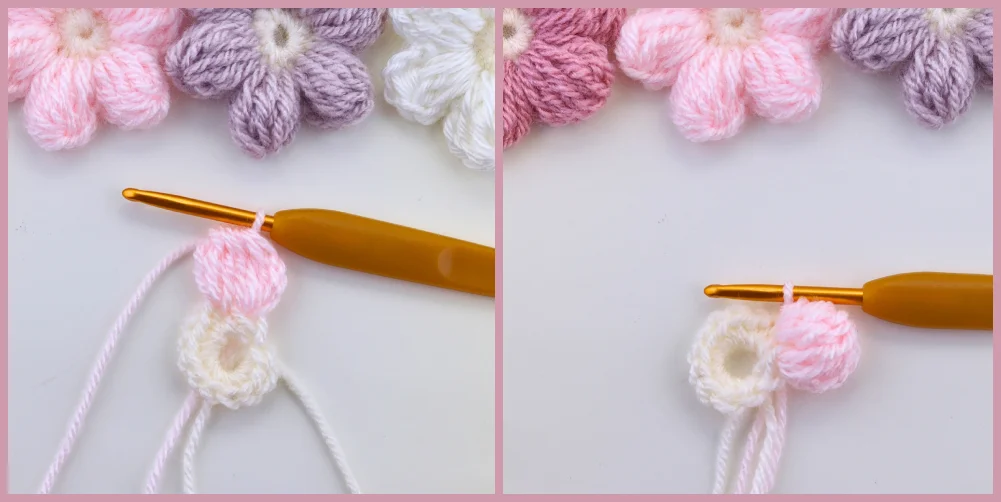
Second and subsequent petals:
Ch3, repeat from *3 times in the next 2 continuous stitches. Yo and pull through all 7 loops on the hook. Ch3 and sl st in the same stitch.
Finish with a sl st in the 1st sc.
See more puff stitch flower ideas and inspiration here: Puff Stitch Flower Crochet Projects and Free Patterns.
FAQ
How to make my puff more round?
You can greatly enhance the puffiness of the puff stitch in a simple way. You merely need to make the first and last hdc loops shorter than the middle loops.
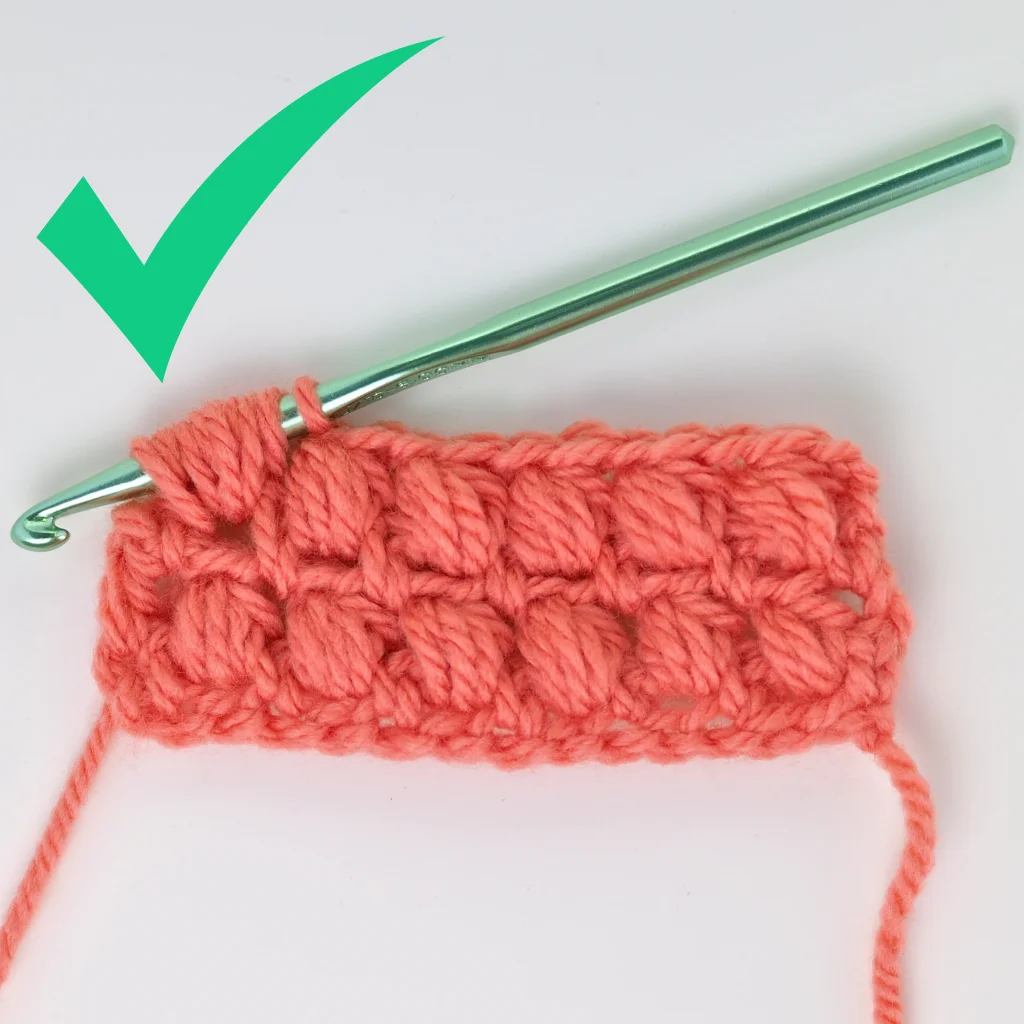
To give a puff more round look, make the first and last hdc loops shorter than the middle loops. This smaller stitches at the ends increase tension making the puffs between them stand proud of the fabric.
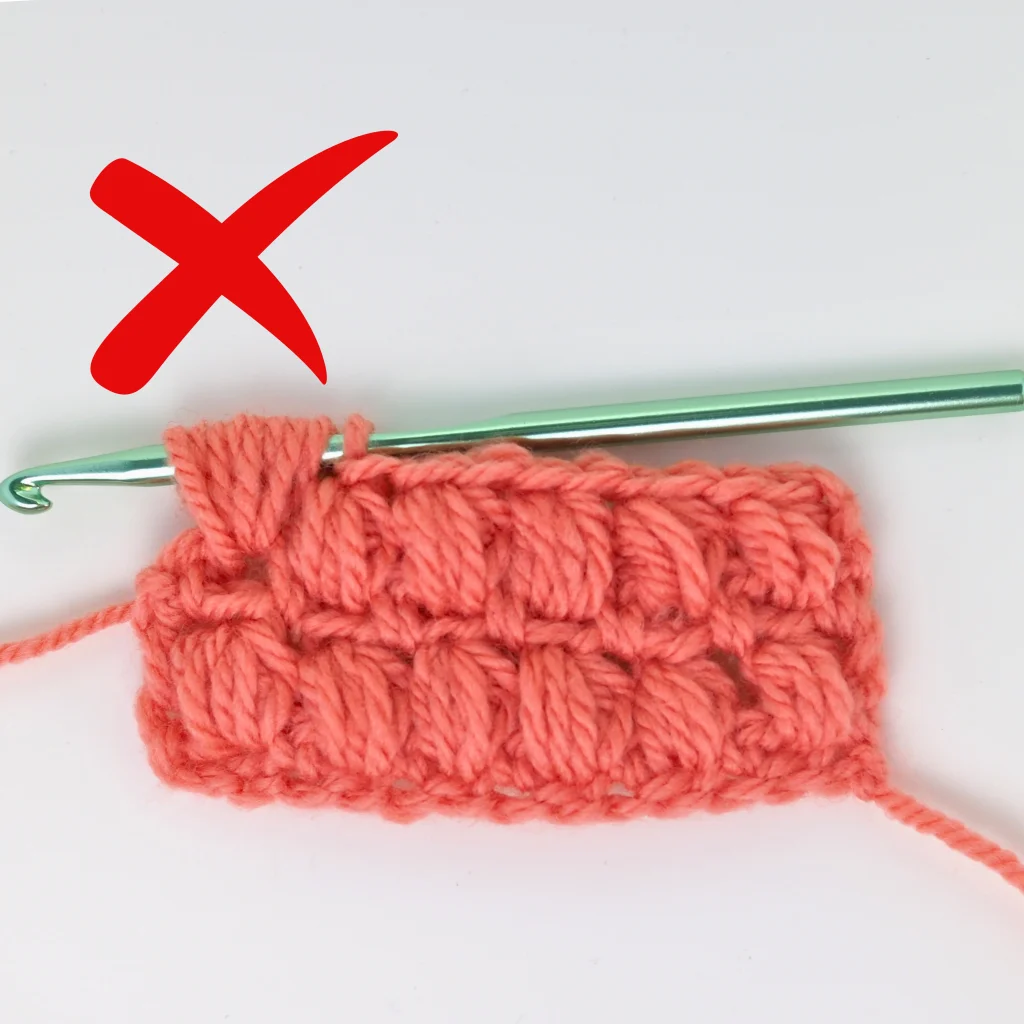
However, it’s not an error to make the loops even as in the picture to the right and it is a popular method too.
Leaving the hdc the same size, tall and equal in height makes an even stitch, which yields an even and more homogenous project, as well as being easier to loop through.
However, this means that the puffs will not be as prominent or “3D” as in the first photo.
How many loops on the hook should I have to crochet a puff ?
The classic hdc4tog consists of 4 hdc stitches gives you 9-loops on the hook. This is the most popular technique, but you can use different numbers of loops if you like.
To learn more stitches, see my full guide through the most popular crochet stitches:
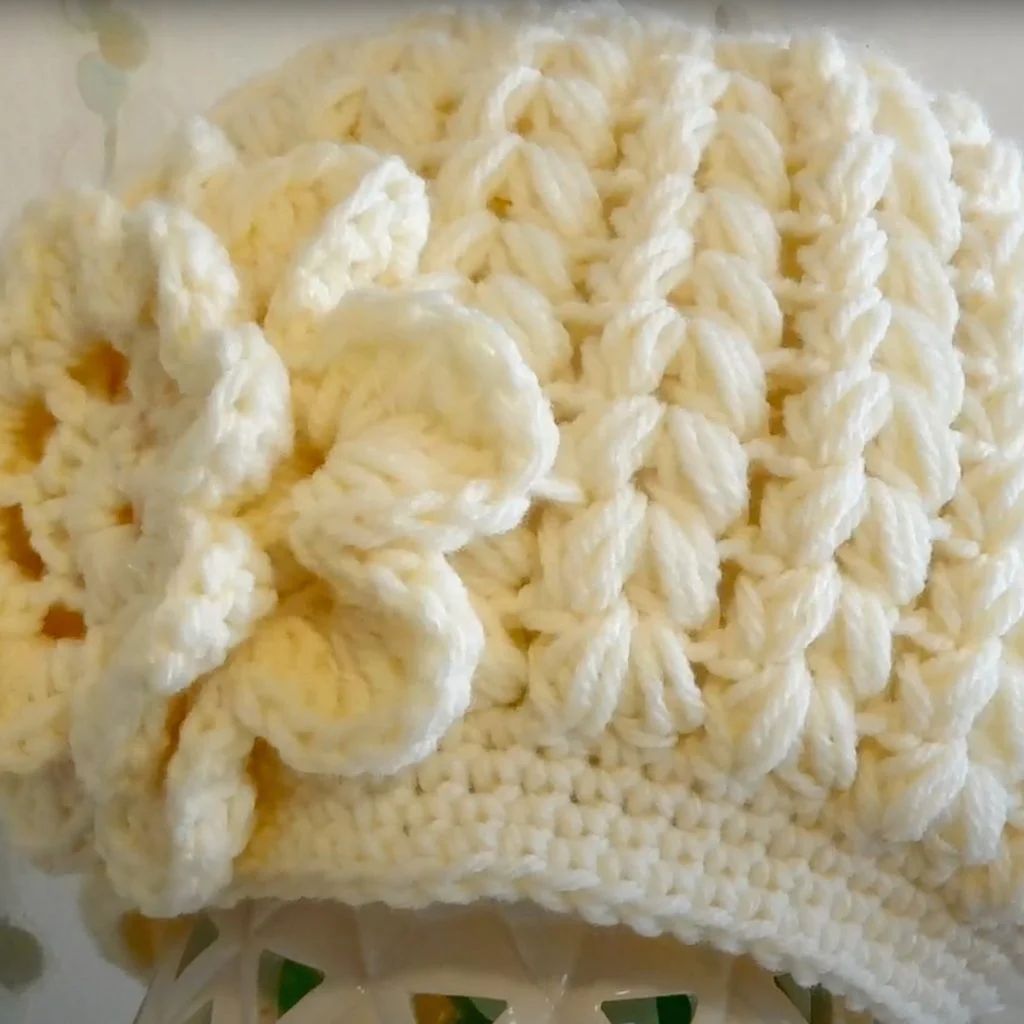
What is the puff stitch good for ?
The double-sideness and warm texutre make this stitch perfect for winter accessories like hats, scarf, but also blankets.
The characteristic ‘puff’ look texture also goes along with flowers and creates realistic looking petals, so is often used to pop up flowers both in appliques and blanket squares.
The puff stitch can be used as the only stitch throughout an item. You can also add only one row of puffs as an accent, e.g. in a winter hat. There is also one more amazing way you can use the puffs. The deep, dimensional texture of this pattern distinguishes it visually from the background and allows you to create any graphic design. Similar to the corner-to-corner stitch (C2C) technique, we can treat a single bobble as a pixel to imitate a pixelated image. From letters or simple geometric shapes, through more complicated patterns like animals, rainbows or boats, to creating scenes or reflecting photos or faces.
See my most favourite puff stitch crochet patterns:

A puff stitch here is implemented as an accent in the baby dress. A free pattern by Winding Road Crochet:
Puff Stitch Hat by Hobby Crochet
To learn more stitches, see my full guide through the most popular crochet stitches:
Do you like this post? If so, don’t forget to PIN it for later:
It was very helpful and well explained. Thank you!