
In this article:

Do you know my motto for today? Crochet circle blankets make the world go round! Wouldn’t you agree?
Round crochet blankets or circle baby blankets are surely a great way to get rid of unused stashes of yarn. Why? Well, because as you work your way from the center, you can start with much shorter lengths of yarn.
But, and it’s a big but, there is so much more to love them for! They are much better suited to spaces that are more square than rectangular. They also add a flowing, natural look to modern, straight-edged interiors and soften hard edges. Of course, the possibilities of modifying them are endless so you can express yourself through many such projects.
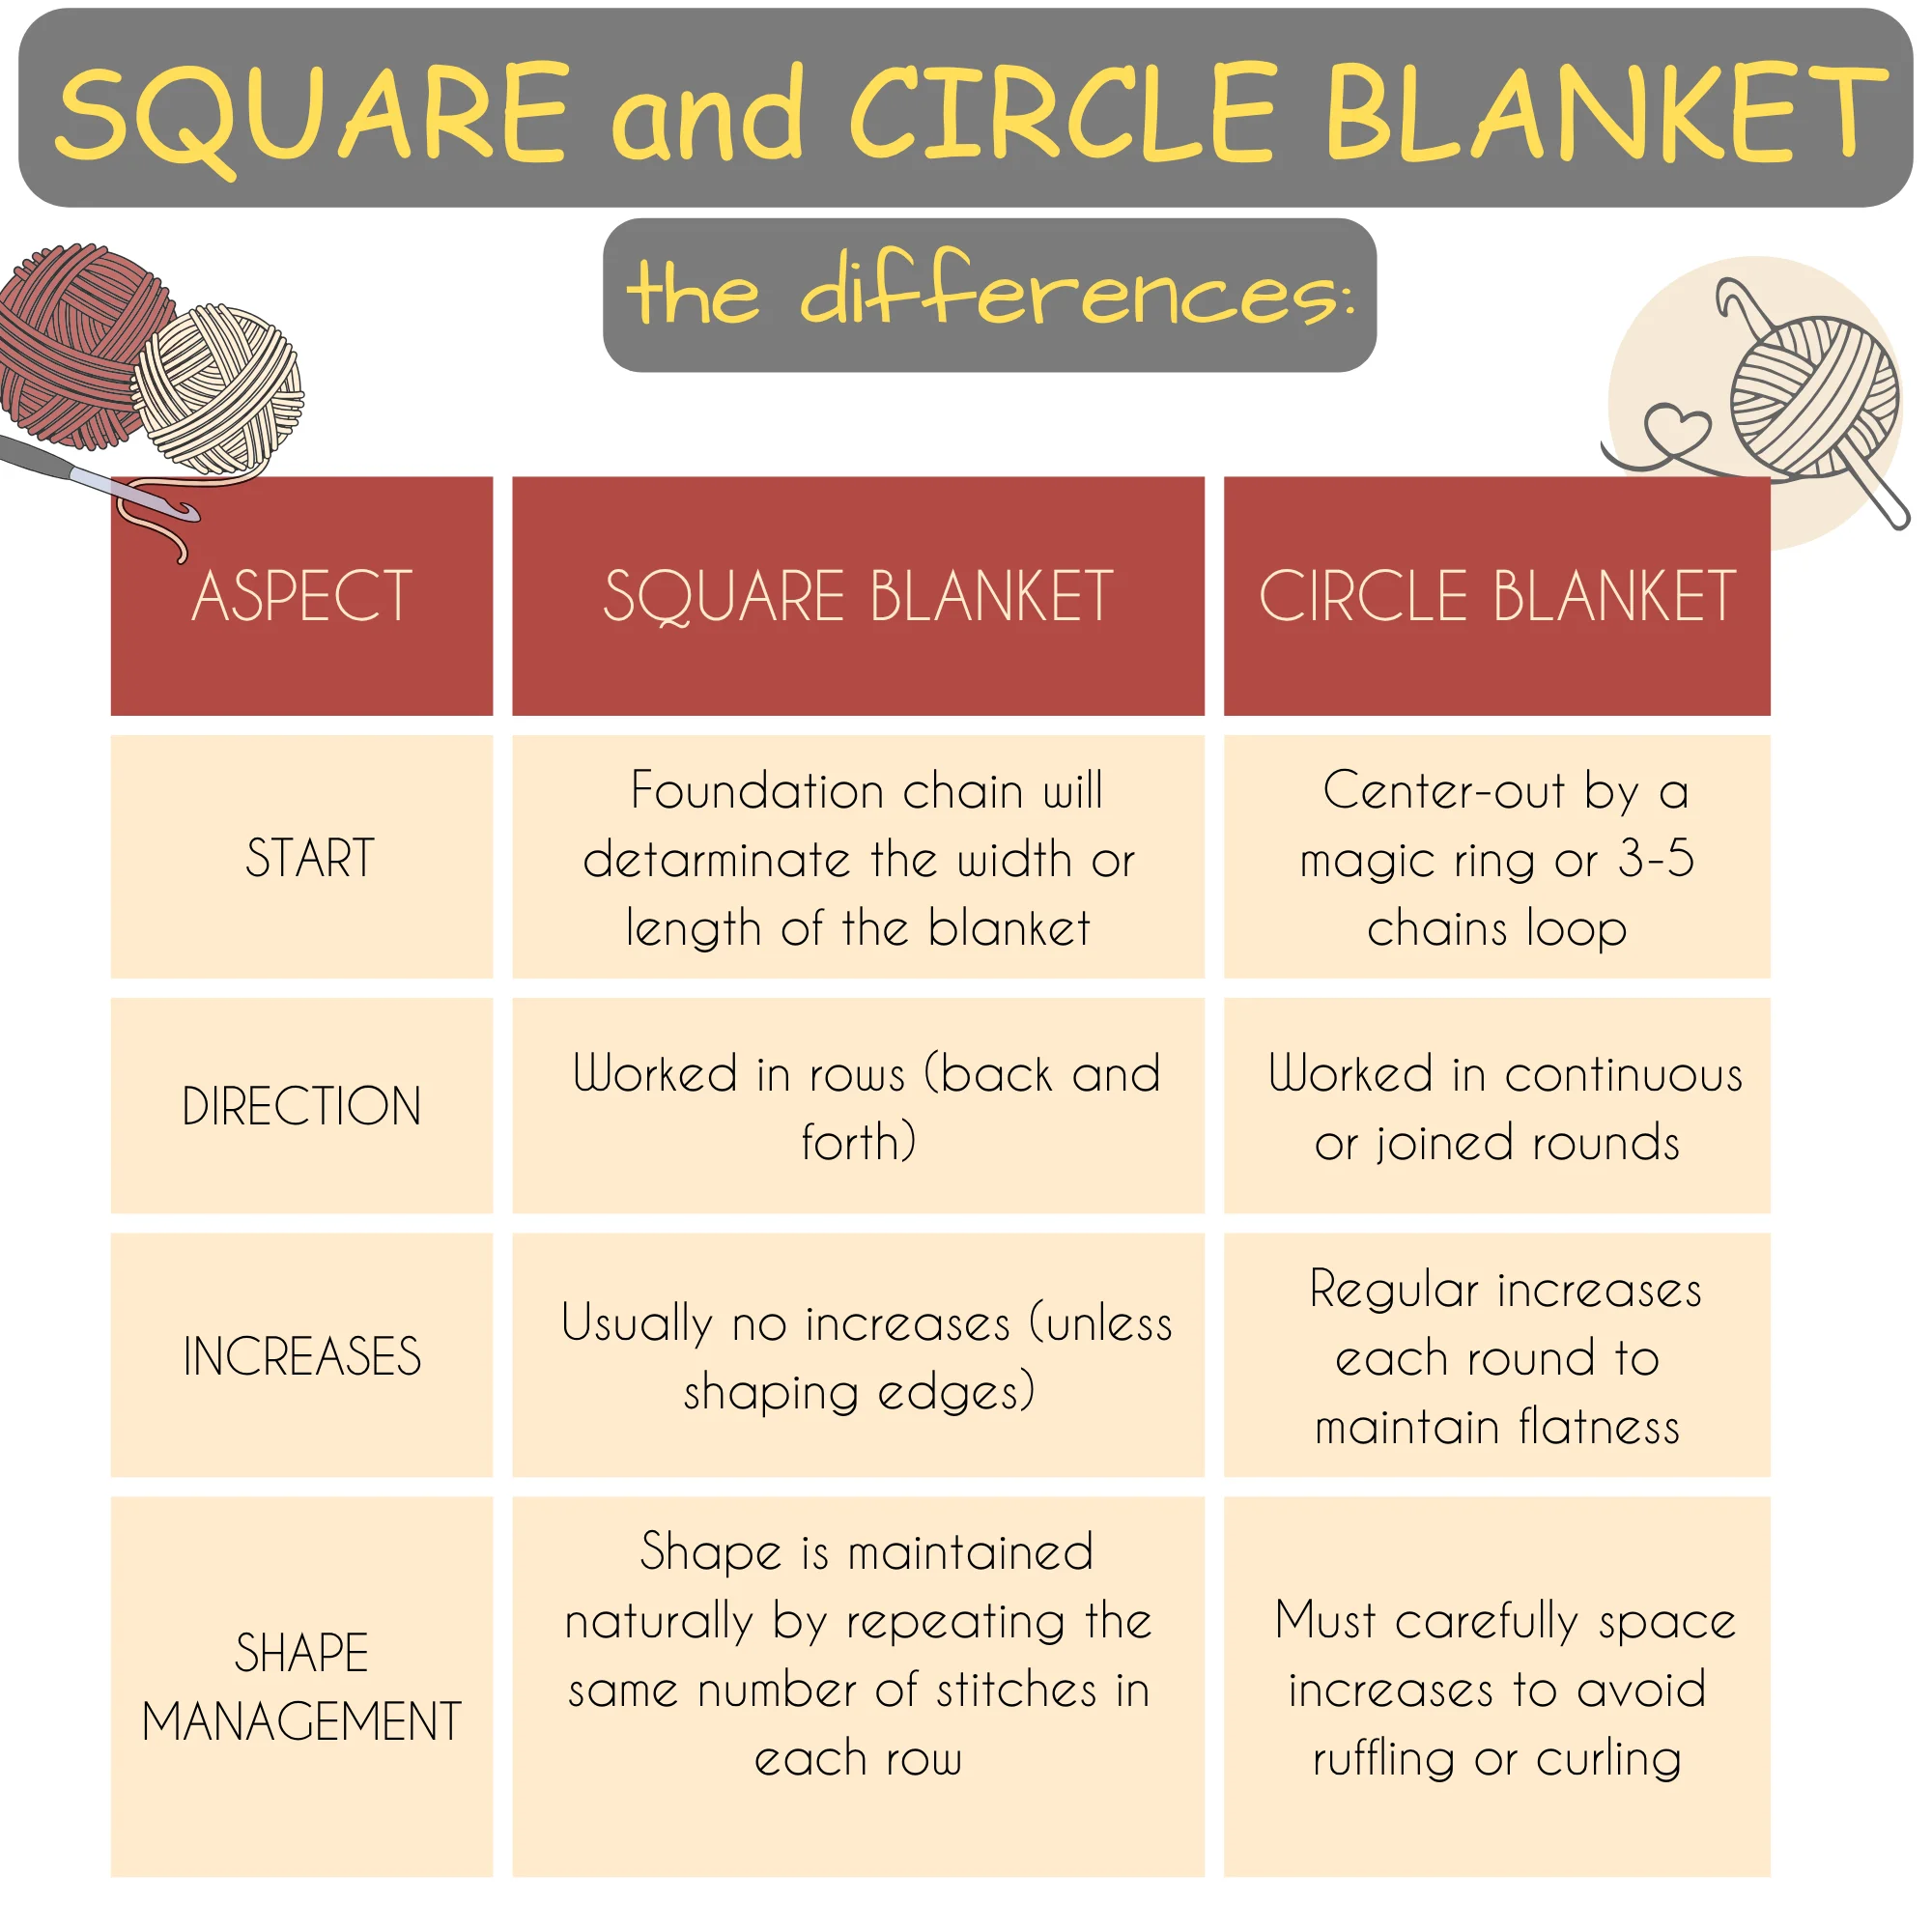
Square and Circle Blanket Differences
You’ve probably crocheted square or rectangular items before or tried to make a stitch swatch to see how it works. Even if you have never made any blankets before, you KNOW how it works: you decide how wide your blanket will be by adjusting the the number of stitches in a foundation row, and you regulate the length by adding more rows. It’s intuitive for a square or rectangular blanket. But a circle blanket is a whole different story.
Here’s a breakdown of the main differences:
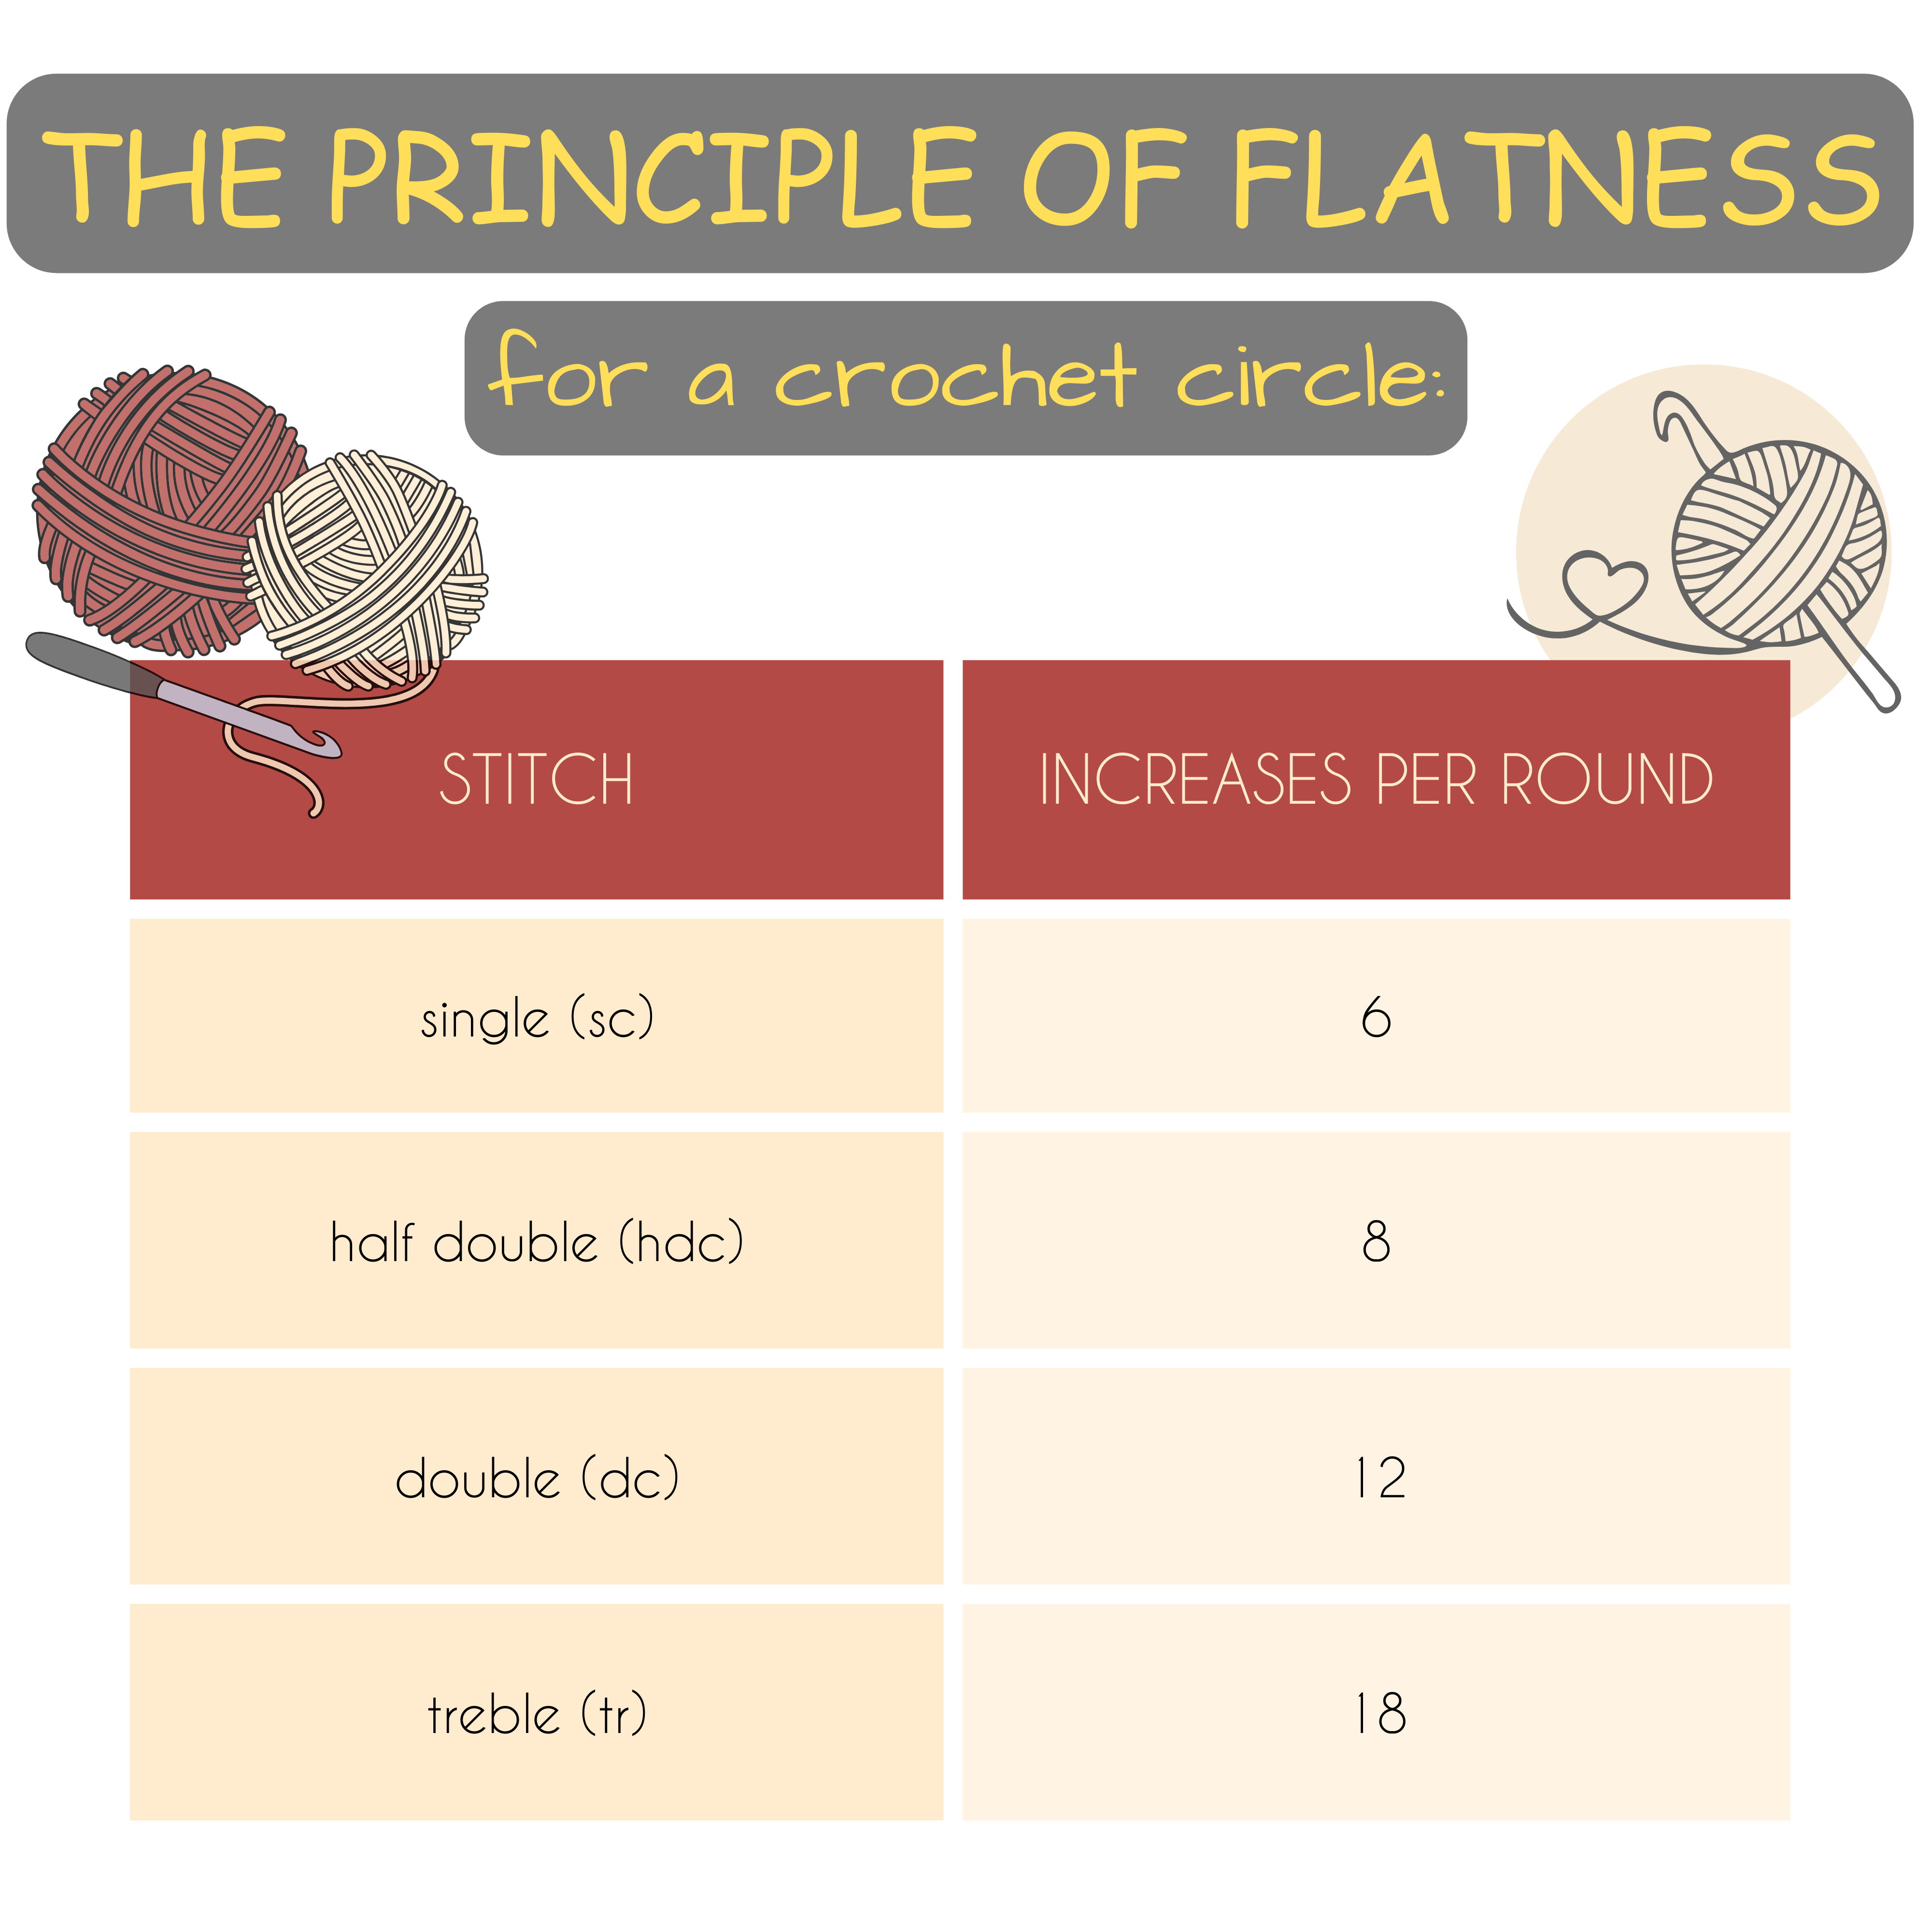
The Principle of Flatness
Increases are a key to keep a circle blanket flat. You will need to add a set number of stitches in each round to avoid ruffling or curling. That means the total number of stitches in following rounds is constantly growing. You will find more detailed explanation in the tutorial How to make a Flat Circle in a part about The Principle of Flatness.
How to Crochet a Circle Blanket – a Step by Step Tutorial
Here, you will find detailed instruction for a basic stitch blanket. No matter which stitch you are going to use – a single crochet, double crochet, half-double crochet or treble crochet, follow the steps below to make a perfectly flat round blanket.
But first, gather the materials below:
Materials You’ll Need
- Yarn: The color and type are your preference, but for beginners, a medium-weight yarn is suggested.
- Crochet Hook: Pick a size suitable for your yarn choice. Check yarn labels for hook size recommendations.
- Stitch Marker: To keep track of your rounds.
- Scissors: For cutting the yarn at the end.
- Tapestry Needle: For weaving in ends.
As a rule of a thumb, to crochet any round blanket, follow 6 steps below:
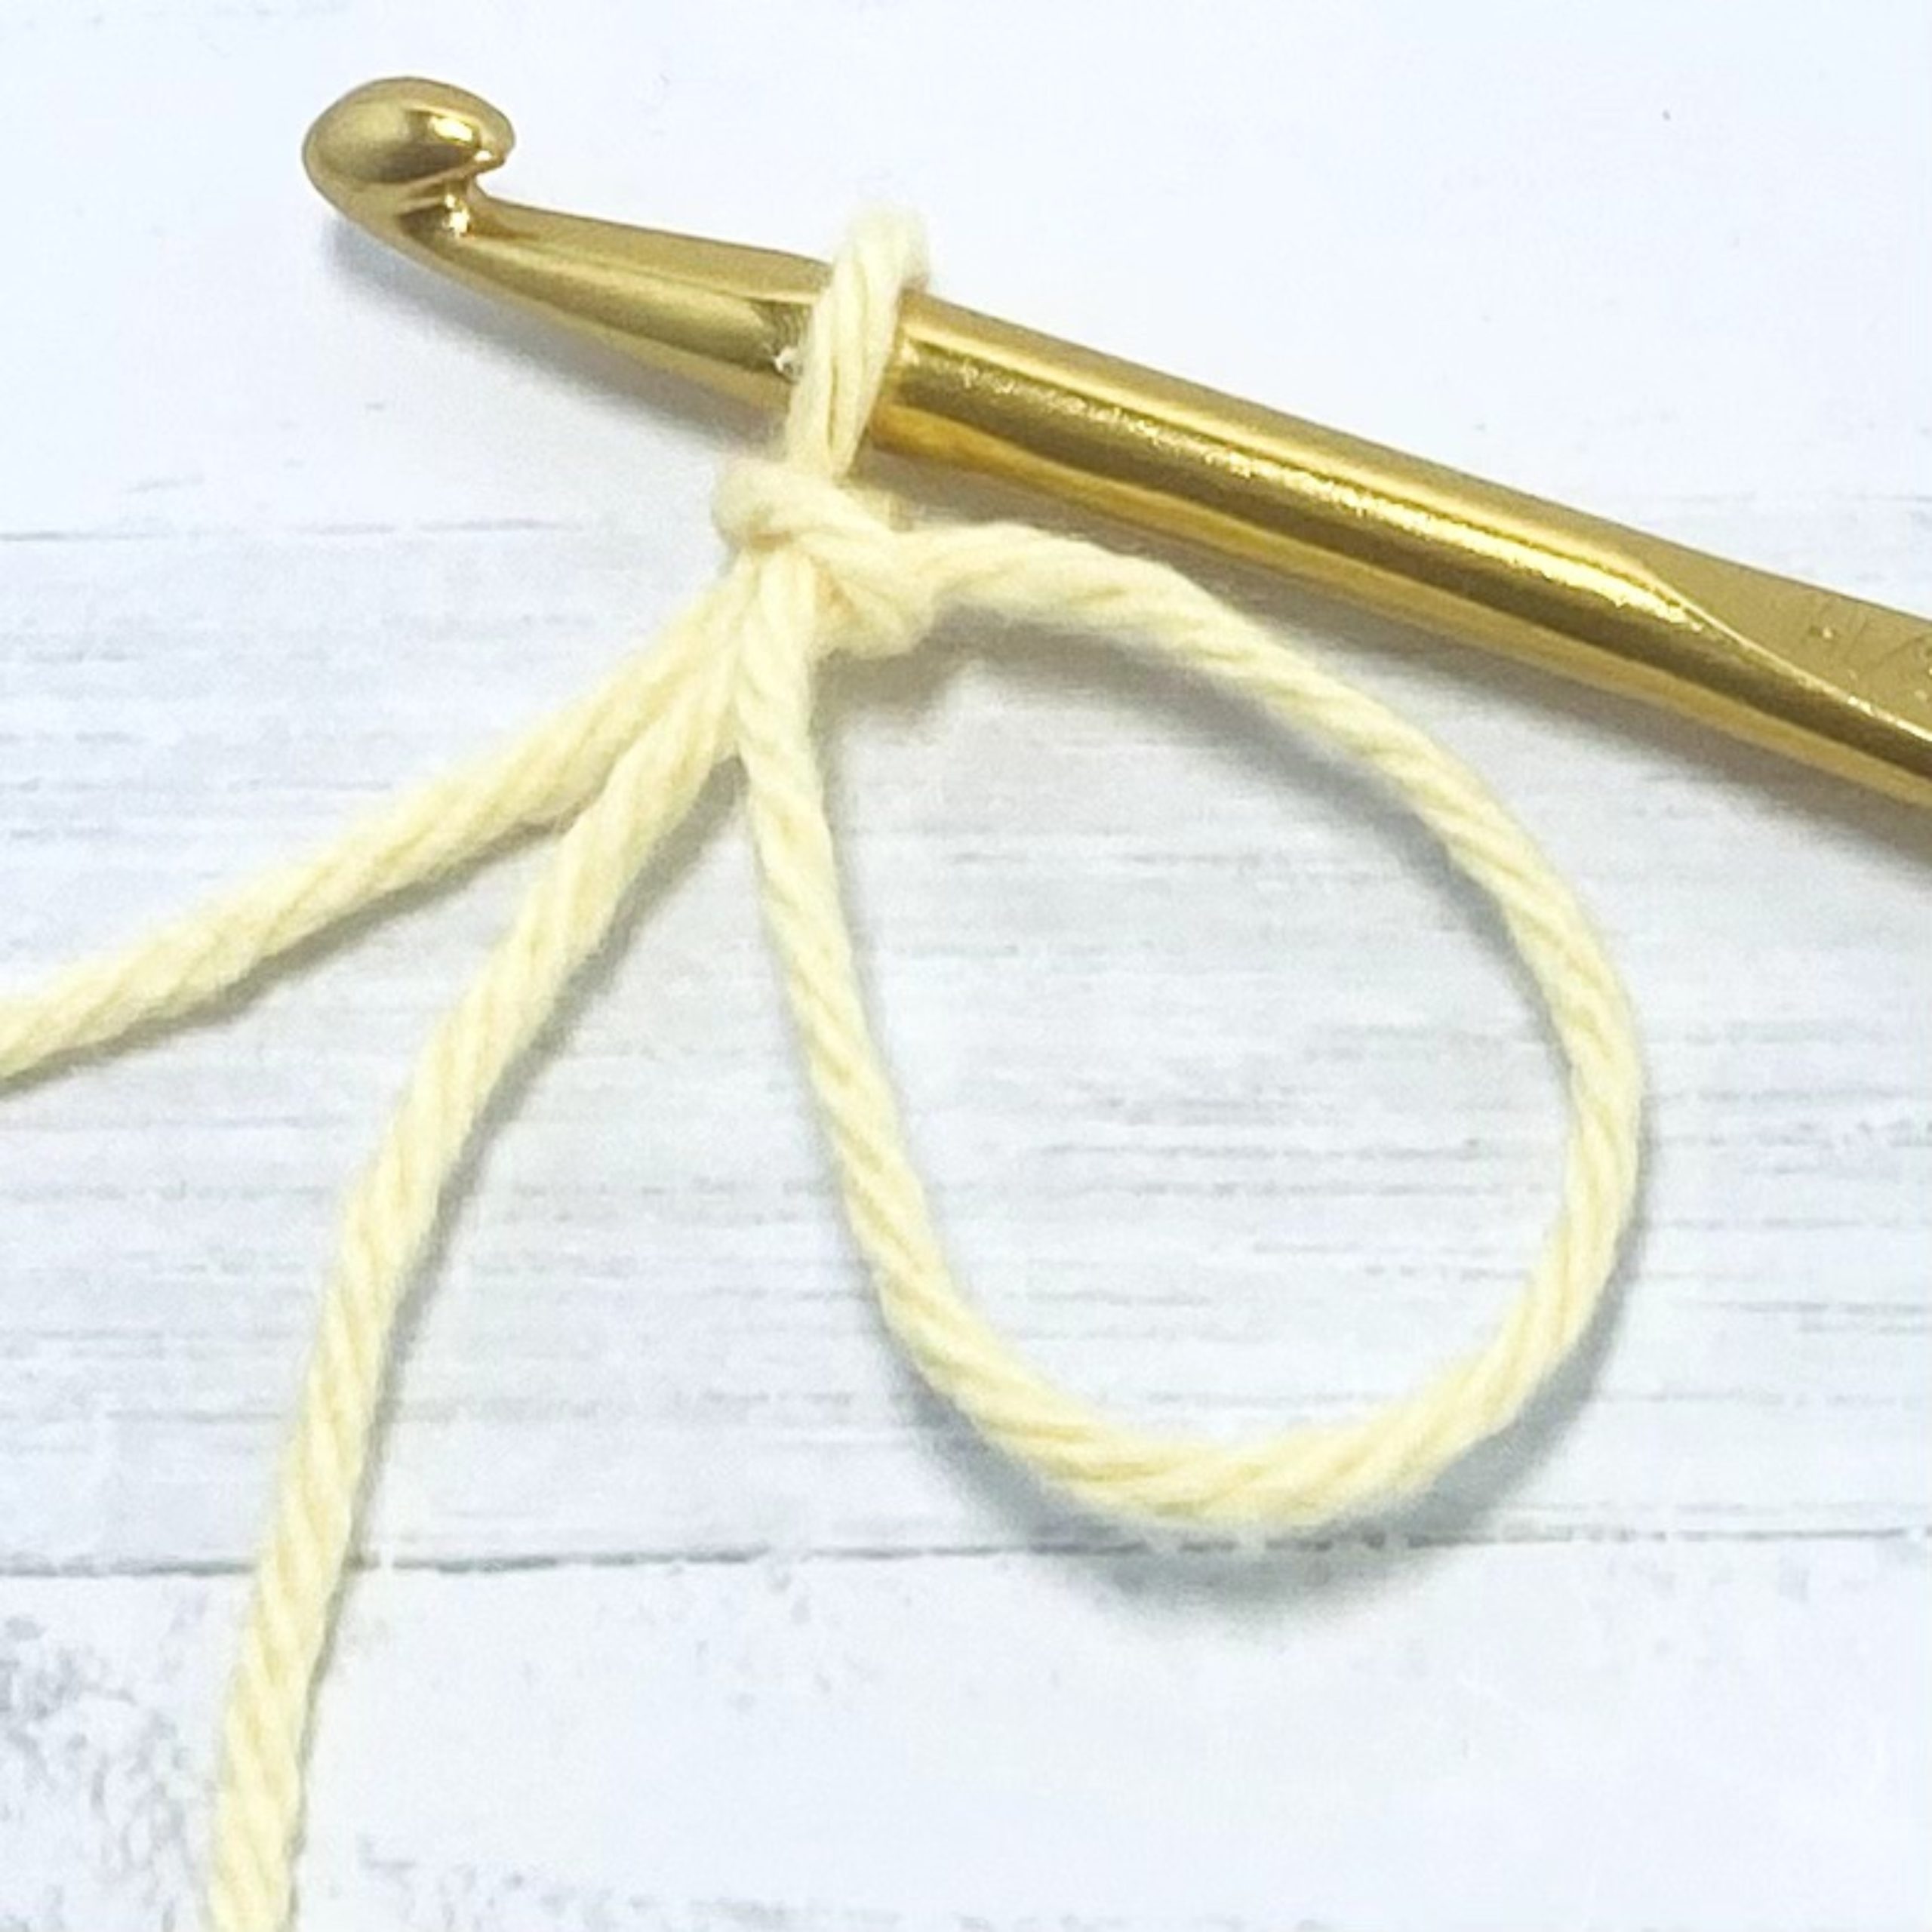
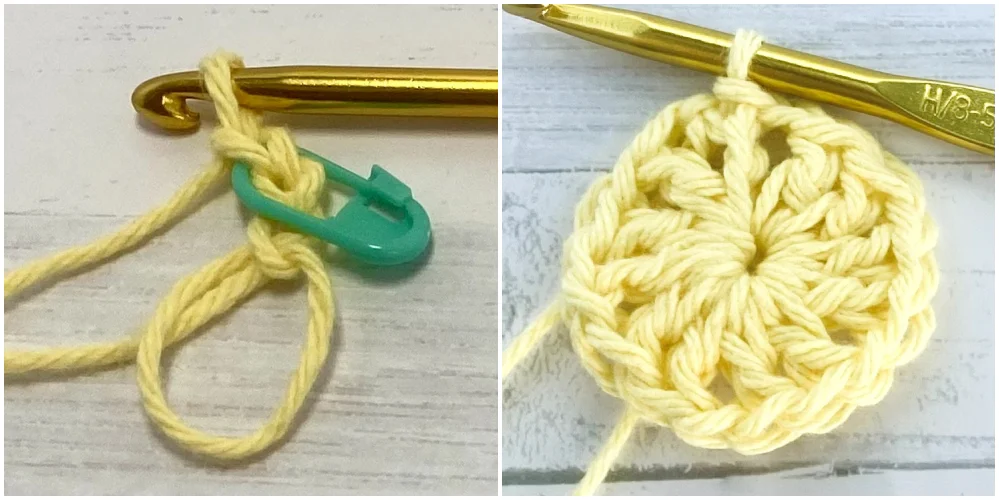
Step 1
Start with crocheting 4 chains and a slip stitch at the 4rd chain from the hook to make a loop. Alternatively make a magic ring.
Step 2
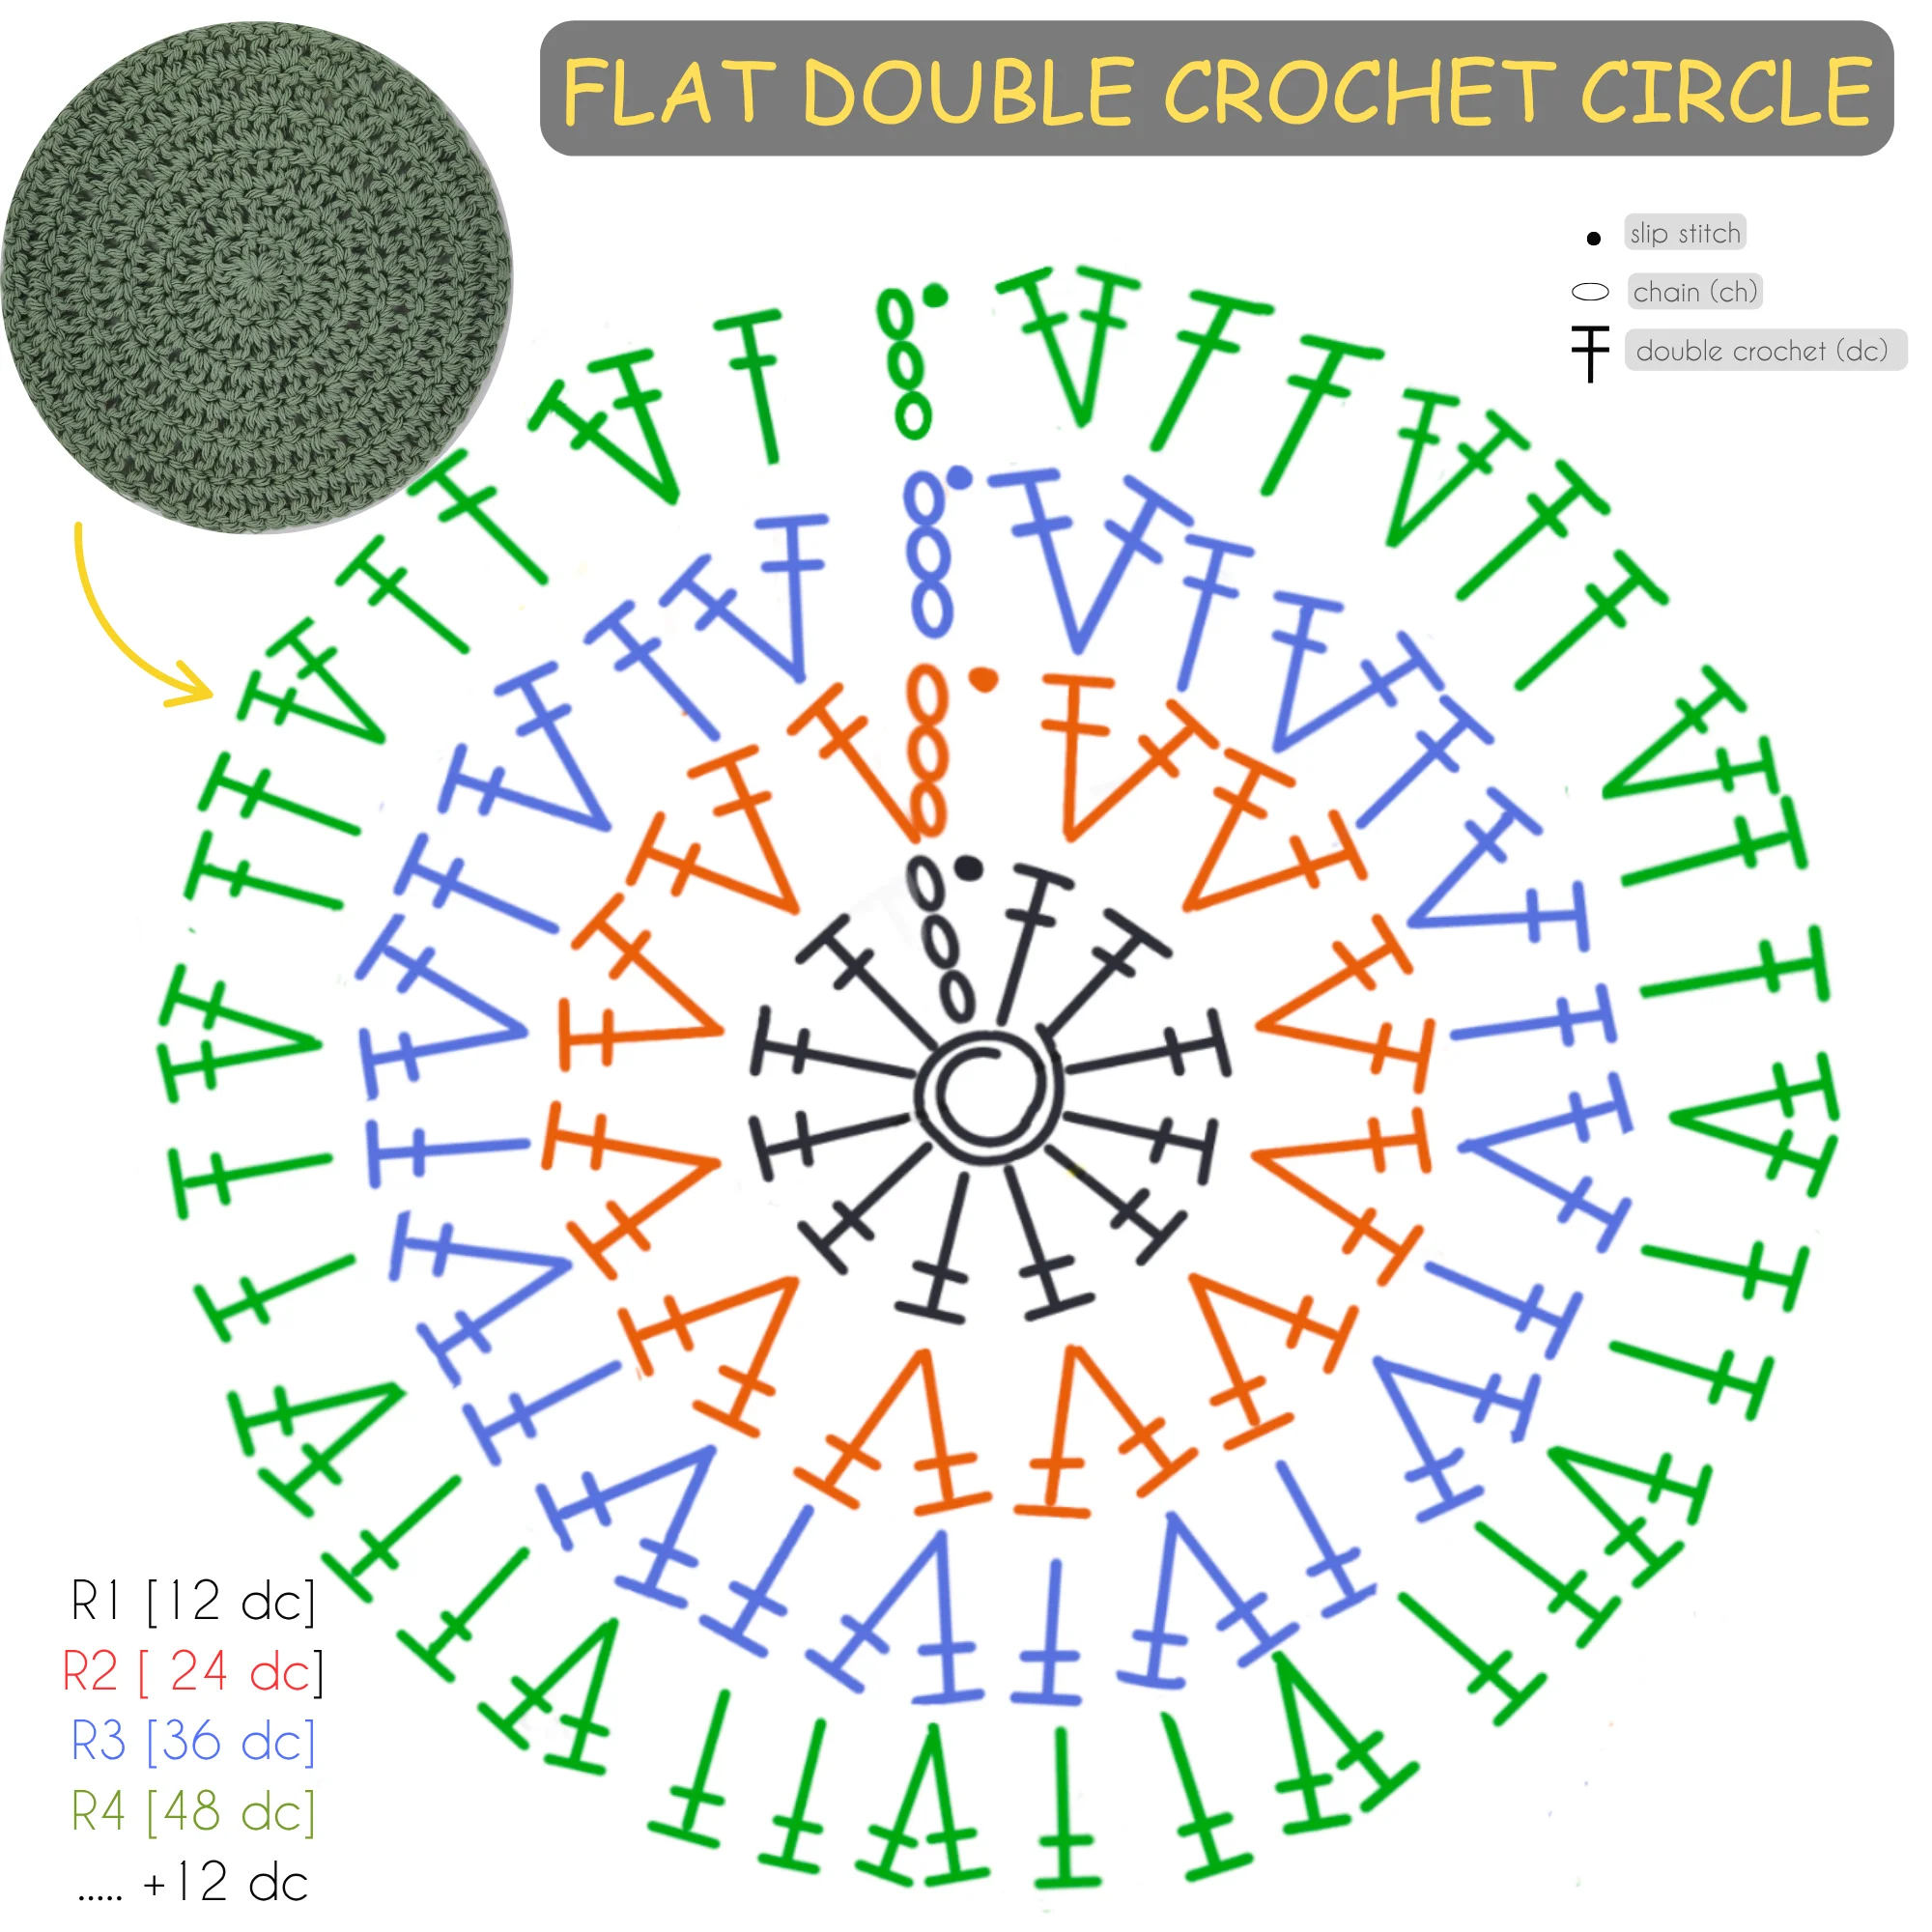
For row 1, determine which stitch you are going to use and make an adequate number of stitches described in the table: The Principle of Flatness below (e.g. for a double crochet blanket, start with 12 dc in a ring/loop).
Step 3
In row 2, make 2 stitches in every single stitch of the first row (you will double the number of stitches). (e.g. 24 stitches for a double crochet blanket).
Step 4
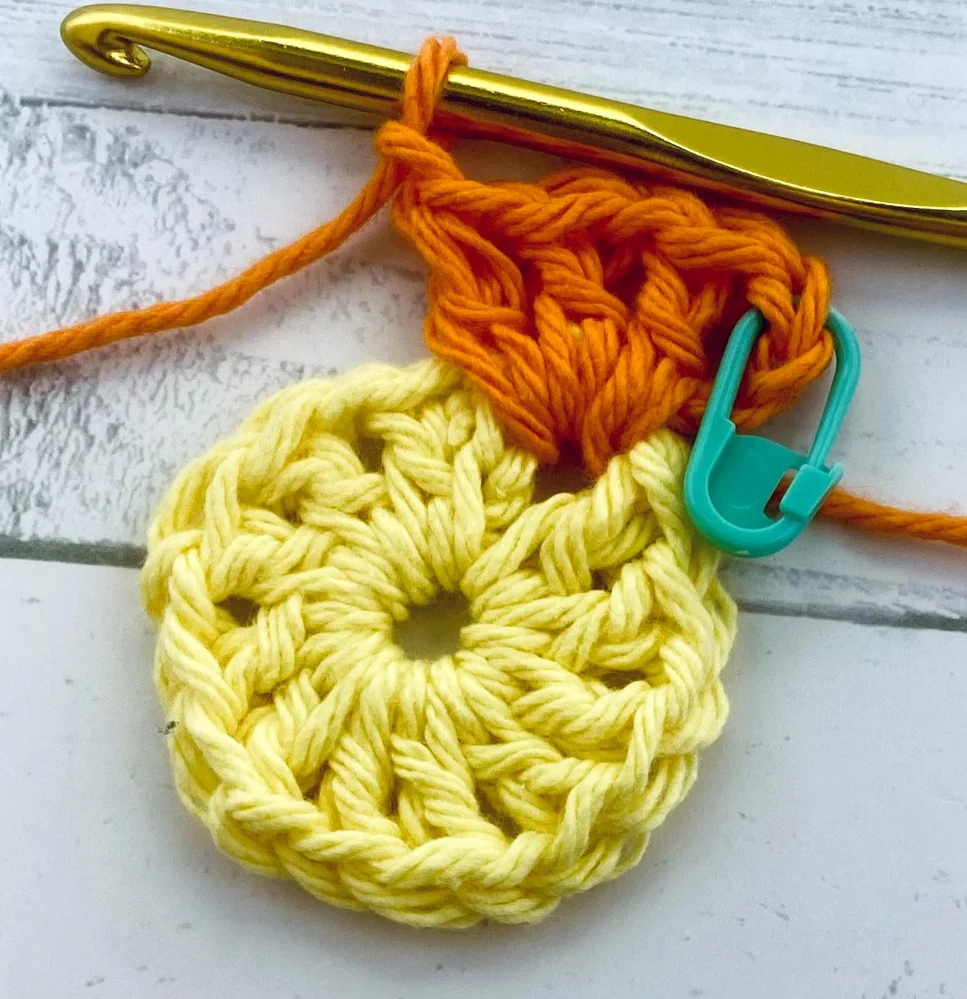
In row 3, increasing in every second stitch. The total number of stitches in this round will increase accordingly with the table The Principle of Flatness above. (e.g. a double crochet – 36 stitches).
Step 5
Continue increasing Round 4rd and the following rows by adding the number of stitches from the table entitled The Principle of Flatness above. Spread the increases evenly throughout the round. To do that, for Round 4 increase in every third stitch, for Round 5 – in every fourth stitch and so on.
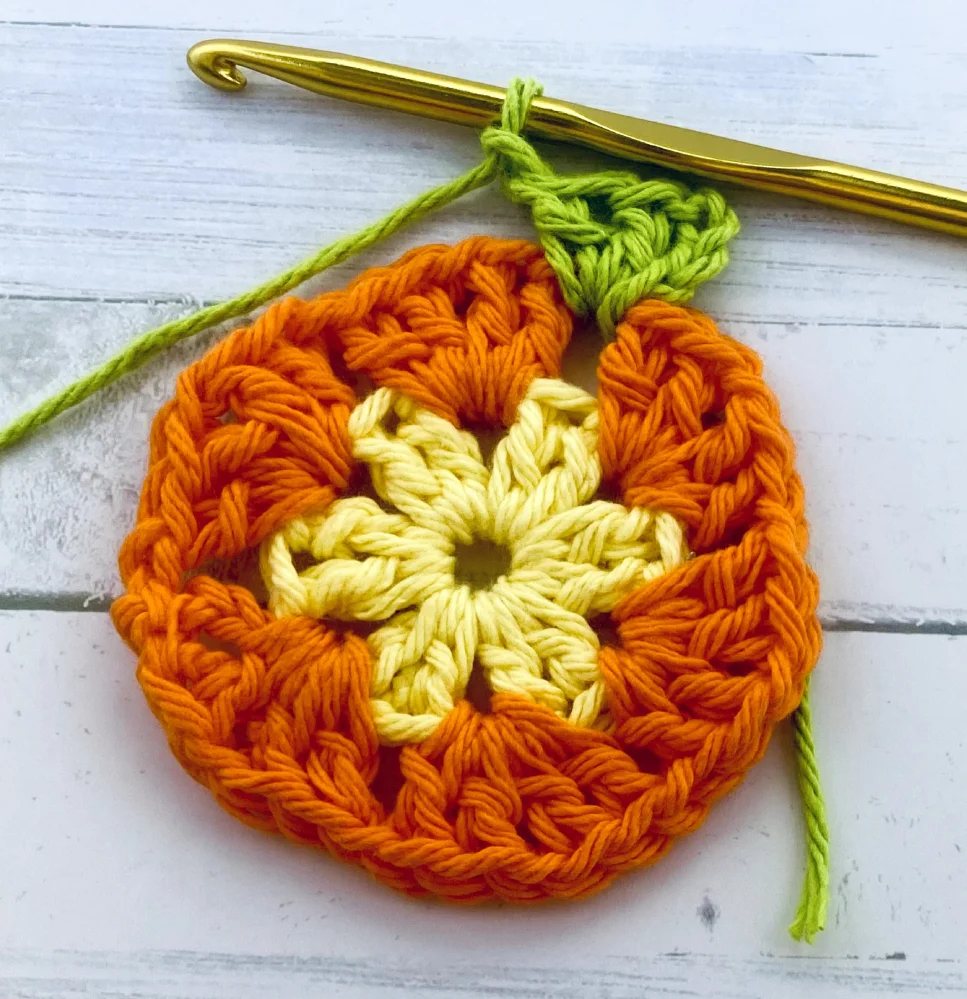
For a better explanation how to spread the increases evenly in a round, I will show it to you using a diagram. In green, you can see Round 4 of a double crochet circle. In that round, there is a repeating a pattern of 2 dc and increase all around.
To make your first double crochet circle, please see the tutorial Crochet Circle For Beginners.
Step 6
Make as many rows as needed to get the desired size of blanket. You may finish your blanket with a border.
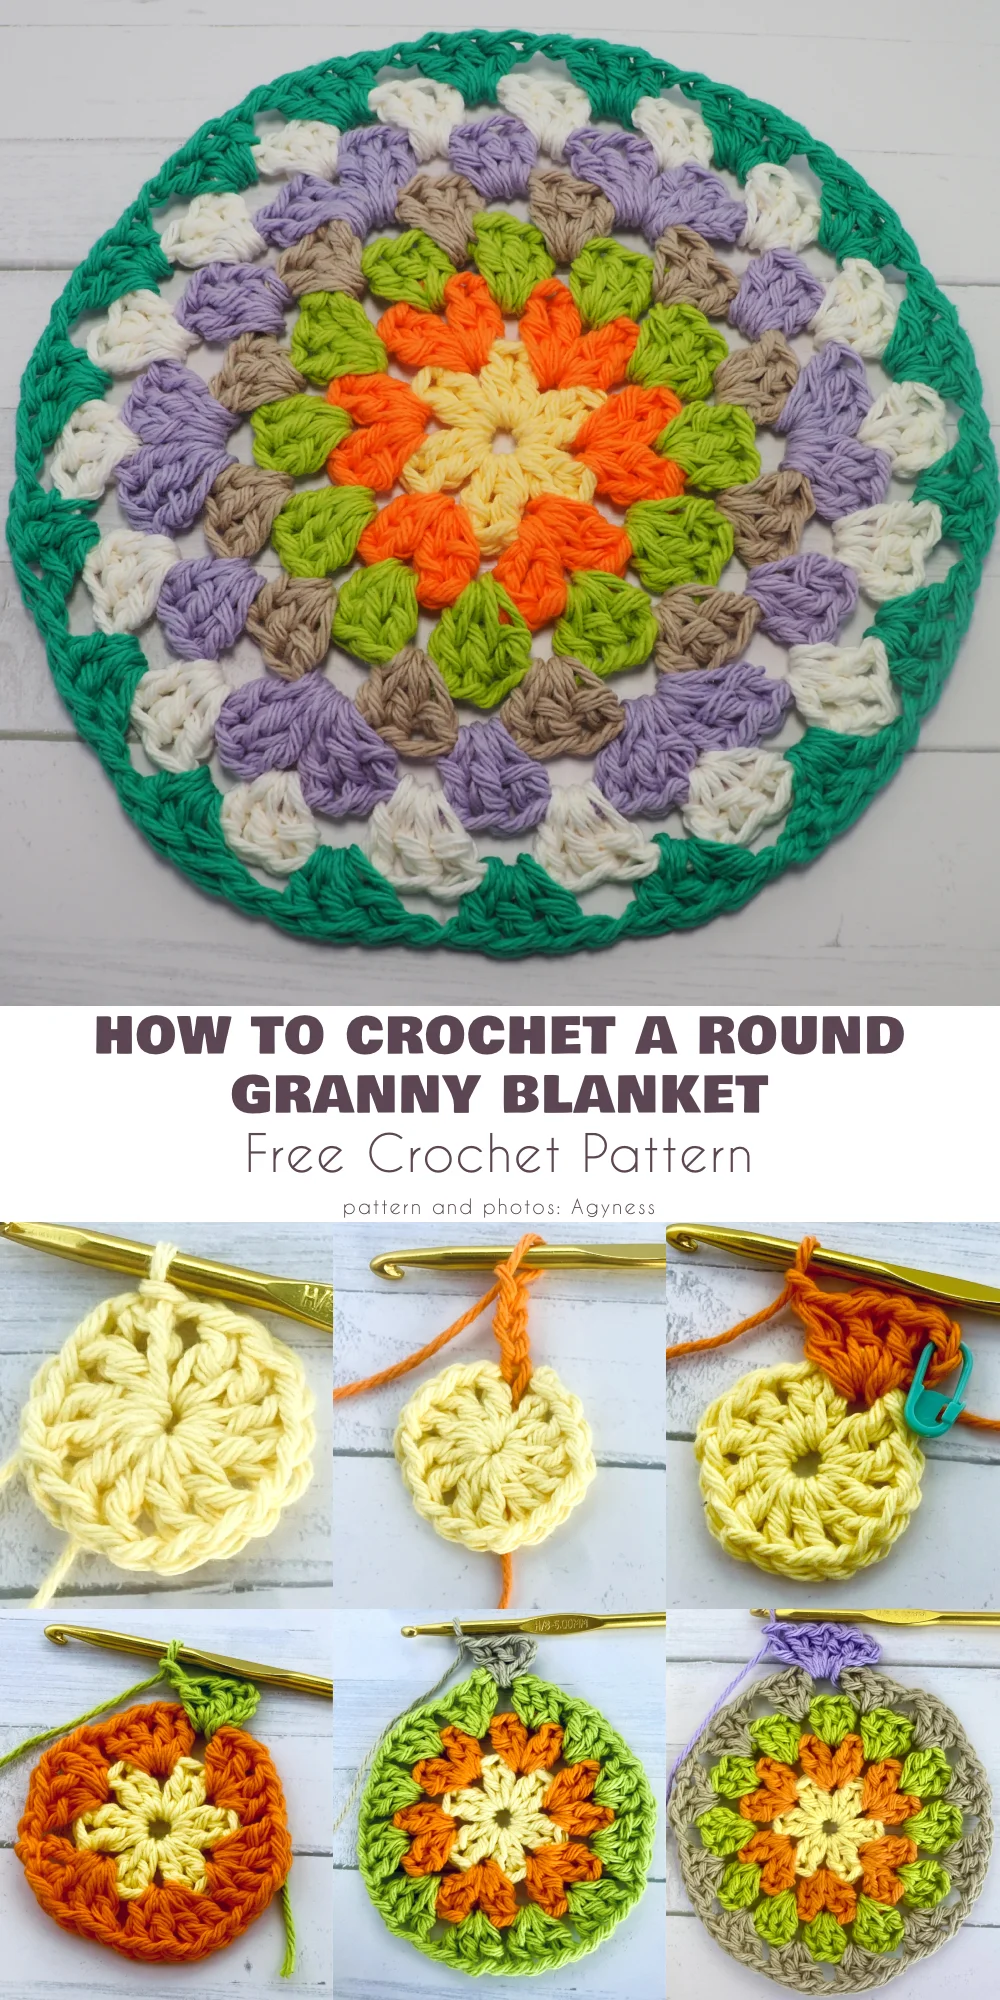
How to Crochet a Round Granny Blanket – a Step by Step Tutorial
As granny squares are usually full of colors, you can use this method to make a granny mandala for a wall hanger, circle for a bag, or to decorate a round stool. A granny round blanket based on basic crochet stitches (frankly speaking you need only one – a double crochet). To maintain characteristic granny square pattern where double crochets are kept in clusters of three stitches together, we need dedicated approach for round granny.
Materials You’ll Need
- Yarn: The color and type are your preference, but for beginners, a medium-weight yarn is suggested.
- Crochet Hook: Pick a size suitable for your yarn choice. Check yarn labels for hook size recommendations.
- Stitch Marker: To keep track of your rounds.
- Scissors: For cutting the yarn at the end.
- Tapestry Needle: For weaving in ends.
Abbreviations
- Ch (s) = Chain stitch(es)
- Sl St = Slip Stitch
- Dc (s) = Double Crochet stitch (s)
- Sc = Single Crochet Stitch
- St(s) = Stitch(es)
Step 1: Start with a Ring
Start with:
- a Magic Ring: This is a popular method because it allows the center to be pulled tight, leaving no hole; alternatively:
- Chain Method: Chain 4 and then slip stitch into the first chain to create a circle.
I started with a magic ring.
Round 1
- Begin with ch3 (counts as your 1st dc). If you are a beginner, use a stitch marker to mark a top chain of ch3 you just made at the beginning of this and following rounds. This will make everything easier at the end of the round(s)!
- Crochet dc into the center of the circle. Ch 1.
- *2 dc, ch 1* – repeat 4 more times. Sp st into the top chain of the starting ch 3.
At the end of the round you have 6 2dc’s separated by ch1 [18 sts]
Round 2
- Next, join the next color with a sl st into a 1ch space. Ch 3 (counts as your first dc). 1 dc, ch 1, 2 dc, ch 1 into the same space. *(2dc, ch1, 2dc , ch 1) repeat from *into each ch 1 space from the previous round. At the end of the round you have 6 2dc’s separated by ch1. [30 sts]
- Slip stitch to join into the top chain of the starting ch 3.
 Round 3
- Subsequently, join the next color with a sl st into a 1ch space. Ch 3 (counts as your first dc). 2 dc, ch 1.
- *(3 dc, ch 1)* 11 times into the each space. (12 3dc’s clusters in total). [48 sts]
- Sp st into the top chain of the starting ch 3.
Round 4
- Following the previous round, join the next color with a sl st into a 1ch space. Ch3 (counts as your first dc), 1dc, ch 1, 2dc into the same space.
- *( 2dc, ch 1, 2 dc)* repeat around into the each ch1 space. [60 sts]
- Sp st into the top chain of the starting ch 3.
Round 5
- Join the next color with a sl st into a 1ch space. Ch 3 (counts as your first dc). 2 dc.
- 3 dc into each ch1 space – repeat around. 24 clusters of 3dc [72 sts]
- Sp st into the top chain of the starting ch 3.
Round 6
- repeat round 3.
Round 7
- repeat round 4.
Next Steps
Continue repeating the 5th round (increasing) and 3rd and 4th (regular granny) rounds. Increasing rounds give a spiky octagon shape, which is then rounded off with the regular rounds. Therefore, plan to finish off your work with two consecutive regular granny rounds.
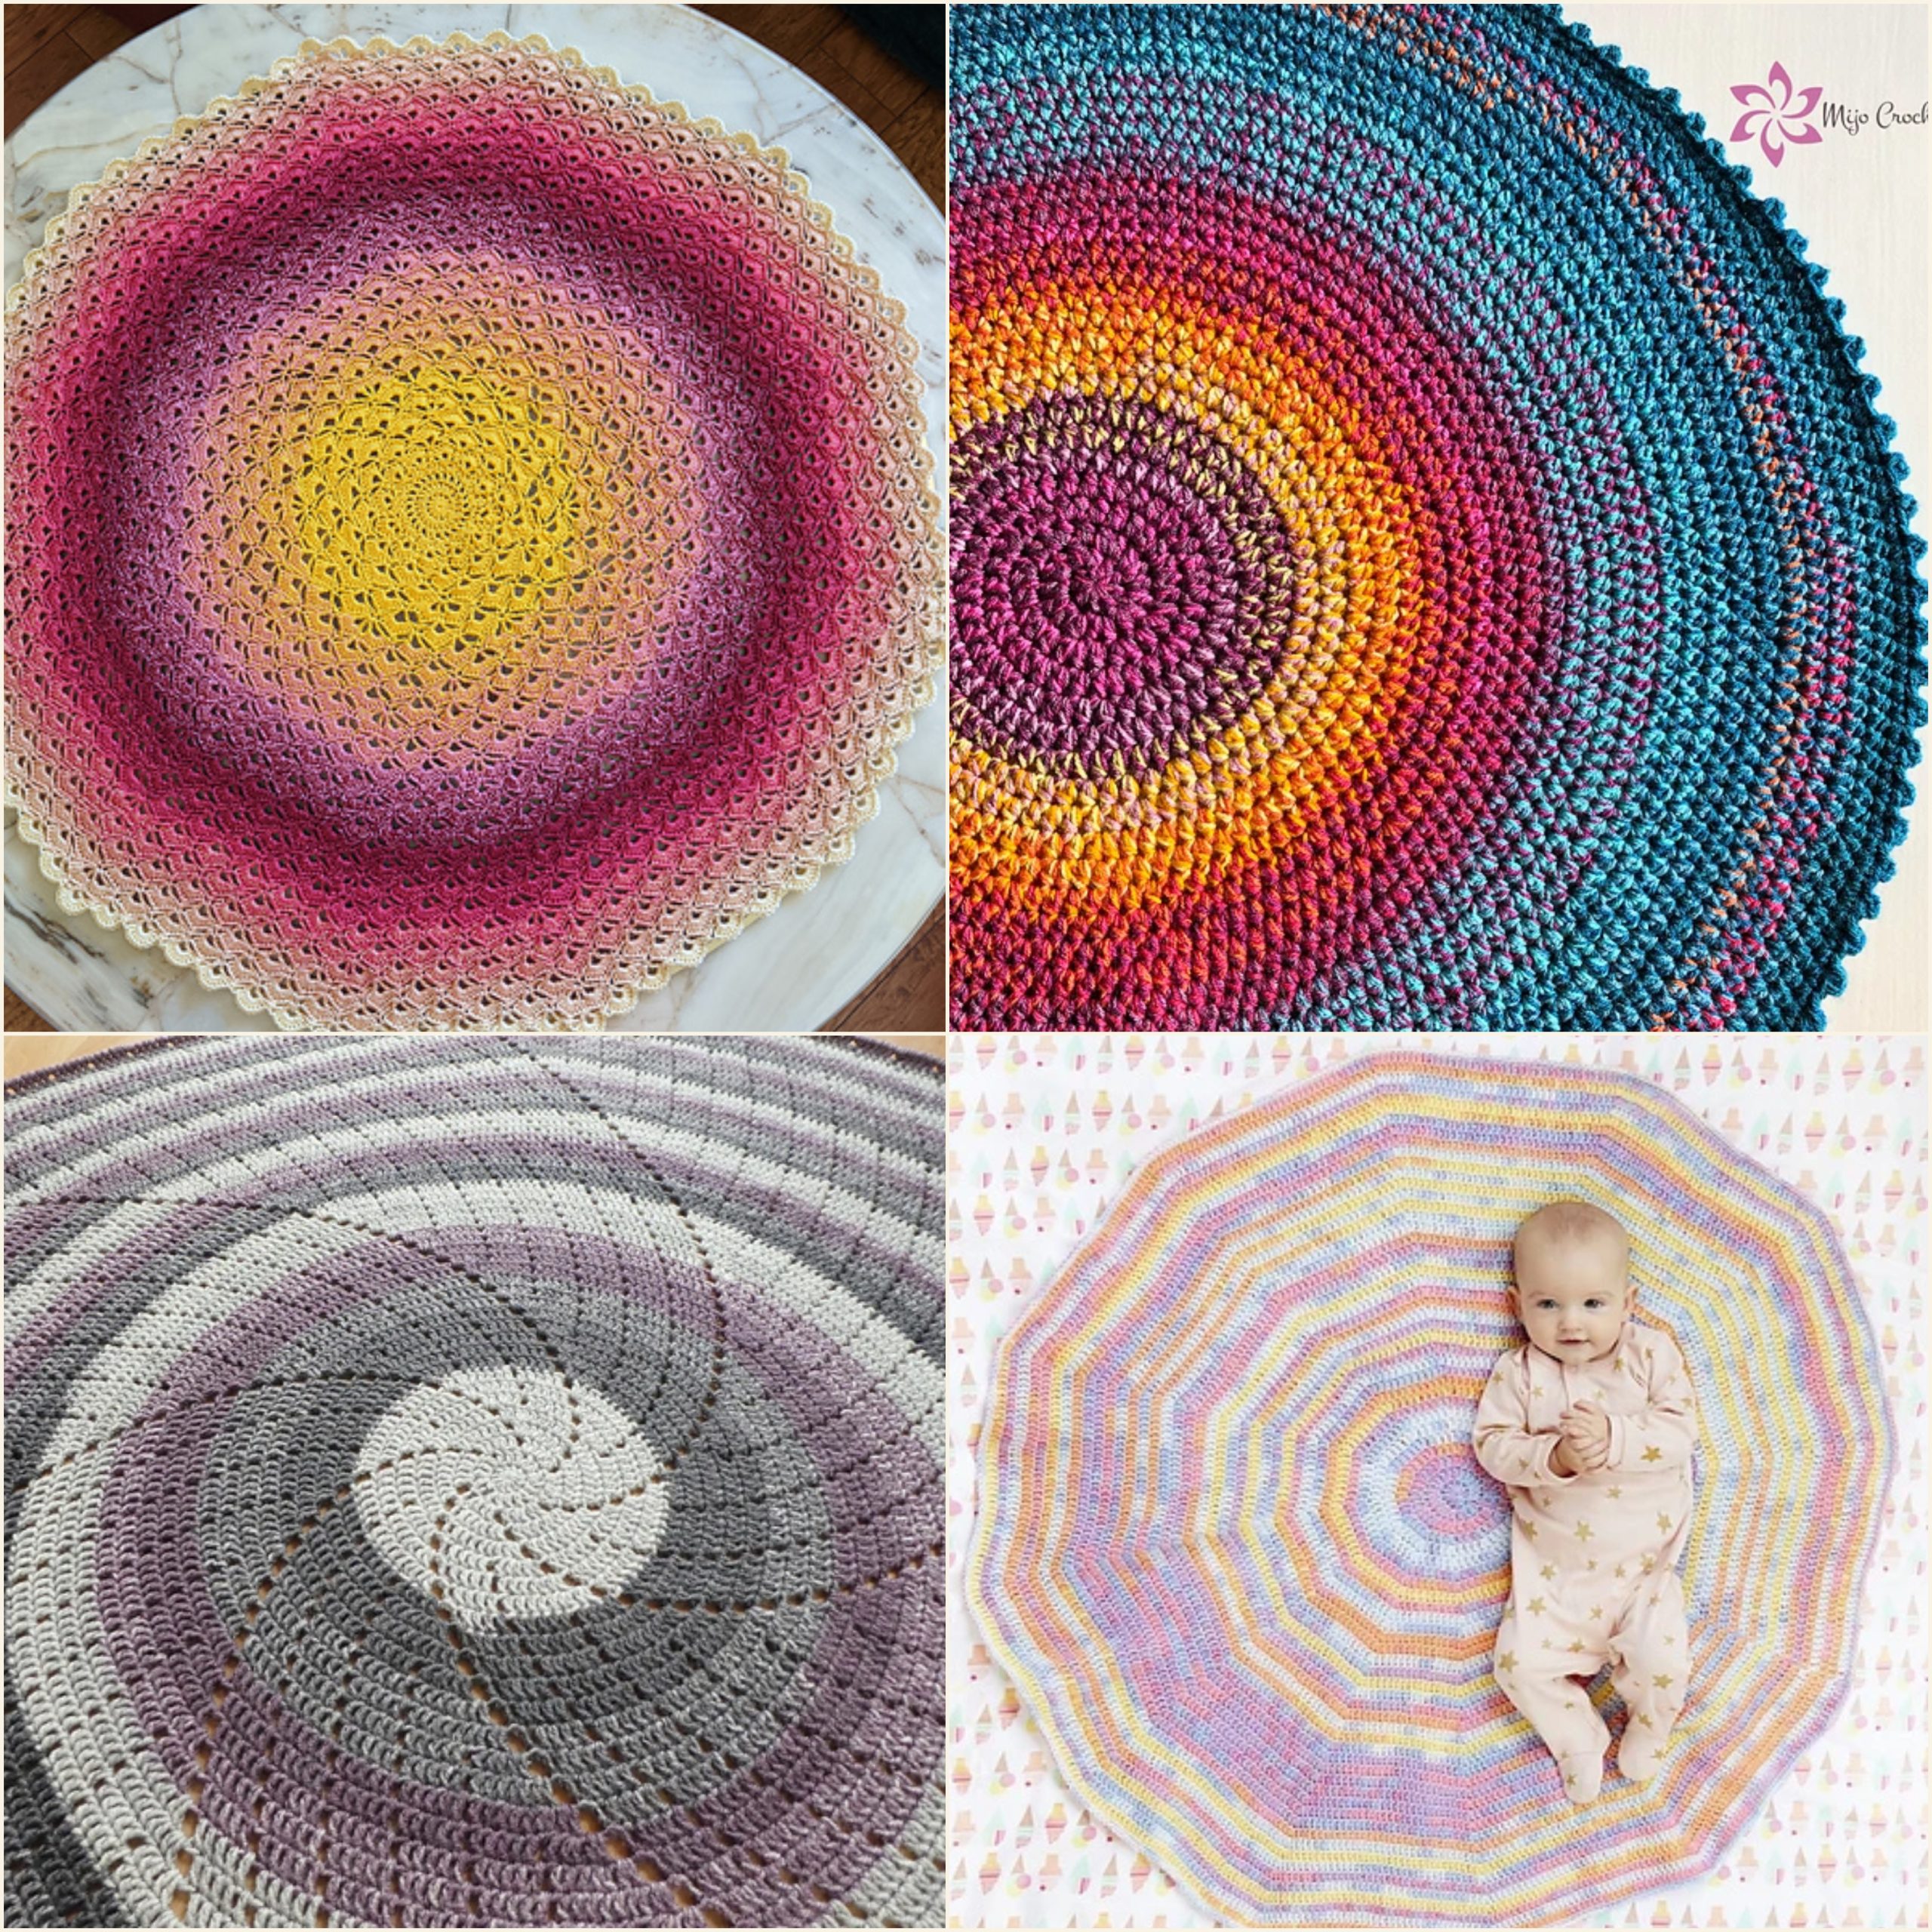
 Mesmerizing Crochet Circle Blankets with Free Patterns
A granny round blanket is only one of the multiple possibilities. You can use any stitch you want or combine them to create unique and eye-catching blankets. Here are other my favorite crochet patterns for blankets definitely worth trying:
![]()
Lotus Flower Baby Blanket
Have you seen the Lotus Flower Blanket from Hooked by Robin before? You must have, this crochet circle blanket is almost legendary! I certainly understand why, especially when we look at this beautiful version by Paige. The author evidently has an exceptional taste for colors, right?
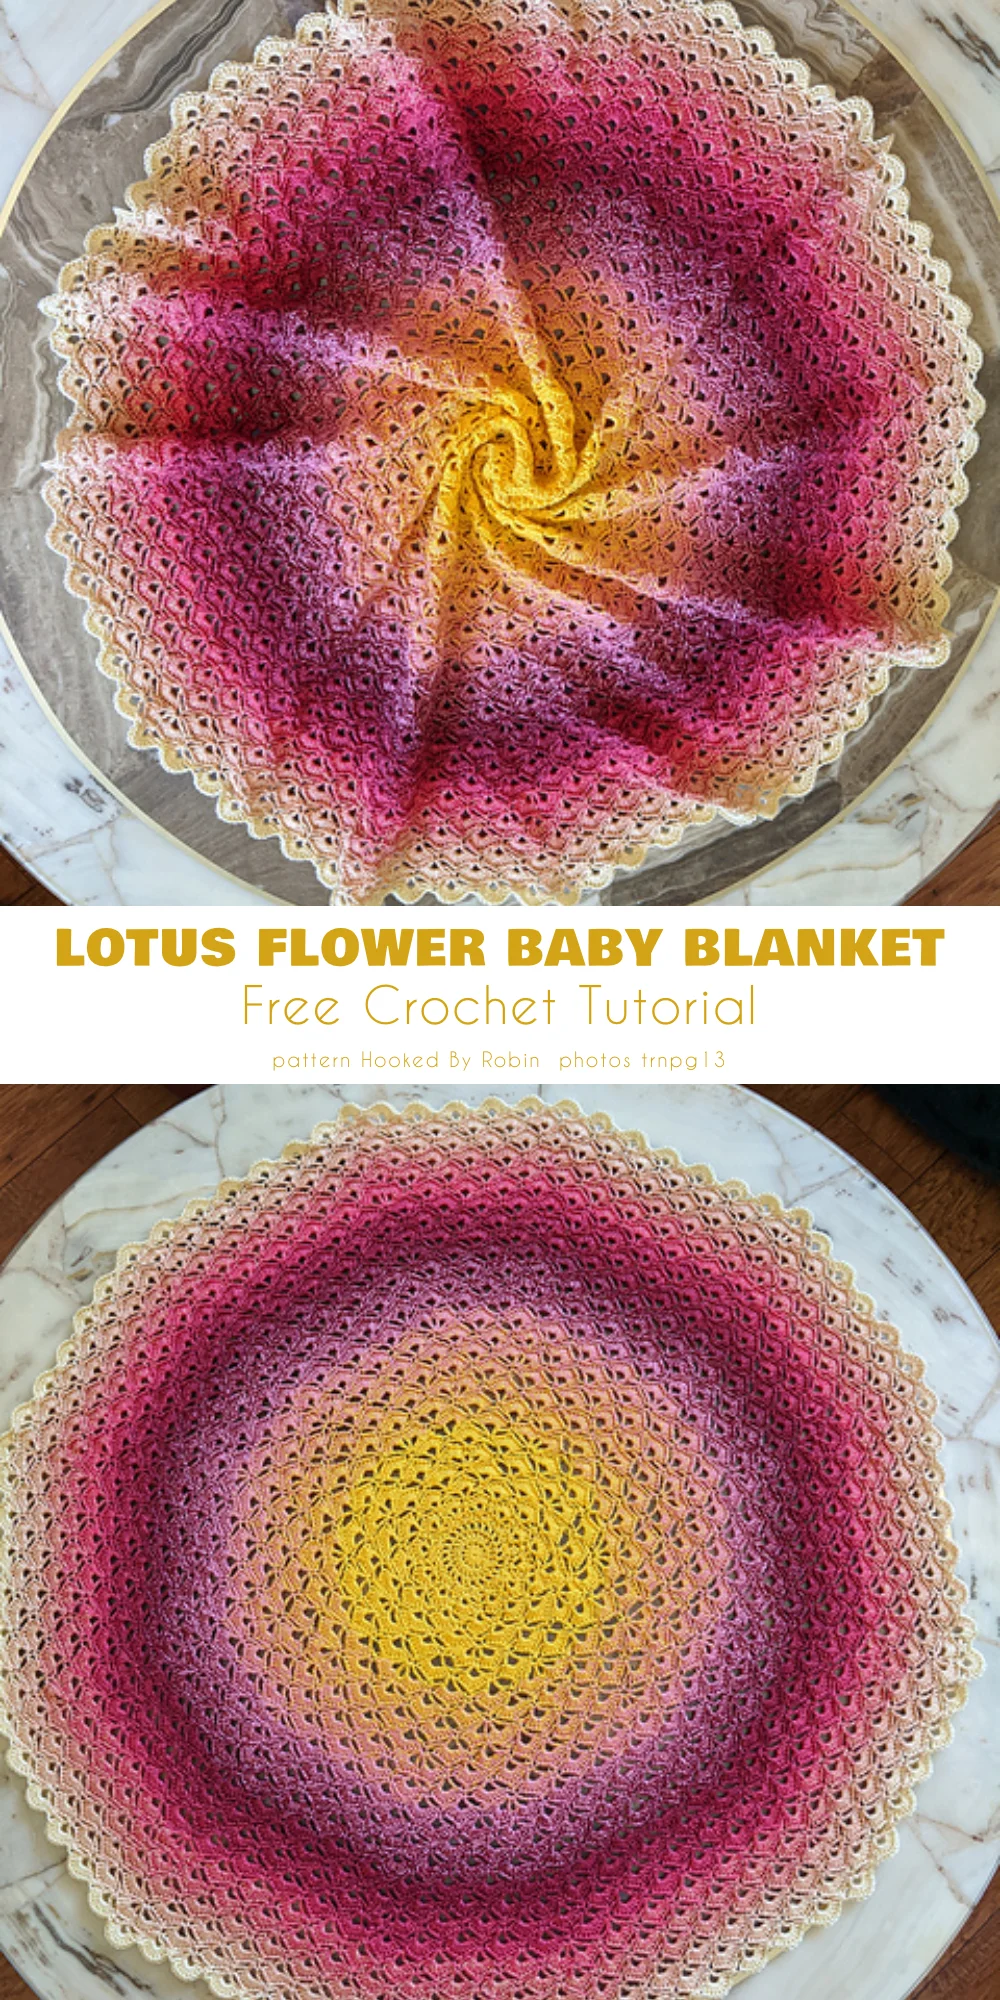
The original pattern is available on By Robin here:
Springville Circle Baby Afghan
There is also more info on Ravelry: here. Info on this version by trnpg13 and the photos are on Ravelry here.
Springville Crochet Circle Blanket for a Baby
Pastel colors and simple stitching, what a lovely idea! Sometimes the classic is the best choice, right? This crochet circle blanket pattern by Lion Brand Yarn surely proves that. Every parent who is redecorating a nursery or looking for a stroller blanket should give it a go.
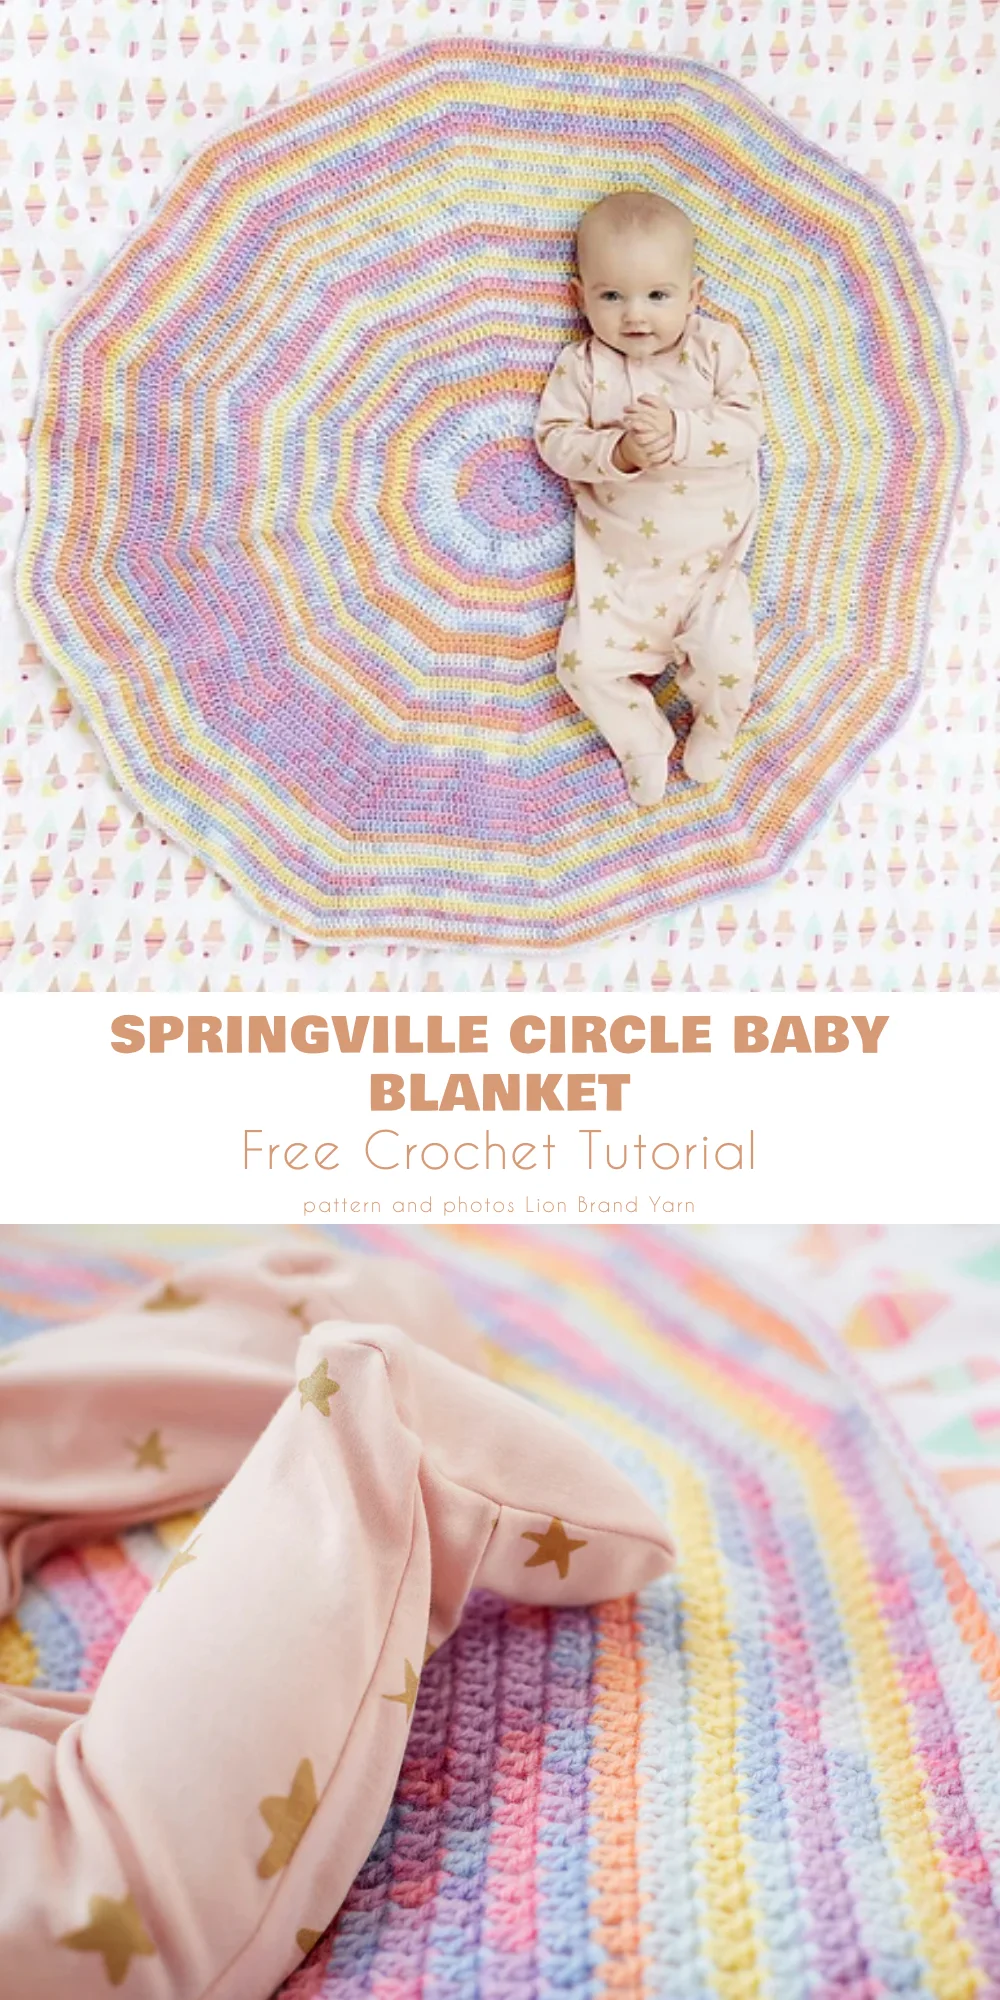
The original pattern and the photos are available on Lion Brand here:
Springville Circle Baby Afghan
More info is on Ravelry here.
Griswold Afghan
What do I love the most about this crochet pattern for a round blanket? Firstly, it’s by Lion Brand Yarn, so it must be awesome to begin with. Secondly, just look at this delicious mix of bright, juicy colors!
And the circular motif? It is so hypnotizing!

The original pattern and the photos are available on Lion Brand here:
More info is on Ravelry here.
No Wool Left Behind
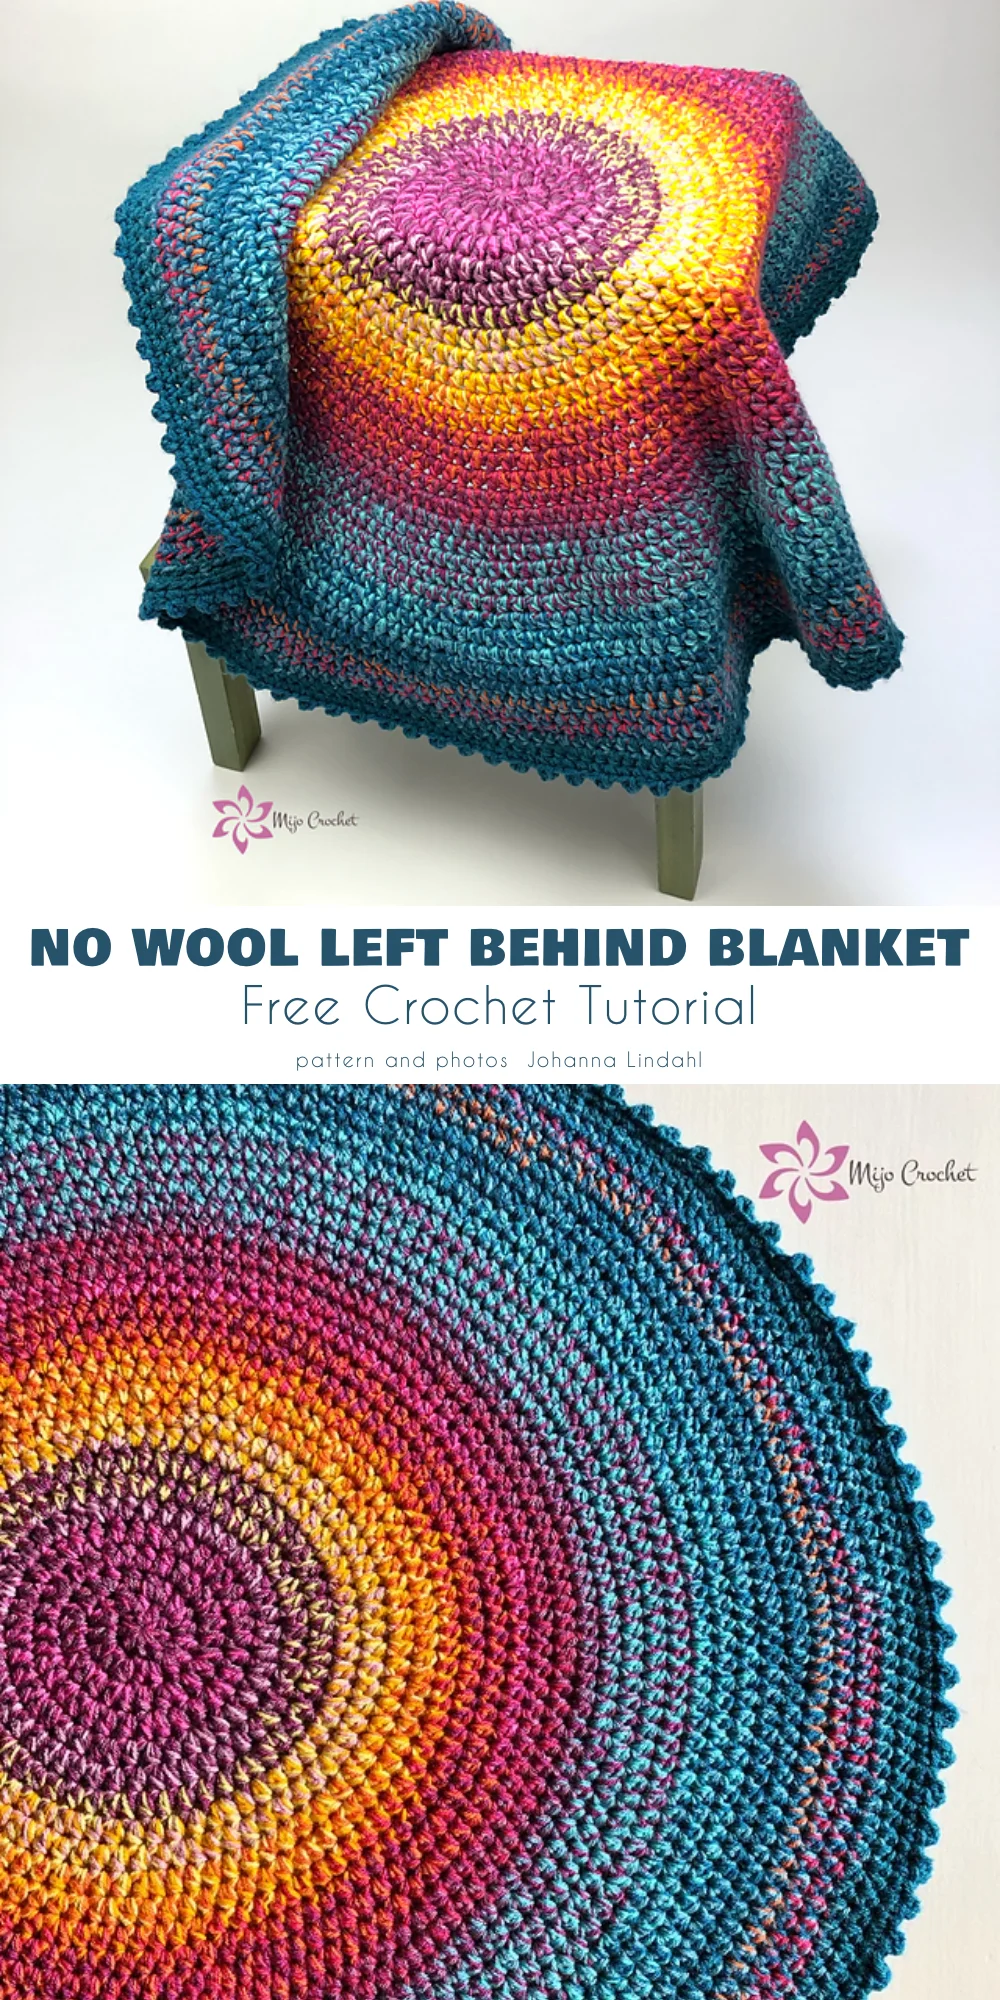
The original pattern and the photos are available on Mijo Crochet here:
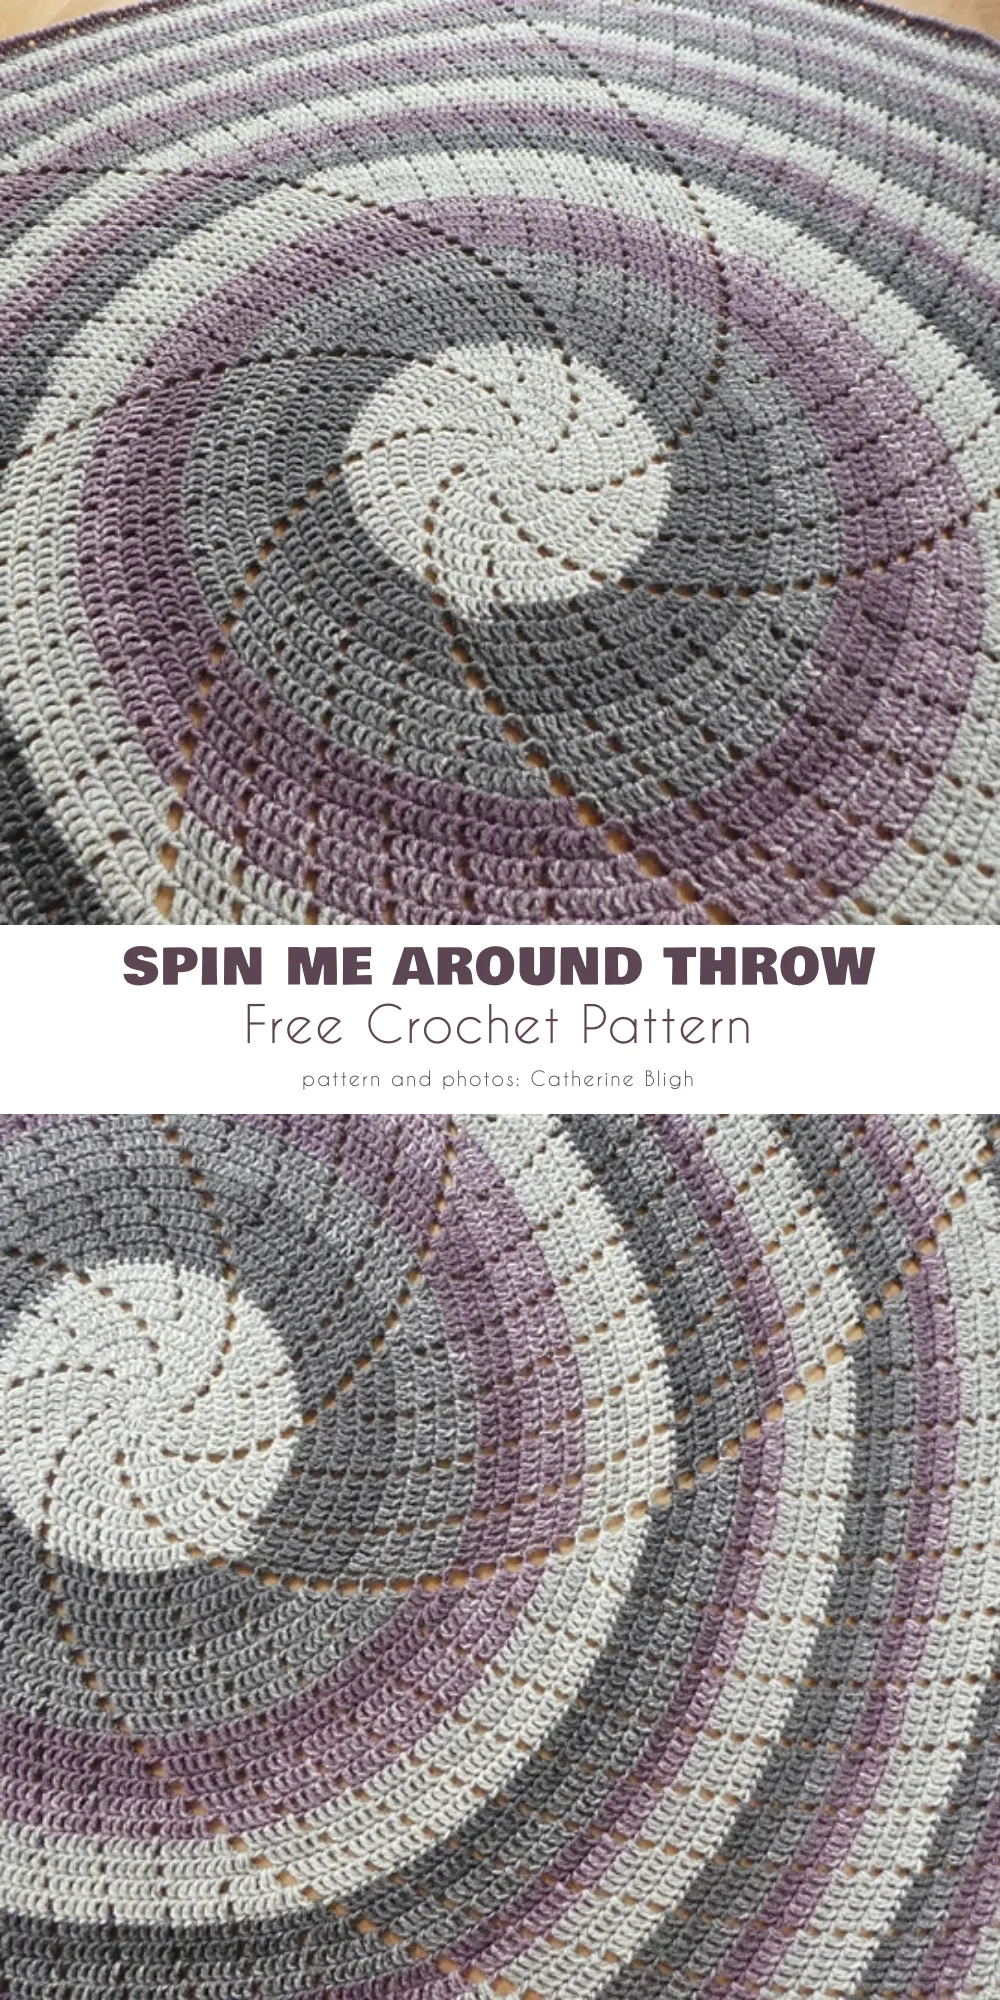
Spin Me Around Throw
This is a hypnotic and mesmerizing crochet circle blanket that works up very rapidly and comprises a simple, iterating pattern that advances as rows are added and increases as you go. The size is arbitrary, from about a foot across, all the way to a bedspread or larger.
The original pattern and the photos are available on Ravelry here:
Rose Bouquet Foldable Blanket
If you want your work to stand out even more, take Spin Me Around Throw to the next level by adding a green border and roses around the circumference. When folded, the blanket will create a stunning rose bouquet. It’s a clever idea for everyone who doesn’t have space to hide a folded blanket or hates folding it after each use.
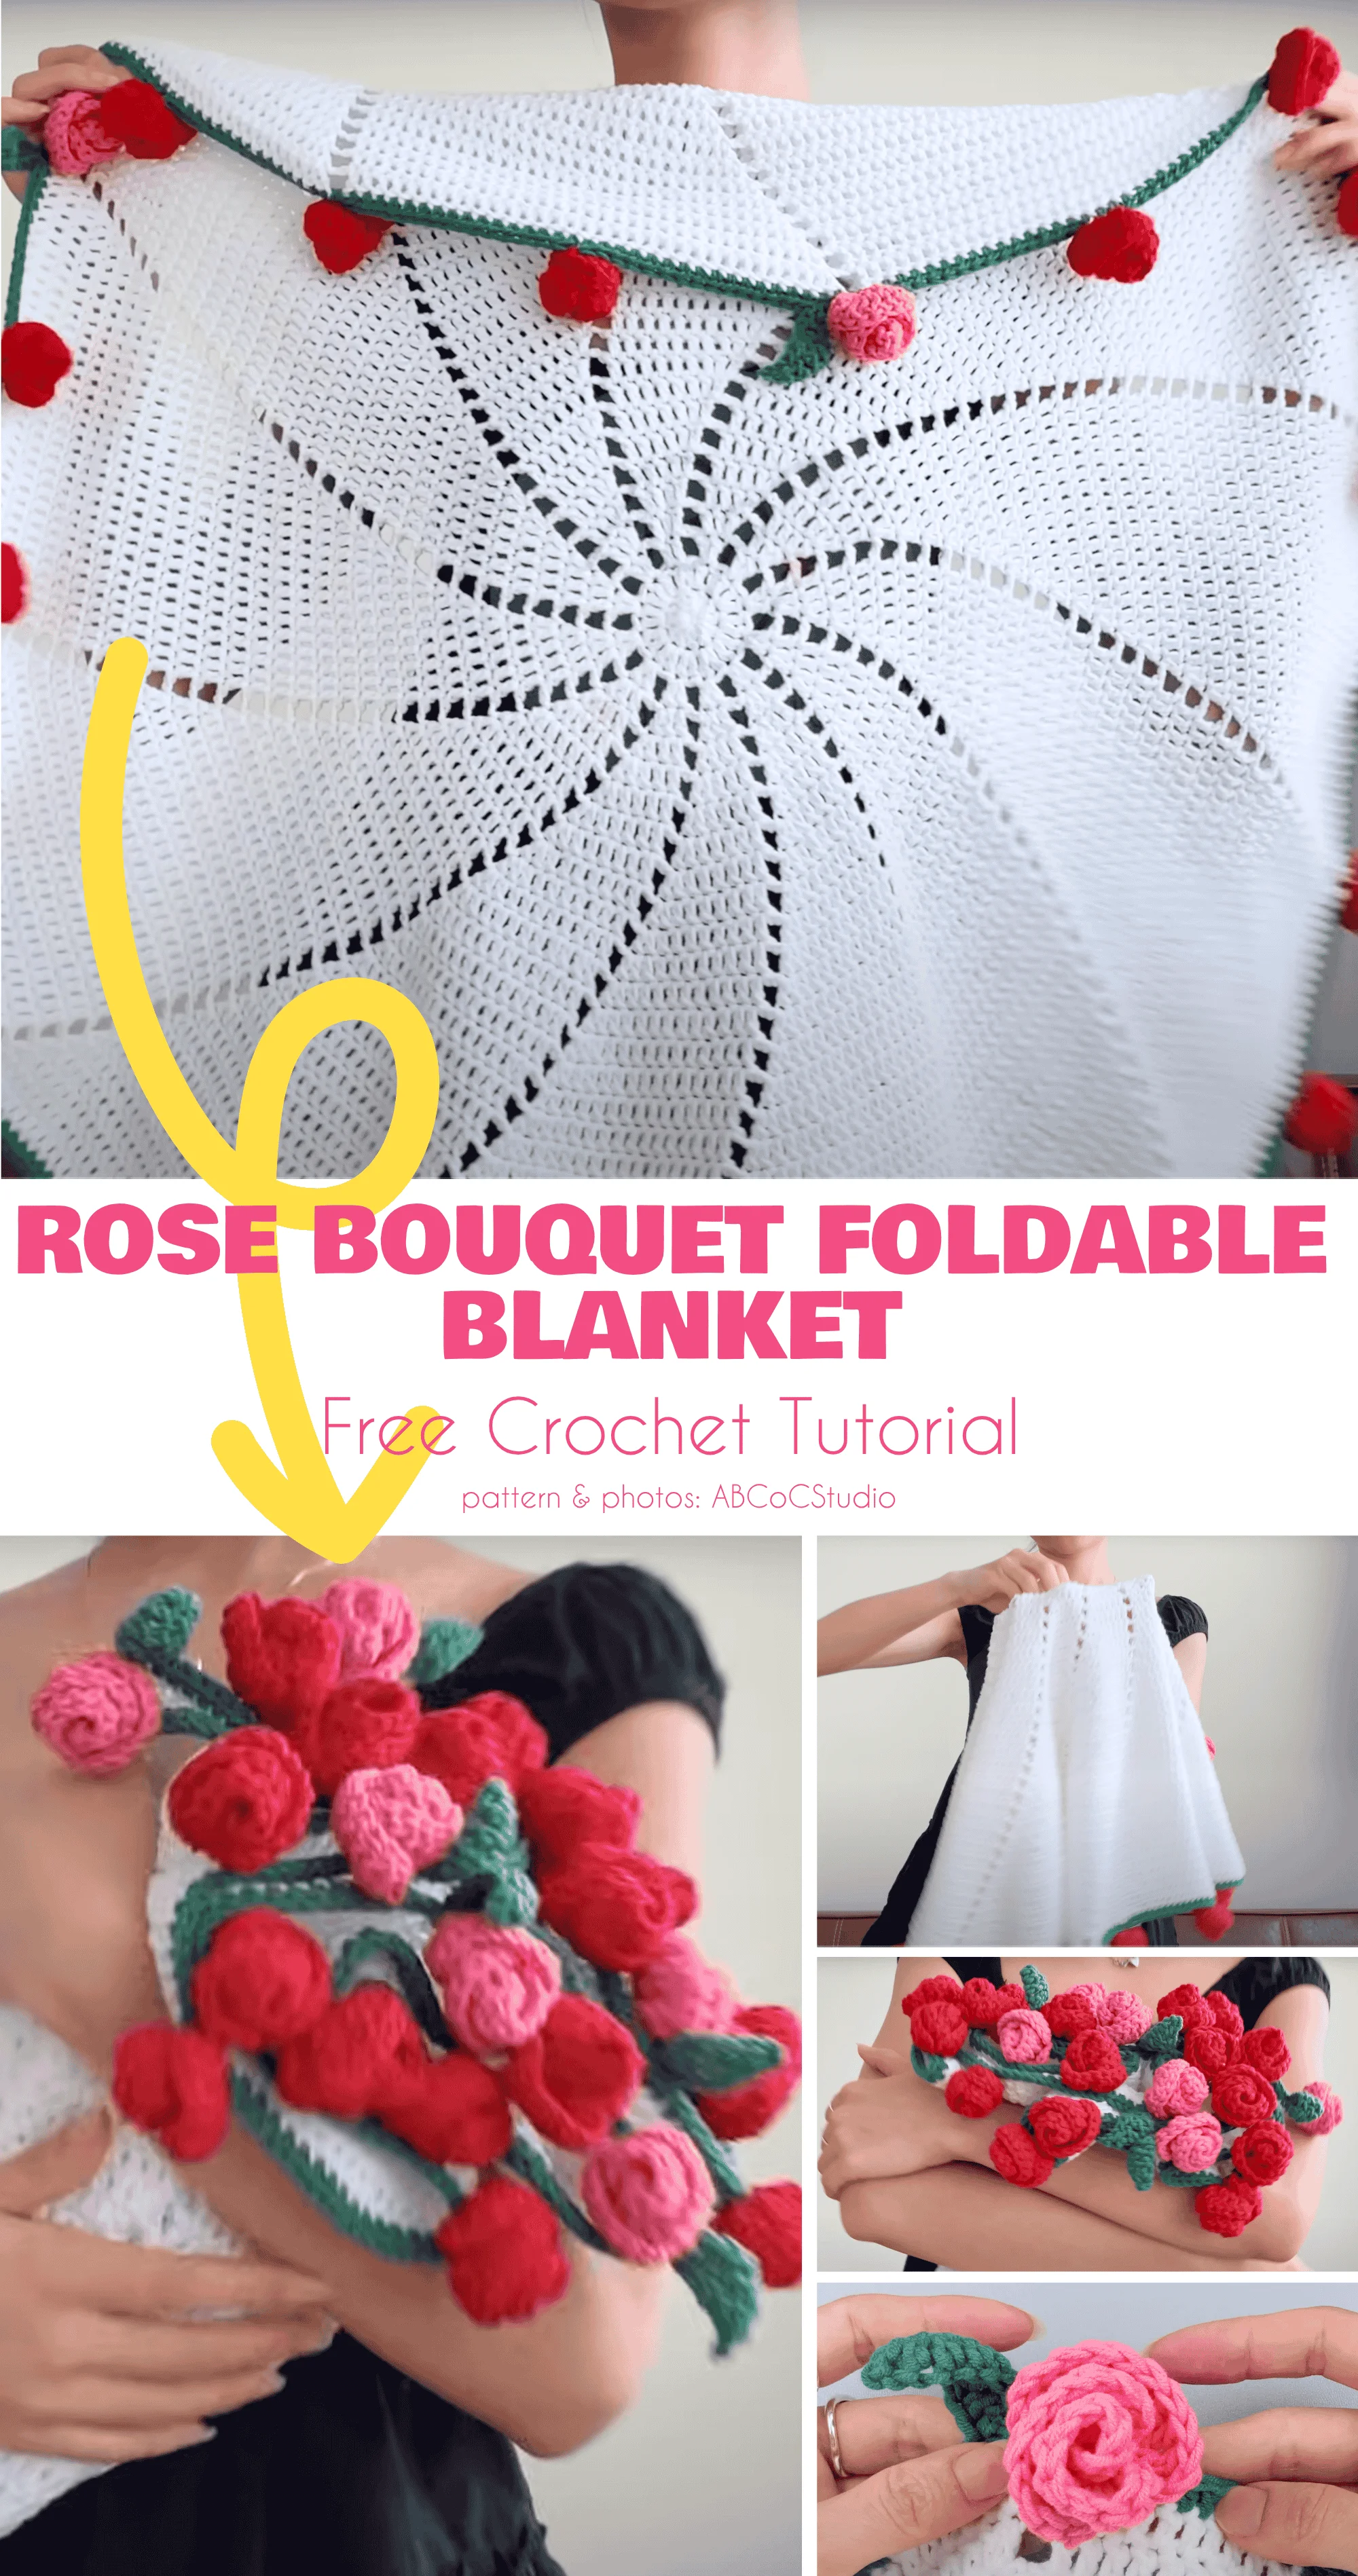
Go to the Youtube tutorial:
Tides of Change Blanket
The Tides of Change is a blanket pattern of concentric waves that will beautifully match a modern or classic home. This is not a particularly difficult pattern to make, and would be an enjoyable project even for an ambitious beginner, once she has some stitches in her quiver. The blanket is greatly enhanced by the differentiation of the waveforms from the center to the edge.

Mini Rings of Change
Mini Rings of Change is a round baby blanket (approx. 40″/101 cm if you use worsted weight and a J/6 mm hook) or a doily if you use thread and a thinner hook. I love this pattern because it gives you a lot of space for your own innovation and will look amazing no matter whether it is plain or very colorful. Don’t believe me? See the prettiest realizations of this pattern. The link to the pattern is below.
Skills: Easy to Intermediate Designer: Frank O’Randle
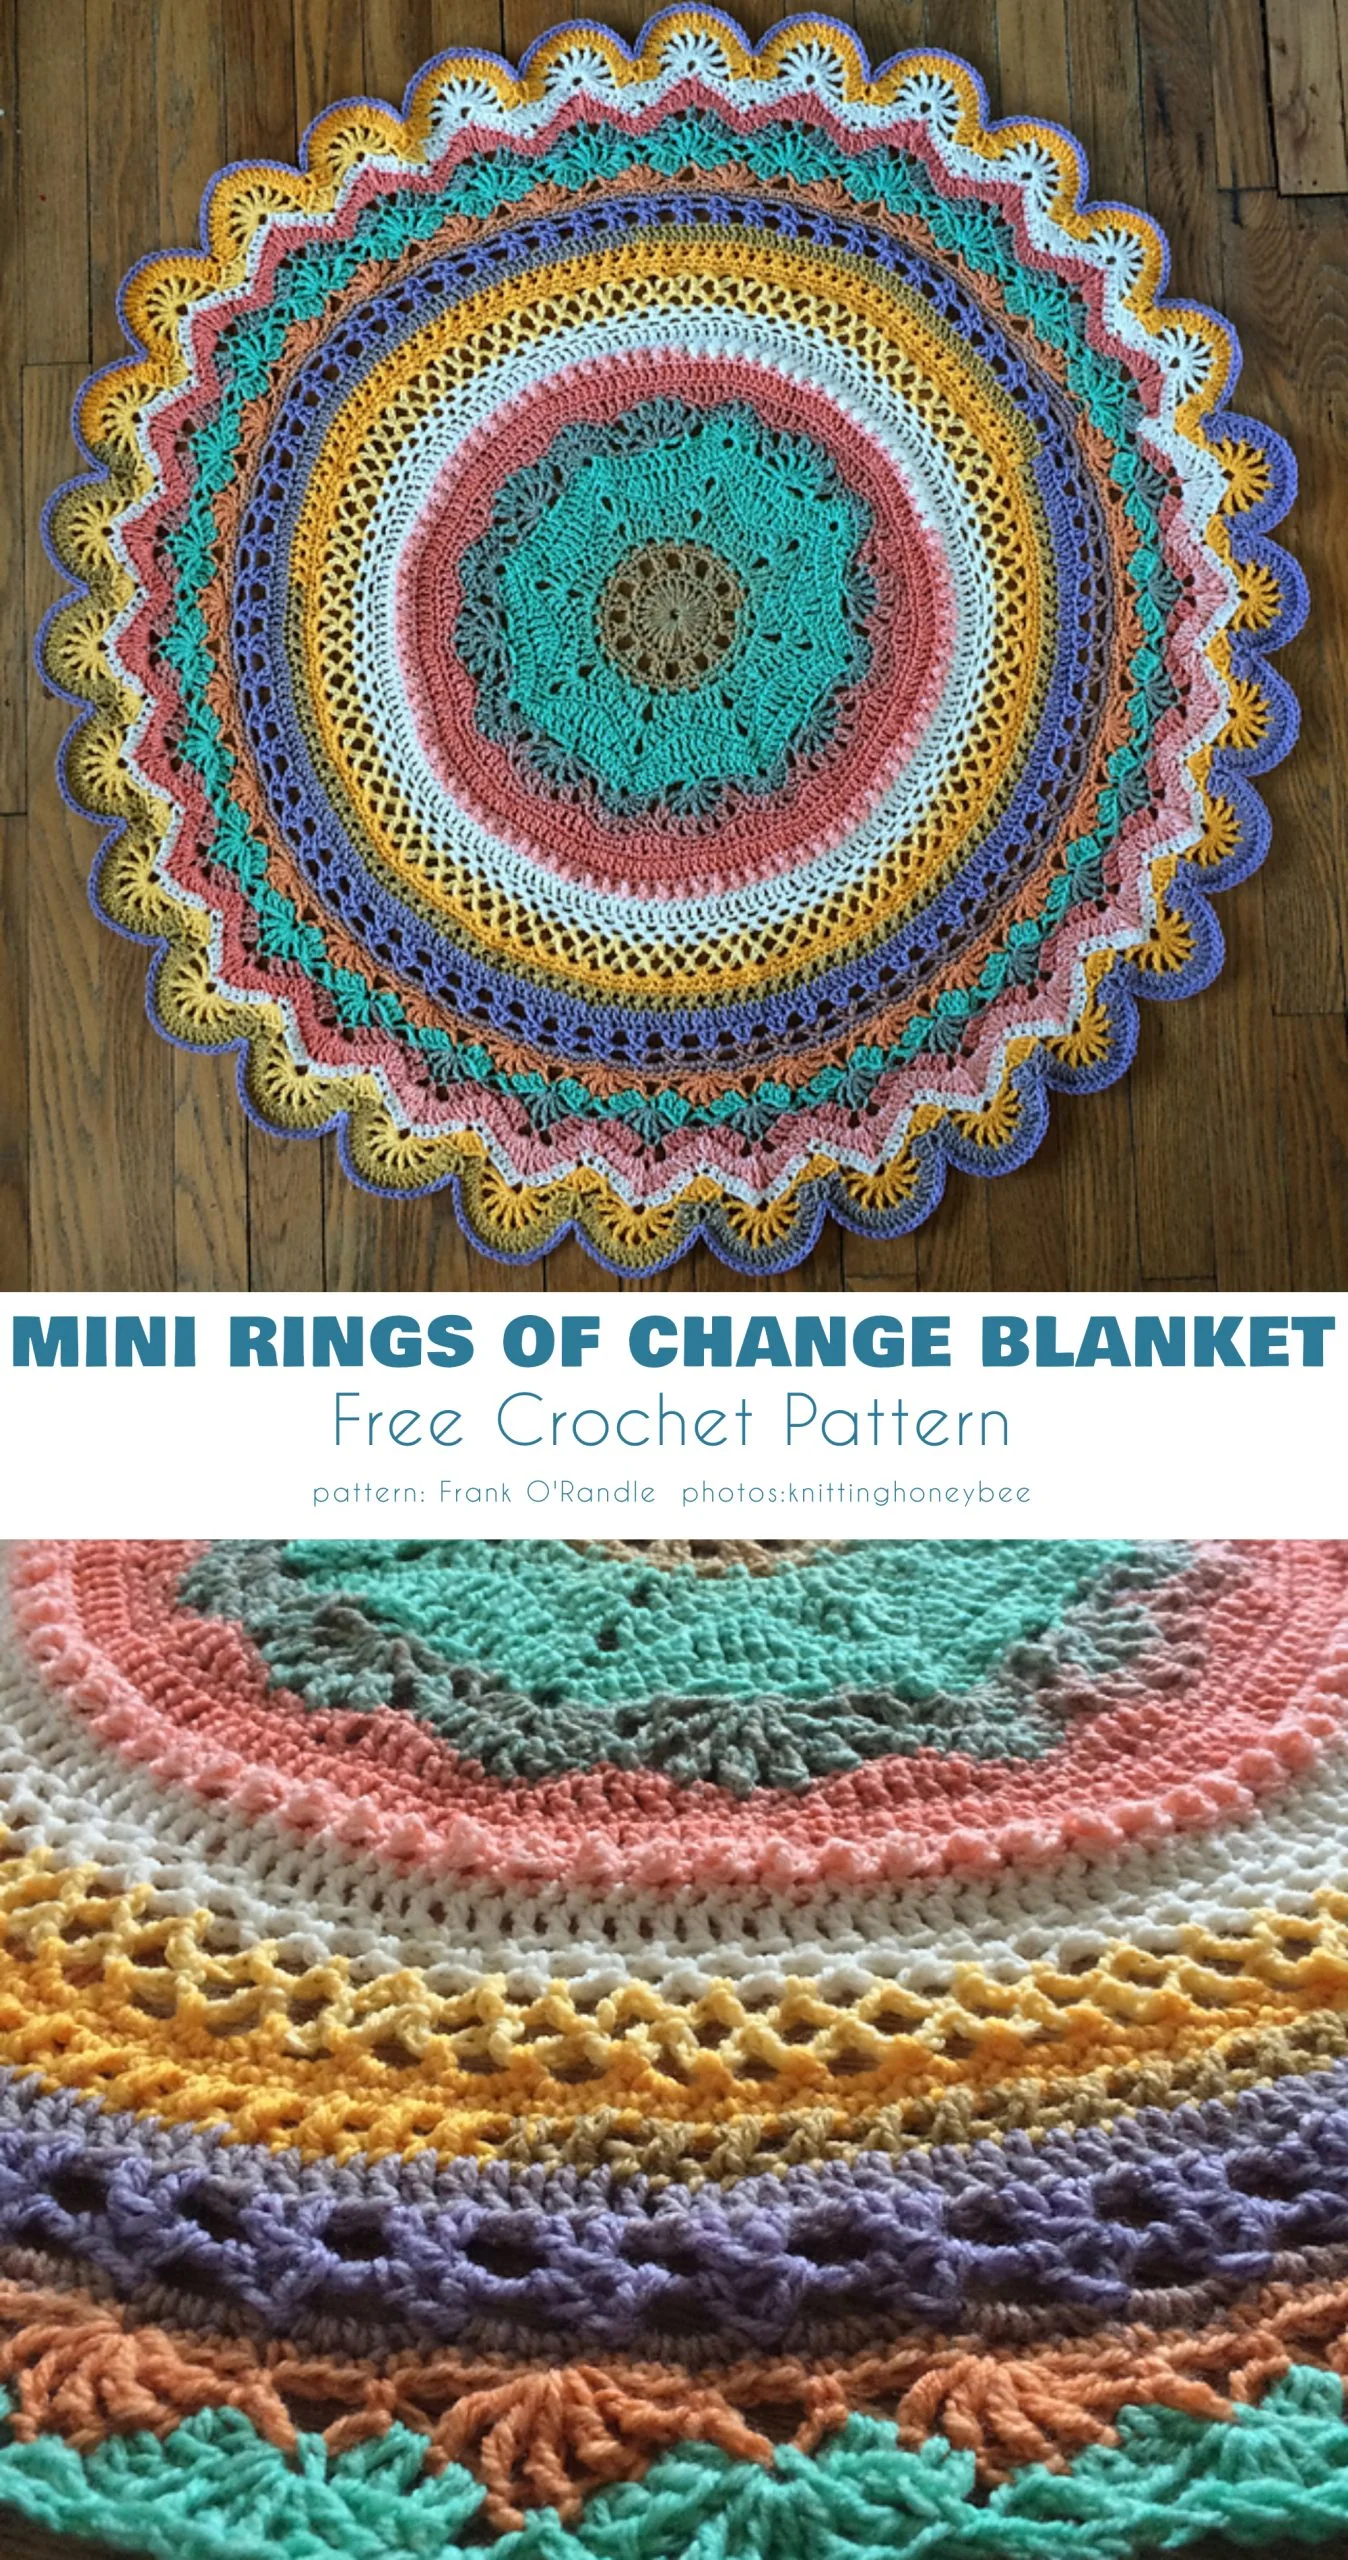
Go to the pattern: Mini Rings of Change Free Pattern. More info about this project: Knittinghoneybee
And below you will 2 more versions of this amazing pattern:
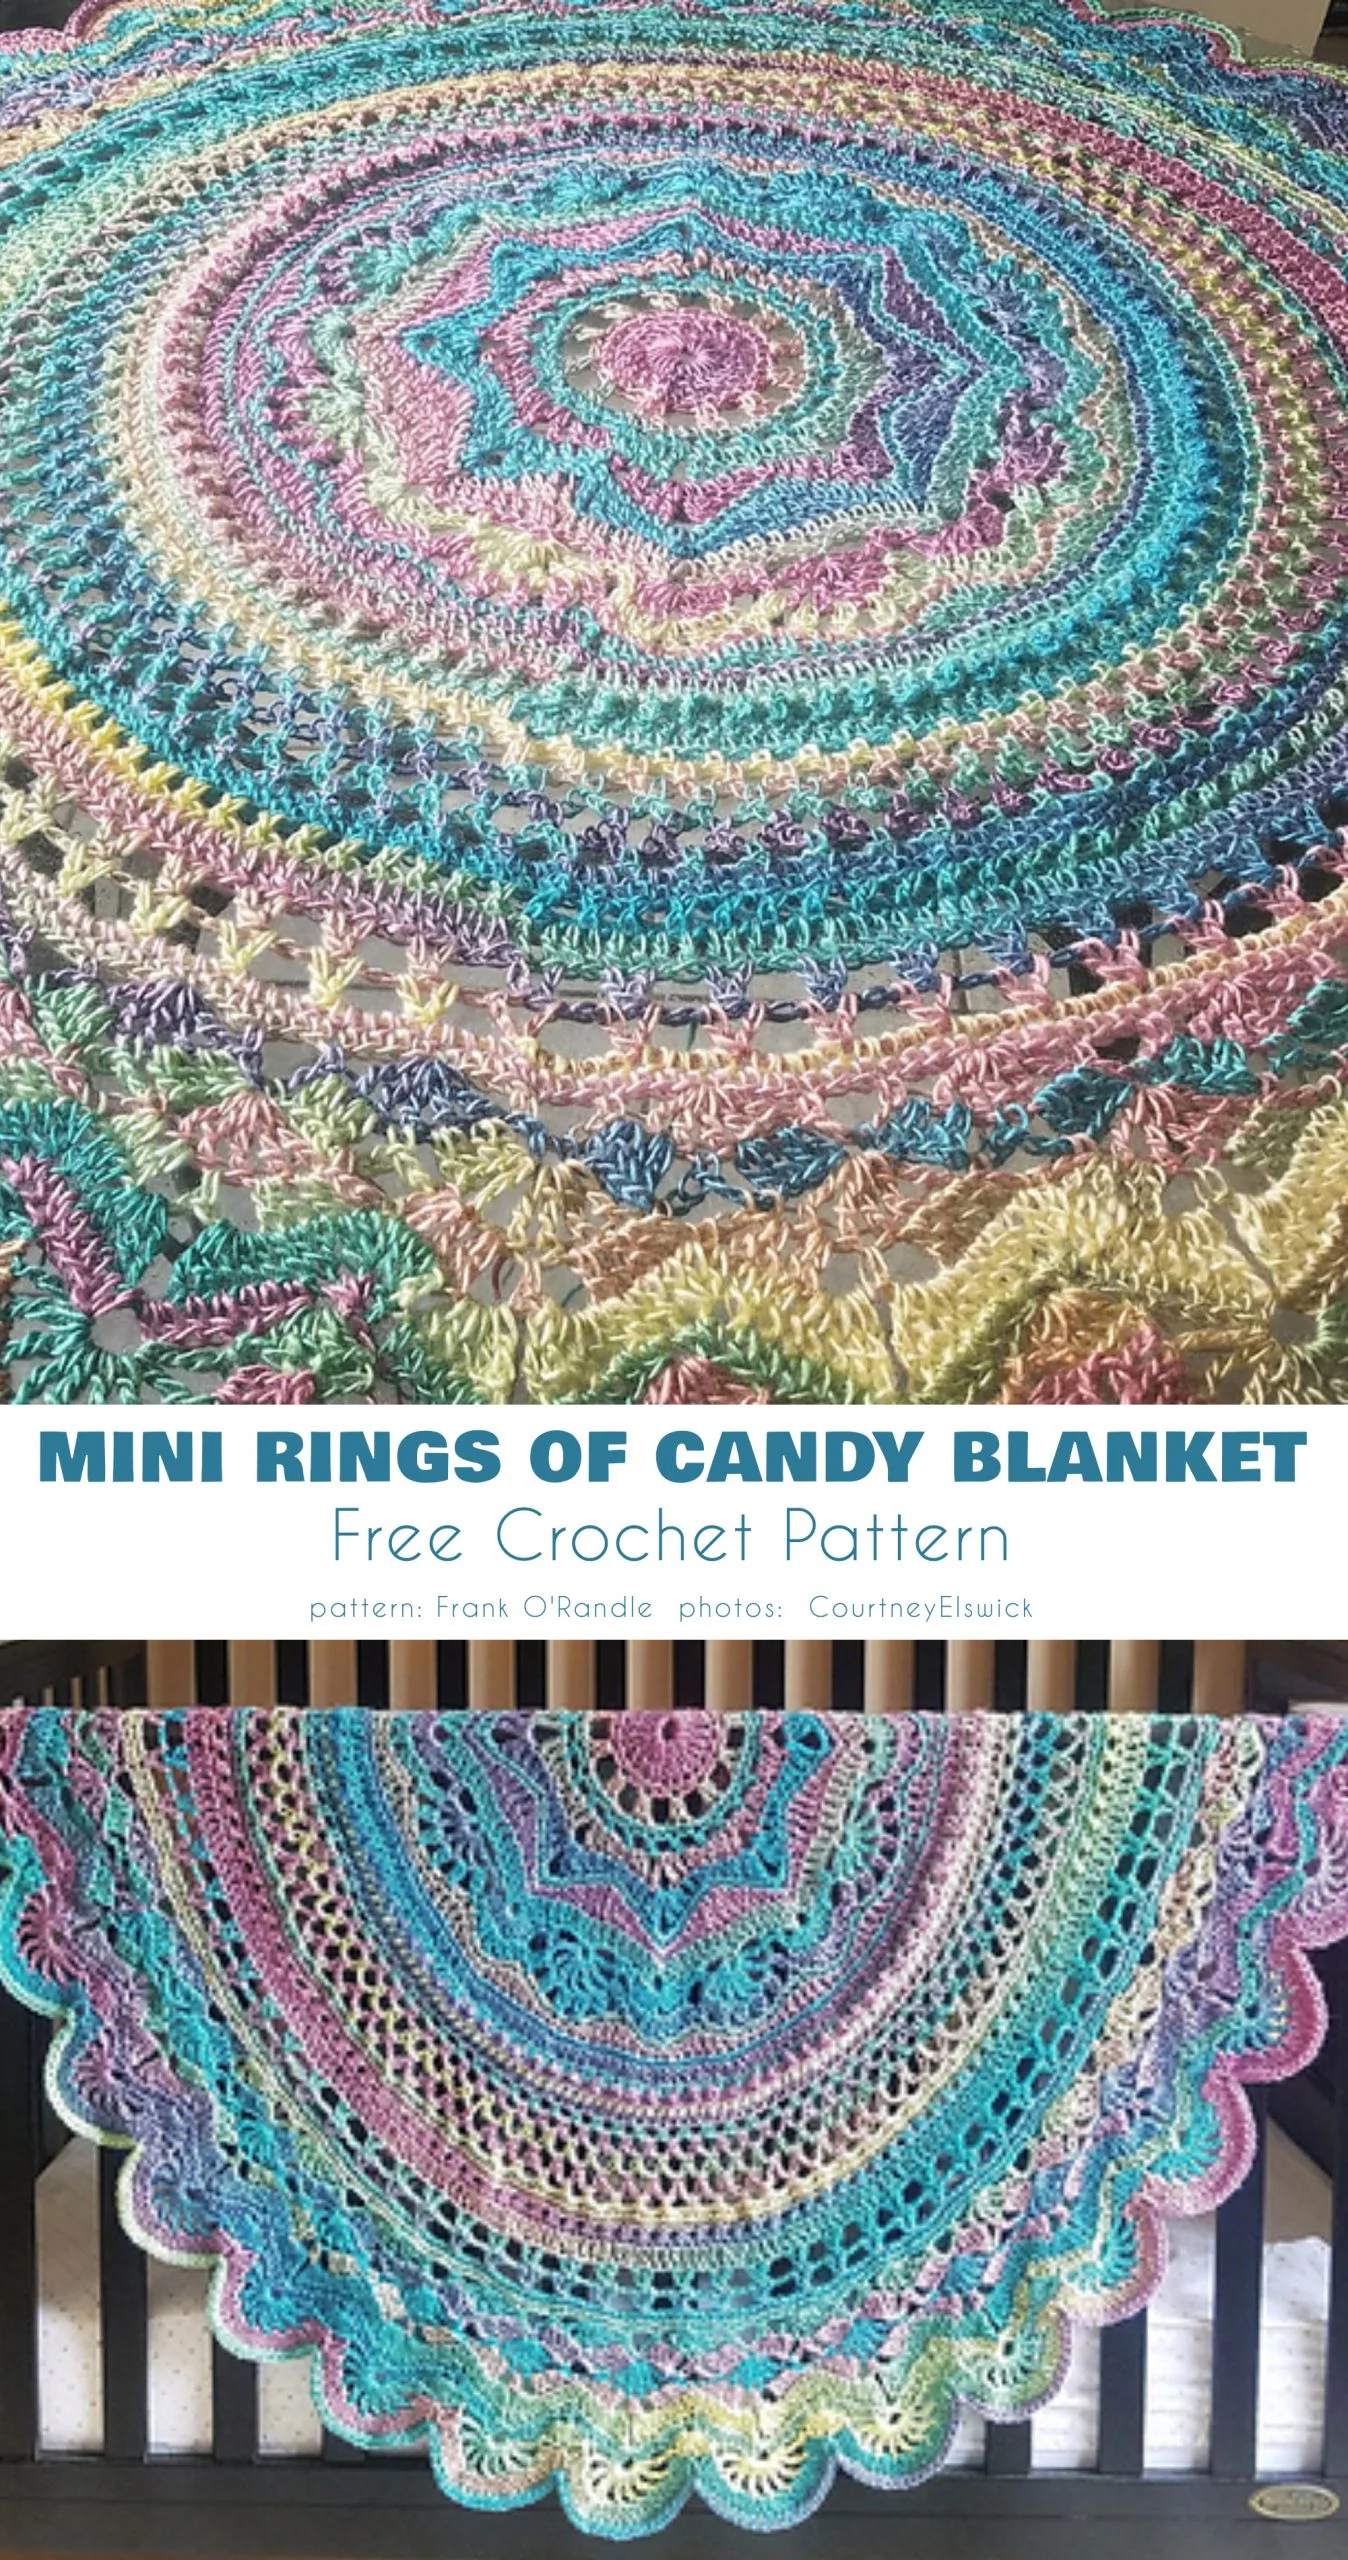
Go to the pattern: Mini Rings of Change Free Pattern. More info about this project: CourtneyElswick
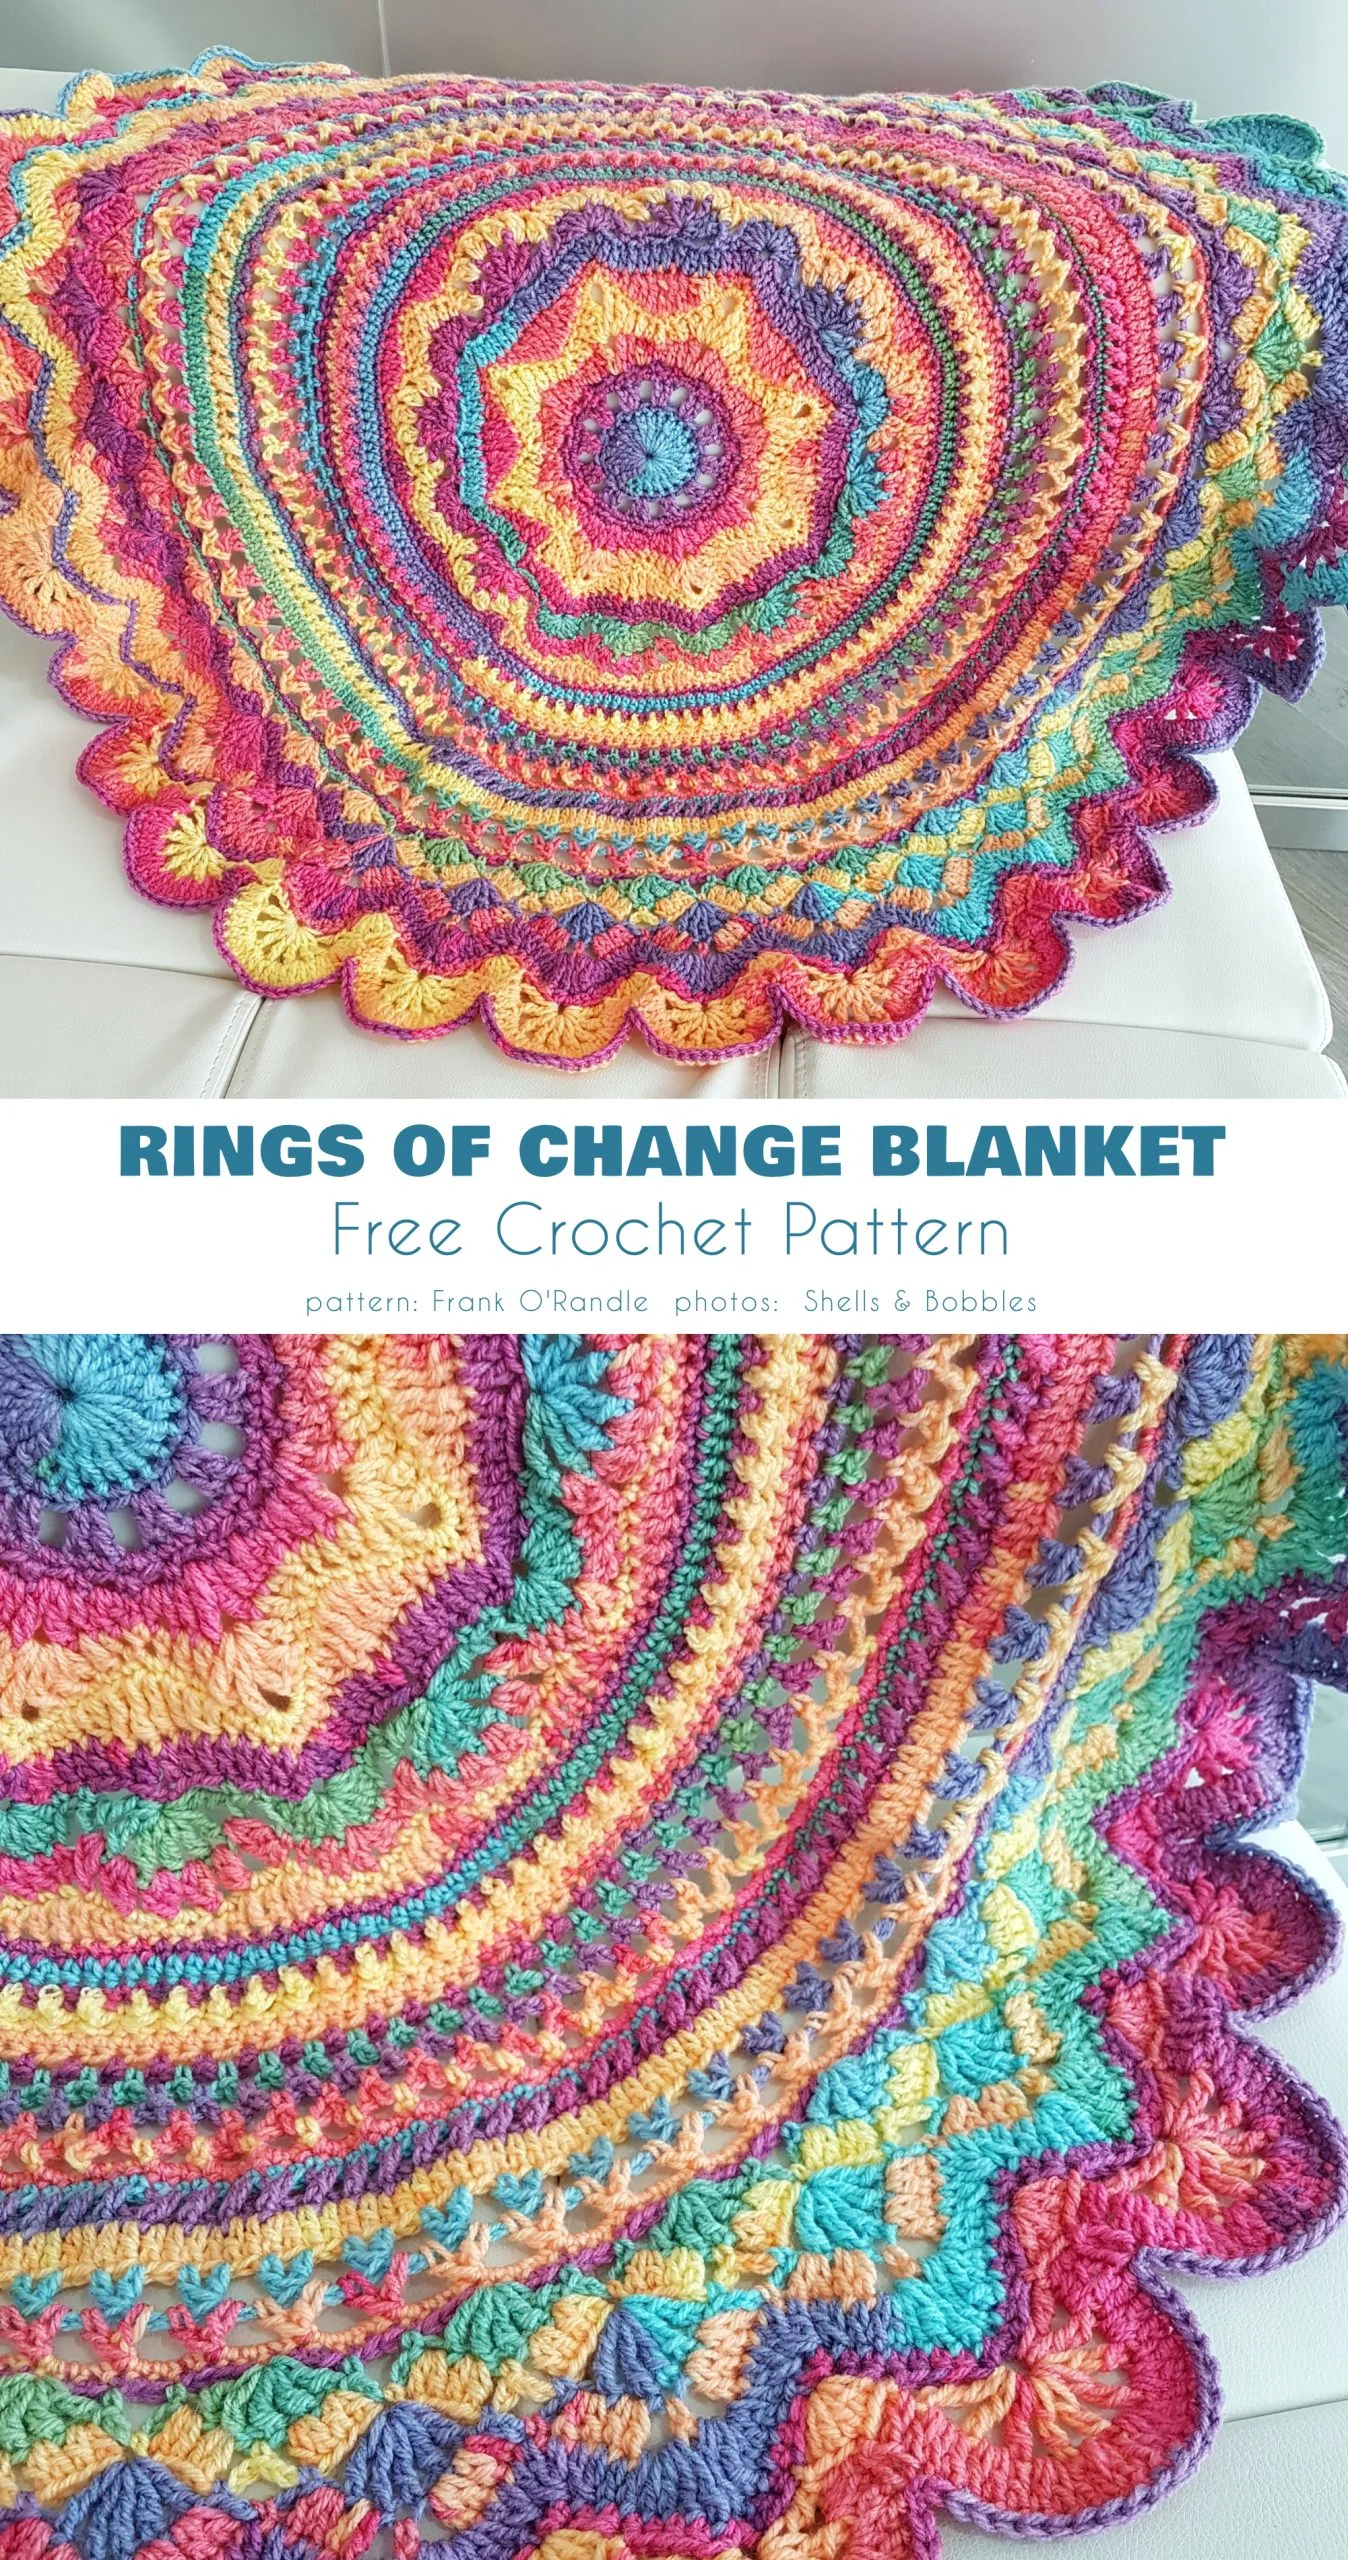
Go to the pattern: Mini Rings of Change Free Pattern. More info about this project: Shells And Bobbles
You may also like:
For more free designs every day, follow us on Facebook. Share your ideas and your work on our Facebook group!