
In this article:

Crochet blocking and stiffening are essential techniques in the world of crochet. These processes help refine the appearance of your crochet projects, ensuring they look polished and professional.
Understanding Blocking
Blocking is the process of shaping and sizing your crochet pieces by wetting them, and then allowing them to dry in the desired shape. It’s a crucial step to even out stitches, eliminate curling, and make your work look its best.
When to Block Your Crochet
You may ask yourself: do I need to block my crochet? Well, most crochet items, including blankets, shawls, scarves, and doilies, should be blocked. It’s especially important for lacework and projects where stitch definition and sizing are critical. Blocking can help open up lace patterns and enhance the overall appearance of your work.
However, if you have a chunky oversized sweater or a cardigan made with heavy wool, you don’t need to block it in most cases.
How Blocking Works
While you crochet, the yarn undergoes a lot of tension changes. As a result, it loses its definition, twists, or is otherwise distorted. Blocking uses water or steam to loosen up your stitches. This way, the yarn evens out and returns to its natural volume. This process makes the stitch pattern much more even and presentable.
Although many crochet patterns don’t include it as a mandatory step, most projects would benefit from blocking. It’s very important, however, what type of yarn you are using.
While wool, cotton, linen, and other natural fibers should respond very well to blocking, acrylic yarn may not. Its shape and volume don’t change much during crocheting, so it doesn’t have to use blocking to even it out. Check the yarn label to see what type of yarn you’re using.
Types of Blocking Methods
There are three most popular types of blocking your crochet project. Learn how they differ and choose which method of blocking is your favorite.
Wet Blocking
If you’re new to blocking, you will most likely start with this process. It requires you to submerge or spray the project with water, lay flat, pin it down, and leave it to dry. Below you can find a full tutorial on how to do it.
Steam Blocking
This method requires a steamer and is a more convenient version of wet blocking. Instead of water, you are using steam to shape your crochet. However, you have to be very careful not to use too high a temperature, as it may damage your project. If you have a garment or a blanket made with acrylic yarn, be extra careful, as it will melt when in contact with hot iron.
Dry Blocking
If you don’t have enough time to use the other blocking techniques, you can “dry block” your piece. It works well for small, preferably rectangular pieces, such as swatches, granny squares, or dishcloths.
Take your project and stretch it evenly vertically and horizontally with your hands.
How to Block Crochet Projects
This tutorial shows you how to wet block crochet garments, accessories, or ornaments.
- Gather Your Materials: You’ll need your finished crochet project, rust-proof pins, a blocking board or towel, and a spray bottle filled with water.
- Spray Blocking: Lightly mist your piece with water using a spray bottle. Avoid soaking it, as you want it to be damp but not soaking wet. If you have, wring out excess water beforehand.
- Pin It: Lay your crochet flat on the blocking board or towel. Using pins, secure it in the desired shape. Pay special attention to straightening edges and maintaining even dimensions.
- Allow to Dry: Leave your project to air dry while still pinned. The drying process will set the stitches and shape your piece. This can take several hours to overnight, depending on the size and thickness of the project.
- Remove Pins: Once your project is completely dry, gently remove the pins. Your piece should now hold its shape.
Special Blocking Accessories
These accessories may come in handy, whether you want to block a crochet or knit project.
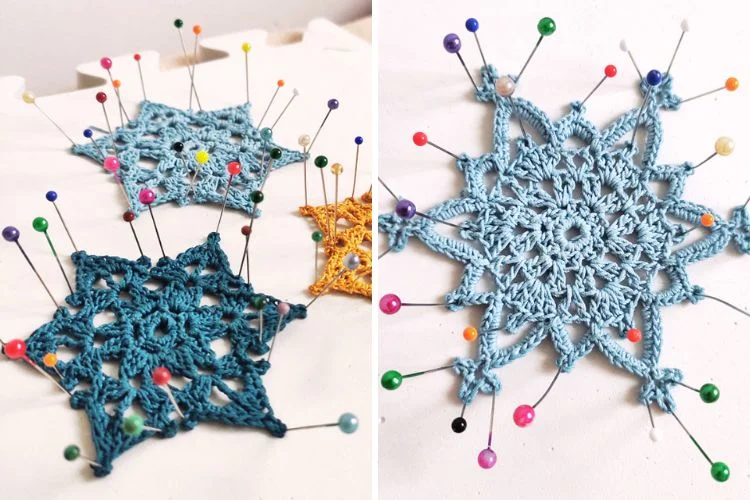
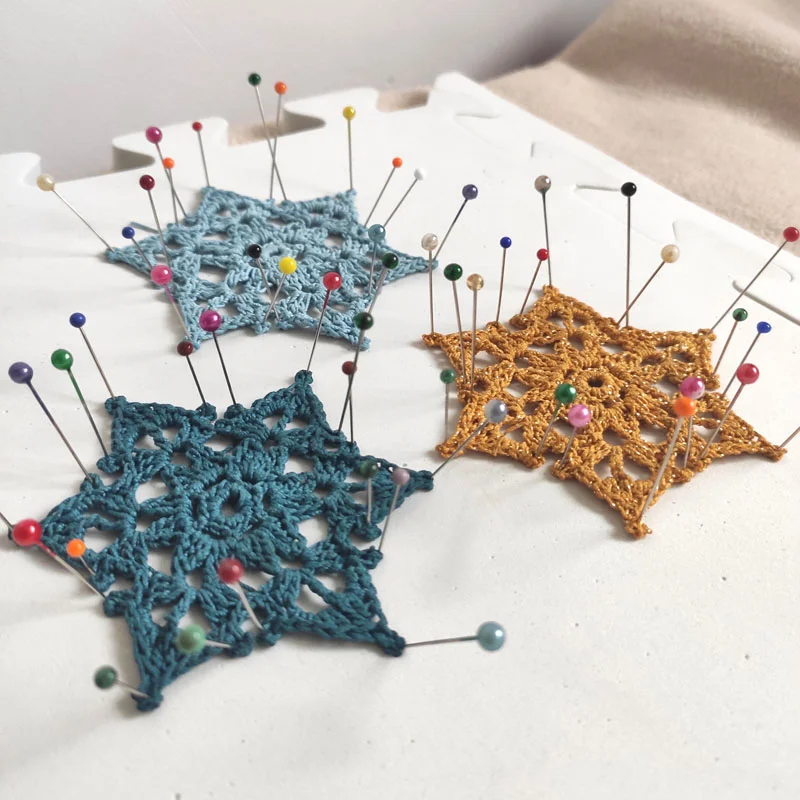
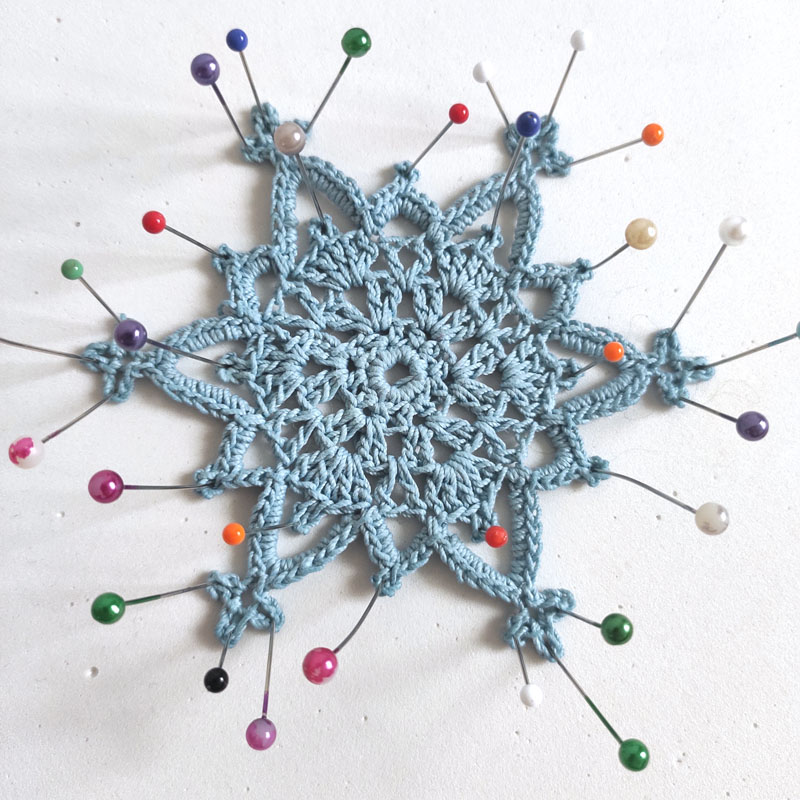
Blocking Pins
It’s essential to block delicate, lacy designs, but they often require using a lot of pins. That’s because every picot and scallop must be secured. The only requirement for pins is that they should be rust-free. Using regular sewing pins is a good idea, as long as they are the modern, rust-free type.
Blocking Mats
I highly recommend blocking your crochet sweaters and other garments on a foam mat. You can buy kids’ play mats (often in the shape of puzzle pieces), for a cheaper option, or go for special mats for crafters.
Professional blocking mats have grids and rulers printed on the surface, which helps with pinning the crochet fabric evenly.
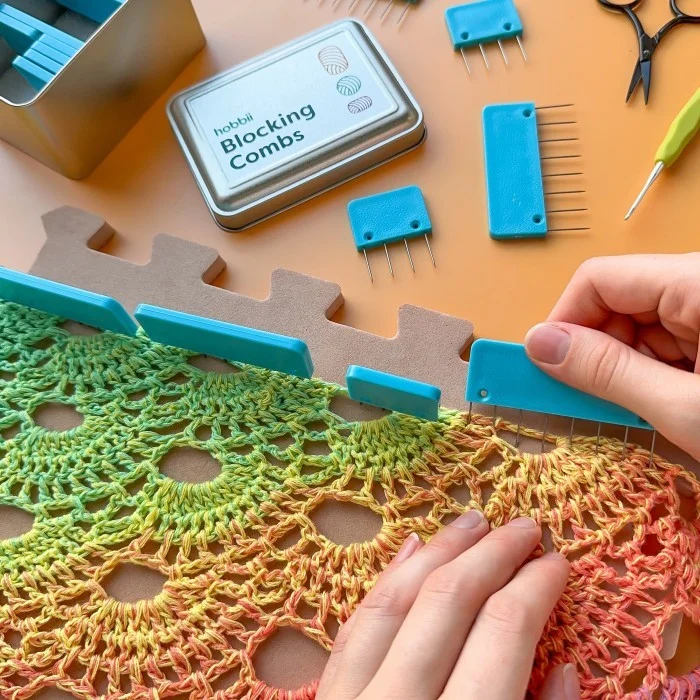
Blocking Combs
If you want to streamline your process, you can invest in special blocking combs. These items work like a bunch of pins organized in a straight line, so instead of using 6 individual pins, you can use a comb. It comes in handy when you want to pin a straight edge.
Blocking Board
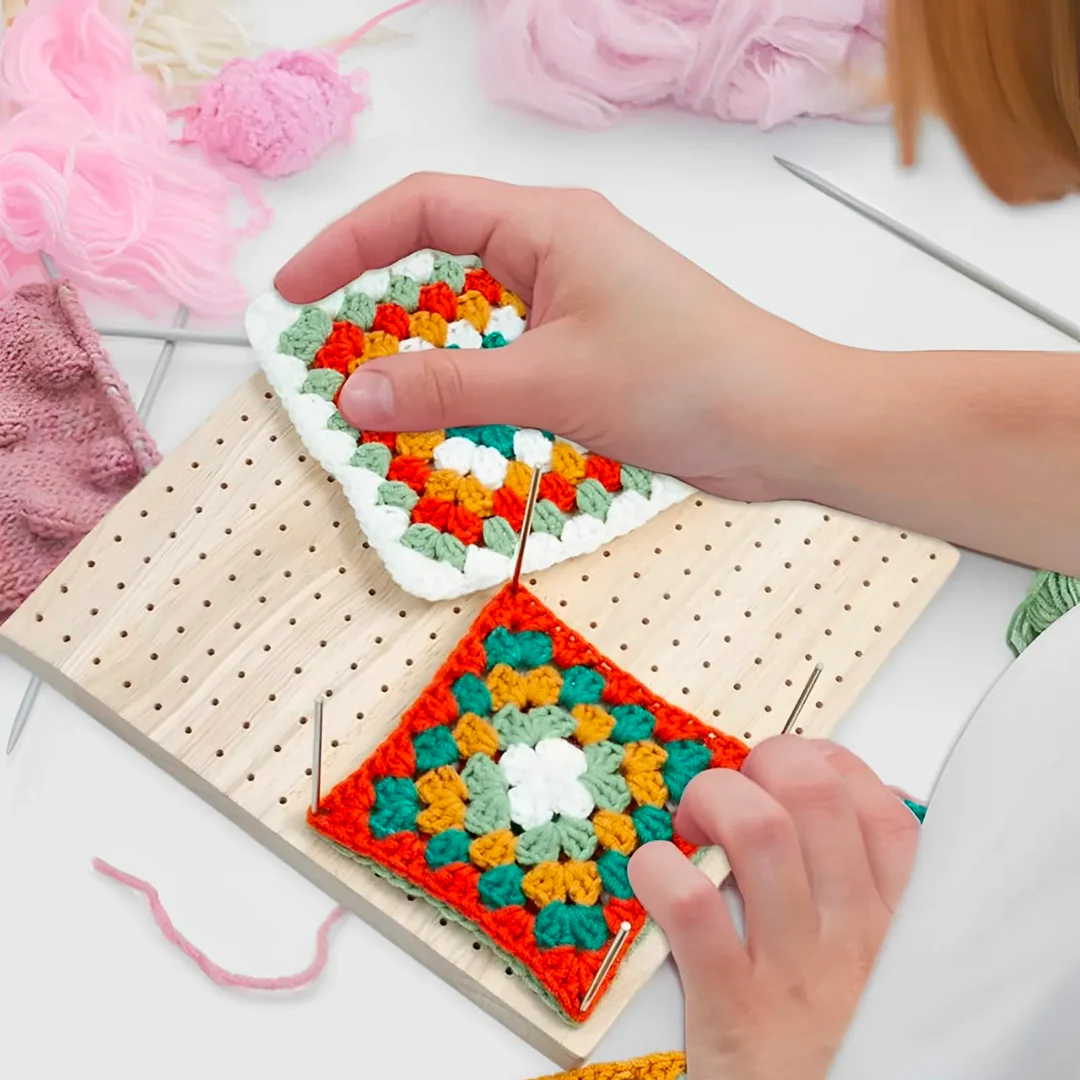
If you often work with many individual pieces, such as squares, crochet blocking boards are a choice for you. You don’t have to block every square individually, measuring it every time. A blocking board allows you to stack your squares on top of each other, saving a lot of space and ensuring uniform dimensions.
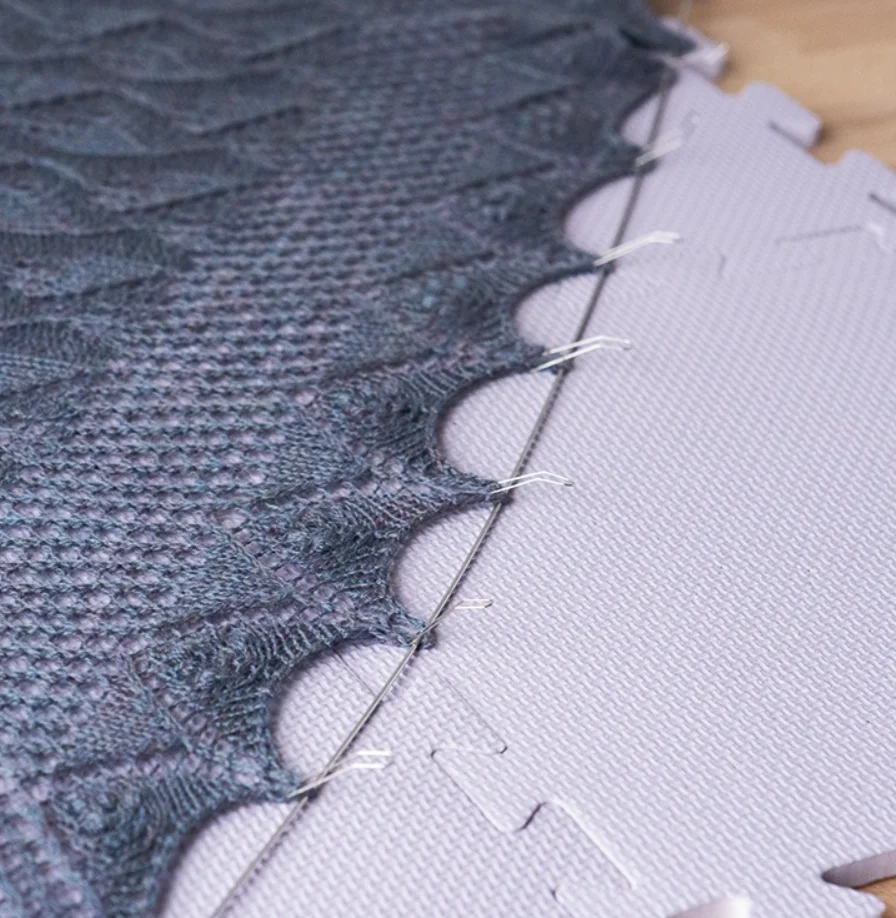
Blocking Wires
To block your works with circular or semi-circular elements, choose wires. Weaving a supple wire through the edge of your work will help your crochet or knit fabric dry in its natural shape. Using pins for circular pieces may result in uneven, pointy edges.
DIY Blocking Station for Crochet Squares
Are you too lazy to pin squares down when you crochet them? We found the perfect solution for you – a Blocking Station for Squares which you can make by yourself. It works perfectly for squares that are of a similar size and simply require a touch of TLC. You will find more about the blocking station and a tutorial on how to make it below.
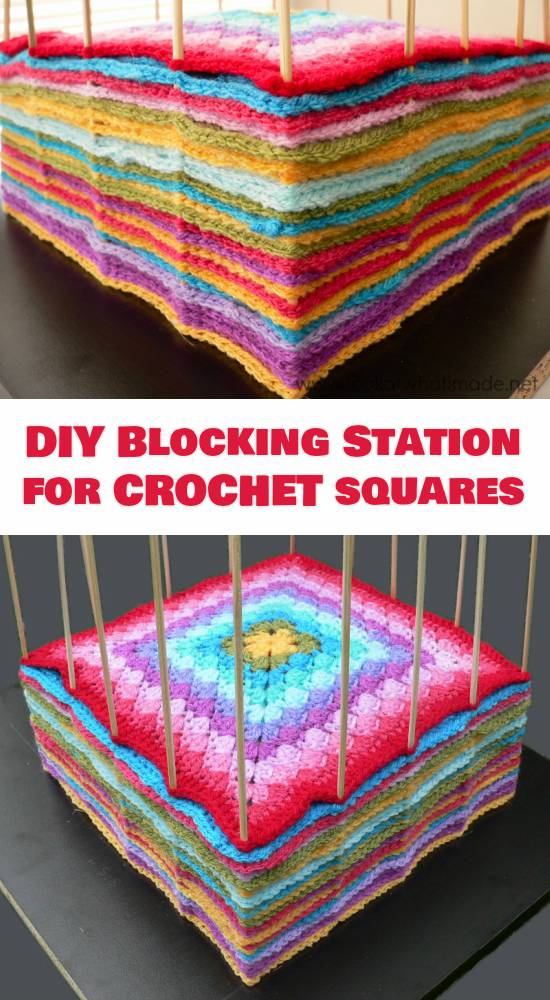
DIY Blocking Station for Crochet Squares – the full article is at lookatwhatimade.net.
Is Blocking Permanent?
While good blocking can increase the evenness of the project, it’s only semi-permanent.
Sometimes you wash and block your finished project only once, as is the case with doilies, ornaments, or other home accessories. However, after you initially block a garment, you wear it and eventually have to wash it.
One thing is certain – a blocked crochet project will always look better than an unblocked one and will keep its shape. When handled properly, it shouldn’t grow, stretch, or distort, even after a second or third washing.
However, if your project has a lacy pointy edging, you may have to pin it down after every wash.
Understanding Stiffening
Stiffening is the process of making your crochet rigid or firm, often used in applications like ornaments, jewelry, or sculptural items. There are several methods for stiffening crochet, but a common one involves using a stiffening solution.
When to Stiffen
Stiffening is typically used for projects where structure and form are crucial, such as ornaments, appliqués, and decorative elements. It adds durability and stability to projects and helps them maintain their shape over time.
How to Stiffen
You now know all there is to know about blocking in general, so let’s learn about stiffening.
- Choose a Stiffening Solution: You can purchase commercial fabric stiffeners or make your own by mixing equal parts white craft glue and water. Adjust the solution’s thickness to your preference.
- Dip Your Piece: Dip your crochet piece into the stiffening solution, ensuring it’s evenly coated.
- Squeeze Out Excess: Gently squeeze out any excess solution from your piece.
- Shape It: Mold your piece into the desired shape, stretching or arranging it as needed. Place it on a non-stick surface or over a form to maintain its shape as it dries.
- Allow to Dry: Let your piece dry completely, which may take a day or more, depending on its size and thickness.
Tips for Success
- Always follow the care instructions for your yarn when blocking, as some fibers may require special attention.
- Test your blocking or stiffening method on a swatch or scrap piece before applying it to your main project.
- Be patient and gentle when handling your crochet during these processes to avoid stretching or distorting the stitches.
- Keep your blocking board or towel clean to prevent any debris from transferring to your projects.
Blocking and stiffening are finishing touches that can transform your crochet work from ordinary to extraordinary.
Summary
Virtually all crochet and knitting projects look better after blocking. Whether you use single crochet, double crochet, or special techniques, such as Tunisian crochet, blocking is a must. It’s the best way to even out your projects and enhance the look of crochet stitches. You are now ready to choose the best method for blocking and try it yourself.