
In this article:

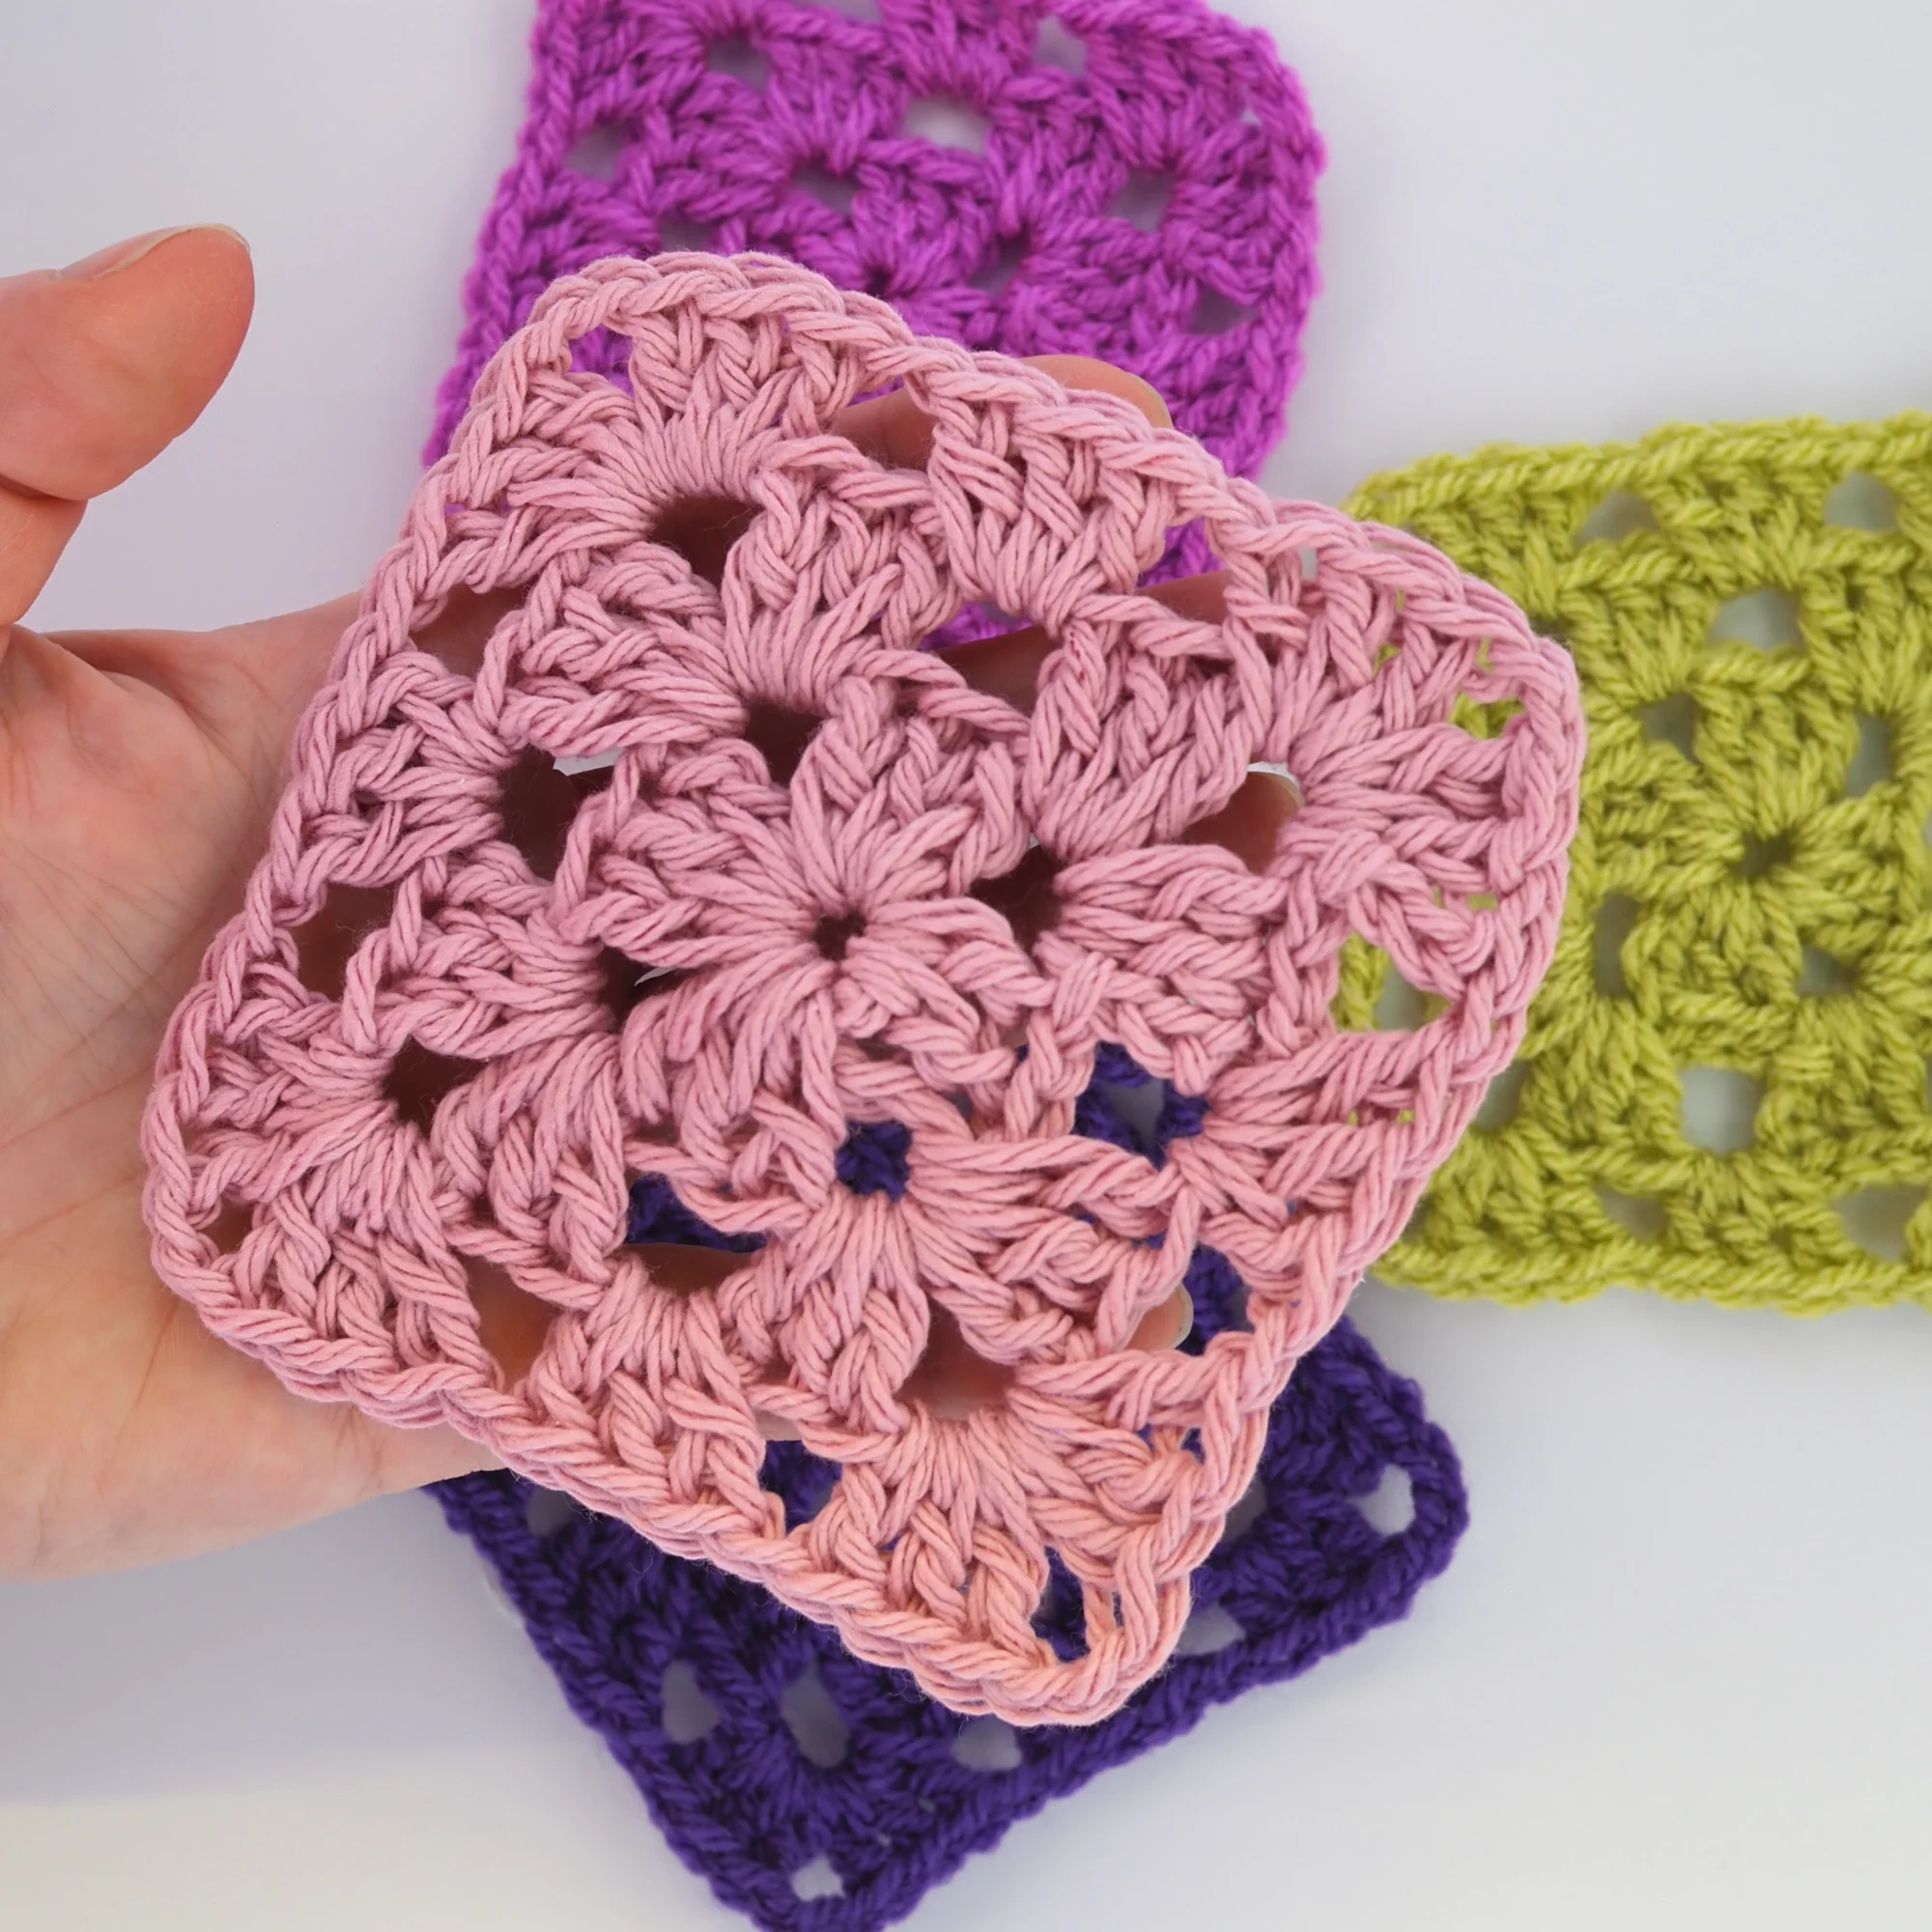
A granny square is one of the most popular techniques and you will be able to quickly learn how to crochet it. The pattern is based on common crochet stitches. And yes, you really can follow this pattern even if you never crocheted before! I will teach you how to make it step-by-step and explain all the stitches.
After you master the basic granny square, you can then use it to make blankets, scarves, vests and many more different projects 🙂 Best of all, you don’t need a gauge swatch, because the square itself doubles as one as well.
Materials you will need:
- Yarn of your choice, and you don’t need a whole skein of yarn to get going. A small to medium ball of yarn will do.
- Crochet hook (read a yarn label for info on which hook size to choose)
- Scissors
- Yarn needle (for weaving in ends)
Here’s a step-by-step guide on How to Crochet a Granny Square:
Foundation:
Start with a slip knot on your crochet hook.
Make a foundation ch 4.
(To make a chain, wrap the yarn over the hook and catch it with the barb. Pull it through the loop on the hook. Repeat 3 times to get 4 chains in total).
Insert the hook into the 4th chain from the hook. Slip stitch to create a ring.
(To slip stitch – wrap the yarn over the hook, and pull it through both loops on the hook).
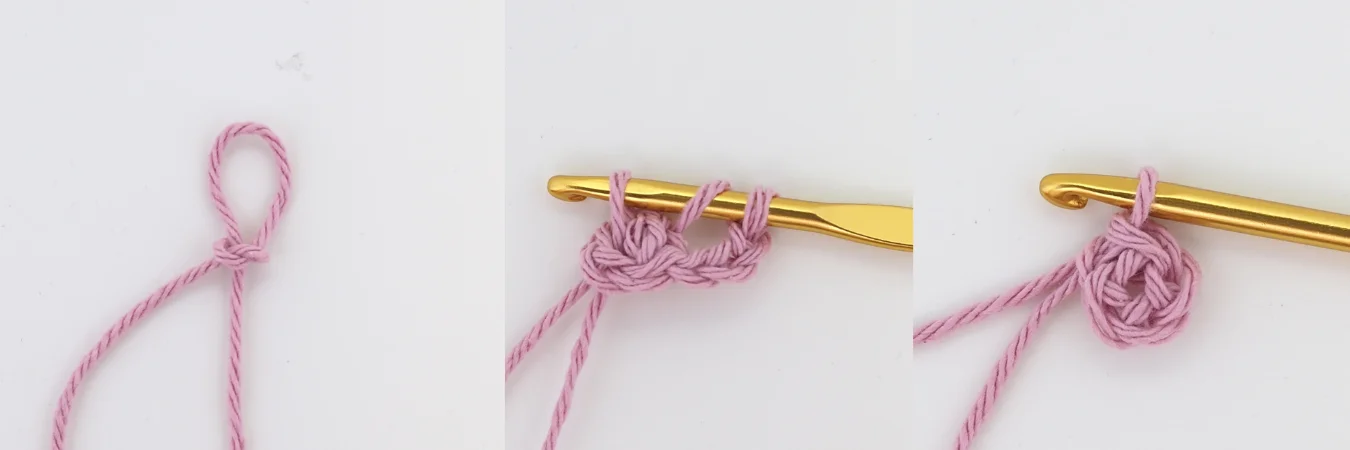
Round 1:
Ch 3. (Yarn over the hook and pull over through the loop. Repeat this 2 times to get 3 chains in total).
Find the center of the ring. Make the first double crochet (dc).
How to make a double crochet stitch: wrap the yarn over the hook and insert the hook into the circle. Grab the yarn again and pull it through. You have 3 loops on your hook. Yarn over and pull it through the 2 first loops. Yarn over again and pull it through those second 2 loops.
Make one dc more.
Our starting 3 ch will count as our first double crochet. So now we have 3 dc crochet stitches starting from the same loop (a cluster). Those stitches create one side of our granny square. Making dc stitches each time insert the hook in the middle of the circle.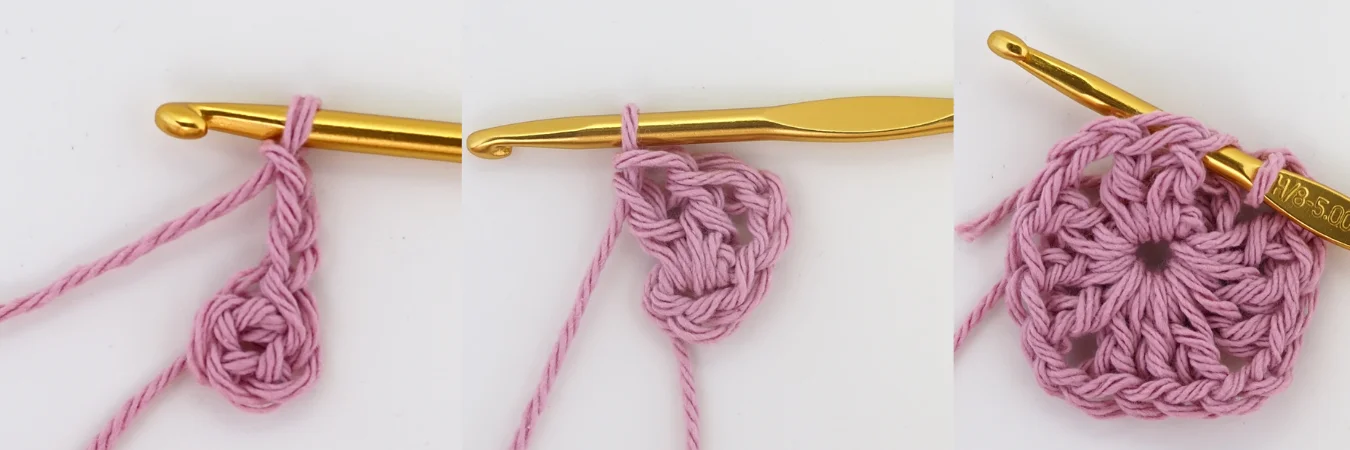
Chain 2 to create a corner space of the square.
*(3 dc, ch2) – repeat from * 3 times to get 4 sides of the square.
To close the first round, insert the hook into the third chain of our starting chains (see step 1). You should catch 2 loops so that you now you have 3 strands of yarn on your hook. Yarn over and pull through. You’ve made a slip stitch (sl st). Now, make a slip stitch into the next dc space and slip stitch into the corner space.
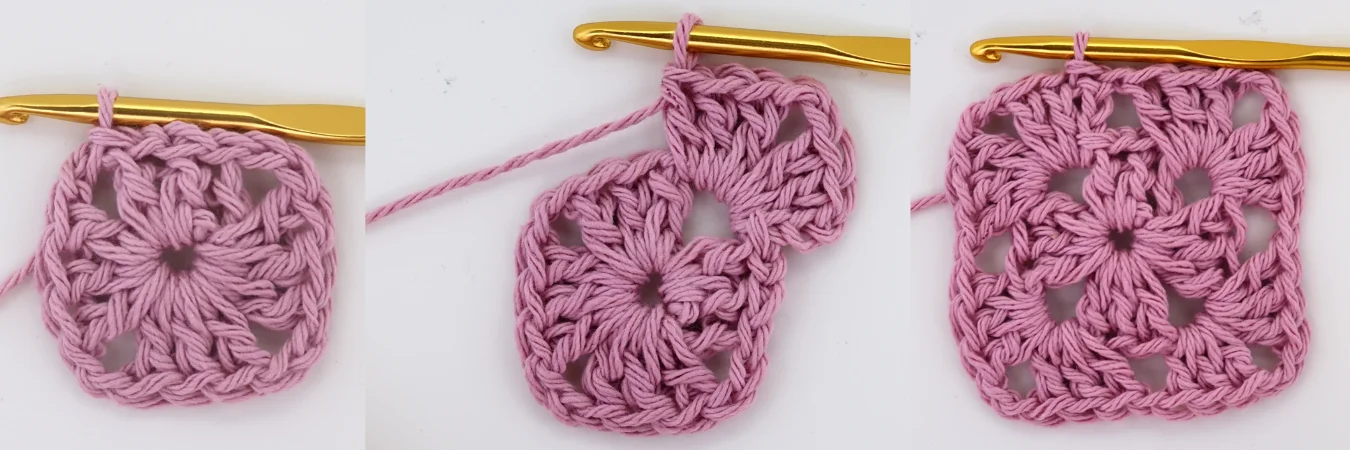
Round 2:
- Chain 3.
- 3 dc into the corner space of the first round.
- Chain 3 and 3 double crochet stitches more in the same corner space.
- *Chain 1 and make a cluster of 3 double crochet stitches into the next corner space. Chain 3 and make a cluster of 3 double crochet stitches into the same corner space. * Repeat this step twice.
- Ch 1 and connect with the beginning of the round by making a slip stitch into the third chain of our chain 3 from the beginning of the round. It’s the end of the round 2.
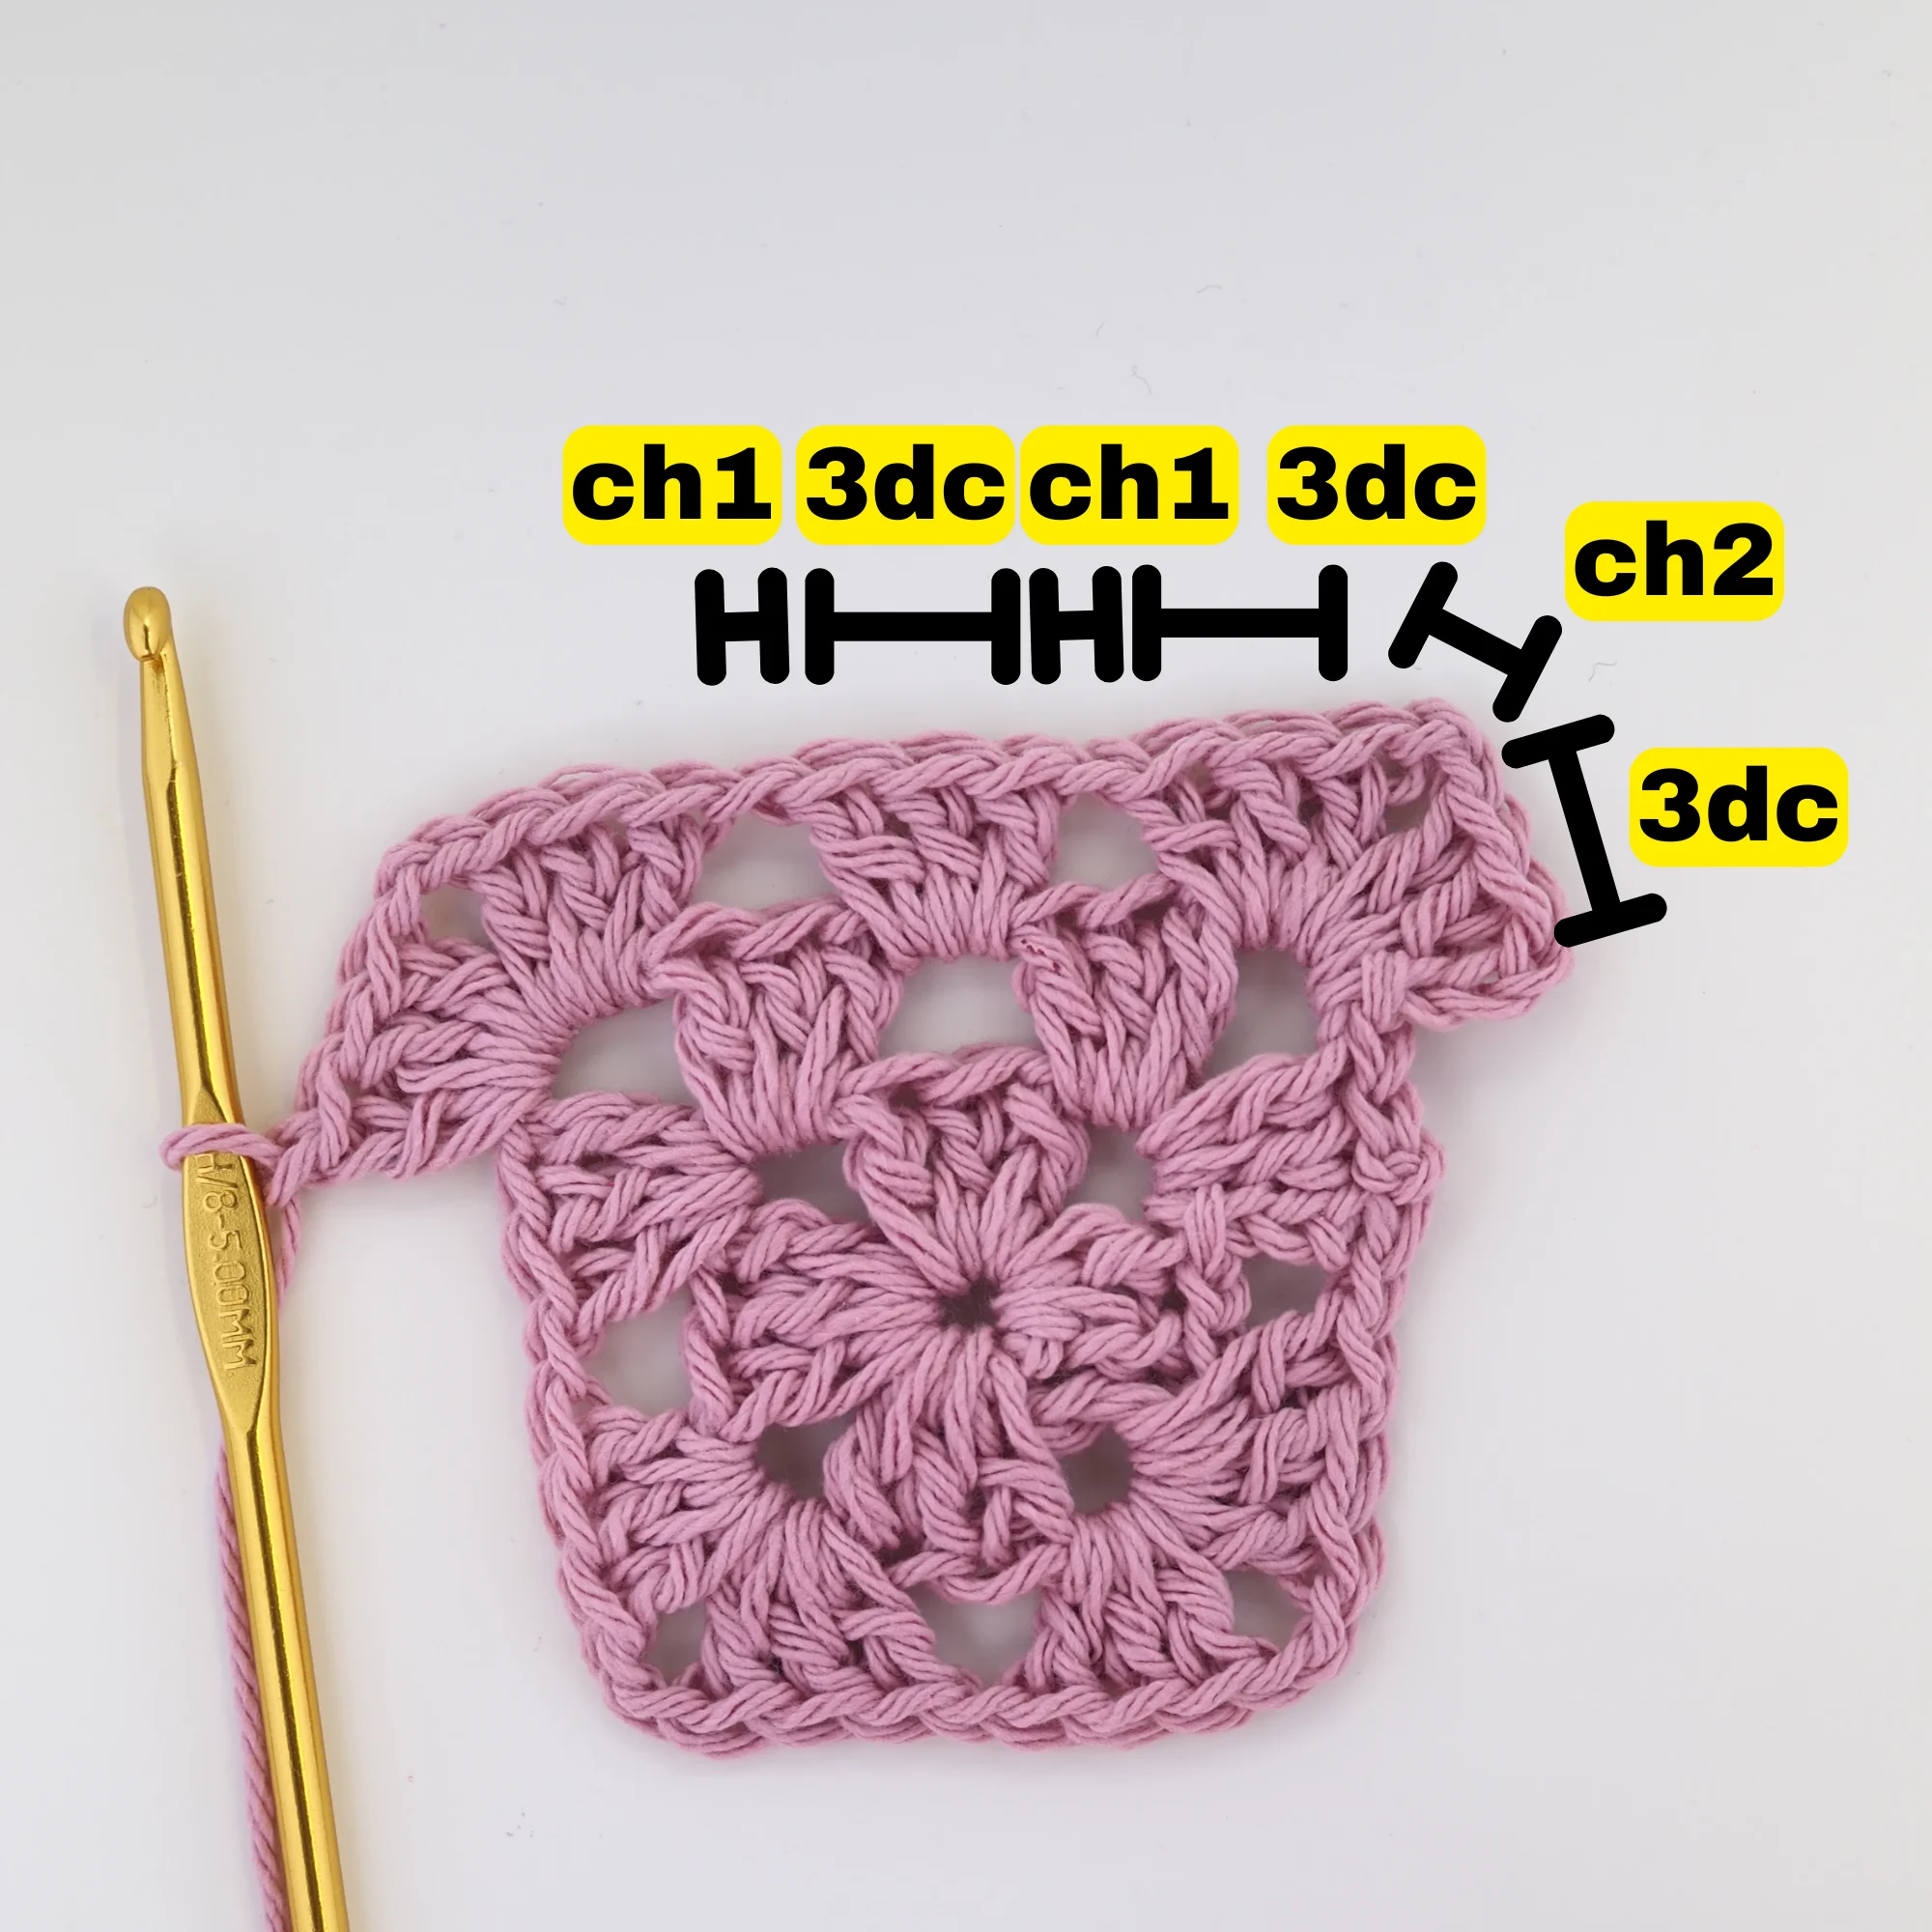
Next rounds:
If you want to make the square bigger, follow the steps from Round 2. Slip stitch into a corner space, and start making a cluster of 3 double crochet stitches into that corner space, chain 3 and another cluster of 3 double crochet stitches into each corner space. On each side, make a cluster of 3 double crochet stitches on the side space created by chain 1 (in between 3 dcs clusters) from the previous round.
Finish off:
Yarn over and pull through. Cut the yarn end and pull the hook out. Finally, pull the yarn to tighten the knot.
Congratulations, you have just made your first granny square!
If you like this post, you may also like:
A step-by-step guide on How to Crochet a Solid Granny Square
50 Free Granny Square Patterns & Tutorials from Absolute Beginners to Advanced Crocheters
For more free designs every day follow us on Facebook and share your ideas and your work on our Facebook group!
Finally! I saw all these groups like “crochet for beginners “ crochet for every one, ect. Ect. I am not sure how to get directions on any of those sites. I don’t want to have a group of people who I have no idea who they are- and they ask dumb questions. I don’t want to be in a group, I’m fine by myself. I just wanted to remember how to crochet some simple steps to show my granddaughter so this was simple right to the point and appreciated. TY