
In this article:

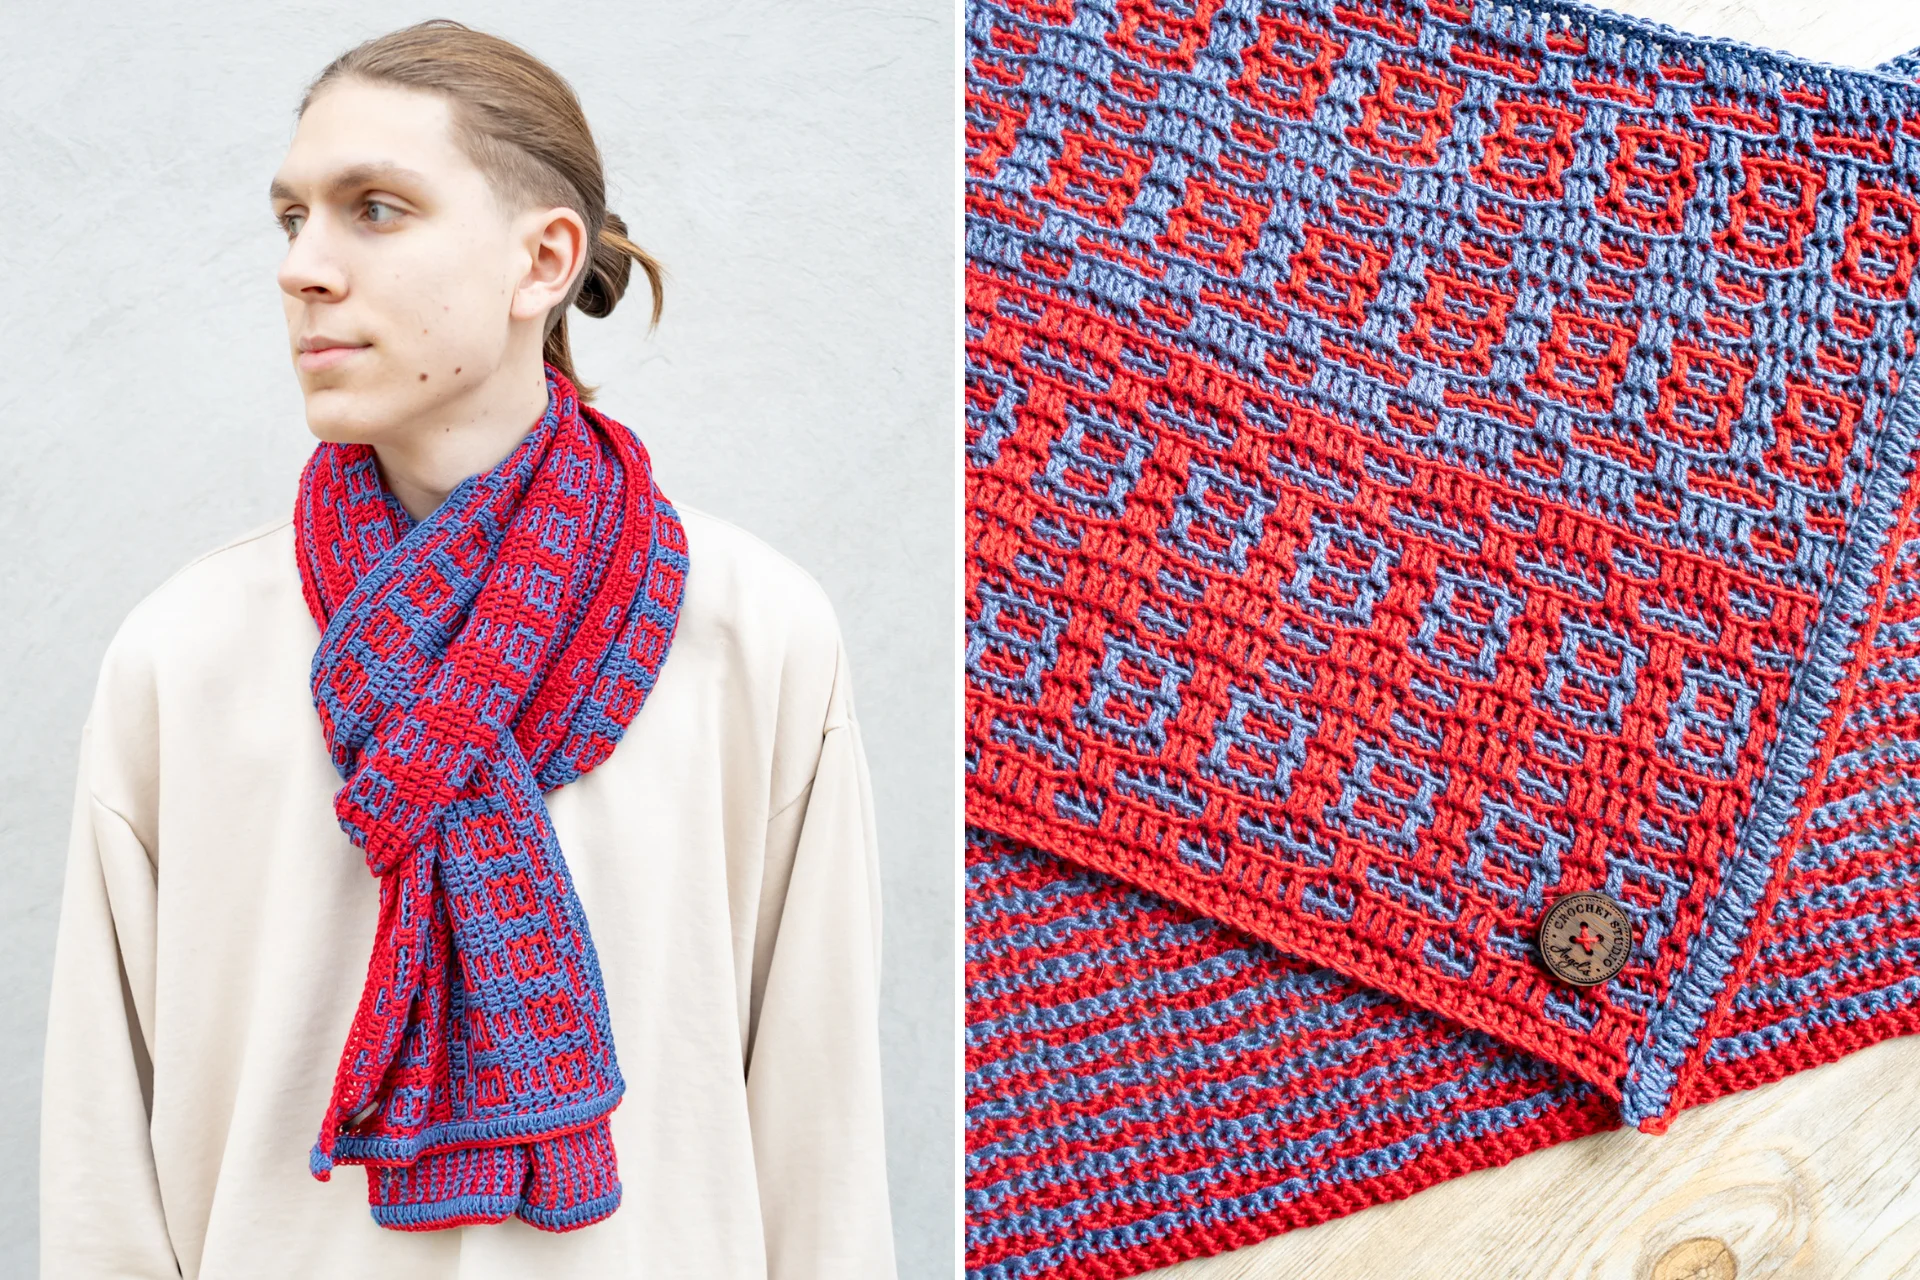
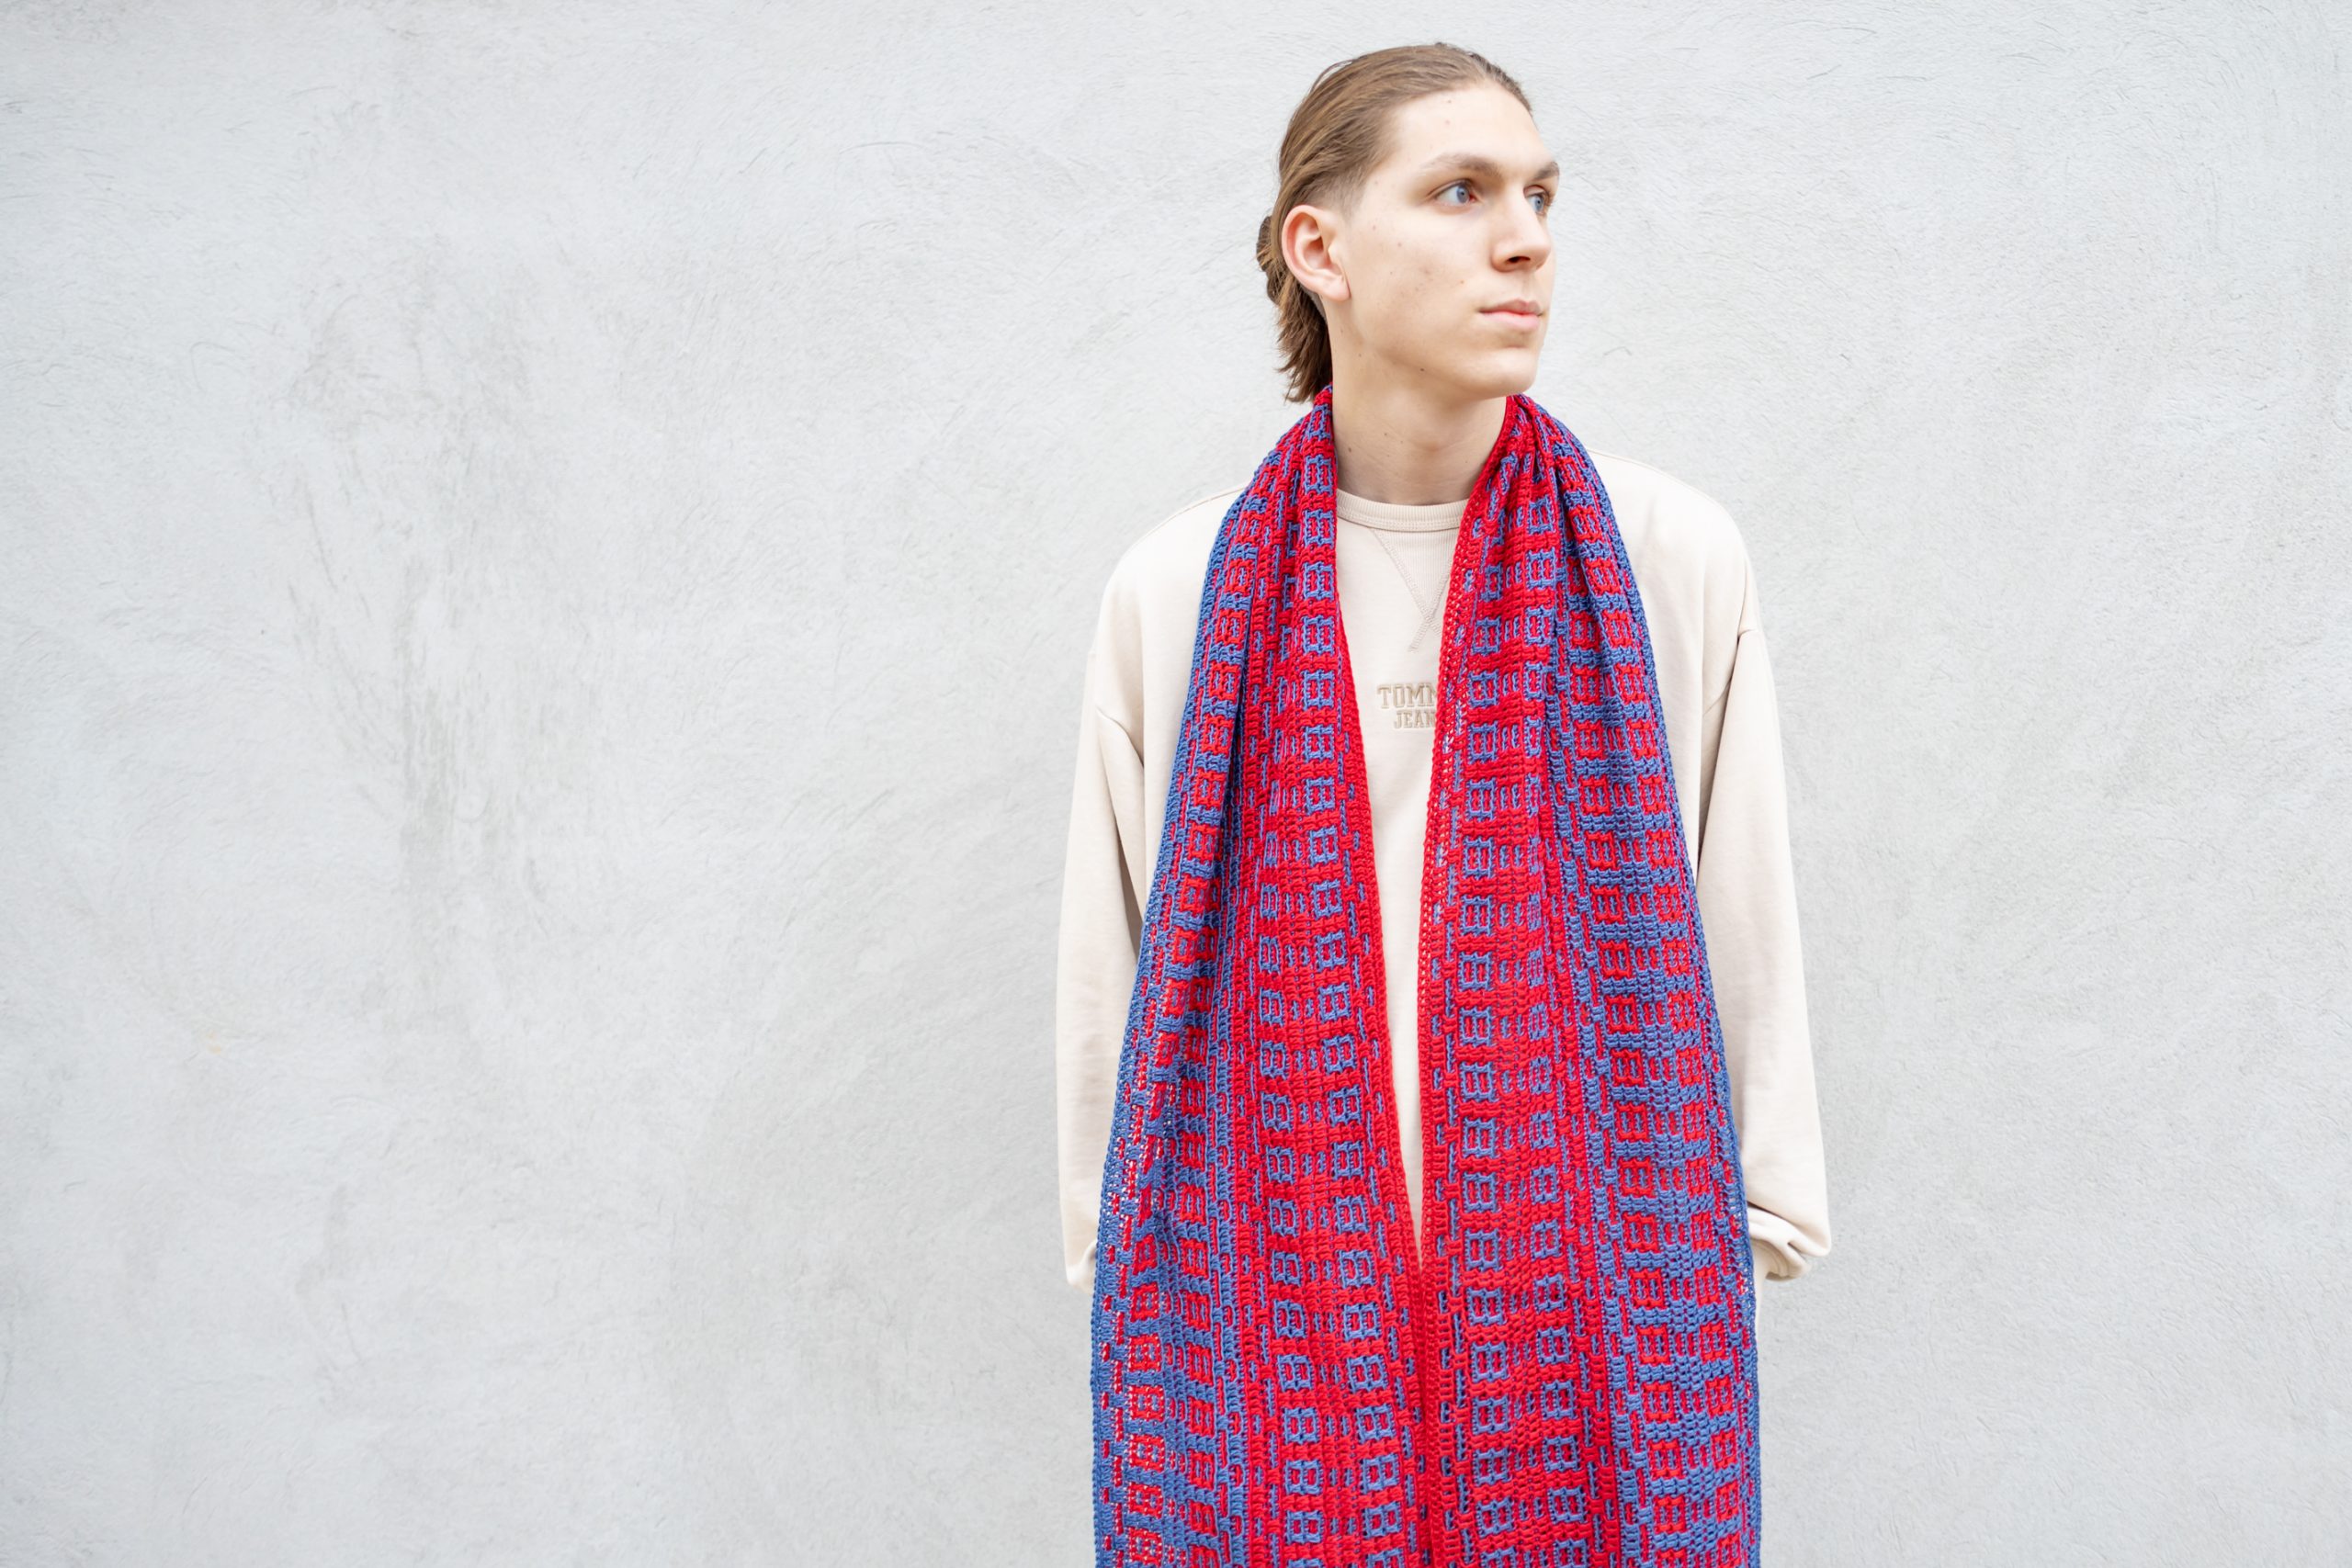
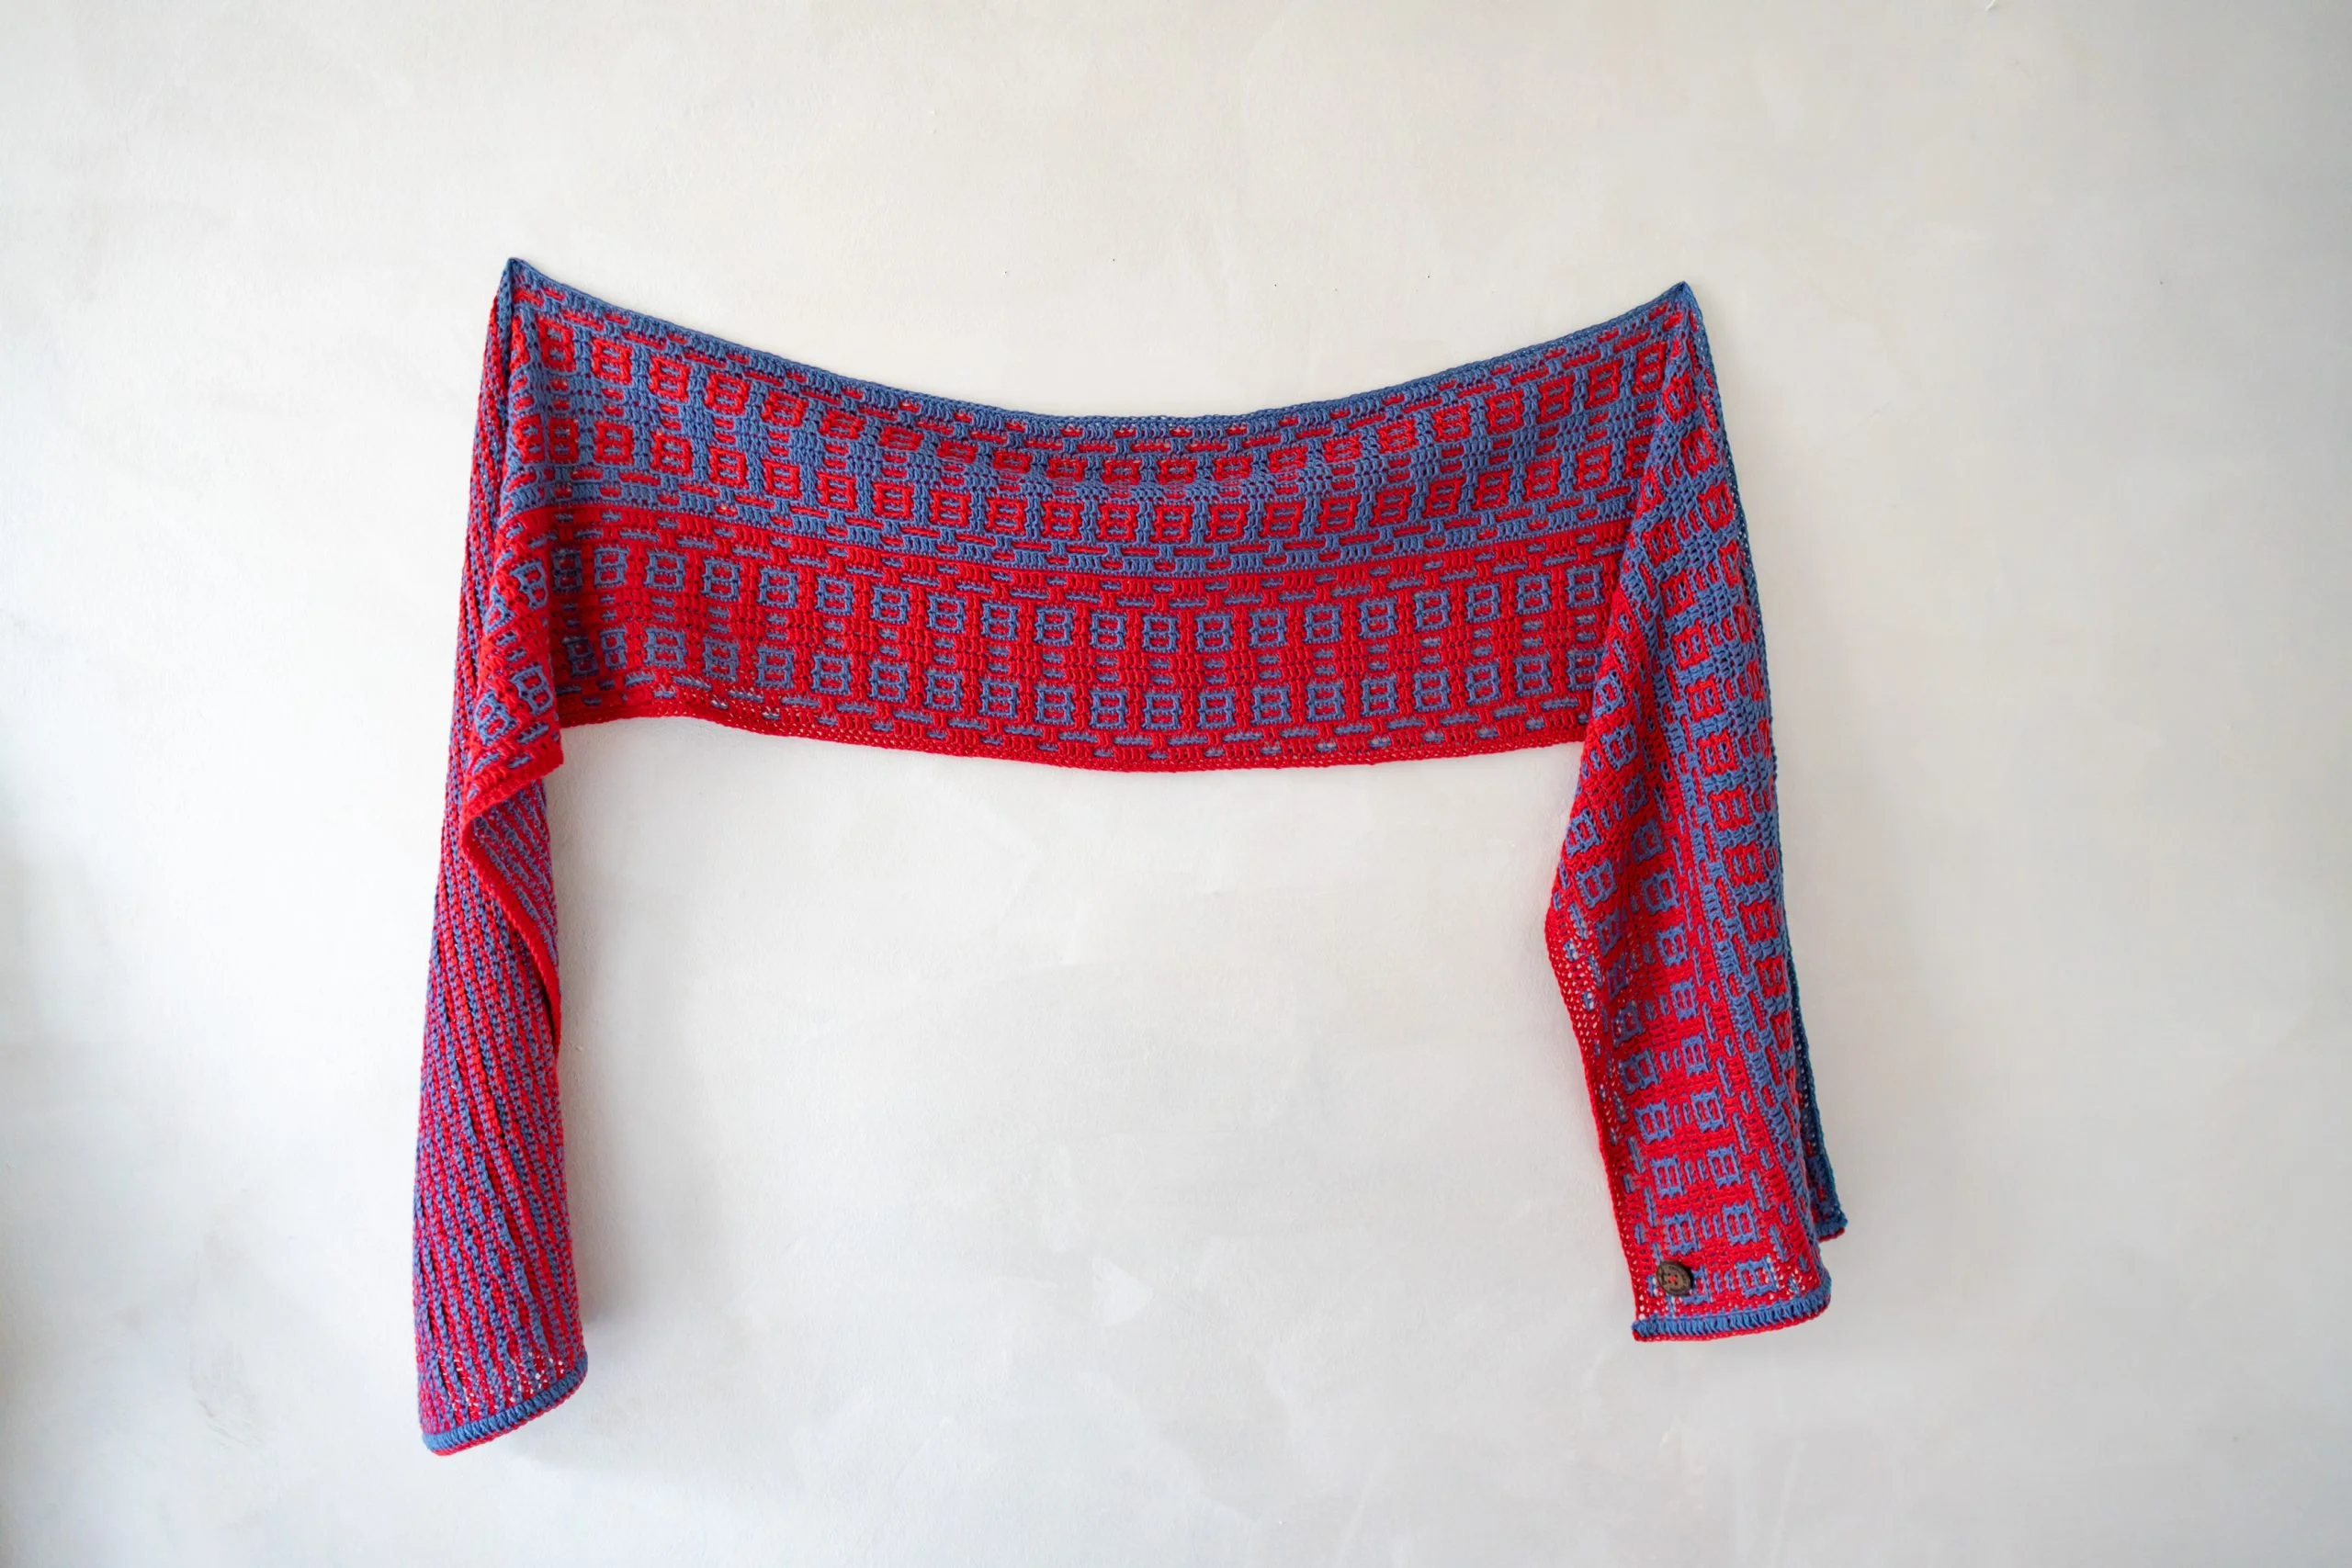
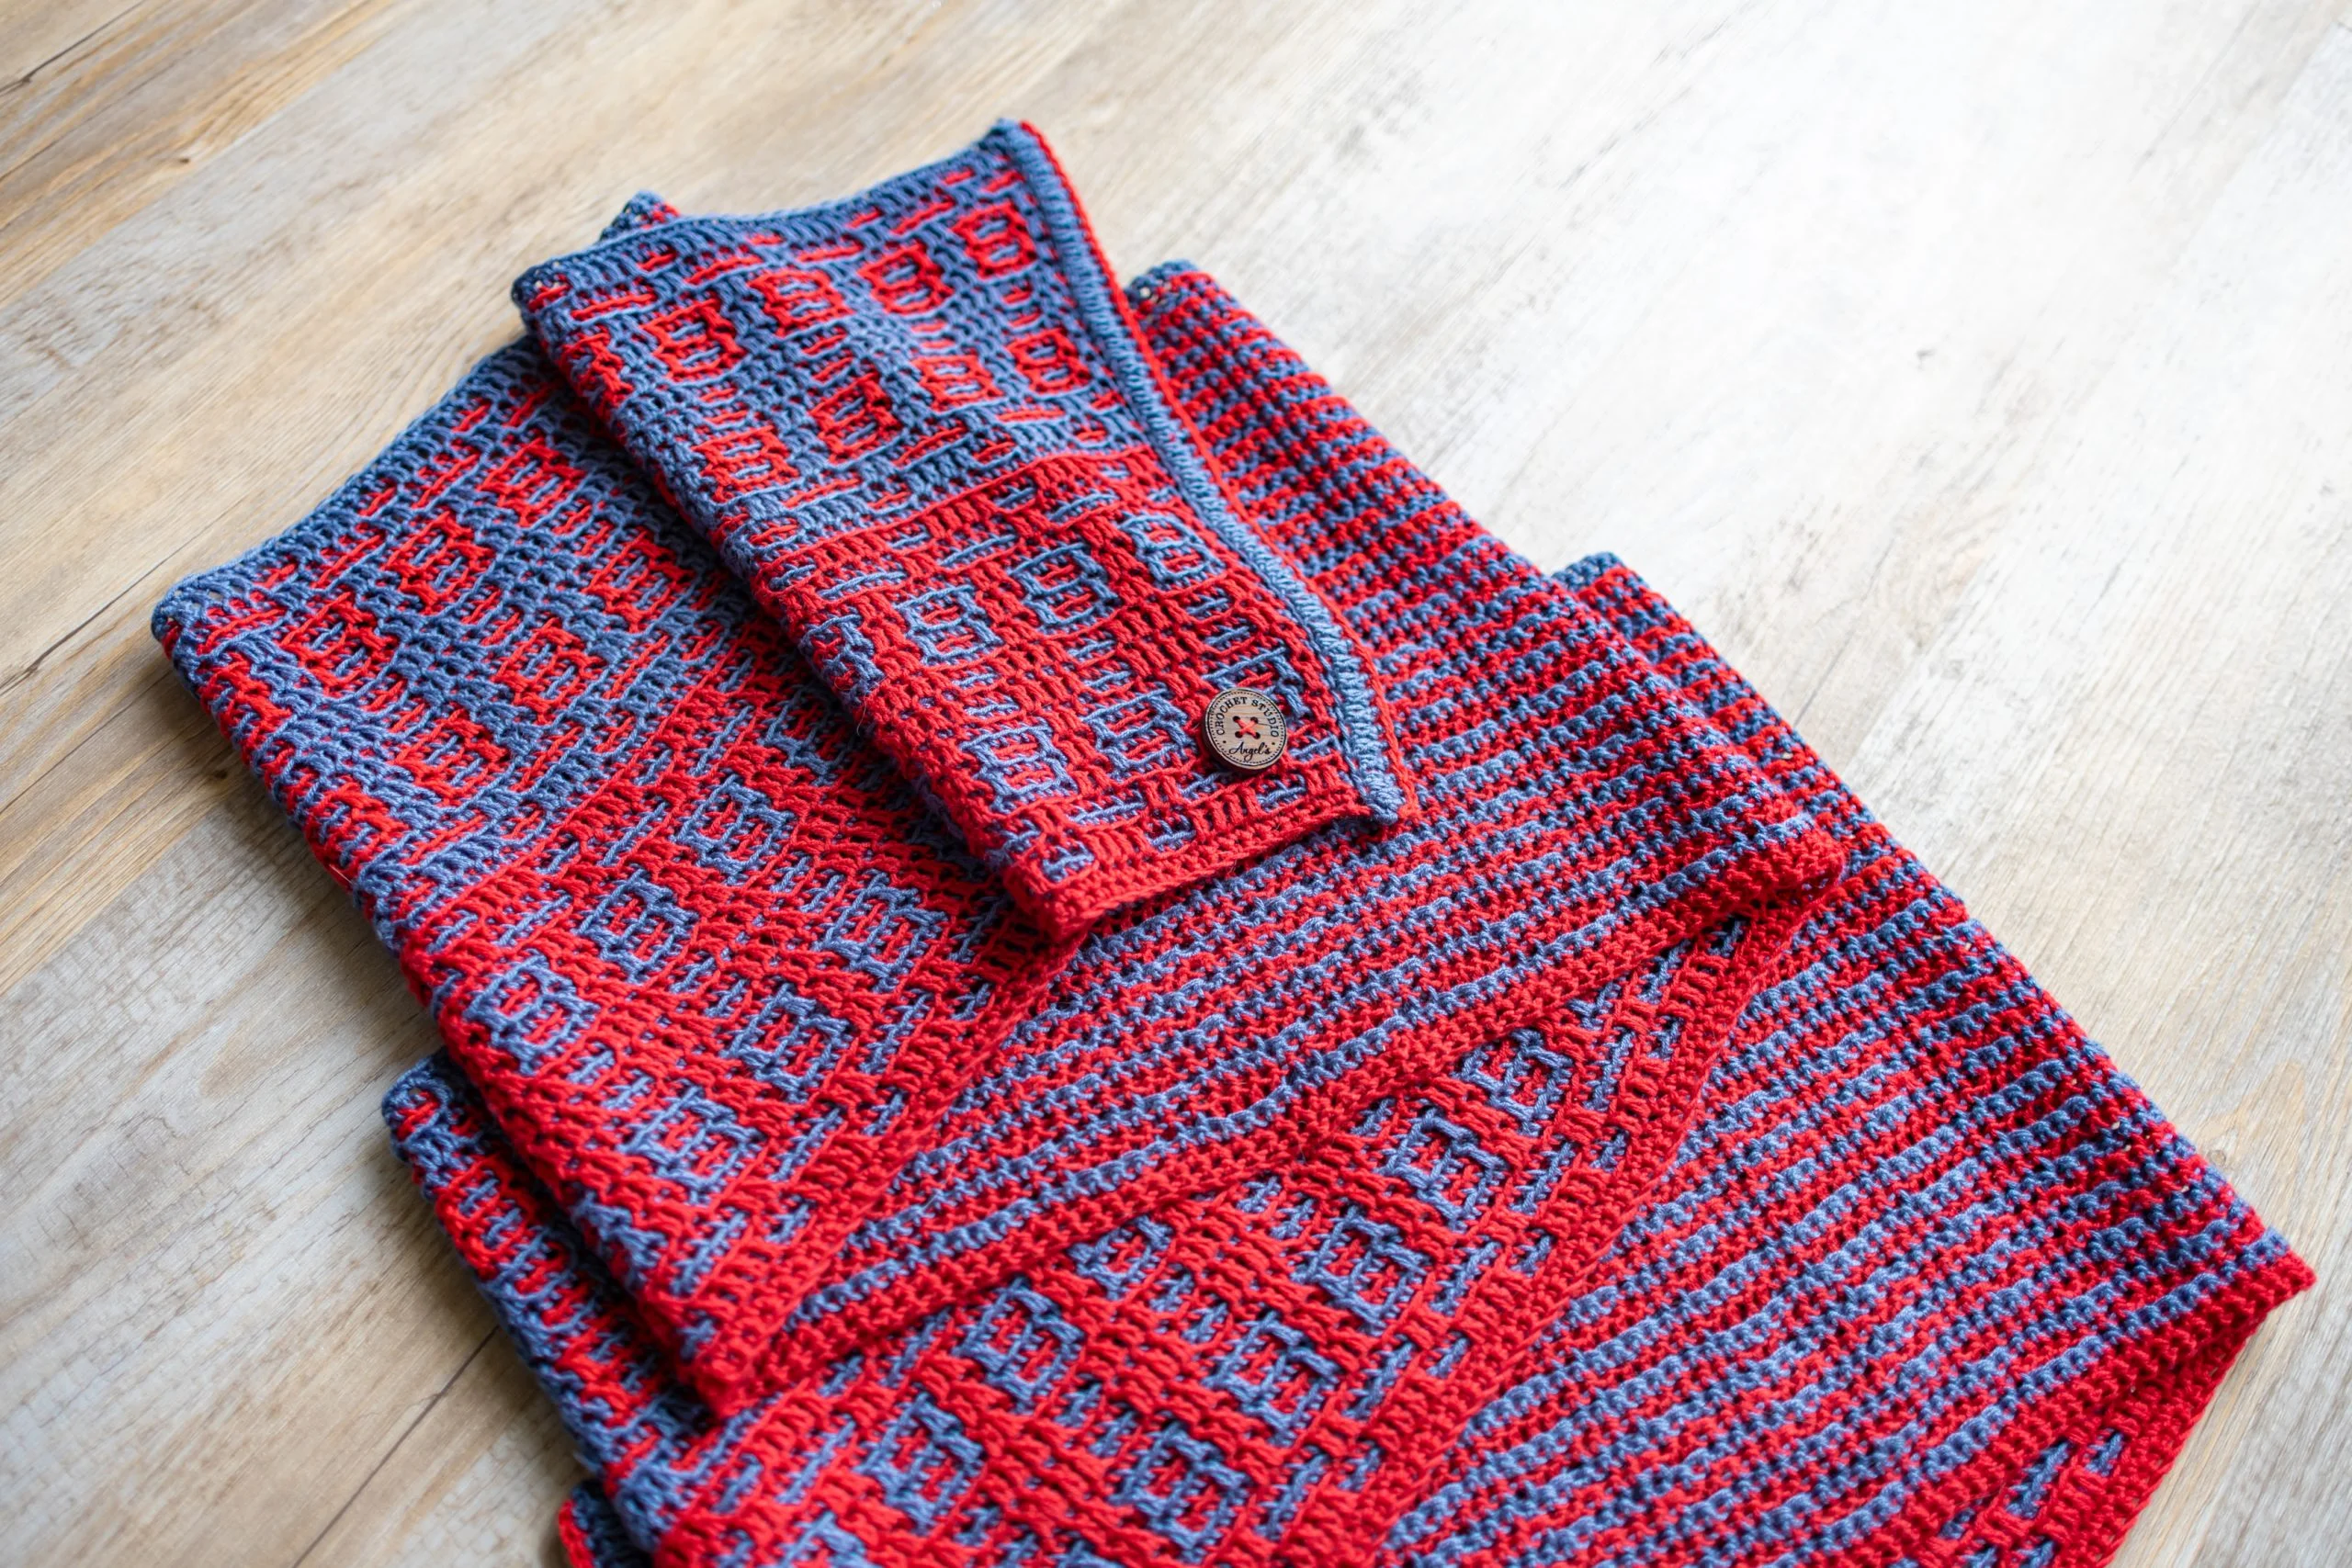
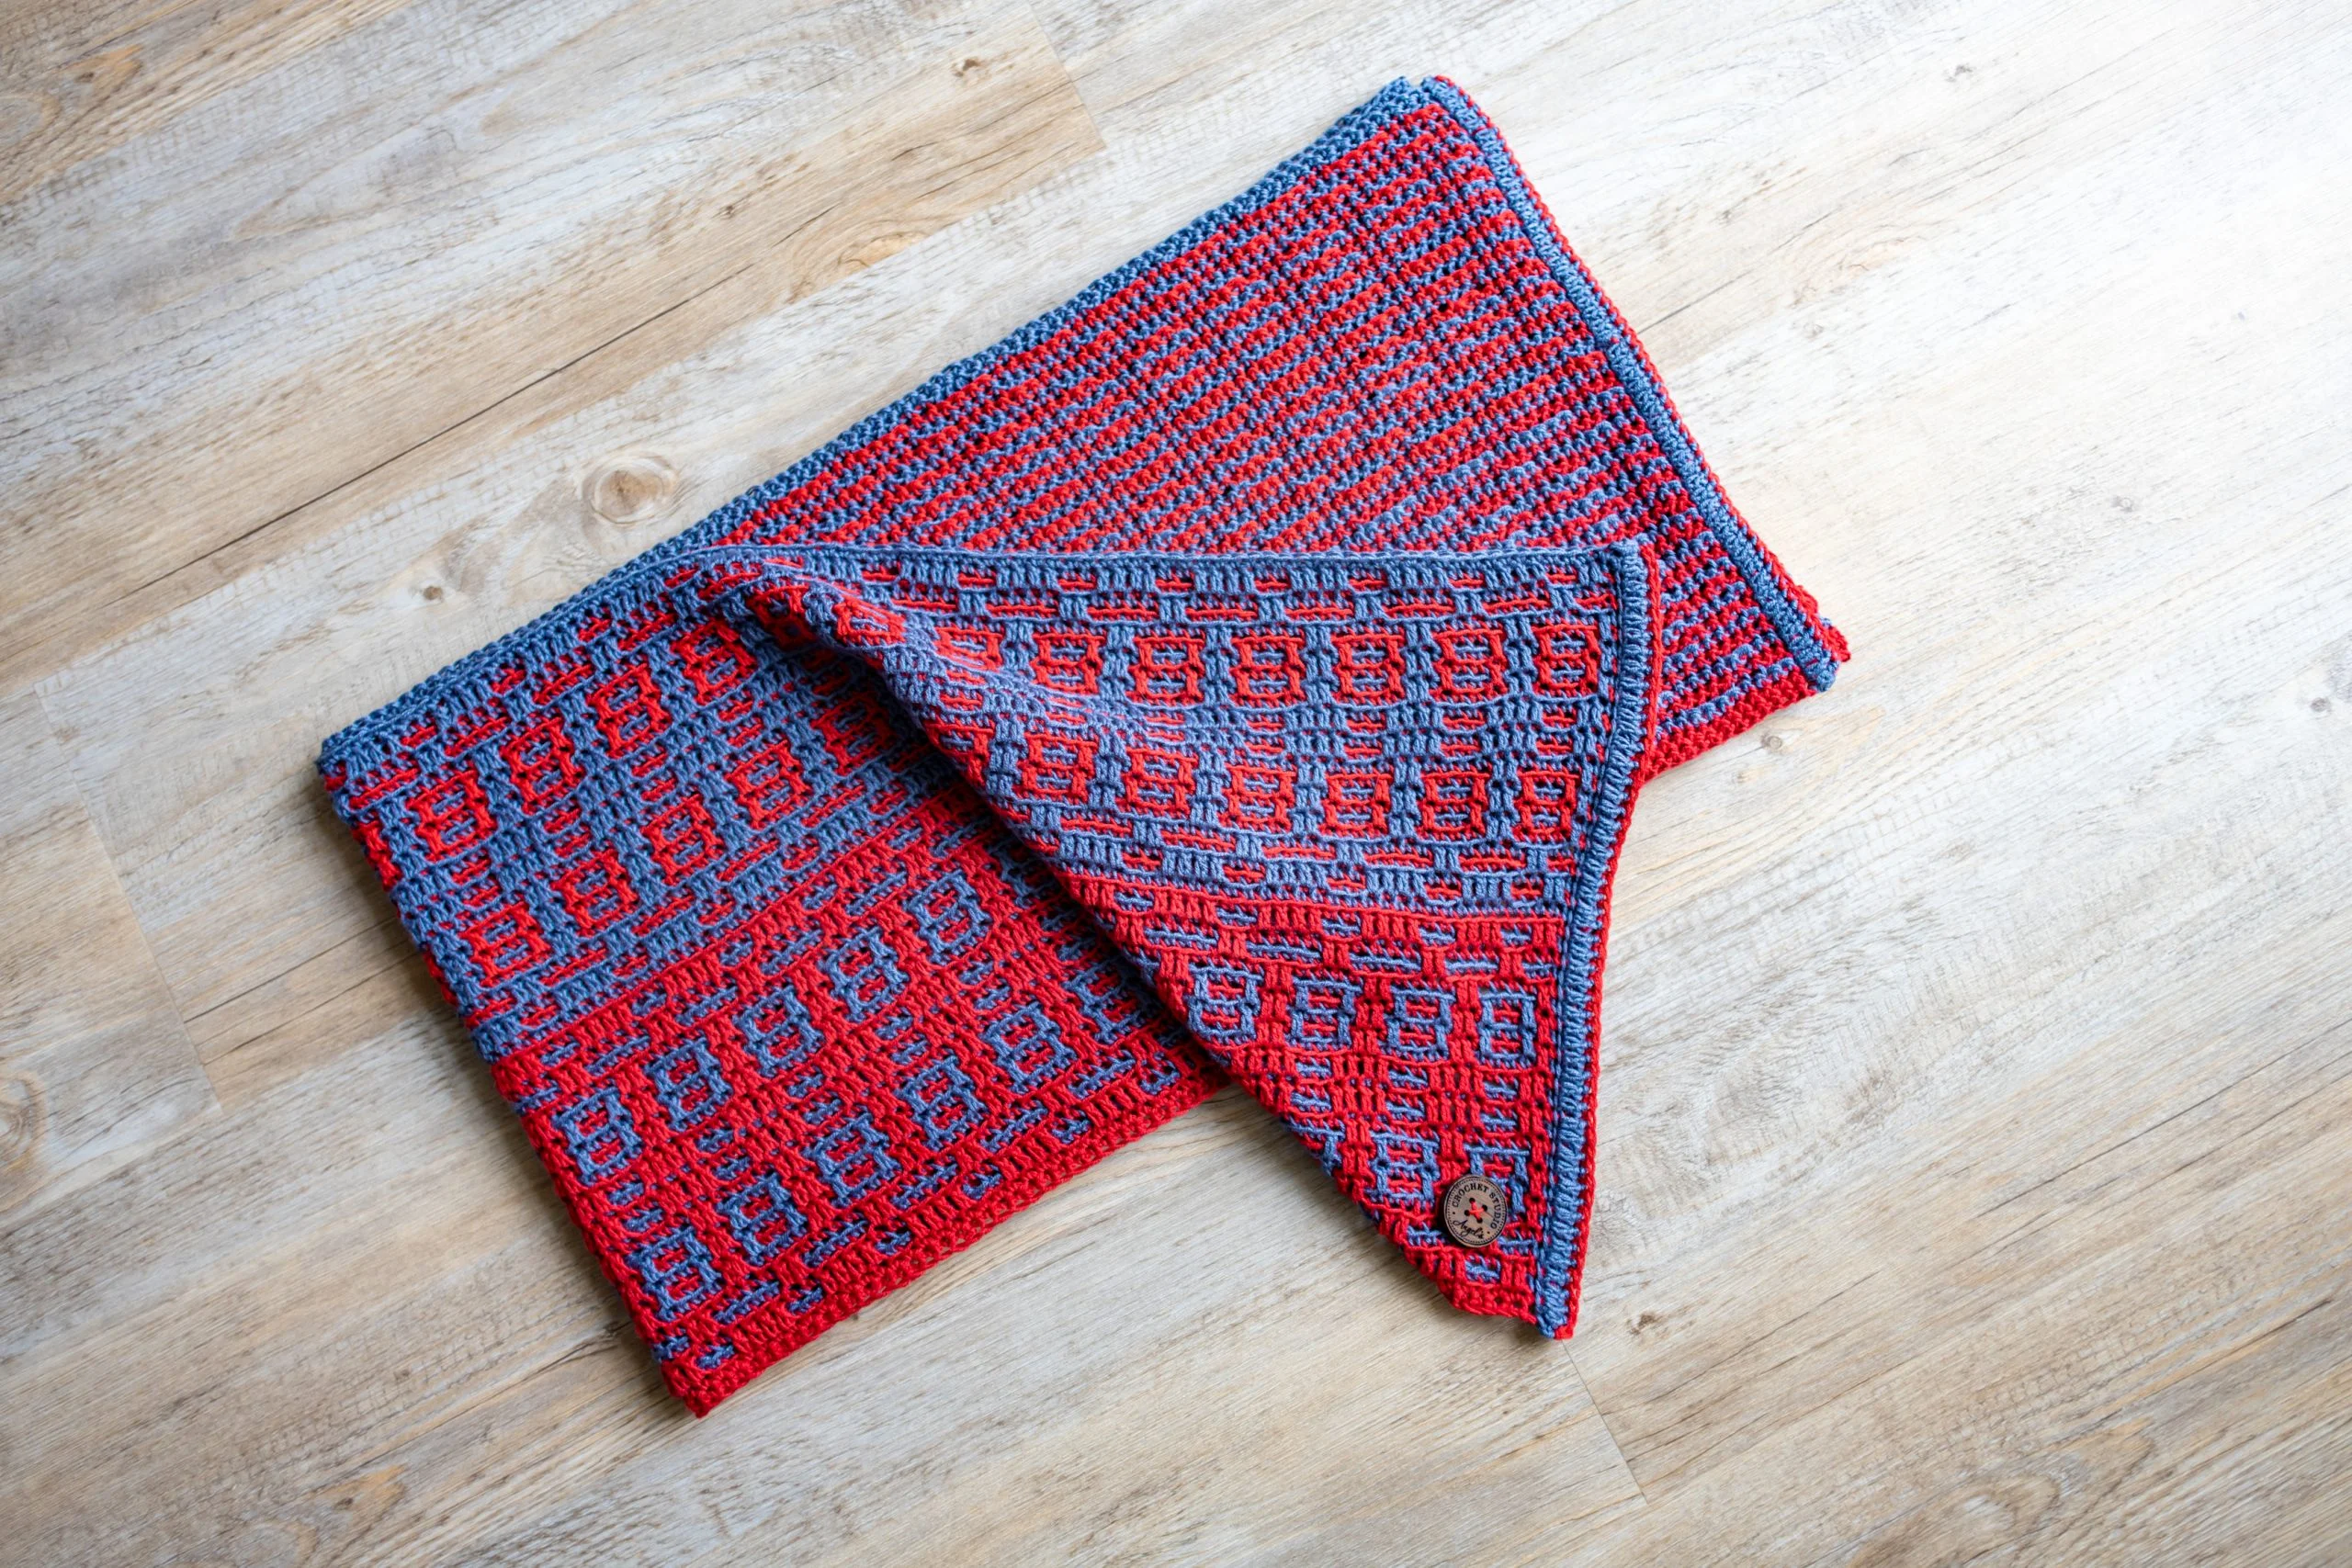
Experience the allure of the Fire and Ice Scarf, a stunning creation that combines the artistry of overlay mosaic crochet with the timeless appeal of a classic accessory. With its mesmerizing interplay of contrasting hues and striking geometric patterns, this scarf is a true masterpiece of crochet craftsmanship, guaranteed to turn heads wherever you go.
Explore the unique technique of overlay mosaic crochet with Angel Koychev from Angel’s Crochet Studio, which allows crocheters to create stunning, multidimensional designs using simple stitches and color changes.
The easily printable Fire and Ice Scarf PDF version is available in our shop:
With his clear instructions and step-by-step guidance, even beginners can master this innovative crochet method and create beautiful works of art. This scarf is sure to become a beloved addition to your crochet collection, with its intricate design, rich color palette, and endless styling possibilities. Start your Fire and Ice Scarf journey today and discover the magic of overlay mosaic crochet for yourself.
Pattern Notes
- The following pattern has been written using US terms and uses the Overlay Mosaic Technique.
- Overlay mosaic is worked on right side (RS) only. Each row is made with one color. C1 and C2 are alternated in each row.
- BLSCS are the empty blocks on chart and are always made in back loop only (I will call them SC omitting BL).
- When a normal SC is needed, instructions and chart will say so.
- FLDCS are the “X” blocks on chart and are “drop down stitches”, made in stitches from corresponding color row (2nd row down) and through front loop only (I will call them DC omitting FL).
- At the end of each row, you will FO your color and leave a tail, that will be worked on later on, while adding the border. The Fire And Ice Scarf is worked with its long side as 1st row.
Beg CH1 of each row doesn’t count as ST. - For this project I used mixed cotton/acrylic yarn, but you can choose whatever yarn you prefer!
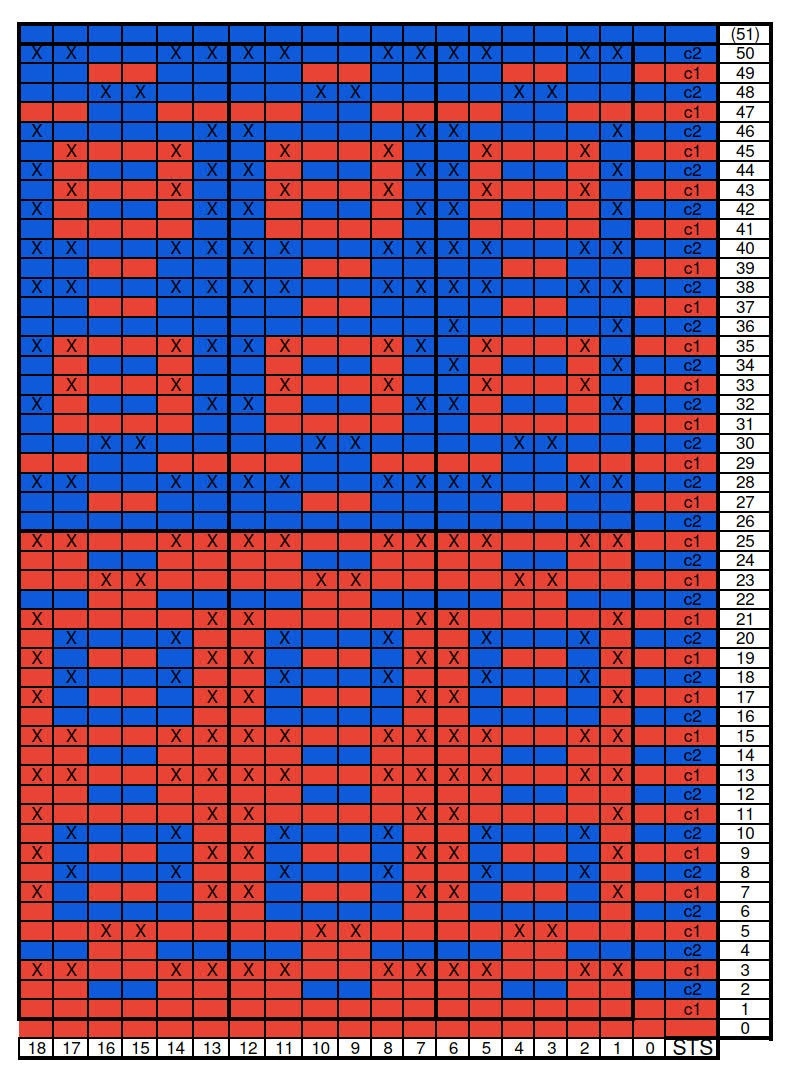
- I have also made a chart to help you follow the instructions, where all colored squares explain the motif, the empty squares are BLSCS (SCS) and the “X” squares are FLDCS (DCS) made 2 rows below.
- The final measurements of the shawl should be around 198 x 29 cm, if you have used the indicated hook size and type of yarn and same n. of repetitions of the motif.
- You will also find a printable version that might be helpful.
- For adjusting your measurements, keep in mind that you will need to start making your FSC with multiples of 6 STS +2 until you get to the desired length. For the width, I recommend 52 rows, if you want, you can always change that as well.
- Reminder: repetition of Pattern Sections start from 2nd ST until next to last one (multiples of 6), and vertically, they occupy rows from 1st to 25th. First and last STS of each row, and first and last row don’t follow the different pattern section, just frame them.
- At the start of every Row, attach your color with a SS, leaving a long tail, CH1, and proceed with instructions.
- At the end of Row, FO, leave long tail and cut.
- I have made a total of 56 repetitions for each 6 STS part.
The easily printable Fire and Ice Scarf PDF version is available in our shop:
Difficulty Level
This is an easy/intermediate crochet pattern.
Gauge
one repetition (rows 1-25, 1-6 STS) will be 11 cm in height and 3,5 cm in width.
Yarn & Hooks
- Yarn: HOBBII TWISTER SOLID (55% cotton/ 45% acrylic, 100 g (3.5 oz) ca. 400 m (437 yds)
- Color 1 (C1) Red 112 (1,2 x 100gr/400mt skeins)
- Color 2 (C2) Steel Blue 127 (1,2 x 100gr/400mt skeins)
- HOOK 4 mm
- Tapestry needle (to weave and hide yarn ends)
- Scissors
Abbreviations
BLSC – Back Loop Only SC
CH – Chain
DC – Double Crochet
FLDC – Front Loop Only DC
FO – Fasten off
FSC – Foundation Single Crochet
RS – Right Side
SC – Single Crochet
SS – Slip ST
ST – Stitch
WS – Wrong Side
YO – yarn over
Here you can see a chart that explains how to start every section of rows and the SECTION chart:
THE PATTERN
The easily printable Fire and Ice Scarf PDF version is available in our shop:
The Scarf
With C1, CH 339, SC in 2nd CH from hook and in all remaining STS, for a tot. of 338 SC, CH1, turn).
If you need to adjust the width, simply add or subtract multiples of 6 STS to this part.
Row 0 (C1)
For this Part, work with normal (both loops) SCS: SC in 1st ST and in all remaining STS, FO, cut. (338)
From now on, SC= BLO SC and DC= FLO DC
Rows 1-50: follow the instructions for the REPETITIONS, to create the pattern in the example. Start every row with a normal SC, from 2nd until next to last ST follow REPETITIONS, finish with a normal SC.
Row 1: 6 SC
Row 2: 6 SC
Row 3: 2DC+2SC+2DC
Row 4: 6 SC
Row 5: 2SC+2DC+2SC
Row 6: 6 SC
Row 7: 1DC+4SC+1DC
Row 8: 1SC+1DC+2SC+1DC+1SC
Row 9: 1DC+4SC+1DC
Row 10: 1SC+1DC+2SC+1DC+1SC
Row 11: 1DC+4SC+1DC
Row 12: 6DC
Row 13: 2DC+2SC+2DC
Row 14: 6SC
Row 15: 2DC+2SC+2DC
Row 16: 6SC
Row 17: 1DC+4SC+1DC
Row 18: 1SC+1DC+2SC+1DC+1SC
Row 19: 1DC+4SC+1DC
Row 20: 1SC+1DC+2SC+1DC+1SC
Row 21: 1DC+4SC+1DC
Row 22: 6SC
Row 23: 2SC+2DC+2SC
Row 24: 6SC
Row 25: 2DC+2SC+2DC
Rows 26-50: repeat rows 1-25, colors inverted.
(Row 51: this one can be made or not, according to preference: With C2, normal SC in 1st ST, SC in all remaining STS until last one, FO, cut tail.)
The easily printable Fire and Ice Scarf PDF version is available in our shop:
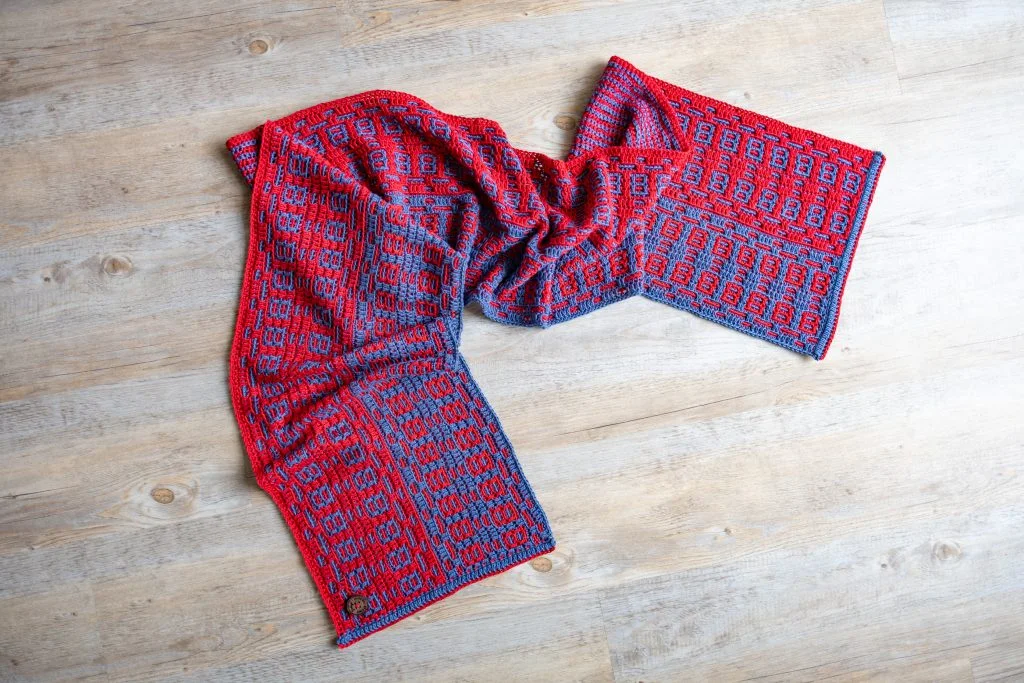
The Border
For this part, I choose to add a double layered border, only on the 2 short sides.
With RS facing you, attach C2 to the side of your last Row and then proceed with SS in every row until all the 1st short side of the work is done(I myself ended up having 52 STS, if that number varies a bit, shouldn’t be a problem). FO and cut your tail. Remember to make this row of SS loosely, so it is easier to work the next part. Repeat the same procedure on the other short side.
With WS facing you, attach C2 to the back of your 1st SS on a short side, CH3 (doesn’t count as ST), DC in same ST and in the back of each SS of previous row, when you arrive at the corner, FO and cut your tail.
With RS facing you, attach C2 to the top loop of your 1st SS (the most external part of the SS), CH3 (doesn’t count as ST), DC in the top loop of same SS and each SS on short side, in the corner FO and cut your tail.
Now, you can tie all rows’ tails in pairs with a double knot, then cut them leaving around 1 cm after the knots. (I have seen this to be done before you start your border, but personally think it is easier to keep those ends long while working)
With RS facing you, one one short side, attach C1 to any 1st DC made previously, and through corresponding ST on the back, with a SS, CH1.
SC in same ST and in all remaining STS, always working through both layers. FO, cut and weave in your tail.
Repeat on the other short side.
Well done! You have a completed FIRE AND ICE SCARF!
The easily printable Fire and Ice Scarf PDF version is available in our shop:
You can sell finished items made from it, but please mention that the item is made using an Angel Koychev (@angelscrochetstudio) pattern.
About the Author

Angel Koychev is the creative force behind Angel’s Crochet Studio, where he brings intricate crochet designs to life with skillful hands and a passionate heart. With a background in art and a love for all things handmade, Angel discovered his calling in the world of crochet, where he combines traditional techniques with contemporary flair.
- Blog: angelscrochetstudio.com
- Instagram: @angelscrochetstudio