
In this article:

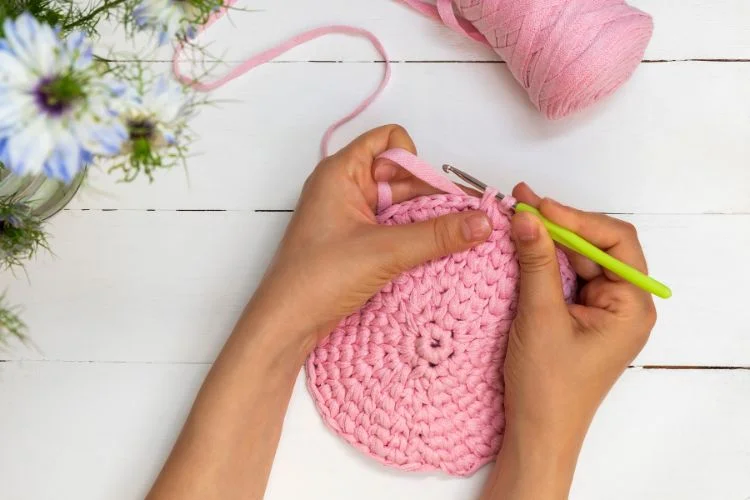
There’s a special kind of satisfaction in crafting a flawless, flat circle. Whether it’s for a coaster, a rug, or a component of a bigger project, knowing how to crochet a circle is a fundamental skill for any enthusiast. However, achieving that perfectly flat circle can be a challenge for many. Fret not! With this guide, you’ll be crocheting circles in no time.
Materials You’ll Need
- Yarn: The color and type are up to your preference, but for beginners, a medium-weight yarn is suggested.
- Crochet Hook: Size suitable for your yarn choice. Check yarn labels for hook size recommendations.
- Stitch Marker: To keep track of your rounds.
- Scissors: For cutting the yarn at the end.
- Tapestry Needle: For weaving in ends.
How to Crochet a Flat Circle
Creating a flat crochet circle is a fundamental skill used in many crochet projects, including coasters, doilies, and the bases of hats or bags. We’ll walk you through the steps to crochet a flat circle and highlight key points to pay attention to along the way.
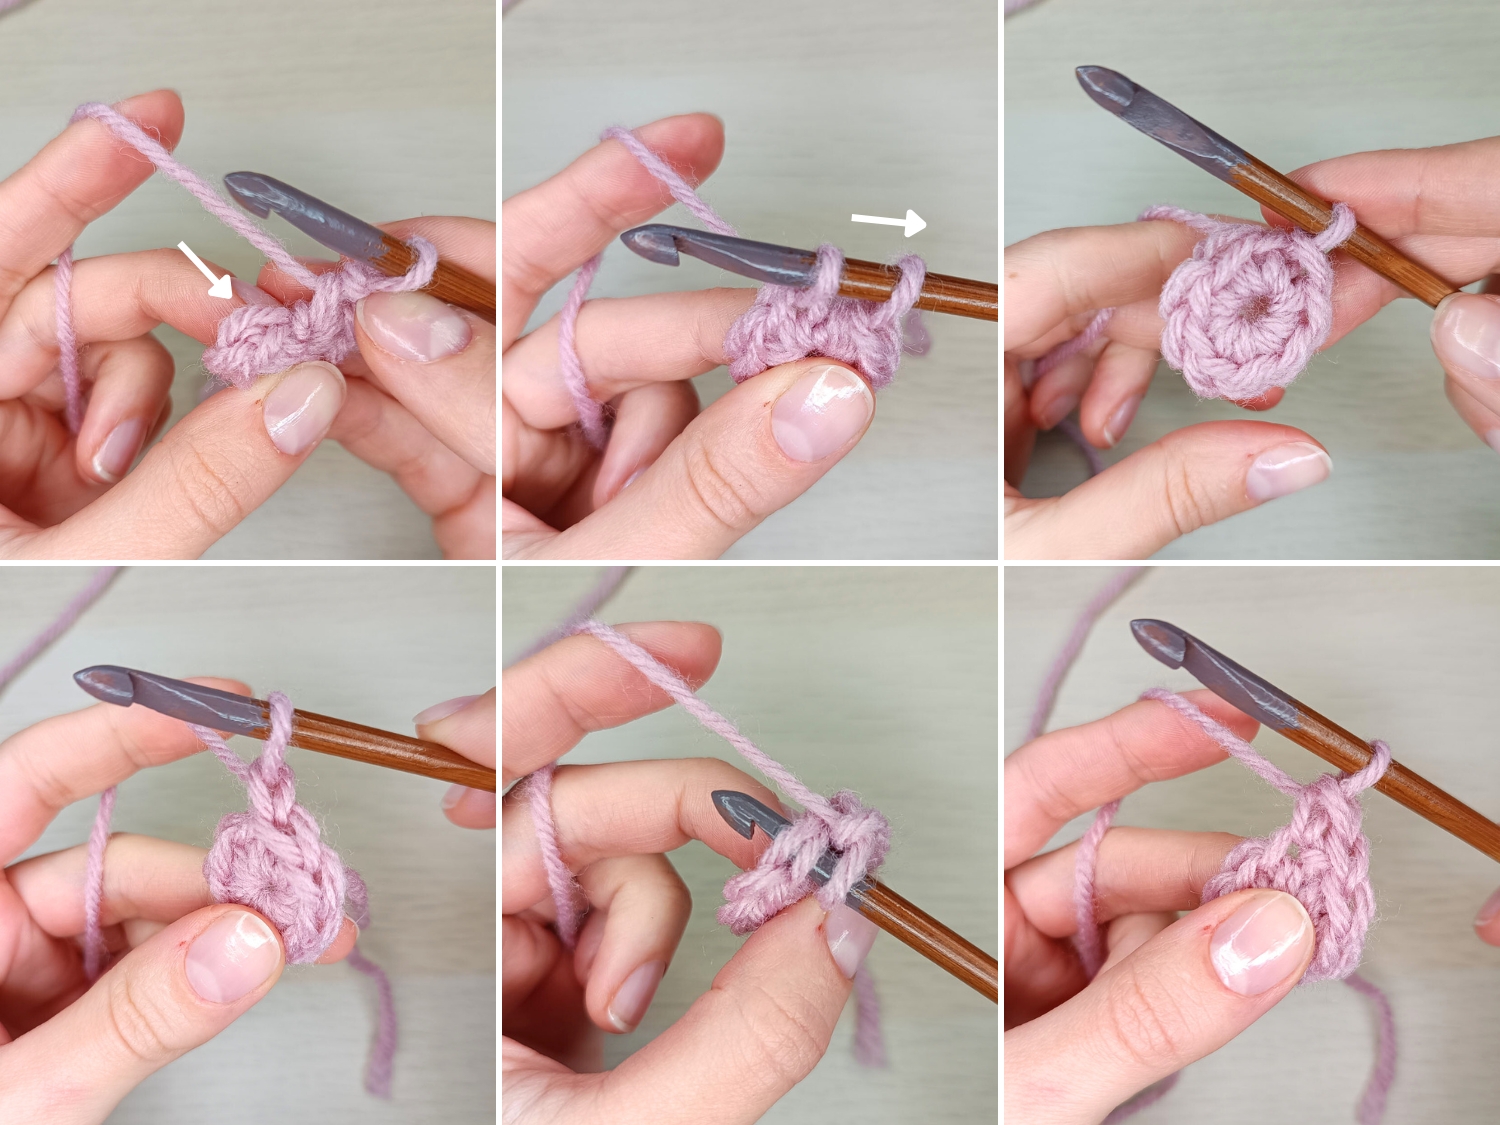
Step 1: Starting with a Ring
There are two popular methods to start:
- Magic Ring: This is a popular method because it allows the center to be pulled tight, leaving no hole.
- Chain Loop Method: Chain 4 and then slip stitch into the first chain to create a circle.
Step 2: First Round
Round 1: start with the desired number of stitches.
This example uses single crochet stitches for each round.
- Work the desired number of stitches into the loop.
- Close the round with a slip stitch to finish the first round.
Step 3: Increasing Rounds
Round 2: multiply the initial number of stitches x2.
- Chain one and work two stitches in each stitch.
- If you had 8 stitches in round 1, for example, you should have 16 stitches in round 2.
- Close the round with a slip stitch to finish the first round.
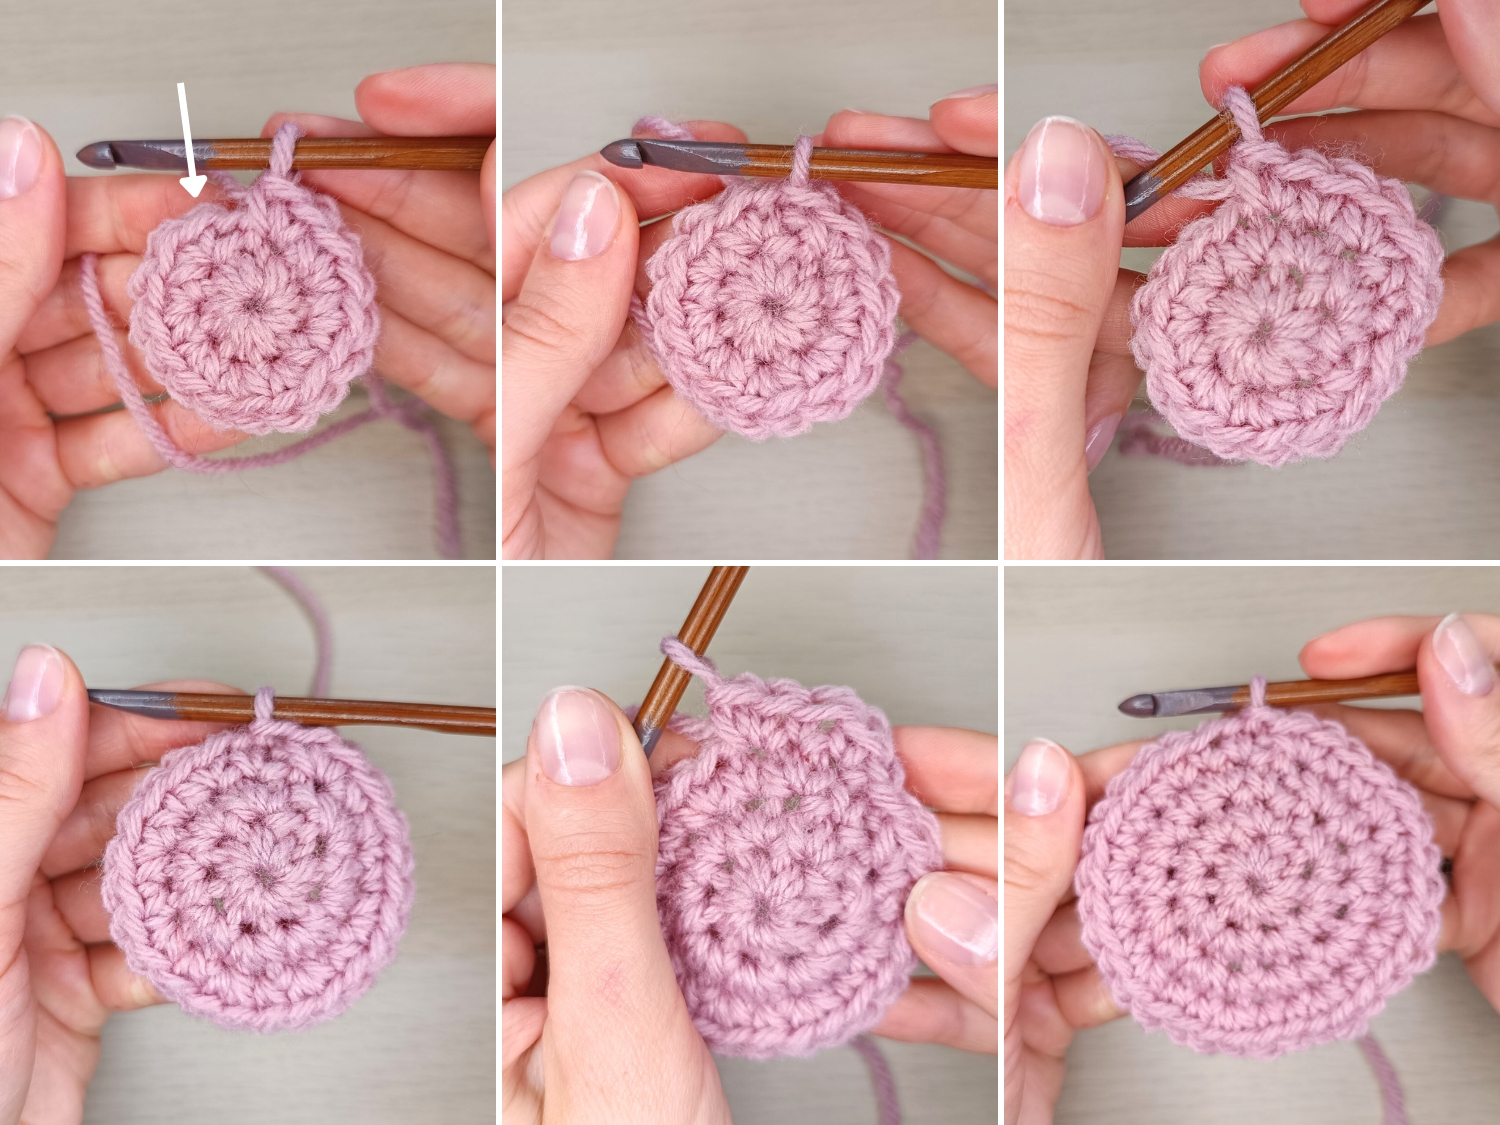
Step 4: Continue Increasing
Round 3: multiply the initial number of stitches x3.
- Chain one and work one regular stitch in the next stitch. Then, work 2 stitches in one stitch. Repeat: 1 stitch, 2 stitches in one.
- If you had 8 stitches in round 1, you should have 24 stitches in round 3.
- Close the round with a slip stitch to finish the first round.
Round 4: multiply the initial number of stitches x4.
- Chain one and work two regular stitches in the two consecutive stitches. Then, work 2 stitches in one stitch. Repeat: 2 stitches, then 2 stitches in one.
- If you had 8 stitches in round 1, you should have 32 stitches in round 4.
- Close the round with a slip stitch to finish the first round.
Continue with this rule to keep the circle flat – multiply the number of stitches in the first round by the number of the round.
Step 5: Monitoring Flatness
As you continue to increase rounds, it’s crucial to ensure the circle remains flat. If it begins to curl, you might be adding too few stitches. If it starts to ruffle, you could be increasing too much.
Step 6: Finishing Your Circle
When your circle reaches the desired size:
- Slip stitch into the next stitch after your final double crochet.
- Cut your yarn, leaving a tail.
- Using a tapestry needle, weave the yarn tail into the stitches to hide it.
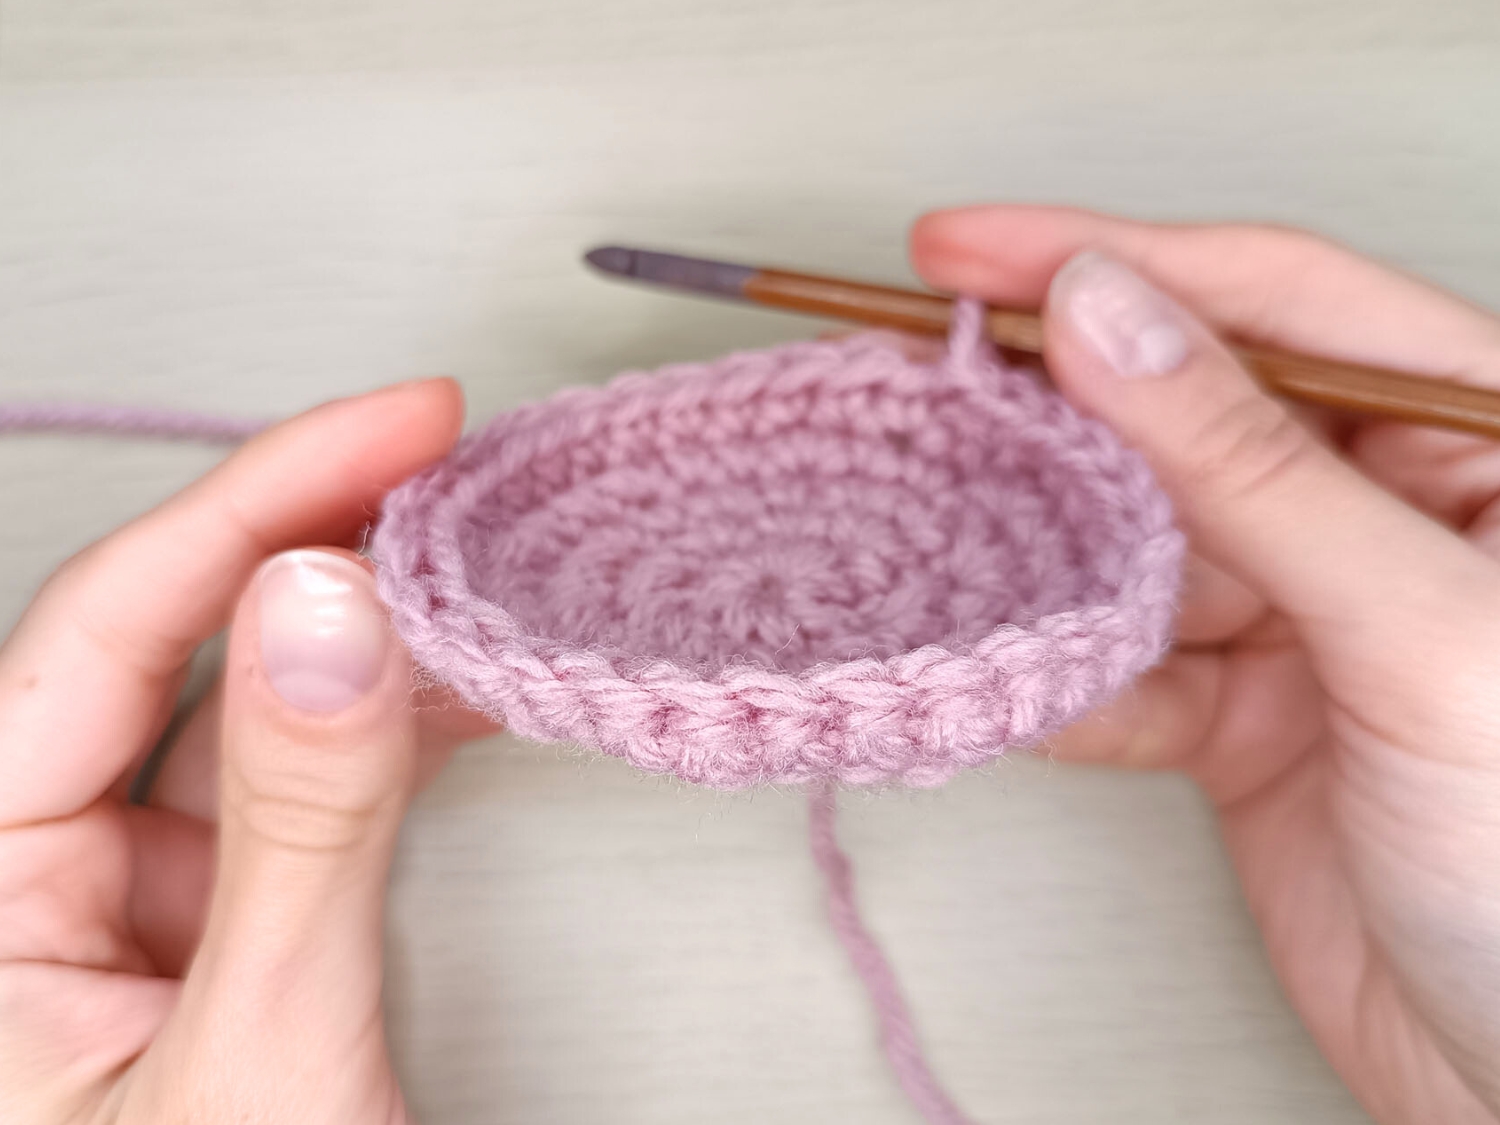
What happens if I don’t add stitches in the round?
As you can see in the photo, if you stop adding stitches, the circle won’t lay flat. The edges will go up, creating a basket-like shape.
Tips to Keep the Circle Flat
- Even Increases: Ensure that your increases are evenly spaced around the circle. This helps maintain the circular shape.
- Count Your Stitches: Count your stitches at the end of each round to ensure you have the correct number. If you’re losing or gaining stitches, your circle may not lie flat.
- Adjust Your Hook Size: If your circle is ruffling or curling at the edges, you might need to use a larger or smaller hook size. Experiment to find the right tension for your project.
- Block if Necessary: After completing your circle, consider blocking your work to help it lie flat. Blocking involves wetting and shaping the piece to its intended size and allowing it to dry.
By following these steps and paying attention to the key points mentioned, you can create beautiful flat crochet circles of various sizes to use in your projects. Practice is key to mastering this skill, so don’t be discouraged if it takes a few tries to get it just right.
Applications of Crocheted Circles
- Coasters: Small circles are perfect as coasters.
- Rugs: Bigger circles can be turned into decorative rugs.
- Bags: Medium-sized circles can be used as the base for cylindrical bags.
- Garment Details: Small circles can be decorative additions to clothing.
Advanced Techniques and Variations
Once you’ve mastered the art of crocheting a basic flat circle, there are endless possibilities to expand on this technique.
Textured Circles
- Puff Stitches: These create a raised “puff” on your circle. Introduce puff stitches in alternating rounds or spaces to give a bobbled effect.
- Front Post/Back Post Double Crochet: Alternating between these two styles of stitches within rounds can give your circle a ribbed appearance, adding depth and texture.
Creating Patterns within the Circle
- Colorwork: By switching colors within rounds, you can create intricate designs, like spirals or even floral patterns, within your circle. This technique can turn a simple flat circle into a tapestry of color.
Adapting to Different Shapes
While the circle is a basic shape, understanding its construction allows you to adapt it into ovals or even rectangles with rounded corners. By controlling your increases and the spacing of stitches, you can manipulate the shape to your desires.
Decorative Edges
Once your circle is complete, consider adding decorative edges. A scalloped or picot edge can transform a simple circle into a decorative piece.
It is Time to Get it Started
Understanding how to crochet a circle is like having a foundational building block in the world of crochet. With practice and patience, your circles will become flatter, neater, and more consistent. As you become more proficient, don’t hesitate to seek out free crochet patterns to expand your horizons and incorporate your newfound skill into diverse projects. Embrace the circle, and let your creativity flow in every loop and stitch.