
In this article:

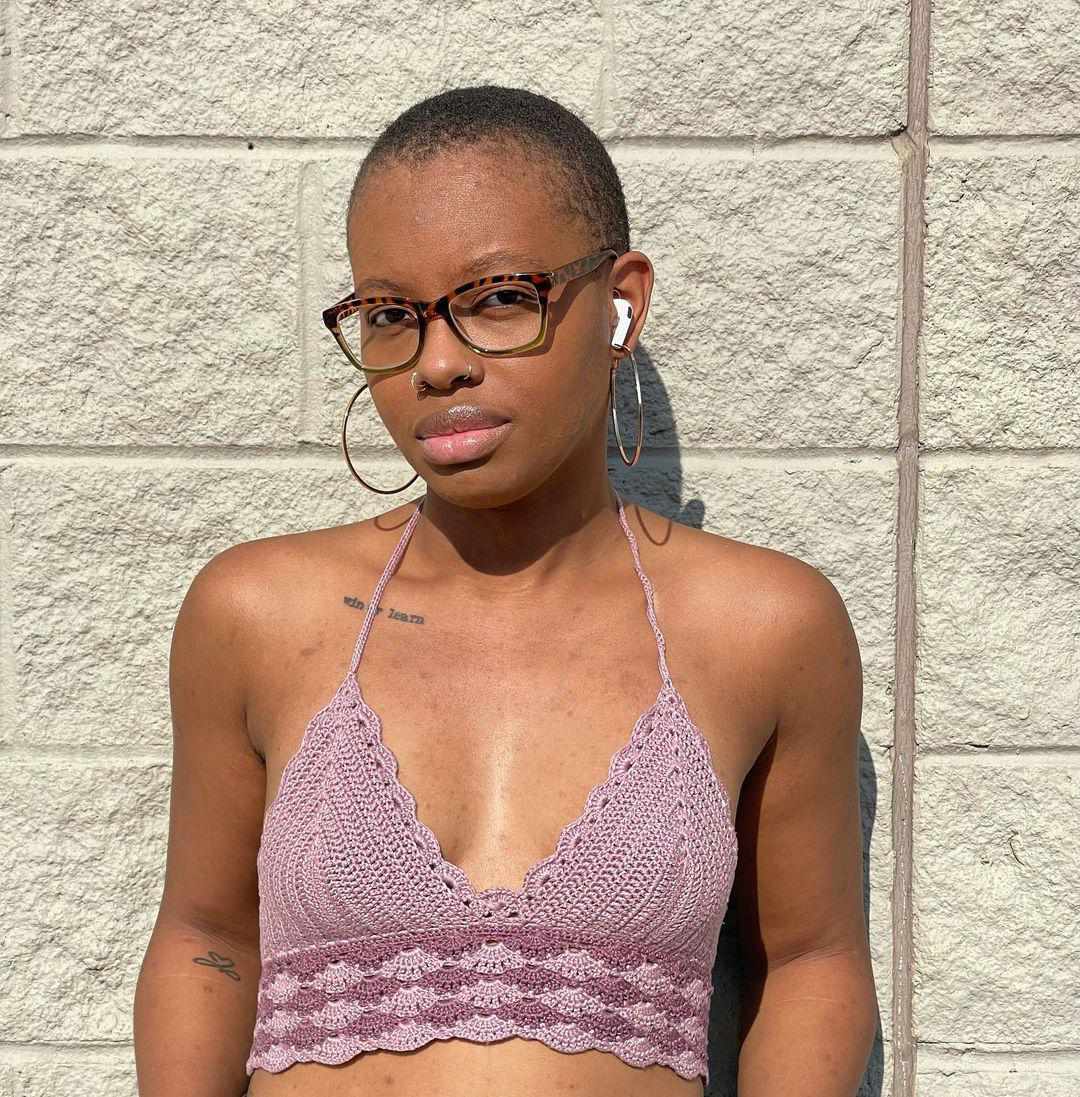
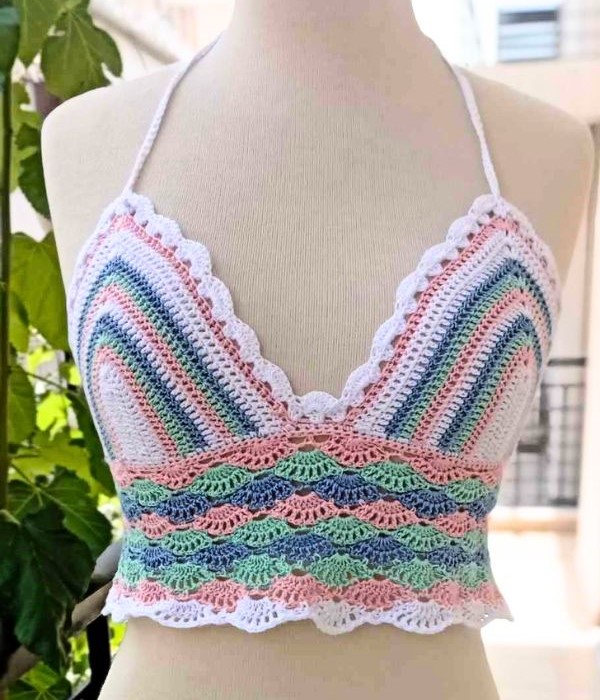
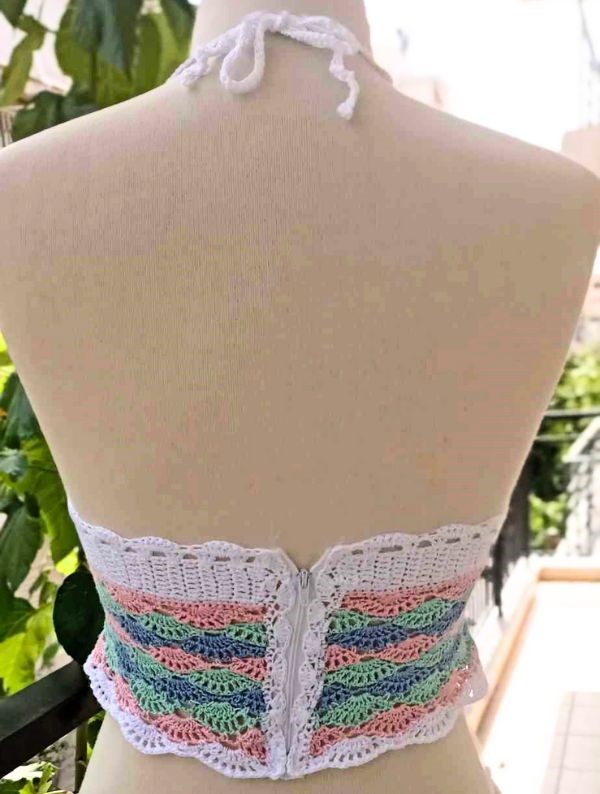
This crochet Maya Summer Crop Top is a perfect combination of comfort and style. Made
with Magic Yarn Ball yarn, it comes in a beautiful color combination of white, pink, light green
and blue. With an adjustable pattern to accommodate all body types, this crochet crop top is designed to provide all-day comfort.
Maya Summer Crop Top is a superb design by Joanna from Joanna Crochet Designs
The easily printable Maya Summer Crop Top PDF version is available in our shop:
Materials
- Magic Yarn Ball yarn 3 ply around 500-600 m for M size, in 4 colors but you can use
any yarn of your choice as long as it meets my gauge. (you can find yarn here) - Hook size 3mm
- needle
- zipper 12 cm – 15 cm (optional: if you want it to close the top with zipper)
Gauge
26 dc sts x 14 rows = 10 cm x 10 cm
Abbreviations
ch = chain
sl st = slip stitch
ch1-sp = chain 1 space
sp = space
ch3-sp = chain 3 space
dc = double crochet
st = stitch
sk = skip
sc = single crochet
dc2tog = double crochet 2 stitches together
CA = color A = white
CB = color B = pink
CC = color C = light green
CD = color D = light blue
Chart Size
| (cm) | XS | S | M | L | XL | 2XL | 3XL |
| AMERICA | 30-32 | 32A-34A | 34B-36A | 36B-38 | 38D+ | ||
| EUROPE | 65-70 | 75 | 80 | 85 | 90 | 95 | 100 |
| INITIAL CHAINS | 16 | 17 | 18 | 20 | 21 | 22 | 23 |
| (CM) OF INITIAL CHAINS | 6 | 6.5 | 7 | 7.5 | 8 | 8.5 | 9 |
| FINAL WIDTH OF CUP IN THE FIRST CH-SP | 14 | 15 | 16 | 17 | 18 | 19 | 20 |
| FINAL HEIGHT OF THE CUP | 13.5 | 14.5 | 15.5 | 16.5 | 17.5 | 18.5 | 19.5 |
| UNDERBUST | 76 | 80 | 88 | 96 | 106 | 118 | 130 |
| NEEDED YARN IN METERS | 570 | 600 | 660 | 750 | 800 | 890 | 980 |
for bigger sizes.
Notes
- The final width of the cup in the 1st ch-sp is the 1st ch1-sp you make in R1. In that space
the finished width must be the cm of the chart size. - If you think that the finished width is smaller than you really want then you will just repeat rows and measure it on your body.

Instructions
The easily printable Maya Summer Crop Top PDF version is available in our shop:
The Pattern of the crop top is adjustable to each body type. You can choose your size and different sizes of cups.
When you join the cups there are 2 options: with space between them or not. Choose your size with the initial chains from the chart size above.
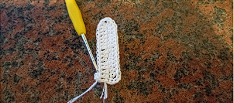
Cup x 2
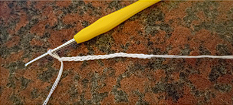
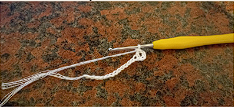
Start: Ch 16, (17, 18, 19, 20, 21, 22) with CA color
CA: R1: Ch3, dc in the 4th ch from the hook, dc in the next 14, (15, 16, 17, 18, 19, 20) ch, in last ch work (3dc – ch1 – 3dc) and continue working on the other side, dc in each st till the end and turn. [37,(39, 41, 43, 45, 47, 49)]


CB: R2: Ch1, dc in the 1st st, dc in each st till you reach ch1-sp, (2dc – ch1 – 2dc) in the ch1-sp, dc in each st till end and turn. [41, (43, 45, 47,49, 51, 53)]
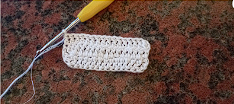
CC: R3: Repeat R2 [45, (47, 49, 51, 53, 55, 57)]
CD: R4: Repeat R2 [49, (51, 53, 55, 57, 59, 61)]
Repeat R2 until you have 13.5 (14.5, 15.5, 16.5, 17.5, 18.5, 19.5) cm total height of the cup.
Once you reach the height if you are in CA color continue with the next row. If you are not then cut yarn, weave the ends and join yarn with CA color in the 1st st of the cup and:
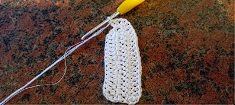
Side of the Cup
CA R15: Ch1, dc in the 1st st, dc in the next 8 sts, dc2tog and turn. (10)
R16: Ch1, dc2tog, dc in the next 8 sts and turn. (9)
R17: Ch1, dc in the 1st st, dc in the next 6 dc sts, dc2tog and turn. (8)
R18: Ch1, dc2tog, dc in the next 6 sts and turn. (7)
R19: Ch1, dc in each st and turn.
Repeat R19 for 22, (23, 26, 29, 33, 38, 43) cm total (counting from R15).
IMPORTANT NOTE: If you close the top behind with a zipper use the cm above.
But if you close the top behind with string as pic shows in the end then the cm are:
Repeat R19 for 17, (18, 21, 21, 25, 28, 33) cm total (counting from R15).
If you think you need smaller or bigger length then remove or add rows for better results measure it on your body.
Cut yarn and weave the ends.
The easily printable Maya Summer Crop Top PDF version is available in our shop:
Joining The Cups
Below you will find instructions to join the cups together. It can be done two ways, first, joining them with a ch5 space between them (version 1) and second (version 2) joining them without this space (see the red notes of NEXT ROW* and NEXT ROW 1* below).
Version 1: with space between
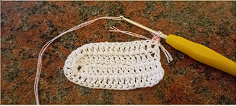
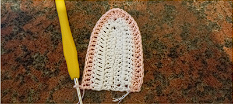
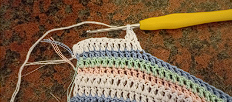
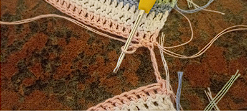
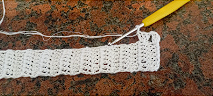
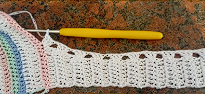
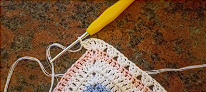
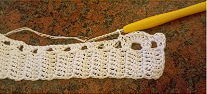
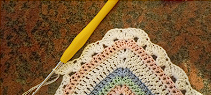
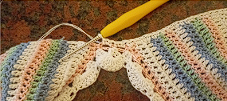
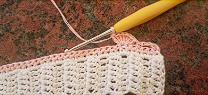
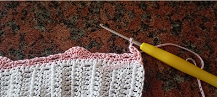
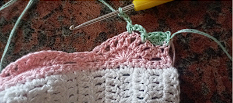
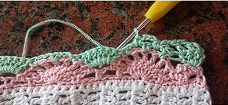
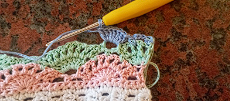
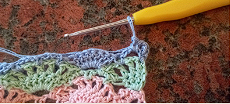
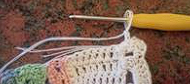
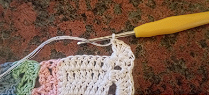
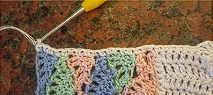
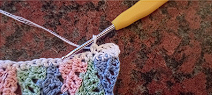
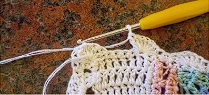
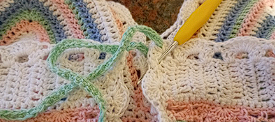
Repeat the same for the 2nd cup, until the point when you have to reach 13.5 (14.5, 15.5, 16.5, 17.5, 18.5, 19.5) cm total height of the cup. DO NOT cut yarn, make 5 chains, sl st on the other cup in the 1st st, sl st in the next st of the 2nd cup, ch2, sc in the third ch of the ch5-sp below, ch2, sl st in the 2nd st of the 1st cup, cut yarn, weave the ends (see pic below).
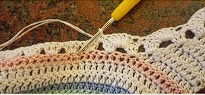
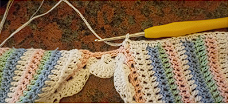
Now with CA color, join yarn on the other side of the 2nd cup, in the 1st st and repeat R15-R19 to form the side of the other cup and then only R19 until you have the same cm with the 1st cup.
Around The Cup
When you finish with the side of the 2nd cup, do not cut yarn, turn your work 90o and continue with the next row.
NEXT ROW:
Ch1, 2 dc in the 1st st, *ch 1, sk the next dc post, 3 dc in the next dc post* repeat the *_* till you reach the 1st cup, sk the last dc post before the cup, ch 1, *3 dc in the next st (of the cup), sk 2*, repeat *_* till you reach the top corner of the cup (ch1-sp).
If you have 2 sts left before corner then: (3 dc – ch 1 – 3 dc) in the ch1-sp.
If you have 3 sts left before the corner then: 2 dc in the last st (before the corner), (dc – ch 1 – dc) in the ch1-sp (corner), 2 dc in the next st.
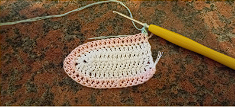
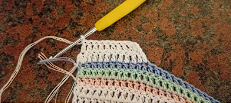
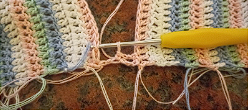
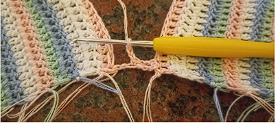
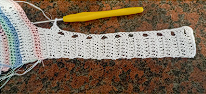
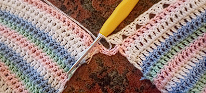
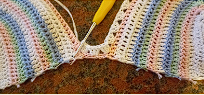
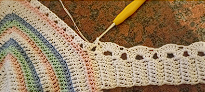
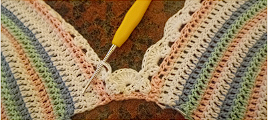
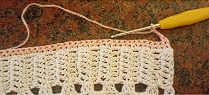
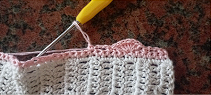
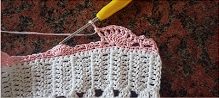
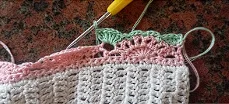
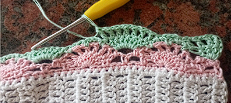
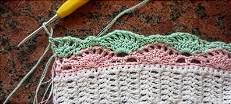
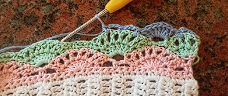
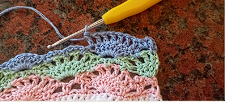
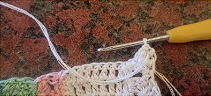
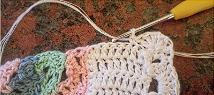
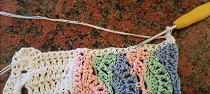
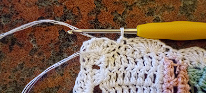
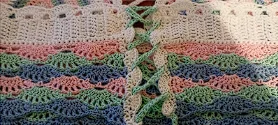
*sk 2, 3 dc in the next st*, repeat the *_* till end of the 1st cup, sk ch2-sp, 3 dc in the next sc, sk ch2-sp, 3 dc in the 2nd st of the 2nd cup, *sk 2, 3 dc in the next st*, repeat the *_* till you reach the top corner of the 2nd cup and repeat the same you did in the 1st cup, *sk 2, 3 dc in the next st*, repeat the *_* till end of the 2nd cup, *sk next dc post, ch 1, 3 dc in the next dc post*, repeat, ending with 2 dc in the last st and turn (see pic below).
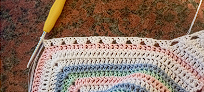

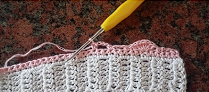
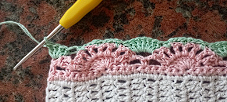
NEXT ROW 1: Ch 1, 2 dc in the 1st st, sk 1 dc, *sc in the next ch1-sp, sk 3 dc, 6 dc in the next ch1-sp, sk 3 dc* repeat the *_* till you reach the cup, then, *sk 3 dc, 6 dc ( if you have finished with sc before or else you will do this repeat *_* opposite and start with: sk 3 dc, sc in the next st, sk 3 dc, 6 dc in the next between) in the next between ( between is the space between 2 3dc’s), sk 3, sc in the next between* repeat the *_* till corner, sc in the ch1-sp (or 6 dc), *sk 3, 6 dc in the next between ( or sc ), sk 3, sc (or 6 dc) in the next between* repeat the *_* till the end of the cup, then sk 4 dc, 9 dc in the next st, sk 4 dc, sc in the next between.
NOTE : if the last repeat of *_* you have finished with 6 dc then: sc in the next between, sk 1, 5 dc in the dc st, sk, sc in the next between.
*sk 3 dc, 6 dc in the next between, sk 3 dc, sc in the next between* repeat the *_* till you reach the top corner of the 2nd cup, repeat the same you did on the 1st cup, ending with 2 dc in the last st.
Version 2: Without the Space Between
Repeat the same for the 2nd cup, until the point when you have to reach 13.5 (14.5, 15.5, 16.5, 17.5, 18.5, 19.5) cm total height of the cup. DO NOT cut yarn, join the 2 cups with a sl st in the 1st st, cut yarn, weave the ends.
Now with CA color, join yarn on the other side of the 2nd cup, in the 1st st and repeat R15-R19 and then only R19 until you have the same cm with the 1st cup.
When you finish do not cut yarn, turn your work 90o and continue with the NEXT ROW* and NEXT ROW 1*.
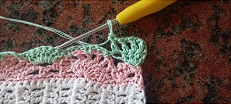
NEXT ROW*: This row is for the top edge.
Ch 1, 2 dc in the 1st st, *ch 1, sk the next dc post, 3 dc in the next dc post* repeat the*_* till you reach the 1st cup, sk the last dc post before the cup, ch 1, *3 dc in the next st ( of the cup), sk 2* repeat *_* till you reach the top corner of the cup (ch1-sp).
If you have 2 sts left before corner then: (3 dc – ch 1 – 3 dc) in the ch1-sp.
If you have 3 sts left before the corner then: 2 dc in the last st (before the corner), (dc – ch 1 – dc) in the ch1-sp (corner), 2 dc in the next st.
*sk 2, 3 dc in the next st*, repeat the till end of the 1st cup, dc in the next slst st (the slst you did to join the 2 cups), 3 dc in the 2nd st of the 2nd cup, *sk 2, 3 dc in the next st*, repeat the *_* till you reach the top corner of the 2nd cup and repeat the same you did in the 1st cup, *sk 2, 3 dc in the next st*, repeat the*_* till end of the 2nd cup, *sk next dc post, ch 1, 3 dc in the next dc post*, repeat, ending with 2 dc in the last st and turn.
NEXT ROW 1*: Ch 1, 2 dc in the 1st st, sk 2 dc, *sc in the next ch1-sp, sk 3 dc, 6 dc in the next ch1-sp, sk 3 dc* repeat the *_* till you reach the cup, then, *sk 3 dc, 6 dc (if you have finished with sc before or else you will do this repeat *_* opposite and start with: sk 3 dc, sc in the next st, sk 3 dc, 6 dc in the next between (between is the space between 3dc’s), sk 3, sc in the next between*, repeat the*_* till corner, sc in the ch1-sp ( or 6 dc), sk 3, 6 dc in the next between (or sc), sk 3, sc (or 6 dc) in the next between*, repeat the*_* till the end of the cup, then sl st in the next dc (the dc you did in the previous row between the cups).
NOTE: if the last repeat of *_* you have finished with 6 dc then: sc in the dc st (the dc you did in the previous row between the cups).
*sk 3 dc, 6 dc in the next between, sk 3 dc, sc in the next between*, repeat the *_* till you reach the top corner of the 2nd cup, repeat the same you did on the 1st cup, ending with 2 dc in the last st.]
Cut yarn, weave in the ends.
The easily printable Maya Summer Crop Top PDF version is available in our shop:
Pattern Under Cups
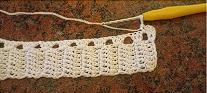
Pattern under cups is multiple of 12. When you do the next row, (or next row*) count your sts and make sure the number is multiple of 12.
If it does not then remove (if you need to add more than 6 sts) or add (if you need to add less than 6 sts) some sts and instead of 2 sc in each dc post, do sc in each dc post to reach the desired number (for example: multiple of 12 are: 12 x 6 = 72, 12 x 7 = 84, 12 x 9 = 108 etc).
Turn your work upside down and join yarn with CA color in the 1st st and:
NEXT ROW 2: Ch 1, sc in same st, 2 sc in each dc post till you reach the end of the 1st cup, 2 sc in the next ch2-sp (if you have chosen VERSION 1), 2 sc in the next ch2-sp (if you have chosen VERSION 1), continue 2 sc in each dc post and on 2nd cup till end and turn.
Change to color CB.

NEXT ROW 3: Ch 1, sc in each st across and turn.
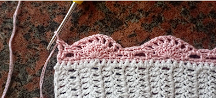
NEXT ROW 4: Ch 1, sc in the same st, ch 3, sk 2, *sc in the next st, sk 2, 7 dc in the next st, sk 2, sc in the next, sk 2, ch 3, sc in the next, ch 3, sk 2*, repeat the *_*, ending with sc, sk 2, ch 3 and sc in the last st and turn.

NEXT ROW 5: Ch 1, dc in the 1st st, ch 1 *sc in the next ch3-sp, (dc in the next dc st, ch 1) x 6, dc in the next dc st, sc in the next ch3-sp, ch 3*, repeat the *_*, ending with sc in the last ch3-sp, ch 1 and dc in the last st and turn.

Change color.
NEXT ROW 6: Ch 1, dc in the 1st st, 3 dc in the next ch1-sp *sc in the 2nd ch1-sp, ch 3, sc in the 2nd dc (after the sc you made), ch 3, sc in the 2nd ch1-sp (after the sc in the dc st you made), 7 dc in the next ch3-sp* repeat the *_*, ending with 3 dc in the last ch1-sp, dc in the last st and turn.

NEXT ROW 7: Ch 1, dc in the 1st st, (ch 1, dc in the next dc st) x 3, *sc in the next ch3-sp, ch 3, sc in the next ch3-sp, (dc in the next dc st, ch 1) x 6, dc in the next dc st*, repeat the *_*, ending with (dc in the next dc st, ch 1) x 3 and dc in the last st and turn.
Change color.
NEXT ROW 8: Ch 1, sc in 1st st, ch 3, sc in the 2nd ch1-sp, *7 dc in the next ch3-sp, sc in the 2nd ch1-sp of the shell, ch 3, sc in the 2nd dc st ( after the last sc you made), ch 3, sc in the 2nd ch1-sp( after the last sc you made)* repeat the *_*, ending with sc in the 2nd ch1-sp of the last s, ch 3 and sc in the last st and turn.
NEXT ROW 9: Ch 1, dc in the 1st st, ch 1, *sc in the next ch3-sp, (dc in the next dc st, ch1) x 6, dc in the next dc st, sc in the next ch3-sp, ch 3*, repeat the *_*, ending with sc in the ch3-sp, ch 1 and dc in the last st and turn.
Repeat R6-R9 2 more times for sizes: XS/S/M, 3 more times for sizes: L/XL and 5 more times for sizes: 2XL/3XL.
If you need more rows just keep repeating R6-R9.
Cut the yarn, weave in ends.
Straps x 2
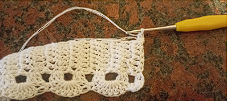
Join CA color on the top of each cup, ch1-sp and make 100 ch for XS/SM and 150 ch for L/XL/2XL/3XL, (if you need more add more chains) then, ch 1, sc in each ch till you reach the cup again, sl st in the sc st, cut yarn, weave the ends.
Repeat the same for the 2nd cup also.
Edges of the Top
There are 2 options that you can choose to join the edges of the top so it has a closure behind.
● You can sew a zipper 12 cm for smaller sizes and 15 cm for bigger sizes, you can measure it in the end and take the proper zipper.
● Make a closure with a string.
If you choose the 2nd option follow the instructions below:
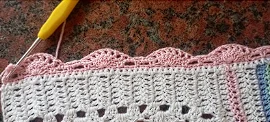
Join yarn with CA color or the color you want, on one edge, on the 1st st. from the top (basically where the shell ends).
R1. ch 2, sl st in the last st of the shell, 3 dc in the same st of the shell, sk 2, *sc in each st and 2 sc in each dc post*, ending with sc in the last st and turn.
R2. ch 1, dc in the 1st st, 2 dc in the same st, *sk 2, sc in the next, sk 2, 6 dc in the next st*, repeat till end.

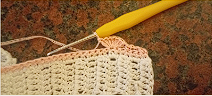
NOTE: In this row we make shells again. The spaces that are created with sk 2, are the spaces you will use to pass the string through them.
Also, if you have 4 sts left before end, then in the last shell do 7 dc, sk 3, sc in the next and sl st in the 1st st of the shell on top.
If you have 3 sts left, then, ending with 6 dc, sk 2, sc in the next st and sl st in the 1st st of the shell on top.
If you have 2 sts left, then, ending with 5 dc, sk1, sc in the next st and sl st in the 1st st of the shell on top.
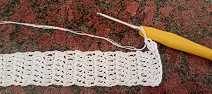
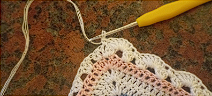
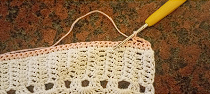
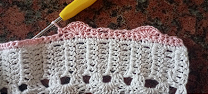
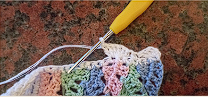
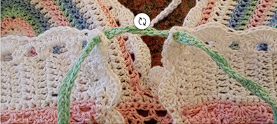
String
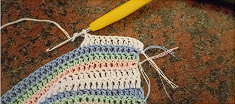
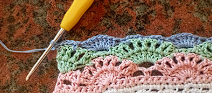
The string should have a minimum 200 ch. For bigger sizes add more chains by 50. After you make the chains, sc in each ch, cut yarn, weave then ends and pass the string through the space we talked above and make as pic follows.
The easily printable Maya Summer Crop Top PDF version is available in our shop:
About the Author

Joanna Crochet Designs
I am Joanna. I am a mother of 2 little children. Years ago, I discovered the art of crochet between work and my obligations. I started by looking at blanket patterns on YouTube, and over time I discovered the world of crochet! I’m self-taught, I learned through the videos and getting deeper and deeper into the world of crochet, I discovered that I want to create my own designs. Thus the name Joanna Crochet Designs was born, and with all the will, stubbornness, persistence and love for crochet I became a crochet designer with a list of designs that is constantly growing!
If you need help with the pattern, email me to: [email protected]
Items made with this design can be sold but please give credit to the designer.